Simple upgrades turn a weekender into a world cruiser

Issue 38 : Sept/Oct 2004
The sails are stowed, dinner is cooking, and a day of sailing has taken the edge off a hectic workweek. The heavens turn crimson, the water morphs into a sheet of liquid fire, and there you are in the cockpit sipping a sundowner. Thoughts turn to taking a leave of absence and going on an extended cruise. A winter in Mexico . . . a voyage to the Bahamas . . . a sojourn in Alaska. Sunsets every night. Well, almost every night. Everything would be perfect except for one thing — money.
How can anybody take time away from work to go cruising and still afford to make payments on a brand-new cruising boat? Let’s see: work 10 more years, pay the boat off, save some cash . . . but wait. By then my new boat will be an old boat all over again.
The solution is simple: buy a boat that’s already old, fix it up, and get going. The truth is, many of today’s off-the-shelf production boats have the same problems as their predecessors and will need some serious attention. These problems include oversized cockpits, leaky companionways, vulnerable windows, and undersized rigging. Whether a boat is newish or oldish, after correcting some of these shortcomings, you will be ready to go great distances.
The cockpit
A cockpit is a large water-catchment system with holes in it. These holes include the companionway, cockpit seat lockers, portholes, air vents, electrical fittings, and shifter controls. My experience has shown that a truly water-tight boat can survive horrific seas. The key to survival is preventing water from flooding the cabin. Try to visualize what would happen if the cockpit became filled with water. This could happen due to a knockdown, a tide rip, or a serious storm. Where is all that water going to go?
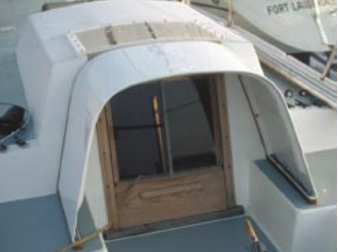
The companionway is the most vulnerable inlet, due to the difficulty involved in sealing the removable door slats and sliding hatch. Care taken in this area will ultimately create a safer boat. Unfortunately, each boat is different, so there are no magic answers. But with a fair dose of creativity and ingenuity, it ought to be possible to keep the water at bay.
One method of sealing door slats is to put thin weather-stripping in the grooves where they seat: sides, top, and bottom. (This will increase their size so the slats may have to be cut down a little.) There should also be a system to lock the slats in place so they don’t get washed overboard. This can be achieved with lanyards or barrel bolts. Some companionways have swinging doors. I like these because they can be closed at a moment’s notice. They are also easier to seal and are less cumbersome than removable slats. If the doors or slats have louvers (or other types of vents) build special ones without openings for offshore sailing.
In cases where the bottom of the companionway is level with the cockpit floor or bridge deck, think about installing a door slat that is permanently sealed with silicone or epoxy. Make it as high as tolerable for stepping over. It might be a nuisance, but a sill is a great failsafe to help keep water out of the cabin.
Easy leak test
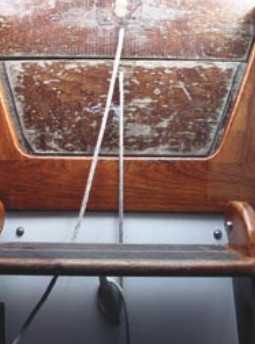
A sliding hatch is an invitation for leaks. (An easy leak test can be performed with a hose. Aim the water directly on the seams. A few drips leaking in might be a nuisance, but large amounts of water getting in are a problem.) Short of completely rebuilding a leak-prone sliding hatch, a viable alternative for stopping water is to cover the hatch with tight-fitting canvas. A semi-permanent cover could even be built using plywood. Since it will be difficult to negotiate the companionway, these temporary hatch covers could be put in place during open water passages or when it looks like a storm is brewing.
Cockpit lockers are huge water magnets, but they are easier to seal off since access is generally not necessary during bad weather. Lockers must be well-gasketed and reliably secured so they don’t open during a knockdown. Drip troughs under the lid might keep spray from infiltrating, but lockers need to be 100-percent watertight for ultimate safety.
Weatherstripping is one way to seal a locker. On my Cal 25, Direction, I solved the leaky-locker problem by permanently sealing the lids with screws and silicone. Fortunately, there was adequate access under the cockpit via the quarter berths. If the design of the boat allows it, another alternative is to turn the locker into its own watertight compartment. That way, if the lid leaks, water will not infiltrate the cabin.
Other potential cockpit leaks include 12-volt electrical plugs, remote windlass switches, shifter controls, speakers, instrument panels, coax cable ports, Dorade vents, and cowls. While most of these items are rainproof or splash-proof, they may not be submergible. Think about installing plugs and switches in a recessed box that has a watertight cover. Most products today include foam gaskets for water-tight installations, but I like to smear a thin fi lm of silicone on either side of the gasket to ensure a good seal. For Dorade vents or cowls, have a reliable way to cap them off during rough, unsettled weather.
Lastly, the best-designed scuppers will drain through the transom, either through mouse holes or through a large 3- or 4-inch-diameter conduit. If the scuppers drain through the bottom of the boat, make sure that the drain hose is as large as possible and as vertical as possible without any bends. (Footnote to getting pooped: when a cockpit gets filled to the brim, 50 percent or more of the water will slop out when the boat rolls or heels.)
Hatches
Alloy deck hatches not only look good, they are also strong and seldom leak. Many older production boats, however, have molded fiberglass hatches. These are prone to leaks and many are attached with inadequate hinges and clamps. Be aware that when a boat is loaded for cruising, the bow is more prone to plunging. When this happens, water will course across the foredeck and slam into the hatch — sometimes with great force.
One way to test the strength of a molded hatch is to give it a solid thump with a large mallet. No kidding. Put a block of wood against the hatch to avoid scarring, then aim the blow laterally against all sides to challenge the hinges and clamps. This may seem extreme, but it’s better to discover the weak link at the dock instead of in a storm. After this, if the hatch survives the hose test, you’re on your way.
Windows and portholes
Windows are a liability. They eventually leak, they sweat, and if they break at sea it’s a huge problem. Still, we all want windows. I know I do. Many older boats have tempered safety glass windows set in aluminum frames. This style of window is a nightmare waiting to happen. If smacked by a wave and pulverized or hit by the butt of a spinnaker pole, the formerly rigid glass can now be pushed right into the cabin. I believe that putting anything on a boat that’s made of glass is a bad idea. Imagine a wet cabin besprinkled with minute glass shards — not to mention being saturated with seawater.
Glass windows can be made safer, however, by installing storm shutters over them. Any stiff material will make a good shutter. Plywood is the cheapest; aluminum is the stiffest.
In my opinion, the safest windows are made from polycarbonate (Lexan). Polycarbonate can be pricey but it’s nearly unbreakable. Best of all, it’s easy to shape with standard woodworking tools. If thick enough polycarbonate is used (3⁄8-inch for small windows, 1⁄2-inch for large), storm shutters should not be required. Acrylic plastic (Plexiglas) is much cheaper and less prone to scratching, but it is more of a challenge to work with and gets brittle with age. It is also prone to breaking when being removed for resealing. Always check with manufacturers for the best type of sealant to use.
If you’re uncertain whether your boat’s windows are strong enough, give them the large mallet test.
Weight distribution
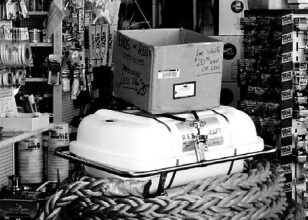
The extra gear required for long-distance voyaging will add up not only in dollars, but in weight. Basics include extra sails, spare anchors and chain, larger batteries, water, fuels, tools, a life raft, books, clothes, shoes, toiletries, toys, games, spare parts, and food.
Strategic placement of gear will help maintain the boat’s performance and also keep it stable. Overloading the bow and stern will accentuate pitching, or hobbyhorsing. This can hamper boat speed, especially when punching into a seaway. Worst of all, it can impair directional stability — particularly when sailing downwind in heavy seas. Overloading a boat above the waterline will raise its center of gravity; a top-heavy boat is more likely to be knocked down or even rolled.
So where does all that stuff go? Try to keep heavy items such as cans, books, anchors, tools, batteries, and liquids located amidships and below the waterline. Stowing heavy things low will help compensate for all the stuff that has to be stowed above the waterline. Let’s face it, there is only so much optimum stowage space inside a sailboat hull. Stuff will have to be wedged into every nook and cranny. By exercising weight awareness, it will be possible to keep the boat in trim.
A common solution for extra water and fuel storage is to line the deck with jerry jugs. It’s an easy and inexpensive alternative, but all those jugs will put concentrated loads in the worst possible place: outboard and up high. A few gallons are not going to cause problems, but I have seen as many as a dozen jugs lashed to the rail. That’s nearly 500 pounds. It would be a lesser evil to add tankage under the V-berth or under the cockpit. Even though this increases pitching, a low center of gravity is maintained. Bonus: by adding extra tankage below, the deck will remain clear — allowing easier, and thus safer, crew movement.
Now that all the lockers are full, think about what might go flying if the cabin is tilted beyond 45 degrees by a sudden gust of wind or a big wave. Consider the following questions. Will the hinges and latches on locker doors resist the bombardment of shifting goods? Are the lift-up boards under the settee cushions locked in place? Are the tools secure? Are the water and fuel tanks properly installed? Do the batteries have adequate tiedowns? Does the galley stove have preventers to keep it from jumping out of the gimbal-brackets? Often, the most serious injuries on a boat are due to stuff flying across the cabin.
Mast and rigging
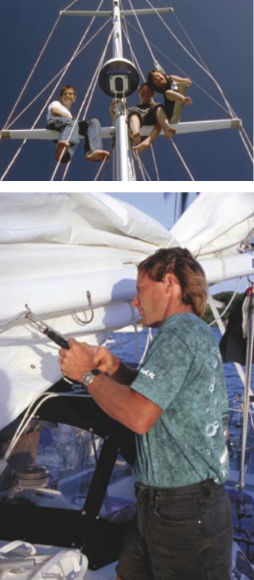
When a cruising boat is fully loaded with food, liquids, and spares for long-distance voyaging, its displacement is going to be radically increased. Boats under 30 feet take the biggest hit; their displacement might be increased by as much as 50 percent. What this means is the once snappy cruiser/racer is going to be stiffer, thereby putting increased loads on the mast and rigging.
It’s important to recalculate the displacement and righting moment of a fully provisioned boat to ensure that all the rigging components can cope with increased loads. Although a mast section will usually be OK, things such as tangs and bolts, turnbuckles, and chainplates may have to be upped a size. (If the boat is more than 10 years old and has swaged terminal fittings, they should be replaced anyway.) Many racing sailboats have a rigging safety factor ratio as low as 1.5 to 1. A fully loaded cruising boat should have a ratio of at least 2.5 to 1 or higher.
Doing it yourself
Finding a boatyard to make these modifications is an option. However, one of the characteristics that successful cruisers share is having the confidence to build or fix anything on the boat. Self-reliance begins at the business end of a screwdriver. What better way to build confidence than by making the boat watertight? Most importantly, by personally working on your own boat, you’ll understand the strengths, weaknesses, and limitations of the vessel.
The cost of a new production boat is appalling. The way I see it, a sailboat — any sailboat — is a platform from which adventure springs. Isn’t that the real reason we take to the high seas — to seek adversity and then persevere in the face of peril? Aren’t the best memories created when the rail is buried, the spray is flying, and a cozy anchorage is the destination? An older boat will take any of us to those cozy anchorages as easily as a brand-new boat.
Thank you to Sailrite Enterprises, Inc., for providing free access to back issues of Good Old Boat through intellectual property rights. Sailrite.com