Acid can cure those temperature-rise blues
Issue 31 : Jul/Aug 2003
I guess I’m not much of a sailor. After racing in doldrums for a large part of my life, I find irresistible joy in turning to my reliable Atomic 4 whenever my GPS reads less than 4 knots. A friend gave me a drifter for my Easterly 30, but I gave it to someone very much more committed to wind power than I. So you will appreciate my consternation as I watched, over a period of months, the normal operating temperature of my ancient, raw-water-cooled auxiliary climb from the optimum 150 ̊ to 165 ̊F. Some might say the temperature increase is normal, considering Lake Ponchartrain water temperature ranges from below 50 ̊F in winter to more than 90 ̊F in late summer. And they have a point.
My Atomic 4 has a manual thermostat. I removed the spring-loaded automatic thermostat that never seemed able to cope with our lake’s temperature fluctuations, and I installed a simple manual valve in its place. The thermostat (whether automatic or manual) works by opening a cooling-water bypass line. When the engine is cold, the bypass is open and cooling water bypasses the engine block and head. As the engine warms, the thermostat gradually closes the bypass line, forcing cooling water through the block and head. The 140 ̊F thermostat recommended for raw-water operation starts opening at its rated temperature and generally should keep the engine temperature in the 150 ̊ to 160 ̊F range, which is the maximum allowable temperature to minimize the precipitation of certain seawater minerals in the cooling passages.
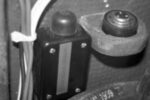
Manual valve
For long motoring passages, I simply adjust the manual valve in the bypass line to get precisely the needed cooling to maintain the preferred temperature. (The acknowledged Atomic 4 guru, Don Moyer, recommends against removing the automatic thermostat even if a manual valve is installed in the bypass line. I’ve not followed his advice on this point and to date am pleased with my. arrangement.)
But, lately, instead of my usual precise temperature control, the engine temperature had been rising, and I guessed it was time to clean the engine-cooling passages. I needed to clear away the accumulated rust scale, mineral deposits, and assorted crud that was insulating my engine from the meager cooling capability our hot lake water otherwise provides. Here’s how to do it.
The plan is to introduce fresh water mixed with muriatic (hydrochloric) acid into the inlet side of the engine and remove the water/acid/crud-laden mix from the cooling-water discharge at the engine-exhaust manifold.
Close the cooling-water throughhull valve. Locate the water pump. See the hose leading from the pump to the engine block? Disconnect the hose from the discharge side of the pump and carefully measure the hose diameter.
Now go to the point where the cooling water comes out of the engine. On the Atomic 4, the cooling water exit is at the left rear of the engine at the back of the exhaust manifold. Disconnect that hose and carefully measure its diameter as well.
Think about it
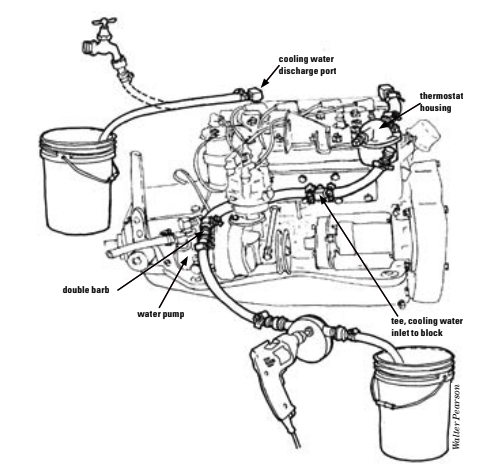
Now before going to the store, think about what’s needed. Every hose connection will need a hose clamp because this cleaning is going to be done under pressure. A double-headed hose barb will be needed to connect the hose carrying the acid solution to the cooling water hose you disconnected from the water pump. A hose of the right diameter and length will be needed to connect to the cooling-water discharge port at the rear of the exhaust manifold. Think about where you’ll put the 5-gallon bucket holding the acid solution. Think about where you’ll place the 5-gallon bucket receiving the acid and goop coming out of the engine. Those thoughts will tell you how long your hoses need to be. Remember you need a hose clamp for every connection.
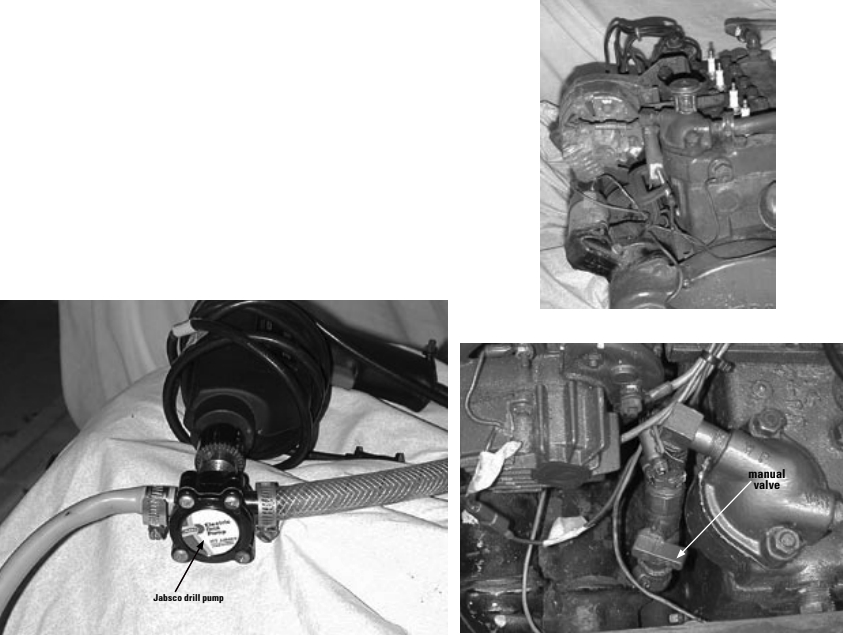
What’s the best way to power the solution through the engine? A cheap way is to buy a Jabsco rotary pump that chucks in to your hand-held drill like a drill bit. Marine chandleries sell them for about $15. But don’t hang around too long at the marine store or you’ll buy expensive stuff you don’t really need. Instead, off to a hardware store for the rest of this project.
For very few bucks, the local hardware store will sell you two 5-gallon plastic buckets, a gallon of muriatic acid (30-percent solution), and hose clamps (at least two clamps for the two-headed barb, two for the drill-pump intake and discharge barbs, and one for the discharge-line connection to the engine). Get hoses of the right diameter for the connections and of the right length to easily reach your buckets.
While at the hardware store, get a female garden-hose connector that fits the acid/crud discharge hose. Also, pick up the right-sized two-headed barb to fit the hose on the engine’s cooling-water inlet side.
Clear it away
When you get back aboard, carefully clear away anything that might be damaged by an acid-solution spill. Clear your cushions and other stuff well away because this job can be a mess. Put the female garden-hose connector on the discharge hose and clamp the other end of the discharge hose to the cooling-water discharge stub by the exhaust manifold. Install and clamp one end of the double barb into the engine-water inlet hose. Connect one end of the hose from the drill pump to the double barb and clamp that connection. Finally, clamp the hose connections on the inlet and dis- charge sides of the drill pump.
When you’re done clamping, you should have hoses leading from the bucket that will contain the clean acid solution to the drill pump to the cooling-water inlet. The other hose runs from the cooling-water discharge to the waste bucket. Charge your dock hose with fresh water and keep that water source running and ready just in case you have an acid spill.
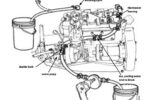
In order to have the acid solution pass through the engine block and head, you must plug the rubber bypass line leading to the thermostat housing on the forward, right side of the engine. You must also open the thermostat housing cover and take out the thermostat so that all the engine passages will be open to the acid solution (see illustration at right). Re-secure the thermostat housing cover before you start pumping the acid.
Mix the acid
After all connections are clamped, you are ready to mix the acid solution. Put on your safety glasses and fill one bucket with about 5 gallons of fresh water. Slowly and carefully pour 1⁄3 gallon of muriatic acid into the water. This is the proportion recommended by Don Moyer. (Caution: the chemistry prof. says always pour acid into water — never, never pour water into acid. When you pour water into concentrated acid, it can “explode” and get the acid all over you. –Ed.) Start your drill pump and let the acid solution pass through the engine block until the clean acid bucket is about empty. Then stop and wait 15 minutes as the acid solution in the engine block dissolves the rust and mineral deposits.
You can use this interim period to remove the dirty acid that has passed from the engine to your discharge bucket. Rinse both buckets, filling one with clean fresh water. Before you dispose of the dirty diluted acid/water mixture, be a good guy and mix it with common household baking soda at the rate of 1⁄2 pound of baking soda to 5 gallons of water. It is going to foam when you do that, so put it in a little at a time and don’t put your face or other skin parts over the liquid while you are neutralizing the dirty acid.
After 15 minutes, flush the block with fresh water using the drill pump, with the acid and crud passing from the block to the empty discharge bucket. Empty the dirty bucket and refill the clean bucket again with fresh water and repeat the freshwater flush.
Now hook up your dock hose to the female garden-hose fitting on the discharge hose and disconnect the drill pump from the inlet line. Back-flush the engine with fresh water moving backward through the engine under hose pressure as even more crud is discharged from the inlet hose to the buckets.
After removing about 20 gallons of back-flushed fresh water and crud, disconnect your flushing hoses and reconnect the usual engine-cooling water hoses. Start your engine and see if you didn’t knock about 25 ̊F off your engine’s operating temperature. If you’ve a manual thermostat, just dial in whatever operating temperature you like.
Thank you to Sailrite Enterprises, Inc., for providing free access to back issues of Good Old Boat through intellectual property rights. Sailrite.com