Make your own ventilators to keep fresh air flowing down below
Issue 29 : Mar/Apr 2003
If I were to ask all those sailors whose boats have adequate ventilation to raise their hands, I think there would be more wry smiles than hands in the air.
Ventilation in a boat is a very important issue because if a wooden boat is not properly ventilated it will surely rot. If any other kind of boat is not ventilated, it will soon become musty and smelly.
A damp, airless atmosphere is bad for electrical and electronic systems and, however simple our boats, we all have quite a few of those these days. Furnishings will attract mildew, foulweather gear left on board will become revolting, and the world will generally be an unpleasant place.
Even if you have no cabin heating on board, you will be using gas, alcohol, or kerosene for cooking, all of which burn oxygen and create water vapor. Without an adequate replenishment for the oxygen, you’ll end up with a headache at best, or unconscious or dead at worst.
When we were fitting out Can Pyran, our new good old boat, we had another consideration: we have an air-cooled diesel engine. (Like most of our friends, you probably think we’re mad, but we have never understood why salt water is such a good substance to pass through hot steel, aluminum, or copper.) In any event, the engine draws air from the cabin, and an adequate supply is needed.
For all of these reasons, we gave good thought to our ventilation. Maybe our conclusions could help you improve the ventilation on your boat if you did not smugly raise your hand at the beginning of this article. All that is required is some 1⁄2-inch external-grade plywood, some epoxy, woven roving, and simple hand tools. This project also requires space on deck of approximately 19 inches by 8 inches. The maximum height above deck is 6 inches. There is nothing magical about these figures, so you can adapt the concept to suit your own circumstances. However, give the air vent sufficient space within its cover so the air can circulate.
Conflicting requirements
There are two equally important, but conflicting, requirements in a ventilation system. The first is to let air in, and the second is to keep water out.
As far as letting air in is concerned, a little high-school math helps. If you have a ventilator with a 3-inch-diameter hole, then the cross-sectional area is 7.06 square inches. If you increase the diameter to 4 inches, then the cross-section becomes 12.57 square inches. The 4-inch-diameter hole is only a third larger across, but it has a cross-sectional area, and therefore air flow, that is nearly three-quarters as much again. We can do better still. If we use a square 4-inch hole, we have a cross-sectional area of 16 square inches, which is a quarter as much again as a circular 4-inch hole, and two and a quarter times the 3-inch circular hole. We did our math, and our starting point was therefore a square, 4-inch hole.
Then there is the question of keeping the water out. The standard way of doing this is the Dorade vent. This is a rectangular box fitted to the deck with a cowl at one end to collect the air, and the hole into the boat at the other end protected by a tube passing into the Dorade box. Any water that falls into the box goes out through drain holes, while air passes down the box and through the tube into the cabin. This is a fine system, but we were put off by the expense of cowl vents and believe they are ideally shaped to trip you and to catch ropes. We built one of our own design. We find that it works extremely well.
Hollow box
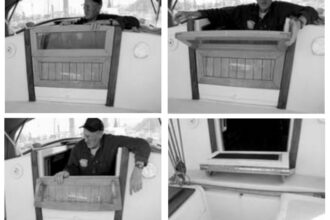
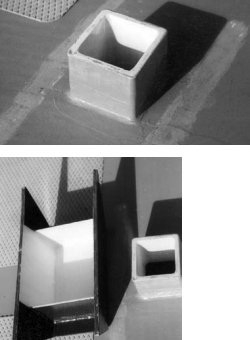
The heart of the system is the through-deck vent, a hollow box made out of 1⁄2-inch ply with an internal measurement of 4 inches by 4 inches (5 inches by 5 inches externally, of course.) The corners are butted and epoxied together. The outside edges are rounded and then covered in 4-inch woven roving epoxied into place. The insides of the corners have thickened epoxy fillets. We cut a 5-inch-square hole in the deck (measure twice, cut once!), and the vent stuck up through the hole to a height of 4 inches above deck where it was epoxied into place with woven roving.
It is covered by a separate rectangular structure that is open to the air at both ends and which gives a minimum clearance around the vent of about 2 inches horizontally and vertically. The 2-inch vertical clearance means that the inside of the top of the cover is 6 inches above deck level. The trick to keeping water out is that suspended from the roof of the cover are two plywood baffles. These are 4 inches deep and come down to 2 inches above the deck and 2 inches below the top of the vent. Except for the skirt, the cover is made of 1⁄2-inch plywood and constructed with epoxy and woven roving as described above. The cover itself is epoxied to the deck with woven roving. Our deck is plywood, but I would expect the idea, suitably modified, to work just as well with fiberglass or composite decks.
In effect, the box is a wind tunnel. Wind passes down the tunnel on either side of the vent, and a really surprising amount of it goes down through the vent. We thought that it might only work with the wind from forward or aft but not on the beam. In fact, this seems not to be the case; we have good airflow at all times. Regardless of weather conditions, we’ve never had a drop of water down the vents.
In case of gales, we have made up blanks that fit on either end of the covers. These should stop all but the most catastrophic seas from coming down below. Since we are born-pessimists, my wife also made some 5-inch-square storm covers that can be passed up through the vents from down below and twisted into place to cover the top of the vent. There is a strongback against the underside of the deckhead and a bolt to hold the cover in place. I profoundly hope never to be out in conditions when they might prove necessary!
We have never had anything snag on the covers; their shape ensures that any stray ropes slide over the top. Best of all, they cost only a few dollars to make, and we had most of the materials on hand anyway. They might not look as beautiful as a lovely brass cowl, but those run $150 each, and you are going to install several ventilators, aren’t you?
Thank you to Sailrite Enterprises, Inc., for providing free access to back issues of Good Old Boat through intellectual property rights. Sailrite.com