An autopilot gets an inexpensive pod
Issue 84 : May/Jun 2012
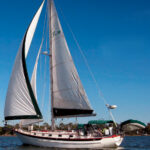
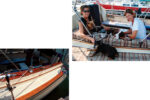
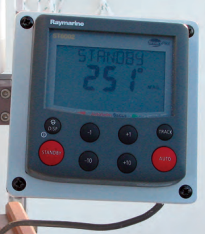
My recently acquired Pacific Seacraft 31, Ann West, has a very long “to do” list, which is probably why I could afford her. (She’d been a liveaboard boat in Key West, Florida, for 13 years.) One of the top items on the list is a new wheel pilot, since I’m singlehanding more now that my son has graduated from college. While I would love to have a belowdecks unit, I couldn’t justify the cost. I bought a new Raymarine X5 SmartPilot. This unit has a belowdecks computer, but I still needed a place in the cockpit to mount the control pad.
An autopilot remote needs to be accessible, convenient, and relatively easy to wire. Most folks mount it on the side of the cockpit coaming or on some sort of pod on their pedestal guard. I’ve owned a boat with the control mounted on the side of the cockpit coaming. That option has the virtue of being easy to wire, since the electrical cables can run through the cockpit lockers. But I’m not too keen on doing something relatively irreversible like drilling a 3 1/2-inch hole in my boat. That left some sort of helm-mounted pod.
My boat is a 1990 model built at the end of 1989, which was the last year Pacific Seacraft used Yacht Specialties steering gear and pedestals. Yacht Specialties made fine equipment, but that didn’t stop the company from going out of business soon thereafter. That left those of us who own a Yacht Specialties pedestal with a guard whose tubes are spaced 12 1/2 inches apart, compared with today’s industry standard of 9 1/2 or 12 inches. You can’t buy a new instrument pod that fits a 12 1/2-inch pedestal guard. Besides, I really didn’t want to. My pedestal guard is not the conventional U-shaped tube of stainless steel. It consists of two vertical stainless-steel tubes that terminate in a cast-aluminum instrument pod designed for the round Datamarine instruments of the day.
If I were to remove the pod, I’d no longer have a pedestal guard . . . just two relatively short pieces of stainless-steel tubing sticking up from the deck. I’ve postponed until Year 2 of my renovation any major decision concerning the pedestal and the guard, but I needed somewhere to mount the X5 control head in the meantime.
The off-the-shelf option
Both Edson and NavPod make nice single-unit instrument holders that attach to pedestal guards. The Edson unit, without attachment hardware, lists for $185; the NavPod unit, with a nice swivel arm, lists for $350. The NavPod unit is not only pricey, but you have to remove the pedestal guard to install it from the bottom of one of the tubes. The odds of my removing something that doesn’t presently leak to install a new piece of hardware are pretty slim. In addition to the cost of these units, there’s the issue of spending money now for something that may be useless next year when I take a more global view of the pedestal situation.
And besides, I just have this thing about the high price of plastic instrument pods. Most of us, I suspect, have a pet peeve about the price of marine products; mine is plastic instrument pods. Thus, I’m a big fan of alternative ways to mount instruments. One of my heroes is a British fellow who bought a new chart plotter and then faced the same cost issue for mounting it at the helm. Rather than spend who knows how much on a pod purchased in a store, he found a clear plastic cake-storage container, painted the inside white, and mounted it at the helm. Then he wrote about it for a British sailing magazine (Practical Boat Owner, September 2006). Rule, Britannia!
The hardware-store option
Thus inspired, I wondered what I could use to mount my instrument head. I approached this problem as I do any similar issue: I wandered the aisles at Home Depot looking for a likely candidate. Lots of electrical products have to deal with adverse weather conditions, and I found a number of likely candidates in the electrical department. Unfortunately, a standard 2-gang outdoor box is a shade too small for the Raymarine control head. Most of them also come with too many holes, or indentations for holes, already in place.
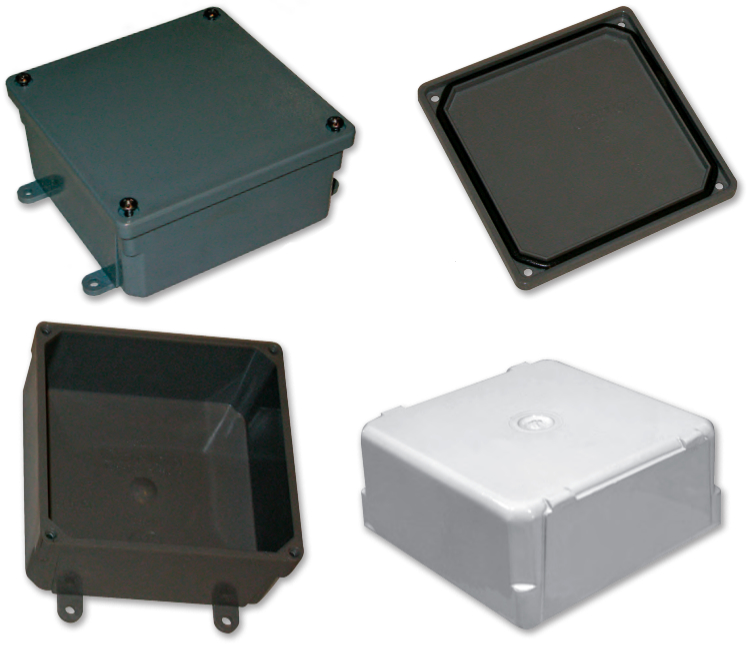
Then I found a gray plastic junction box that fit the bill, except for its size. It was a waterproof junction box (a NEMA 4, for the techies out there) with no holes and a gasketed cover priced at about $11. This box was 6 x 6 x 4 inches. That struck me as a bit too big visually. I found a cardboard box of similar size at home and placed it at the helm for a test fit. I decided it was, in fact, too big.
Since Home Depot carried these boxes in a variety of sizes, just no sizes that I wanted, I thought someone else might have what I needed. I checked the manufacturer’s website (Carlon) and found that they make a box that measures 5 x 5 x 2 inches, exactly what I wanted (model E989PPJ). After a little more searching on the Internet, I found this unit for $17.25 plus $8.75 shipping. This was in a price range I could handle, even if I decide next year to revamp the whole system.
From box to pod
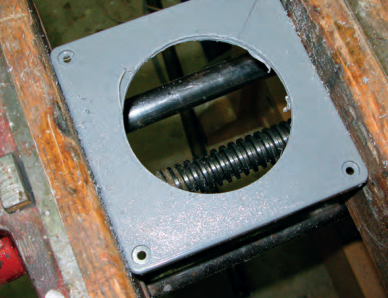
When the junction box arrived, I first cut off the four small plastic mounting tabs as they were of no use to me. I used a file to remove the rough spots and to match the radius around the rest of the box. I mounted the cover in my bench vise and drilled the required 3 1/2-inch hole for the recessed part of the control head. At this point, I could have declared the unit ready for installation, since the box was a shade of gray similar to the Raymarine control head. Like most boat owners, I rarely take the easy way out, so I decided to paint the box white to match the high-priced spread.
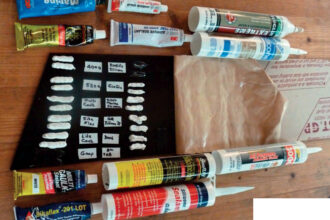
I don’t have a spray gun and have little interest in learning how to use one. But there have been tremendous advances in the kinds of paints and primers you can get in spray cans. I had previously used Rust-Oleum plastic primer and paint to return a yellowed compass housing back to its original white, so I used that brand again. Fusion is another good brand.
First, I washed the box with Simple Green and water to remove any residual oil or dirt. I then dried it and applied one coat of plastic primer following the directions on the can. After waiting an hour, I applied the first of several coats of Rust-Oleum white plastic spray paint.
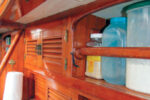
When I was satisfied with the paint job, I moved on to installing the control head. Since I had already run the Raymarine SeaTalk cable for the control head from the helm to the belowdecks computer, I had to figure out how to get the proprietary plug into the box. (Had I waited until I had the box, I could have run the bare wire end through a very small hole in the box first and avoided this issue.) After thinking about alternatives, I decided to make a very small cut in the edge of the box, just deep enough and wide enough to run the cable through. With the cover in place, it would be pretty much invisible and watertight.
Now all that remained was to attach the pod to the pedestal guard. Here again, I had the choice of marine or non-marine products. Edson makes very nice stainless-steel mounting hardware; the least expensive is $35. A number of companies sell plastic mounts at various prices and many of these would have worked just fine. In the past, I’ve successfully used inexpensive stainless-steel electrical conduit straps to attach things to pedestal guards and pushpit tubing. Many of these are available from McMaster-Carr.
Ultimately, I decided to use an aluminum fitting I had removed from another boat five years ago; it and its identical partner had held a Signet Marine instrument pod in place on my former Freedom 30. By simply changing the length of one bolt, I was able to use this part to mount my new X5 control-head pod. It also had the benefit of making it possible to tilt the pod to the appropriate viewing angle.
Since I had the paint on hand and recycled the mounting hardware, the total cost for this project was $26. Even if I had bought the paint and mounting hardware, it would have run about $45, well below the cost of a store-bought unit. I’ll concede that it is not quite as elegant-looking as the purchased kind, but it meets my needs and my aesthetic standards for now. Now, where did I put that cake pan?
Al Lorman practices law in Washington, D.C., to pay for his habit of fixing up boats and then selling them. He is now working on, and occasionally sailing, a 1990 Pacific Seacraft 31 docked in Annapolis, Maryland. This is his fourth article for Good Old Boat.
Thank you to Sailrite Enterprises, Inc., for providing free access to back issues of Good Old Boat through intellectual property rights. Sailrite.com