Careful fall layup gives you a head start in spring
Issue 38 : Sept/Oct 2004
October on the north coast (Great Lakes) or, for that matter, anywhere north of the 38th parallel, means taking the boat out of the water and preparing it for “cold storage.” Over the years, I’ve determined that a significant portion of the pleasure that I experience when my boat is released from its winter cocoon in the spring is directly proportionate to how well I’ve prepared it in the fall. In addition to the washing, waxing, lubricating, repairing, inspecting, and removing, the one aspect of winter storage that affords the greatest impact is the boat’s winter cover.
As the owner of a 22-foot trailersailer, I have a distinct advantage over owners of much larger and less trailerable craft in that I can easily transport my boat home. There I can perform the required fall ablutions, benefiting from the convenience of my workshop’s tools and supplies. Once the fall decommissioning is complete, it’s time to cover the boat for its long winter’s rest. It is at this phase in the winterizing process that boats of all sizes can benefit from a proper winter cover, regardless of whether they’re on a cradle at the marina or parked in the driveway.
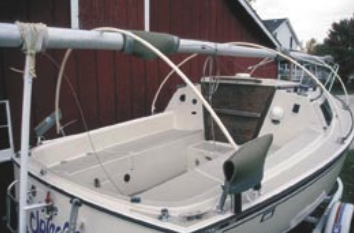
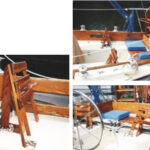
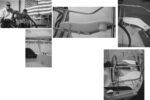
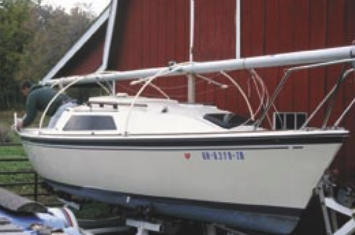
First, I unstep the mast and support it horizontally at three locations on the boat. The bow pulpit serves as the forward support. Amidships, the mid-portion of the spar rests on a wooden cradle that is mounted over the tabernacle. This avoids any “swayback” or bending of the mast. At the stern, the top of the mast rests on a mast crutch that is pinned to the boat’s gudgeons. In this fashion, the mast serves as the backbone support for the winter cover. Since it’s almost 27 feet in length, the mast overhangs the bow and stern and allows for excess tarp at both ends. This ensures complete coverage of the entire boat.
I also remove the stanchions and lifelines. Stanchions are potential “tarp tearers” and, if allowed to remain, must be heavily padded. Once they’re gone, into each vacant stanchion base I insert one end of a 3⁄4-inch PVC water pipe. The pipe is then bent over the mast, where it is supported, and the other end is inserted into the opposite side’s empty stanchion base. The finished product resembles the hoops of a covered wagon.
Foam padding
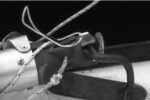
To maintain this rounded and smooth form on which the tarp will rest, I pad all potential sharp spots with closed-cell foam. This includes the tangs, cleats, steaming light, and other mast fittings, as well as any protruding fixtures on the boat itself. I purchased the foam at an Army/Navy store, in the form of a surplus 2-foot by 7-foot sleeping pad. The pieces that I need are cut to size and held in place with duct tape. No tape touches any part of the boat or the mast. I use the same PVC water pipe and closed-cell foam pieces year after year. Only the duct tape is replaced.
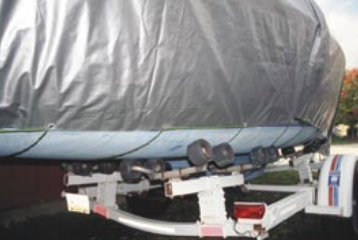
The winter cover is draped over the entire boat, with the bulk of the tarp’s excess drawn to the stern. Starting under the bow of the boat and working my way to the stern, I weave a line back and forth through the tarp’s grommets, much like one would do with shoes and shoelaces. The bow end of the tarp is closed with a combination of lacing the grommets together and using spring hand clamps. The excess tarp at the stern is rolled together and held in place with a series of spring hand clamps. Should I need to go aboard during the winter months, removing a few clamps is a lot easier than trying to untie line with cold fingers.
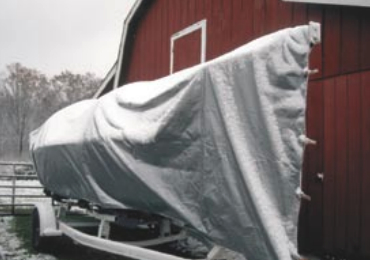
For the cover, I chose a 24-foot by 30-foot reinforced poly tarp that is silver on one side and black on the other. With the silver side facing outward, greater reflectivity and UV resistance is achieved, while underneath the environment is cool and airy. Also, the tarp is sized to not only cover the boat from stem to stern, but also from waterline to waterline, leaving only last season’s bottom paint exposed to the elements. The tarp is on its sixth season and is holding up very well.
I found that a careful fall layup, with emphasis on a proper winter cover, is like getting a head start on next year’s spring commissioning.
Thank you to Sailrite Enterprises, Inc., for providing free access to back issues of Good Old Boat through intellectual property rights. Sailrite.com