A determined amateur builds a suit of sails for his ketch
Issue 67: July/Aug 2009
I spent about three years, from 2003 to 2006, getting my Whitby 42 ketch, Blue Stocking, ready for extended voyaging. Financially, the biggest issue was replacing her sails. A ketch has a lot of them, and most of mine were the original 1983 equipment. I was looking at $12,000 or more for locally built new sails if I replaced the main, mizzen, working jib, and staysail, all of which were pretty tired. That was too big a chunk of the total budget.
I had heard that Hong Kong-built sails are quite good and cheaper than those I could purchase in the United States and that some sailors have had success buying good used sails from a broker and modifying them for their boats. But a third option grabbed my imagination: building my own sails.
Doing it myself is a huge part of the satisfaction I gain from boat ownership. I have never liked taking sails and other canvas work to the loft for expensive repairs. This seemed like an opportunity to acquire the tools and skills I needed in another big department of sailboat management.
I decided to take the plunge by starting with just one sail. The only commercial supplier I’m aware of that caters to the home sail-builder is Sailrite. I already had some previous and positive experience dealing with them and had recently schmoozed with the staff at an Annapolis boat show: nice folks. When I decided to write about building sails, which was long after I went sailing, they helped by taking the accompanying photos.
A question of size
My largest concern was that my sails are pretty big — the main and jib are more than 300 square feet. I wondered if the folks at Sailrite were really set up to support the construction of sails as large as these, so I went to their website to see what I could learn there.
The site has an interactive tool for sail design. I was pleased to note that the dimensions of the standard Whitby 42 sails were in their database, along with those for most other production boats. I ran through the online design-and-quote process with one of my sails and liked the final price: about half the cost of a locally built sail.
I figured I could get a kit and a new sailmaking sewing machine for substantially less than the price of a new commercial sail. As I browsed through the many articles and notes Sailrite has posted online for general information about the sail-building process, my confidence grew.
Eventually, I decided to buy a sewing machine, an Ultrafeed LSZ-1, and a kit for my working jib, a 115-percent, high-cut, roller-furling jib. I called Sailrite and talked to Jeff Frank, their sail designer. He helped me make the final design decisions and reassured me about the scale of the project. A point he emphasized was that the larger and cleaner the workspace, the more smoothly the project would go. I ordered the sail and the machine.
I had a great deal of contact with Jeff during the whole process that ensued. He was consistently patient, pleasant, and competent. You are definitely not alone when you build one of these kits. And so, over two winter seasons, I ended up building all four sails, as well as a replacement dodger/Bimini, two sail covers, and a Jordan series drogue.
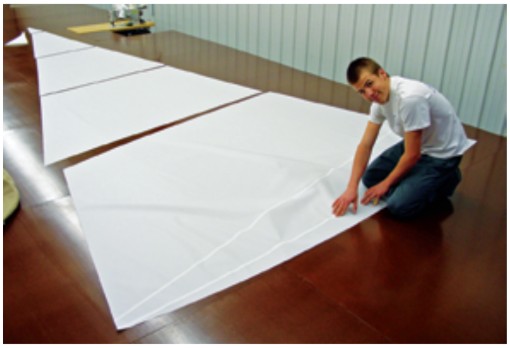
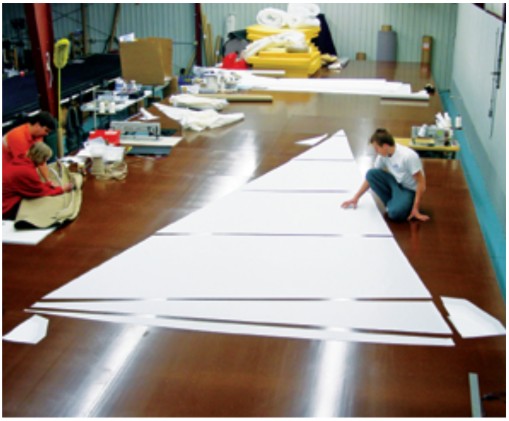
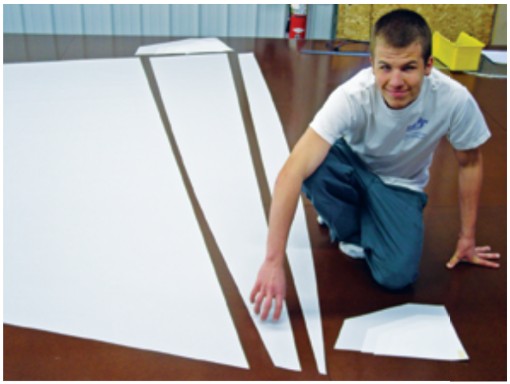
Sailrite shipped the machine right away, but creating the sail kit takes a little longer. Once the design is finalized, Jeff enters the design data into his computer, which then develops a cutting plan. He puts sailcloth on the cutting table and the computer-driven cutter marks and cuts the large panel pieces and small patches. It takes about a week for the kit to be designed, cut, and shipped.
Sailrite uses the same design and cutting process as other modern sailmaking operations. Because the panels are precision-designed and cut, the amateur builder, who is really just doing assembly, can expect a finished sail to be identical in all important respects to a professionally built one. At least, that’s the sales pitch. I would see how it played out.
Learning the machine
As soon as the new machine arrived, I started to get familiar with it. Unlike most home machines, the LSZ-1 has a walking foot, so there’s less tendency for fabric creep as the upper part of a seam slides against the lower part. The little puckers caused by machines without a walking foot are unacceptable in a sail. I opted for a few additional features for improving slow speed control: a heavy-duty speed control (the foot pedal) and a much heavier balance wheel, the big wheel on the other end of the machine from the needle. The LSZ-1 does straight and zigzag stitching, but not the fancy composite stitch that commercial sailmaking machines can do.
I had a little setup to do on the machine — installing the Monster Balance Wheel — and then began experimenting by sewing bits of scrap sailcloth. In a few hours, I felt pretty confident with the machine. The motor runs on house current. This works for me because I have an inverter on the boat. It also has a hand crank, which I haven’t tried.
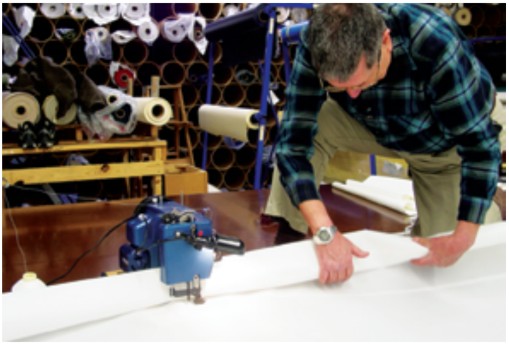
The Ultrafeed is an intelligent compromise in my opinion. In some ways it’s a bit small for sailmaking, even though it’s a lot heavier than a typical home machine. On the other hand, it will do most of the large-scale sewing on the sails used in typical family cruising and voyaging and it’s small and compact enough to bring along on the boat. I don’t think a better single machine exists for amateur sailmaking. Professionals use a range of machines — with each being optimal for a particular job — but this is not an option for most cruisers.
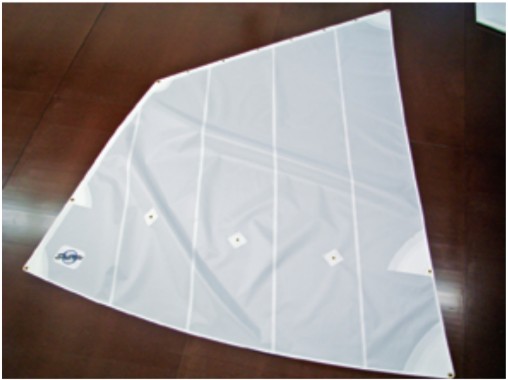
The jib arrived in a surprisingly small package: about 4 feet long and maybe 8 inches square. Inside were a dozen or so sail panels, each 3 or 4 feet wide (all rolled into one cylinder), a bunch of pre-cut corner patches, and the appropriate selection of notions and accessories. Also in the package were a few pages of documentation, including instruction sheets and computer-design specifications that provide a basic roadmap for constructing the sail.
The instructions warn you at the outset that they are somewhat generic and, before you start sewing, you have to study them in the light of your particular sail’s design to develop a construction schedule. In other words, the process is not idiot-proof, which I admit worried me a little. But I did the recommended study and planning — a matter of a few hours, including sorting the various pieces — and got started with construction.
The first step is to sew panels together into sub-assemblies (I had three sub-assemblies on the jib) and then sew these together into a final raw sail.
Building in the shape
As described earlier, each panel had been cut by a computer-driven cutter/marker. Two of the edges are cut straight and the two that are to be sewn to adjacent panels have a slight outward curve. This is called broadseaming and it is the primary technique by which a sail is given its curved airfoil shape. If all the edges of each panel were straight, the sail would come out essentially flat; that is, without draft and without the ability to generate full power to windward.
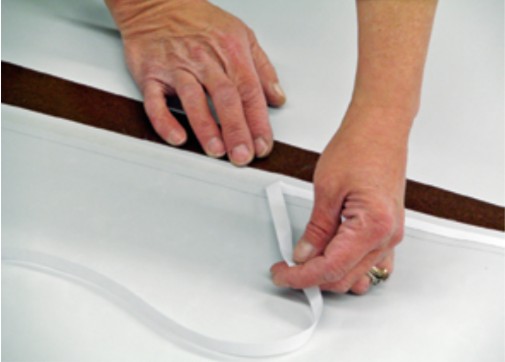
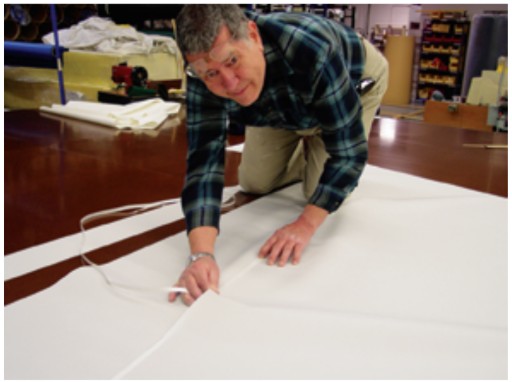
The upper edge of each panel is also marked with a seam allowance line. The basic technique for joining panels, repeated many times, is to place double-sided basting tape along the inside of the marked seam allowance, then attach the adjacent panel to it, following the seam allowance line as closely as possible and taking care that the tension on both panels is the same so the ends come out even and there are no puckers. Once you have achieved this with double-sided tape, you sew each seam three times with a zigzag stitch.
The concept is simple, but doing it is not easy, especially as the size of the sub-assembly increases. The part of the assembly that is outside the machine is no problem, but the other part has to be rolled tightly so it will fit inside the “throat” of the machine. Sailcloth is stiff and slippery when new, so the trick is to keep the rolls intact. I used large spring clamps at each end and in the middle of the roll and switched each clamp from in front to behind the machine as it approached the needle.
Fitting it all together
The final sewing of the sub-assemblies worried me a little. It did take a little extra time and patience, but it worked. As I went along, following the detailed construction schedule I had developed, I sewed the various patch assemblies at the corners and (in the case of the reefing sails) along the luff and leech. It’s generally easier to do these jobs while working with the smallest possible assemblies — ideally just with one or two panels plus the patch assembly.
As with so many big projects, the devil is in the details. For example, if you’ve done any machine sewing you know that there are two threads — the obvious one in the needle and the hidden one inside the machine in the bobbin. The needle thread feeds off a huge visible spool. It will last through all but the largest projects. The bobbin, on the other hand, is only about the size of the tip of your thumb. Its thread runs out many times each day, invariably in the middle of a really long seam. It can be a project to get the material out of the machine, change the bobbin, and reposition the material to start again where you left off.
I learned two things. First, you can get pre-wound bobbins that just pop into the bobbin case. These save the effort of winding bobbins and are a great convenience. Second, with a little planning, you can generally predict when the bobbin will run out and replace it before you start sewing a new line of stitches. You waste a little thread this way but save a lot of time and frustration. I tended to cut this a little close (just like I tend to drive my car a little too close to empty) and occasionally got caught out. But much of the time I got it right.
Making patches
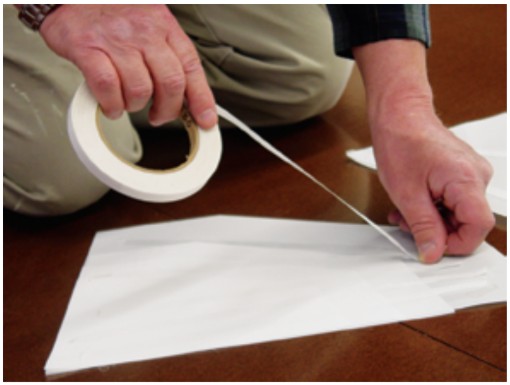
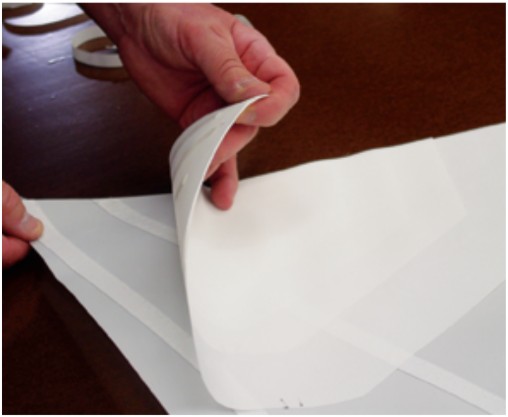
Another little problem was making neat patch assemblies. As you know, the corners of sails are reinforced with a series of roughly triangular pieces of sailcloth that spread the load of the corner fastening out onto the sail itself in an effort to minimize point-loading, which could result in a sail failure. These corner pieces are called patches. The biggest patch goes on the outside with the smaller ones progressively closer to the sail. The assembly is basted together at its edges but has to be sewn onto the sail right through the edges of each patch, which of course you can’t see. I ended up holding the patches against a window so I could mark on the outer patch the line for sewing each inner patch.
Luff, leech, and foot
Next comes finishing the edges of the sail. In the case of the jib, this involved sewing the pre-constructed luff tape (which fits into the roller furler’s foil slot) to the luff. The unfinished luff slides in between the two halves of the tape. I was able to do much of the edging freehand (without using double-sided tape), which saved a lot of time. Because my sewing room was shorter than the sail edges, it was often necessary to cut a slit on one side of the tape so I could make a fold in the sail while keeping the tape properly aligned on the sail. The slit more or less disappears once the edge is completed.
When fitting a leech cord, you place it into the leech tape and keep track of it (by feel) while you sew (since, to function, it must run free).
One design decision I made concerning the edges is worth noting. Most of the Sailrite mainsails have boltropes on the luff and foot. On reflection, I concluded that the boltropes really didn’t add any strength on those edges and that they would definitely not work on the luff with the Dutchman slides I was going to use for the mast track. I decided to go with the widest edge tape Sailrite had available. This made construction a good deal easier and saved a bit of change as well. So far, I have had no cause to regret the decision, but time will tell. All the edge tapes Sailrite sells are pre-folded, so installing them is straightforward.
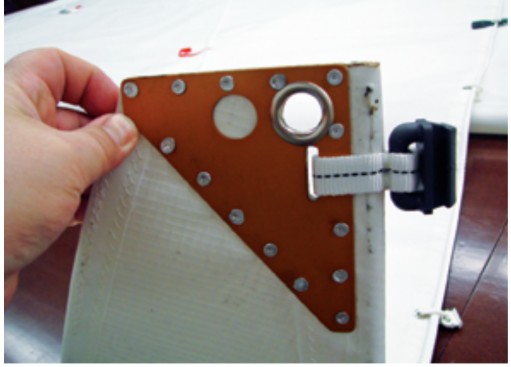
The corners generally need a bit of handwork. On the jib, I had webbing loops at the head and tack. These were mostly machine sewable. It was impressive how the needle went through about seven layers of cloth to sew these down. I added a few hand stitches closest to the corners where the machine ran out of steam and skipped stitches. On the main and mizzen, the heads use manufactured aluminum headboards. These are riveted on with easily managed aluminum rivets.
Laboring over grommets
In the Sailrite kits, the clew, tack, and reefing cringles use traditional worked grommets. The name is appropriate, with the emphasis on “work.” Each one took a solid hour. First you mark the location and cut a round hole. I used a razor blade and an X-Acto knife. Then you mark spaced locations around the hole for the stitches and you hand-sew a brass ring into the hole. Finally, you install an inner ring that crimps on and covers the stitches, insulating them from the chafe of the clevis pin that will go through the ring. This crimping requires the use of a hammer-driven die-and-anvil set that you have to buy. The die set worked, but it was a bit of a struggle, probably because I didn’t have a really rigid floor to support the anvil.
I had to put in 12 of these grommets, so I didn’t mind buying the die set. For one sail, though, I might have thought twice about it. On my next sail, I plan to use a combination of stainless rings and webbing for the corner grommets. I think this will involve less labor and could be stronger than the grommets. I might even be able to figure a way to use that method for the reefing grommets. Depending on the price, it might make sense to take the sail to a loft to have pressed grommets installed. While I wasn’t all that happy with the worked grommets, I was glad to learn the process of installing them, and they do look nice. The one at the tack of the mainsail has deformed a little under load; I’ll back it up by sewing a webbing loop onto the patches next time I’m doing sail maintenance.
A word about hand sewing: lose the sailmaker’s palm. I found that most of the hand-sewing had to be done in places where the machine couldn’t punch through. In those situations, I couldn’t punch through by hand either. You don’t want to push too hard with a sailmaker’s palm — if you slip or break a needle, you can get a pretty dramatic puncture wound in your hand. In those situations, the trick is to make the holes first, then sew. I usually made holes by hammering a finish nail through the fabric and into a wooden backing board. Another possibility is to use an electric drill, but fabric will sometimes wind onto the bit. Even with the help of a pre-made hole, it still can be hard to get the needle through. I made a thick aluminum pusher with a little hole for the needle and sometimes had to finish the pull-through with pliers.
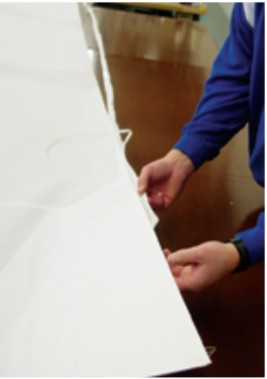
With the roller-furling headsail, there was a final challenging step — the sacrificial sun cover, made of Sunbrella. Professionals put these on in one piece; it takes an amazing amount of artistry and skill to install them neatly. Sailrite knows that won’t work for the amateur builder, so they have developed a method of installing the cover in fairly short sections that overlap a bit at their joints. Even with that modification, it’s not an easy project. Luckily, it came at the end, after I had acquired a little experience.
(Note: Sailrite says, “Some sailmakers do install sacrificial strips for furling headsails in one continuous panel. But the trick is not to force the material to take a bend, as this causes puckering and tight sail edges. So if the leech is being covered and the edge has a hollow, then the long strip must be wider at the top and bottom of the edge because of the hollow at the midpoint of the leech. The only argument for doing it this way is that it is faster — given a large working space. Otherwise, it takes more fabric and adds more weight to the sail, since the extra width at the top and bottom is not required.” –Eds.)
Battens — boons and banes
When it came time to build the mainsail, I decided to include full-length battens, using the Dutchman system for the cars. Sailrite sent the batten material in one big (and very springy) roll that had to be unwrapped very carefully . . . lots of stored energy there! The batten aspect of the construction was straightforward. In use, the battens have their pros and cons. They almost completely eliminate flogging, which is a tremendous advantage. Naturally, as with all battens, they call for a bit of extra maintenance, especially at their leech ends, but this is routine. The big and unforeseen problem is chafe. On a reach or a run, the mainsail rests on and chafes against the lower shroud and, higher up, the upper shrouds.
Some people put anti-chafe gear of some kind on the shrouds and some put chafe patches on the sail. Either approach will work. But add a batten to the equation and the chafing is accelerated dramatically, since the batten acts as a backing plate to push the sail material against the shroud. The fabric can rub through in a few days and chafe patches made of sailcloth do the same. I have tried a few other materials for patches without great success.
A satisfying conclusion
The bottom line is that I’d give the sails I made an “A” for function and a “B” or “B-” for finish and appearance. I never was able to sew absolutely straight lines or get completely even stitching everywhere, both of which are hallmarks of commercial sails. For that level of quality, I think you need a bigger machine, a loft floor, and a lot of hours behind the needle.
I could have improved the aesthetic results to some extent by a greater sacrifice of speed for precision — the basic trade-off in any craftsmanship. My hand sewing always looks a bit improvised to me although, like my machine sewing, it does the job.
During the construction phase, I worried a lot about crinkling and crumpling the sail. I wanted the sails to go on the spars looking brand-new. In retrospect, I don’t think I needed to worry so much about this issue. Once the sails are on the spars, these little surface issues are nearly impossible to see and I doubt they affect strength, durability, or function.
On the plus side, the sail shape came out exactly as specified. There is no visible seam puckering in any of the sails I made, and I can’t see any hard spots, although I don’t have an expert’s eye. I had no major sail failures in the first 10,000 miles of voyaging. I am a lot more confident and better equipped for sail repairs and the cash outlay was within my means. The big sails (more than 300 square feet) each took 80 to 100 hours to build.
For me, it was well worth it. I would say the sail-building project was one of the two or three most satisfying aspects of my cruise preparation, due to the work itself and to the skills I developed. Sailmaking, by the way, is slightly strenuous work, especially with larger sails. It’s a great way to build flexibility for the coming sailing season.
If you might be thinking about building a sail or two for your own boat, start fairly small: replace your smallest sail or make a riding sail if you don’t have one. To begin with, you might want to use a sewing machine you already have. Theresa Fort wrote an article in the January 2003 issue of Good Old Boat on modifying a home machine for sailmaking. Spinnaker-type sails made from ripstop nylon are especially quick and easy to make and they require nothing more than a home machine. On the other hand, if you have the cash, I doubt you would regret buying an Ultrafeed. A few canvas projects will pay for it. If you don’t use it enough to justify the expense, you can sell it on eBay for just about its price when new. Build the sail and see how you like the process and the result. Like me, you might never look back.
It continues to be a source of satisfaction to see my sails in action doing their job as intended: getting the old girl and me around the world.
Lessons from a family-room loft
The workspace I had available was long and narrow, 22 feet by 12 feet, in an antique New England house. It had a varnished wooden floor that had pretty big gaps between the wide planks. The space was generally used as a family room, so I moved some furniture to the sides of the room. It was workable but not ideal. A little more width would have been helpful.
By the time you have a few panels of sailcloth assembled together, you are working with a pretty heavy sail on one side of the machine and a tight roll of material on the other. For this reason, it’s probably not practical to work on a table, unless you happen to have access to a huge, room-sized sailmaking table. I ended up working with the machine on the floor while I sat on a very low footstool. Some people sit on the floor cross-legged. I guess they work the pedal with a knee. Often, it’s more practical to move the machine than the sail, especially in later stages, so working on the floor makes sense.
The edge work is the stage for which you most need room. If you have a sewing room that is as wide as the foot of the sail, you can fold the sail in the conventional way and do a neat job as you gradually unfold the sail. You could even fold the top of the sail neatly and just work on a fairly long middle section. But my room didn’t permit this and — hard as I tried to manage the material neatly — it often ended up in an amazing wuzzle. It wasn’t pretty, but the job got done.
Paul Denton is a life coach, freelance writer, and full-time voyager. Contact him at KetchBS@gmail.com.
Thank you to Sailrite Enterprises, Inc., for providing free access to back issues of Good Old Boat through intellectual property rights. Sailrite.com