Adding a tee adds versatility
Issue 90: May/June 2013
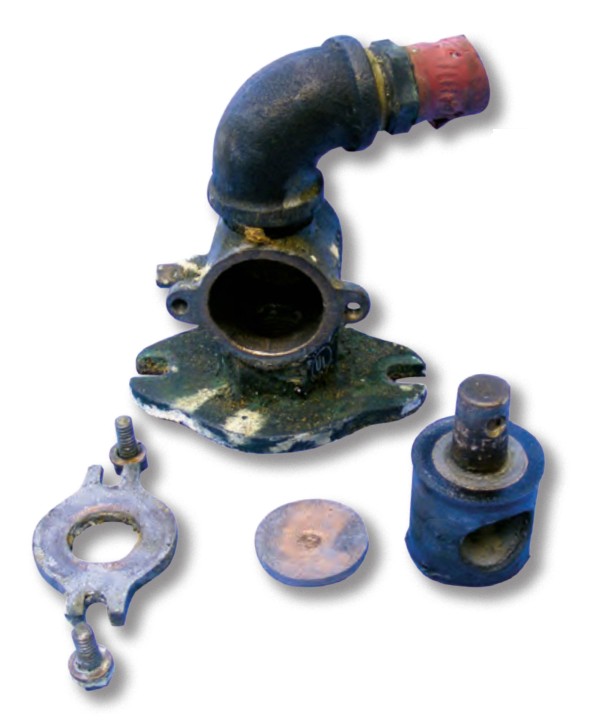
My Columbia 10.7 was suffering from hardening of the arteries. More specifically, it was hardening of the seacock. The Groco SV Series seacocks were a unique design. Instead of a tapered bronze plug or spherical ball, this type had a rubber plug at its heart. The horizontal rubber plug had a vertical hole through the center. To operate the valve, you loosened a wingnut on the side of the seacock. This relieved pressure on the rubber plug and allowed the handle to rotate. Once the seacock was open or closed, as desired, you tightened the wingnut, compressing the rubber cylinder and sealing off leaks. The series was manufactured from 1960 through 1993 and, if properly maintained, the seacocks continue to serve faithfully in many good old boats.
When maintenance is deferred and the seacocks aren’t exercised often or maintained, however, the rubber plug hardens and the seacock becomes harder and harder to operate. The previous owner of my boat had let them go to the point that the seacock on the engine’s cooling-water inlet seized and the handle broke off. The good news was that it broke off with the seacock open so the engine could be run. The bad news was there was no way to close the valve.
I limped by until the next haulout by squeezing the hose closed with Vise-Grips . . . not an ideal situation. I knew for safety’s sake I’d have to replace the seacock at the next haulout.
Gathering the parts
As haulout time approached I began to gather the needed supplies and tools. The first order of business was purchasing a new seacock, one with a stainless-steel ball with Teflon seals, a stainless-steel stem, and a bronze body.
I chose a Groco model BV750 bronze seacock. In addition to the stainless-steel ball and stem, it had PTFE (Teflon) seals and can be serviced while installed. The mounting holes on the triangular base were, of course, different from those on the old seacock. This turned out to be a good thing. There are two drain plugs and a provision for attaching the grounding wire.
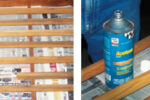
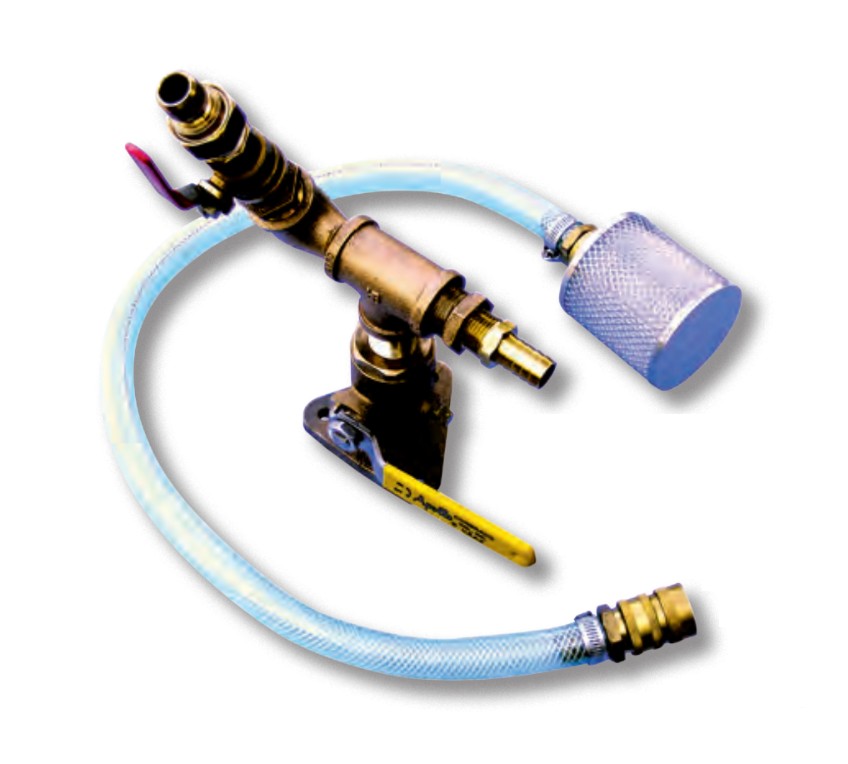
While going through my parts boxes gathering supplies, I came across a flush-valve setup I had done a magazine test on years before. The system was designed for an inboard/outboard unit on a powerboat but had features I liked, primarily a quick-disconnect fitting and an associated ball valve that allowed for easy introduction of antifreeze into the engine. You simply connected a hose to the quick-disconnect fitting and dropped it in a bucket of antifreeze.
It also came with a length of hose with a quick-disconnect fitting at one end and a strainer at the other. This could be dropped into the bilge and the valves configured to allow the engine cooling pump to act as an emergency bilge pump. With a little repurposing, I adapted that setup to my new seacock installation.
Extraction and reassembly
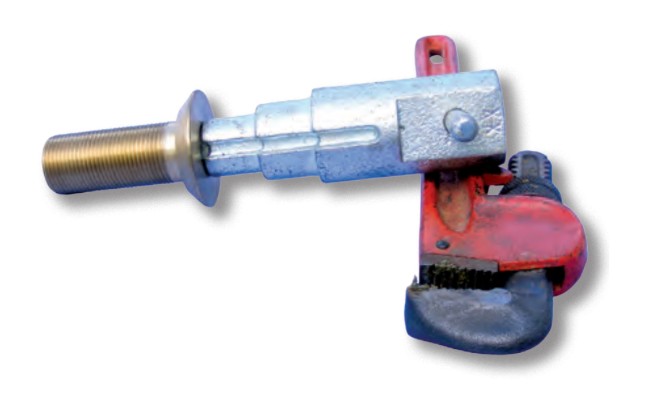
Once the boat was hauled, the first task would be to remove the through-hull from the seacock. This particular through-hull had been in place since the boat was built in 1978. I figured it would be well and truly stuck in place and wasn’t looking forward to removing it. To ease my task, I purchased a through-hull removal tool. This is a cast-iron fitting that is stepped and notched to fit any through-hull from a 1/2-inch to a 1 1/2-inch diameter.
I figured I would need all the help I could get, so I used a pipe wrench on the tool with a 4-foot pipe as a breaker bar on the pipe-wrench handle. To my utter surprise, the through-hull backed out slowly but surely from the seacock. The butyl sealant applied all those years ago was still sealing and still pliable. I don’t think I really needed the breaker bar.
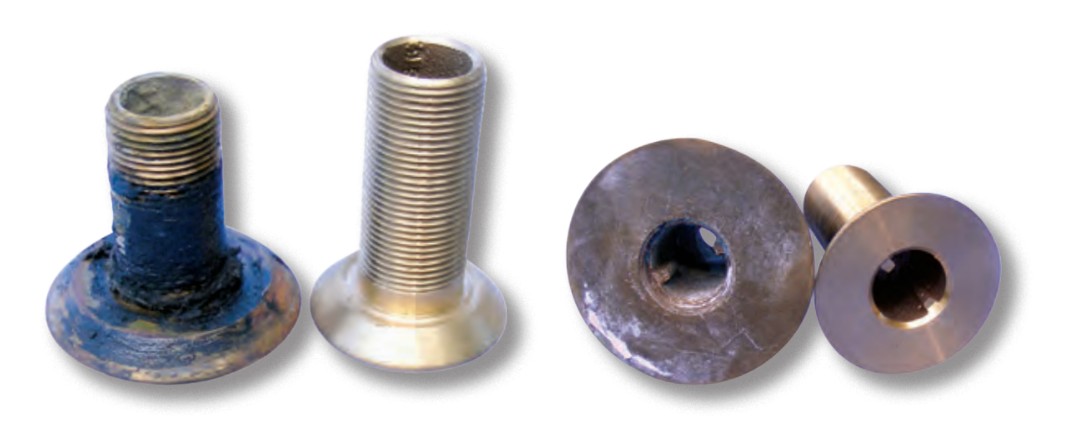
With the through-hull removed, it was time for the next surprise. In the belief that I might have to cut out the old through-hull, I had purchased a replacement. My through-hulls are all of the flush, countersunk style. I soon learned that modern through-hulls have much smaller heads than older ones. If I had cut the old one out, I would have had to fill in and patch the old hole to fit the new through-hull. Luckily, the old one was in perfect shape and could be reused.
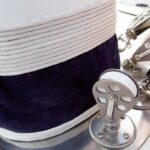
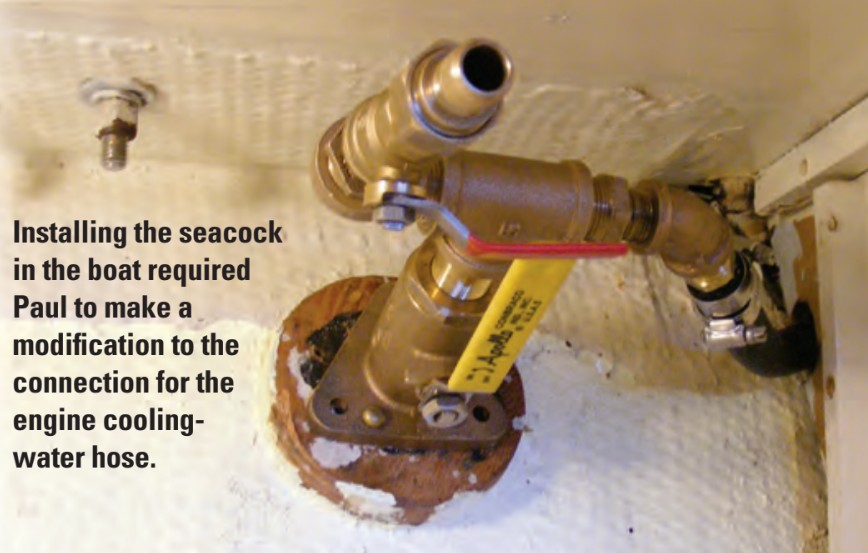
The first step in assembling the new seacock and associated plumbing was to add a bronze tee to the top of the seacock. I fitted one leg of the tee with a hose barb for the connection to the engine’s cooling-water intake. On the other leg I fitted a ball valve, then the quick-disconnect fitting. Actually, it was a bit more complicated than that as I had to use some creativity and additional bronze fittings to get the various connections headed in the right directions. I used Teflon plumber’s tape on all the connections.
The original seacock was installed on a plywood donut epoxied in place. I had planned on replacing that donut along with the seacock. On inspection, however, the donut proved to be as sound and as solid as the day it was installed, a further sign that no leakage had ever occurred. One less job to accomplish.
I found a reputable supplier of marine butyl sealant online and purchased more than enough for the job.
I applied a layer of the butyl sealant on the through-hull with a bead of it around the base of the threaded section. I then screwed the through-hull into the seacock and slowly tightened it. The sealant will slowly flow into place, so I retightened the fitting over the next day or so, scraping off excess sealant that oozed out.
While I was at it, I replaced the hose from the seacock to the engine, as it was also original to the boat. I pulled it out to measure the length of new hose I would need — big mistake! I should have bought more hose than I needed and taped the end of the new hose to the old one so I could pull it through the various limber and access holes. I probably spent more time fishing that new hose into place than replacing the seacock.
Simple and functional
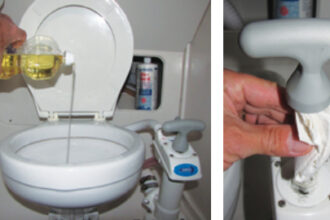
Operating the new seacock is simple. Normally, I keep the quick-disconnect ball valve closed and open just the normal seacock for cooling water when I’m aboard and close it when I leave the boat. To winterize the engine, I close the seacock and open the ball valve. I place a hose from the quick-disconnect in the antifreeze, start the engine, and the cooling pump pulls the antifreeze through the engine. By switching the antifreeze hose with the strainer-equipped hose, I can use the engine cooling pump as an emergency bilge pump.
So I now have a new seacock for my engine cooling-water intake, an easy way to winterize the engine with antifreeze, and a potential emergency bilge pump should I need it. As long as I regularly exercise and maintain the seacock, it should last as long as the original, maybe longer.
With the engine cooling seacock replaced, that leaves just the galley sink, the head sink, and the head overboard-discharge seacocks to be replaced. Whew!
Paul Esterle has been boating since the early 1960s. Starting out with a wooden Sunfish, he graduated to stripper canoes and sailing wooden Folkboats on Lake Erie. Paul is currently based at the head of Chesapeake Bay, where he works on and sails his small fleet of classic plastic sailboats.
Thank you to Sailrite Enterprises, Inc., for providing free access to back issues of Good Old Boat through intellectual property rights. Sailrite.com