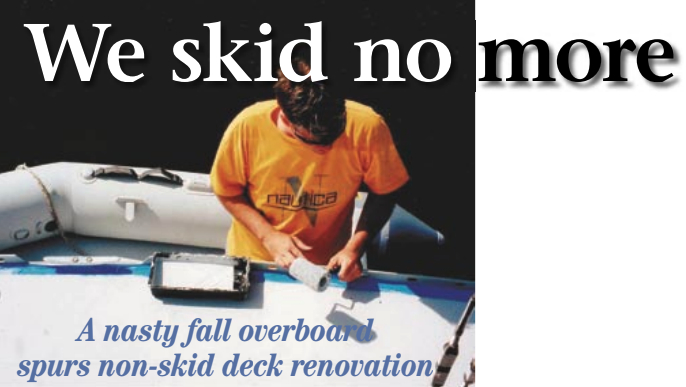
A nasty fall overboard spurs non-skid deck renovation
Issue 38 : Sept/Oct 2004
I knew the deck of our 42-foot boat needed attention, but I always put it off in favor of other projects. Non-skid replacement was not exactly on the top of our to-do list. Actually, it wasn’t on the list at all. One sunny afternoon as I climbed out of the cockpit, I slipped, grabbed for the dodger and took most of it with me as I fell head-first over the side. Fortunately, we were tied to the dock at the time. Lying there on the dock, I thought about what would have happened next if this had occurred while we were sailing. I realized it was time to do something about our slippery deck.
I started by reading articles about popular methods, such as prepping the surface for painting, adding your first coat of paint, and using a flour sifter or screening material stapled to a wood frame to sprinkle sand in the wet paint. Once it dries, you apply a second coat of paint to encapsulate the sand. It looked as if the previous owner had used this method on my boat; I could see at least two different shades of paint and sanding marks left behind from sloppy prepwork. I thought about adding a quick third coat. This probably would have done the trick for a while, but it was winter here in the Northeast, and I had plenty of time to think about how to solve my gravitating dilemma.
A few weeks later I read an article about how to install a composite material with a sharp, raised, diamond pattern called Treadmaster. The article went on to say that, when properly installed, it would probably outlive the boat it’s attached to. The only problem I could see was the amount of work involved and the final cost. Installation requires removal of old non-skid material, making templates from the existing deck pattern, cutting the Treadmaster material to match your templates, then using epoxy to apply each section. Even though Treadmaster comes in a large range of colors, we also decided the finished product didn’t have the appearance and feel we were looking for.
Put it to the test
Then, one night while stuck below during a nor’easter, I was sorting though some old papers and discovered a small, thin, metal sample with a product called Durabak-18 applied to one side. I remembered that I had picked it up at one of the boat shows a few years ago. I decided to put the sample to a few tests. First I scratched it with my keys. It held up better than my existing deck when the same test was applied. I tried to peel it and couldn’t. I folded it in half hoping to crack it. It didn’t. After contemplating my last test, I decided this might be the material I was looking for. I researched Durabak-18 on the Internet, and discovered the folks at Applied Surfaces have found a way to suspend little bits of recycled rubber from old tires in a polyurethane base.
Here’s the product description on the can: “One step, totally flexible, slip-resistant, waterproof, abrasion-, chemical-, heat-, salt water-, UV-, and corrosion-resistant, lead-paint encapsulant. Range of colors.” Reportedly, it’s used on U.S. Coast Guard ships, and our own Staten Island Ferry here in New York City. As for the range of colors, Durabak-18 comes in a wide variety of colors including bright orange, just in case you want to highlight trouble areas, such as steps, cleats, or anchor chains leading to your windlass.
The next day I called Applied Surfaces to confirm our installation. I wanted to make sure it would hold up when applied to a semi-flexible fiberglass deck which would be in the sun 365 days a year with the occasional saltwater bath. Folks at Applied Surfaces reassured me it would and also mentioned that — due to the light foot traffic seen on most small boats— with regular maintenance, it might last indefinitely. To put light foot traffic in perspective, think about how the decks of the Staten Island Ferry would see more foot traffic in one day than my boat would see in 10 years.
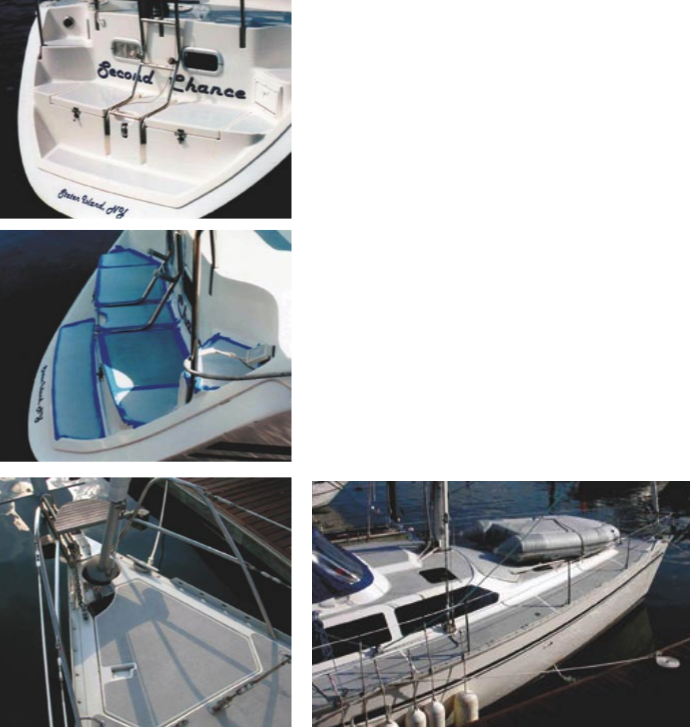
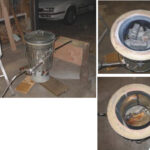
steps, at top and center in “before and during stages.” The finished bow, below, and in wide view on facing page, shows the project soon after it was completed and two years later.
Starting the project
To get the project started, I ordered one quart of light gray Durabak-18 and two of the special 4-inch rollers needed to apply the product. For small areas where a roller won’t reach, you can also use a regular paint brush. If you have the proper equipment and a large area to cover, the product can also be sprayed on.
We decided to start with six small areas that make up the transom steps. If everything worked out, we would continue with the rest of the boat. I very carefully read the instructions and product warnings. Surfaces need to be clean, dry, and roughened. Durabak-18 will bond to almost any surface, but be sure to read the instructions, as preparation varies depending on application.
We also had a few pieces of deck hardware that would need to be removed first. While this added time to the overall project, I decided it was a good excuse to clean, inspect, and reinstall the hardware with fresh bedding compound.
Once all the deck hardware was removed, we followed the instructions for fiberglass and previously painted surfaces.
Before sanding any surface, be sure to remove all traces of wax or other contaminants. As instructed, we used xylene to wipe down all areas to be sanded. Xylene can be purchased at household paint supply stores in quart and gallon containers. We used approximately three quarters of a gallon to complete the decks on our 42-foot boat.
Because our goal was to have completely renewed decks, we also compounded all adjoining fiberglass. Once the Durabak-18 had completely cured, we would go back and renew all surfaces with several coats of fiberglass polish and wax. Although this step increased the overall time to complete the project, it proved worthwhile as we’ve since had people mistake our 13-year-old boat for new.
Roughened the surface
Our surface preparations included using a small palm sander with 100-grit sandpaper. Being very careful not to sand the adjoining deck areas, we only roughened the surface to be painted. There were also a few dings that needed attention, so we mixed up a small batch of epoxy to fill in those areas. Once all sanding was complete, we washed down the entire boat using soap and water, and we wiped everything down with xylene once more. For the next step, we masked off all deck areas we wanted to protect. We used 2-inch tape but, in hindsight, we should have extended this out another few inches using newsprint or kraft paper.
Durabak-18 needs to be stirred very well before applying. We used our power drill with a paint-mixer attachment on low speed. We also added in a small packet of the accelerator Applied Surfaces recommends for cold-weather applications and faster curing. Once everything was mixed up according to instructions, we wiped everything to be coated a final time with xylene. We then applied our first light coat. It takes a few seconds to learn how to apply the product, but don’t worry, your second coat will hide your first-coat mistakes. Using the special roller, you roll in only one direction. Don’t try to roll it out like paint. Once everything has been coated, cover the unused product and take a break. Depending on temperature and humidity, you’ll have one to two hours before it becomes dry to the touch and ready for the second coat. Just before you apply the second coat, thoroughly mix the product once more. Your second coat should be applied a little heavier and at an angle to the first coat. As you apply the second coat, you will see everything come together. Your sloppy first-coat mistakes will disappear, and everything will even out to a nice uniform finish. Durabak-18 is a very forgiving product as long as you follow all preparation instructions carefully.
Small garbage bag
Once you have completed your second coat, remove all masking tape immediately and carefully. It’s best to have a helper at this point to hold a small garbage bag turned inside out as you deposit still very wet masking tape on the bag. Once you have a pile of tape stuck on the bag, your helper can pull the bag up and over the pile, containing the worst of your problems. At this stage, if you notice any missed spots, wait for the Durabak-18 to dry before touching it up. However, if you notice any Durabak-18 where there shouldn’t be any, wipe it off right away with a rag and xylene. Otherwise, you’ll never get it off. This includes any Durabak-18 that might have been splattered by the roller onto other parts of the boat or any that got there from a wayward piece of masking tape.
I would suggest breaking up a project such as this into several weekends. We found we could prep, clean, mask, and paint about 30 square feet during a weekend. Even though it was a little more expensive, we used quart containers rather than gallons. This way we could apply one quart at a time. Once you open the can, the product starts to cure. The folks at Applied Surfaces advised us that the Durabak-18 spread rate is about 60 square feet to the gallon. On average, we found that to be a conservative number, but it was good enough for figuring out how much product to buy. We did have one quart left over, but it’s nice to have a bit with the same color batch number for unforeseen touchups.
After six to eight hours you should be able to allow light foot traffic. We waited two weeks before we polished and waxed the rest of the deck, as the company suggests.
This year alone we’ve put more than 3,000 miles on our boat and our Durabak-18 installation still looks and works great. For regular cleanings we use a soft bristle brush with soap and water. We tried using hard bristle brushes, and although the Durabak held up to our rough cleanings, a soft bristle did a better job. We have spilled oil, diesel fuel, blood, red wine, and other products with no ill effect. Durabak-18 has held up very well after three years of constant use.
Thank you to Sailrite Enterprises, Inc., for providing free access to back issues of Good Old Boat through intellectual property rights. Sailrite.com