Turning an aging Pedrick 41 into a dream boat

Issue 40 : Jan/Feb 2005
My love affair with boats began in 1971, while I was ferrying aircraft in and out of Vietnam via Ching Chuan Kang, a Chinese Air Force base in Taiwan used by the U.S. Air Force for C-130 operations.
During downtime, I would travel to the southern ports along the coast, mesmerized by the sleek yachts under construction for wealthy foreign owners. I would sit and dream, hoping that someday I might set sail in one of these beautifully crafted “leaky teakies,” as those early Taiwanese boats were sometimes called. But it would not be until many years later that, still humbled by the craftsmanship and labor that went into building those boats, I would realize my dream.
Years of sailing and four boats later, I embarked on a quest to find what might become the perfect cruising boat for me. Knowing that all things are at the very least a tradeoff, I set out to find a boat that would fulfill my most basic needs. It must have moderate speed in light air, moderate draft, and the ability to stand up well in offshore conditions; be a dry sailing boat with comfort both in the cockpit and below; have good storage; and, naturally, be affordable.
In order to keep such an ambitious project within my budget, I also knew that I must be capable of doing the refurbishing and repairs myself. After much searching, I finally found the best candidate suited to the task, a basically well-kept 1983 Cheoy Lee Pedrick 41 keel/centerboarder located in the Gulf of Mexico.
I bought the boat and had it shipped to my home in Annapolis, Maryland. By the time it arrived I already had a fair idea of what it would take to turn my dream boat into a reality. So I set about on a two-year task that did a good job of wearing down my fingers as well as thinning out my bank account.
Changed to cutter
Neshuma began life as a sloop, but with a pitiful anchor storage arrangement and some undesirable weather helm. I decided to change her into a cutter and add a more suitable bow platform and a means of extending the rig. I constructed the platform of laminated teak strips, through-bolted internally every 10 inches with stainless-steel threaded rod. I also fabricated the custom twin rollers, scuff plates, headstay fittings, and all other metal fittings.
The platform was firmly bolted through the foredeck with massive backing plates and an adjustable internal truss rod in the anchor locker to take the load of the inner stay. A bobstay connected to a heavily reinforced bow fitting takes the lower loads and those of the truss rod to equalize the forces. I then cut the original bow rail and welded in sections to extend it.
I installed new roller furlers for the headsail and staysail. These increased the total foretriangle area by 120 square feet. This alone made a vast improvement in light-air sailing, decreased the weather helm, and provided much greater flexibility in sail combinations for all conditions. Neshuma is now very well balanced on nearly all points of sail and much easier to manage singlehanded.
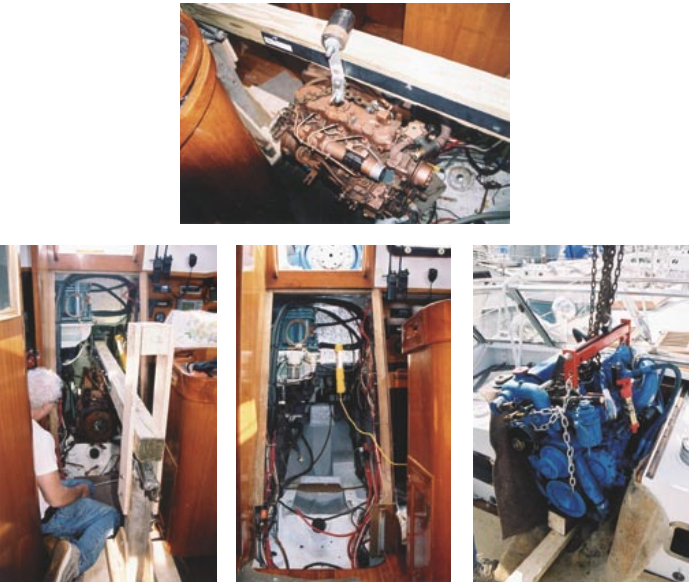
The original engine was a 44-hp Universal model 50 diesel, with barely enough power to make headway into any kind of seaway, especially considering the boat’s 24,500-pound fully-loaded displacement. I decided to replace it with a bit more heft, so I located a newly rebuilt 65-hp Perkins 4-154 diesel. Of course, it was no easy feat shoehorning that beast into place, with a scant 1⁄8-inch clearance going down the companionway.
Tight squeeze
The engine had to be stripped of all accessories then reassembled after having been fitted to the beds, all in a space that scarcely had room for a hand on either side. The entire swap took me more than a month of intensive labor and much custom fabrication in my basement shop. The repowering required new engine beds, a complete new custom exhaust system, and a plethora of custom fittings, each requiring careful engineering and fabrication, including special machining to adapt the Hurth V-drive. Of course all the boatyard mechanics said it couldn’t be done . . . not enough space.
A new custom three-bladed propeller and shaft were provided by Jimmies Prop Shop of Miami, Florida; those guys really know what’s going on and delivered superb service and pricing. Yes, I could have gotten one locally, but at Annapolis prices. With the new engine and prop I can attain hull speed quite handily, but I normally cruise at 7.5 knots at 2,400 rpm.
In the electrical department, I fitted a new 100-amp Balmar alternator, along with a Heart 2,500-watt inverter and three gel cell batteries totaling 525 amp-hours. It’s proven to be a real bulletproof system. I also decided to upgrade the entire electrical panel and rewire the entire boat, since most of the wiring was old and marginal. I also built a custom breaker panel into what had previously been a shelf space at the side of the nav station.
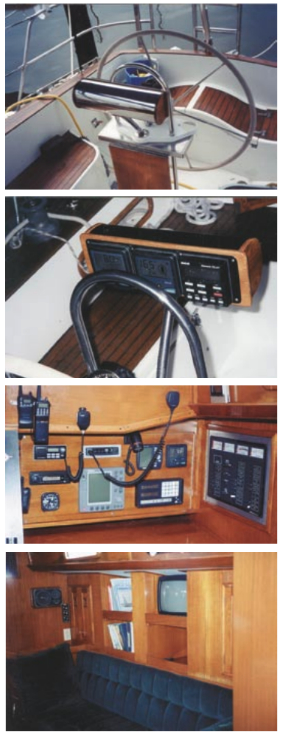
The rewiring job was daunting but ultimately worth the effort. I needed to replace and upgrade all the electronics, but I knew right away that the original open shelf above the nav desk was inadequate, so I built in a new and larger teak-faced panel. It was mounted with a piano hinge so the entire affair can swing out for servicing (see photo on Page 50). It houses all of the radios, radar, and instruments with a built-in look.
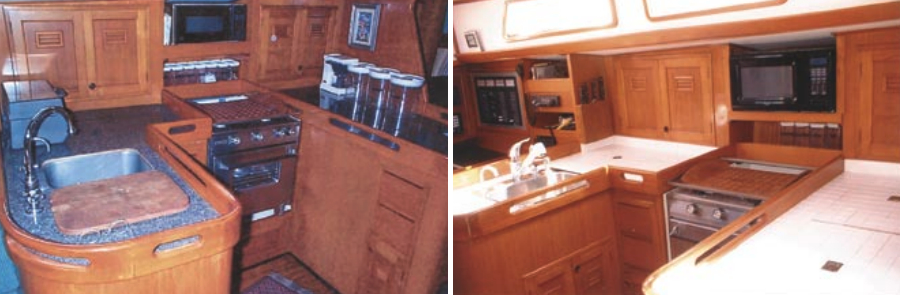
For the most part, Sonny left Neshuma’s interior as it was, concentrating instead on her sailing characteristics and exterior. However, he did rewire her and added an alternator and inverter. He also ripped out all leaking ports (that is to say all ports) and redesigned them, modified the folding table that blocked traffic through the boat, tiled the head and galley countertops and sole in the head, and revised the navigation station.
Teak and stainless
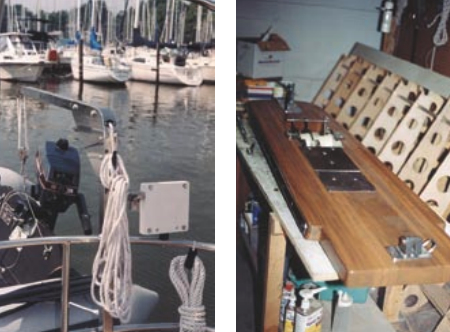
I wanted my cockpit instrumentation mounted in a pod at the wheel, but all I could find were rather expensive pods made of PVC. I rounded up some scraps of teak and cut out the side of an old stainless-steel fire extinguisher (see photo on Page 50). Hey, this modification didn’t even cost what I call a full “boat unit” ($100, because it seems that’s the minimum you spend every time you open your wallet at the marine store).
Early on it became apparent that with the low coachroof, the boat seemed more likely to get green water in the cockpit, making for a somewhat damp ride at times. I hit on the idea of a hard windshield, remembering just how many soft dodgers I’ve had to replace after just a couple of years in service. A quick look on the eBay website turned up a nice used powerboat windshield, which I bought for less than the price of dinner at the marina, herein known as a “marina unit.”
All I really wanted was the frame material anyway, so work then began: making templates, cutting, welding, and forming up a coaming from marine ply and fiberglass. I had a local glass shop make up the windows from tempered plate. The finished product looked almost as though Hallberg-Rassy had put it on at the factory. A new custom mini-dodger was made up that could stand alone over the windshield and further keep out spray, and the new Bimini top was fitted with a center section that can be zipped in to complete the entire ensemble and provide full shade and weather protection.
Since I normally carry my dinghy while sailing, I looked high and low for davits that would do the job, but most were quite expensive and even a bit flimsy, so I welded up my own, using 1 1⁄2 inch-square 316 stainless tube. I designed it so that both arms can swing up out of the way in a crowded storage area or tight slip. I simply remove one pivot bolt, and there are no more charges for additional boat length. The total cost in material was two marina units.
Leaky ports
The interior was basically in excellent condition, save for the ubiquitous leaks found below every fixed and opening port — a Cheoy Lee hallmark. I ripped out every port and window in the boat, only to discover that they were held in by little more than their interior wooden trim rings. One good wave and it might have been all over.
I cut polycarbonate windows for each, but added another 1 inch of material to the perimeter, which was then through-bolted to the stainless exterior trim rings and sealed with 3M automotive window mastic. It required shimming the interior panels just a bit, which I covered in matte white Formica. If nothing else, this really helped brighten up the interior. No more leaks.
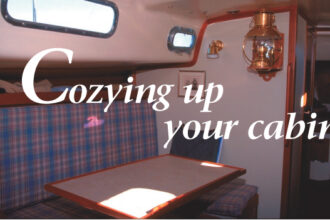
The original folding teak table in the saloon was actually too big when opened — I seldom seat eight for dinner — and blocked all traffic to the forward cabin. I narrowed the leaf on the walkway side by 10 inches and constructed a teak-faced plywood cabinet to enclose all the wasted space under the table, along with two opening doors. This adds much-appreciated storage for dry goods and those ever-so-tall cereal boxes.
The floor in the head and all countertops are now covered in matte white 2-inch tile, which looks superb and is easy to keep clean, all courtesy of Home Depot. Cost? About one marina unit. Because of all the dark teak, the head had to be revamped. Now it’s faced mostly with Formica and teak trim. Much brighter, easy to clean, and inviting.
The hull and topsides were in remarkably good shape when I first purchased the boat. The previous owner had the entire boat painted with Imron polyurethane, a project I would not suggest for the do-it-yourselfer.
No blisters or rubrails
The bottom had also been given a complete epoxy job, and there was no evidence of blisters. One obvious glitch was the lack of rubrails, something most of us think about when docking, especially with beautifully painted topsides. I laminated and spliced up long strips of select mahogany, through-bolted to the hull every 18 inches, and capped it with sacrificial stainless-steel rubbing strakes.
Once I had the new cutter rig, I was disappointed with the original mainsail, so I had one made up by a loft in Hong Kong. I won’t say just how many boat units, but it was about 30 percent cheaper than the prices quoted by the local lofts, and the finished product was better than I expected.
Today, the refurbishing of Neshuma is essentially done, or as done as any boat ever is. Like everyone else, I have my lists. She has recently been fitted with a Pur-40 watermaker, as well as a new rigid inflatable boat (RIB) and outboard. I’ve also fitted a 75-watt solar panel atop the davits with an adjustable swing mount to catch the sun at various angles. An extended cruise to the Bahamas, South America, and beyond is drawing very near.
It’s interesting to note how similar the specifications of this David Pedrick design are to the Hinckley Sou’wester 42, designed by McCurdy & Rhodes. With the exception of the lower coachroof, the hull form, keel/centerboard, underbody, sail plan, and dimensions appear to be nearly identical.
To this day, I often hear the same flattering comment by dockwalkers, “Isn’t that a Hinckley?” When I then explain that it’s a Cheoy Lee built in Hong Kong, most look a bit puzzled and just keep smiling.
Thank you to Sailrite Enterprises, Inc., for providing free access to back issues of Good Old Boat through intellectual property rights. Sailrite.com