Getting back to the water with very little money and a lot of effort

Issue 40 : Jan/Feb 2005
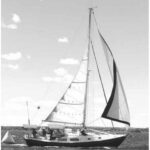
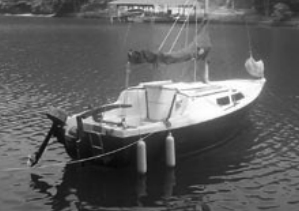
I clearly remember driving down the interstate behind a 1972 MacGregor Venture 222. The boat was being pulled by its current owner . . . headed toward my home in Chattanooga, Tennessee, where I would begin its restoration. As I drove through the shower of leaves and twigs, I remember wondering to myself, “Gee, what was I thinking?”
The sailboat was a sad case. Because it had been lying in the woods half full of stagnant rainwater, everything inside was rotted or mildewed. It had been heavily modified by the previous owner, who may have been a skilled cabinetmaker, but he didn’t understand the subtleties of marine carpentry. Once beautiful interior-grade hardwood plywood had delaminated, and mild-steel screws had turned to rusty, powdery barbs.
So what was I thinking? I once lived aboard a Catalina 27. But I sold her, got married, and returned to graduate school. I never regretted making those choices, but I’d often wished I could have done all that and kept the boat as well.
With my new responsibilities, replacing my Catalina was out of the question, so I began searching for a smaller trailerable boat that I could keep at the house in the winter and sail on our nearby lake in the summer. Sailboats are rather rare near Chattanooga, and those I found were expensive, often at prices well above book value. I was starting to get discouraged.
Things going for it
That’s when I came across the MacGregor Venture 222 that I was following home. This boat did have a few things going for it. It was essentially complete: mast, boom, sails, trailer, cushions. Much would be replaced, but having all the parts gave me the option of rebuilding if possible. If a part was too far gone to restore, it could be used as a pattern. Another advantage was that it was relatively close, only 30 miles away. And it was cheap. I paid $500 for it, though in hindsight I paid too much.
The final advantage was that the seller was willing to sell the boat delivered at my house. This was no small consideration. Since the sale depended on delivery, it was comforting to know that if the boat did ball up, I wouldn’t be responsible for the resulting mess on the highway. But we made it to the house with no problems, and the boat was soon blocked up under a shady tree beside my house. I thanked the former owner for his help, and we closed the deal. As he drove off, I took a good, close look at my boat and assessed the mess.
Surveying a restoration case
One of the most important steps in buying a boat, for restoration or otherwise, is a survey. With larger or more valuable boats, hiring a professional surveyor is always a good idea. But with boats on the low end of the value scale, it makes less sense. A blind man could survey this boat with his nose and come up a reasonably accurate assessment: it had serious problems. To pay a surveyor to tell me the obvious seemed a waste of money.
I did my own pre-purchase survey. I uncovered the most obvious problems: a cracked and delaminating keel, water-damaged interior, rotten trim, and an electrical system beyond repair.
This was sufficient to get the price reduced from $1,800 to $500, though a professional survey might have gotten the price down even lower. Actually, I had to explain to the owner that $1,800 was a completely unrealistic figure for this boat. BUC International gives the retail price range for a 1972 MacGregor Venture 222 at $1,500 to $1,800 for a normally-equipped, sound boat in ready-to-sail condition without the motor. This boat had a motor, but it had an unrepairable lower unit, and the boat was a long way from ready-to-sail. For more information on boat values, log onto http://www.BUCvalu.com.
The seller had said that this boat needed “a good cleaning,” which seems to be a favorite phrase among owners of hopelessly neglected watercraft. I started the next day, doing much of my cleaning with a hammer and crowbar. This had been a much-loved and well-used boat at one time, but clearly if it were to have any hope of ever sailing again, it needed to be “cleaned” down to its most basic structure and reassembled.
Better picture
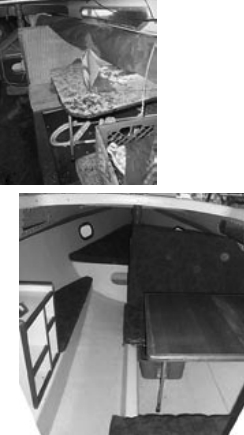
After two weeks of scrubbing, removal, and general demolition, a more complete picture of the boat’s deficiencies came to light: old hull repairs made with Bondo, a pair of pine grubs happily munching away at my winch support post, and a thin repair on the topsides where one could easily poke a screwdriver through the hull. It’s doubtful that a more thorough survey on my part (or a professional surveyor) might have revealed these problems, but you never know.
If you are seriously considering the purchase of a boat in similar condition, ask the seller if you could spend half a day cleaning your prospective purchase. Give it a good scrub. Clean the bilge. Empty the lockers. Wipe down the interior. You might uncover additional deficiencies that you can use to leverage the price. And the boat is going to need cleaning anyway.
The master list
Once I had stripped, cleaned, and thoroughly inspected the boat, I was ready to make my “master list,” an itemization of all the repairs, improvements, and enhancements I wanted to make. A list like this can take any form. In This Old Boat, Don Casey goes into great detail about making your repair plan, identifying nine different categories of jobs. I wasn’t nearly so organized. I just made a big list in a spiral notebook that I called my Boat Restoration Log. I also recorded the money spent on parts and supplies for the boat, as well as the time spent on each repair job.
It was often very helpful to break down a big job, like “fix keel,” into smaller, more manageable parts. Thus, “fix keel” would have several subheadings, like “lift boat,” “remove keel,” “strip off old glass,” and so on. It was a great morale booster to cross a job, no matter how small, off the list.
The way I went about completing each task wasn’t methodical. I’d look at the list, choose something I felt like working on that day, and have at it. If the job required lots of hours, like scraping the hull, I’d often scrape for a few hours, then switch to something a little more manageable, like plugging holes in the deck or renewing a piece of hardware. Certain jobs had to be completed in some kind of sequence — I didn’t install any hardware until the painting was finished, for example — but skipping from job to job kept me from getting too bored with the work and feeling overwhelmed. (Most of the time, anyway.)
Sequence of repairs
The basic sequence of repairs went something like this:
- Removal of everything to the bare hull and deck. This included hardware, woodwork, electrical system, and paint.
- Clean and prepare for painting. This meant repairing all rot, drilling limber holes so the lockers could drain, replacing earlier repairs that were weak or substandard, reinforcing joints with epoxy fillets, and sandblasting the interior.
- Repair or recondition as many parts as possible: keel, rudder, blocks, and winches. Replace those that are substandard or deteriorated, such as the table, the exterior trim, and the electrical system.
- Reinstall and re-bed all of the repaired or new systems.
While there isn’t enough space to write about every single job, here are my thoughts about some of the larger efforts:
Painting the interior
Since this boat had a piece-built interior rather than a liner, I had to paint. When I restore my next boat, I’ll look for one with an interior liner. I’ve heard disparaging remarks about liners. They are a cheaper, and often weaker, form of construction. They allow poor access to the hull. The interiors look like the inside of a refrigerator. But as long as their attachment to the hull is good (they are often tabbed to the hull or screwed into wooden stringers, which can rot), liners are much easier to clean up. Mold doesn’t imbed itself permanently into the surface and, since they are out of the sun, their gelcoat surfaces can look good for a long time, much longer than exterior gelcoat.
Despite a year or so spent with standing water inside, the interior didn’t have too much rot. I was able to remove all of the rot by replacing one seat top panel, addressing the wooden keel winch support, enlarging the seat locker cutouts, and replacing the lids. The lockers were originally hacked out roughly at the factory with a circular saw. By enlarging these with a jigsaw, I improved access and upgraded to lockers with rounded corners. I was able to cut away some rot while I was at it. This is a minor detail, but it gives the boat a more professional finish.
The interior had some sort of fabric attached to the hull. This might have been done at the factory to give the interior a warmer look. I’m sure it looked nice for about a year and a half. Then the inevitable mold set in. After 30 years, it was shot. I ripped it out, revealing a nasty surface of flaky old glue and/or paint. I sanded much off (if you do it, wear a respirator), but some areas could only be sandblasted. I bought a small pressure pot. Next time, however, I’ll rent a large industrial blast pot and compressor. (On second thought, I won’t be doing this again because the next boat will have a liner, right?)
I added structural reinforcing at the corners of the keel trunk, the transom, inside the lockers, and so on, using thickened epoxy. These joints were already fairly strong; no cracks were showing after 30 years. But the joints were rough. Adding a rounded fillet left a smooth, rounded inside corner that is stronger, looks better, and is easier to clean. Then I painted the interior with polyurethane enamel, dented cans on sale for $2 a quart. I used 4 quarts. It’s holding up well.
Replacing the wiring
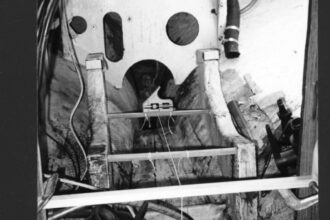
Older MacGregors have a reputation for being poorly wired. On my boat, that reputation was well deserved. The electrics were substandard from Day One, relying on lamp cord, household switches, and a single fuse to distribute power throughout the boat. I threw everything out and replaced it with larger-diameter wire, a distribution panel, and new navigation and interior lights. I tried to follow the ABYC specification for marine wiring as closely as possible. I was unable to find a consumer version of the specifications, but I managed to piece together various parts from the Internet and boat-repair manuals. The result is a vast improvement over the stock system.
Centerboard rebuilding
The centerboard was a major problem. The MacGregors of this era had centerboards that were made from three 1⁄2-inch steel plates, sandwiched together and set in a female mold containing a few layers of glass, but mostly resin. Over time, water finds its way to the core, causing rust. The rust expands, cracking the brittle resin covering and allowing more water in. These centerboards are often found wedged tightly into the centerboard trunk.
Mine had been “repaired” by slicing away some of the fiberglass covering, but it still needed to be driven out of the trunk with a steel pin and a sledge. Lifting the boat off the trailer to access the centerboard was a nightmare. The boat nearly fell over twice despite being shored and braced nearly every way imaginable. The soft ground over which I was working made this a dangerous and difficult job.
But I was able to remove, strip, sandblast, paint, relaminate, and reinstall the centerboard. That’s about three months of part-time work in one sentence. I discovered the 1⁄2-inch keel bolt had bent nearly 45 degrees, so I bored the pivot hole larger and installed a 5⁄8-inch grade 8 bolt. This keel should last awhile, but were I to do it again, I’d get a cast-iron replacement keel as was used on later models. That keel has a better foil shape, and renewing one consists of sandblasting the rust, priming, and painting.
Canvaswork
One of the more enjoyable jobs was the canvaswork. I learned enough about sewing to muddle through replacing and recovering the interior cushions and to do some exterior projects as well (see Good Old Boat, July 2003). Recovering the cushions was a long job that sometimes got tedious, but it’s a great project for the winter months. Next to painting, new canvas makes one of the most noticeable improvements to the overall look of a boat.
It’s been about three and a half years since I started my restoration project. To date I’ve spent about 400 hours and $4,000 on the boat. I’ve won my junkyard war. I have a boat that — while it isn’t perfect, nor the last boat I’ll own — looks, smells, and feels like a nearly new boat. And I’ve kept at least one boat from the junkyard for a while.
If I were to do it again, I’d do a few things differently. First, I’d look for a boat that was a little less modified by the previous owners. Some of these fixes could not be repaired because of the inordinate amount of work and money required. Second, I’d look for a boat that wasn’t quite so badly neglected, has an interior liner, and has a higher resale value than mine does . . . one that can be sailed immediately would be ideal. Of course, now that I have a boat, I can be a little more selective.
In fact, I’m hoping to put my experience to good use on my next boat, maybe something big enough for a Tennessee family of three to sail downriver and spend a season in the Caribbean.
Thank you to Sailrite Enterprises, Inc., for providing free access to back issues of Good Old Boat through intellectual property rights. Sailrite.com