Know how much water you have — at a glance
Issue 62 : Sept/Oct 2008
Water tanks are located in the nether regions of the boat and are covered by bunks, liner pans, access hatches, and all the stuff that goes on top of those. Good quality tanks are thick-walled so it’s difficult, even with a flashlight, to tell how full they are. While it’s a pain to tear the boat half apart just to look at the water tank, it’s important to know how much water is inside.
Like many minimally fitted-out production boats, Miss Bohicket, our Pearson 28, had no monitoring system for the 22-gallon water tank under the V-berth. I considered commercially available tank monitors. The price range for these seems to be anywhere from $200 to more than $1,000 for a multi-tank monitoring system.
Inspirations
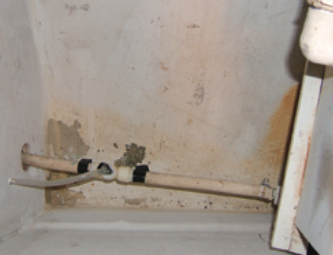
I didn’t want to spend the money if I didn’t have to. I remembered that Jerry Powlas had devised a low-tech water-tube-type gauge for his holding tank (“Swamp Sounder,” March 2002 issue), and I started thinking in that direction. Jerry’s device is a manometer, a tool that uses the displacement of liquid in a column to measure pressure. This solution allowed him to determine the level of a liquid that must be kept completely contained. My second inspiration was a belowdecks tour of an Amel Super Maramu 53, one of the French-built ketches constructed for long-distance voyaging. Amels have every kind of system you can possibly think of; one of those is a liquid-level gauge in the galley that measures the boat’s immense water capacity at a glance.
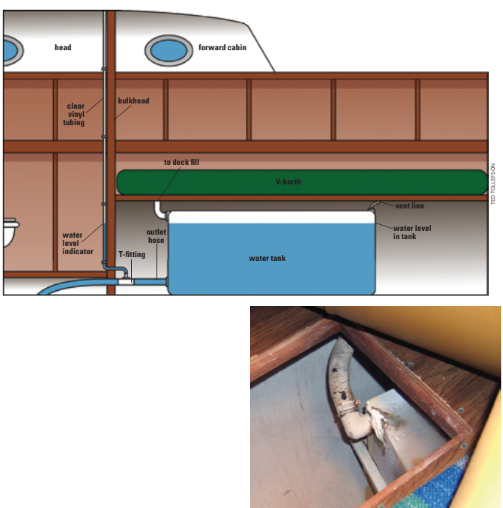
Now that I had clear vinyl tubing and cheap nylon plumbing fittings on the brain, I sat down to figure out how to make the concept work on Miss Bohicket. The installation and location of my tank helped. It’s a rectangular tank that is mounted level. The back of the tank is about 15 inches from the bulkhead that divides the forward cabin from the head. The outlet hose runs straight out the back of the tank and through this bulkhead. If I inserted a T connector into this hose, then ran a small-diameter clear vinyl tube off that connector, through the bulkhead, and up the other side of the bulkhead inside the head, it would be easy to see how full the tank was by opening the head door. And I wouldn’t have to do any boat or tank surgery other than drilling the hole in the bulkhead for the tube.
Buying plumbing fittings
Buying plumbing fittings can be seriously frustrating. Here’s what I’ve learned. First, if possible, take actual samples of all of the fittings and hoses that you need to connect with you to the store so you can fit the pieces together before buying them. One brand’s 1⁄2 -inch barb is another’s 9⁄16 or 5⁄8.
If you can’t take the components with you, measure everything with calipers — twice. Count the number of hose clamps you’ll need — then count them again. Finally, if you want to save a lot of time and aggravation, go to a hardware or plumbing store with knowledgeable staff and get someone to help you. If you tell the clerk what you need to accomplish, he will be able to slap the parts together for you in less than a minute in most cases — and get you out of there.
If you need to step down from a larger hose to a smaller one — in my case, from 1⁄2-inch water hose to 1⁄4-inch clear vinyl tubing — you can save a lot of hose-clamping by using threaded fittings. My assembly was a 1⁄2-inch female pipe thread (FPT) nylon T, with screw-on hose barbs at each end (1⁄2-inch barb x 1⁄2-inch male iron pipe [MIP] thread connectors) and a 1⁄4-inch barb x 1⁄2-inch MIP connector in the middle for the tubing. The threads were sealed with one wrap of Teflon tape and the assembly became one compact piece.
All I had to do was cut the outlet hose (after draining the tank, of course), put on the hose clamps, insert the T-assembly, clamp it, drill the hole in the bulkhead (at a downward angle to reduce the bend in the tubing), run the tubing through the hole, clamp it to the 1⁄4-inch barb, secure the tubing to the head bulkhead with nylon eye straps, and fill the tank. Total parts cost was $11.21.
My knowledgeable and experienced friend Jack James (“Ariadne’s Adventures,” November 2006 issue) consulted with me briefly on this project, and I’m glad he did. He advised me to run the tubing all the way up the head bulkhead before looping it over, to guard against water squirting out the top when filling the tank. When I first re-filled the completely empty tank, there was a lot of air in it and in the outlet hose, and a little water made its way most of the way up the hose. One good suck on the open end of the tube, and the water column was solid.
Calibrating your gauge
With all tubing gauges, whether manometer (pressure-measuring) or simple liquid-level gauge, calibration is usually trickier than installation. Basically, you’ve got to establish the correlation between the level in the tube and the level in the tank. With my level rectangular tank, this was straight-forward; there’s a direct relationship between tube level and tank level. Once I’d found the full mark, I could just halve the distance between full and empty. That mark would indicate a half-full tank and so on.
This won’t work on an oddly shaped tank or a tank that isn’t level. On these tanks, you’ll have to establish the graduations by measuring. Get a 5-gallon bucket and a gallon jug. Pour a gallon of water into the bucket and mark the level on the inside wall. Repeat until you get to the 5-gallon mark. If you overfill the water tank, you’ll get a false indication based on the level in the vent tube. Here’s how you calibrate that: Fill your tank completely full and take a few strokes on the freshwater galley pump. Note the level in the tube; if it falls markedly, keep pumping and checking until the level in the tube stabilizes (put a piece of tape on the bulkhead next to the tube temporarily as a level reference). When you can take, say, 10 strokes on the pump and the level doesn’t fall appreciably, the tank is full.
Mark the tubing with a narrow wrap of electrical tape. (Lines made with a marker will wear off.) Now drain the tank into the bucket in 5-gallon stages until it’s empty, marking the tube as you go in whatever increments you choose. Use a wooden plug, Vise-Grips, or a clamp to stop the flow from the hose when you need to.
Installation considerations
Finally, there are some installation considerations to ponder before committing to this project. If your tank is mounted so low that you can’t see a sight tube that’s level with the side of the tank, this method won’t work. In this case, you’ll need to go with a manometer (see Jerry’s article). If the tank is located far outboard, such that its level will be greatly affected by heel, the sight tube may not be anywhere close to accurate when the boat’s heeled. That may not be a problem, but be aware of it.
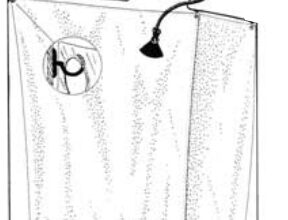
If it isn’t practical to run the tubing up at least as high as the termination of the tank’s vent line, you might want to consider terminating the sight tube inside the tank itself. A friend’s Cape Dory 40 has this type of sight tube on the water tanks. As with any sight-level gauge setup, the side of the tank needs to be either visible or immediately adjacent to a visible location. This version is just a scaled-down version of that used on huge cylindrical industrial tanks.
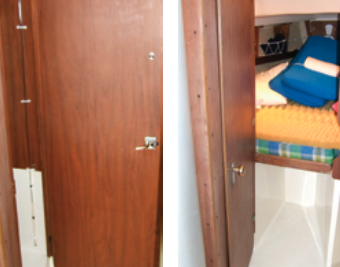
The sight tube comes out the bottom of the tank, goes straight up the side, and then goes back into the tank at the top of the side. The level in the tank is the level in the tube. If the tank sits up against a bulkhead or a liner, you could run this type of tube through a couple of holes in that bulkhead or liner. This might require a couple of elbow fittings and will require putting fittings into the tank itself.
However you construct it, a sight-tube gauge is low-cost, minimal labor, draws no power, and requires no wiring. Better yet, once it’s calibrated and you know how to read it, it should serve you forever — with no maintenance.
Phillip Reid, and his wife, Andie, sail a 1977 Pearson 28, Miss Bohicket, out of Wilmington, North Carolina. They finished a five-year refit in 2005.
Thank you to Sailrite Enterprises, Inc., for providing free access to back issues of Good Old Boat through intellectual property rights. Sailrite.com