Urethane finish generates the Wow! factor
Issue 68 : Sept/Oct 2009
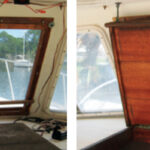
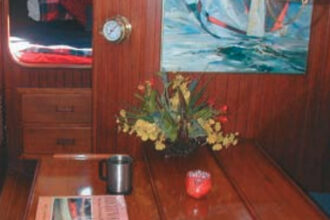
From my perspective, nothing is more pleasing to the eye than the gleaming finish of a sailboat’s brightwork. It makes no difference whether the wood has been freshly oiled or painstakingly varnished, the beauty of carefully maintained brightwork not only enhances the sailboat’s aesthetics but also demonstrates pride in ownership.
Our Pearson 28-2 has about the right amount of teak brightwork to enhance its sand-colored deck without presenting a heavy maintenance burden. Over the years, the teak has been treated with oil, varnish, Cetol, and, most recently, with Armada. Initially, all these products produced acceptable results; however, the longest that any one finish had lasted was maybe a couple of years. Even at that, the toerails usually required annual attention.
Last year, while waiting for the travel lift to haul our boat, I found myself standing in awe, bedazzled by the brightwork of a nearby Cheoy Lee. Not only did it look as if it had been freshly done, it appeared to have been encased in glass. I spotted the owners lounging in the cockpit and complimented them on the condition of the brightwork. I learned that brightwork was the wife’s responsibility. In the past, she’d spend many days each year laboring at this task. The result was a flawless finish to the brightwork and a beautiful tan for her. About four years ago, she switched from varnish to a urethane-based finish. That is what I was admiring: brightwork that had been finished four years ago and not touched since. After recovering from this revelation, I obtained the name of the product: Bristol Finish.
Since that fateful encounter with the Cheoy Lee and its owners, I’ve talked with more than a dozen other sailors who use the same finish. They were unanimous in their praise of the product and, after seeing their boats, I knew I had to try it.
Two-part urethane
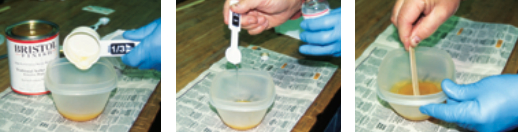
Since it’s a two-part product, the base and catalyst must be mixed together prior to application. The mixing ratio is 8:1 by volume and should not be varied for any reason. The application instructions state that four coats provide minimal UV resistance while six coats provide optimal durability. Up to eight coats are suggested for severe tropical exposure and, if a “wet look” is required, more coats may be applied.
The application of the catalyzed acrylic urethane requires the same basic preparation steps as for any conventional product. However, there are three application methods to choose from: the dry method, the wet-on-wet method, and the practical method.
Dry method
The dry method is familiar to most of us. After the wood is properly prepared, you apply an initial coat and allow it to dry completely. Once the surface has dried, you sand and recoat it. If you are sanding between coats, more often than not you must apply two coats to end up with one final coat. While this is the longest of the three methods, it may yield the best results and is probably the method of choice for refinishing bulkheads and other wooden interior features.
Wet-on-wet method
The wet-on-wet method is the fastest of the three. You allow each coat to dry to a firm tack (approximately 1 to 2 hours). Then you apply the next coat without sanding. You continue this process until you have applied all the coats. While it’s faster than the dry method, your woodwork is more likely to develop runs, drips, and brush marks. Also, unwanted specks of dust may be incorporated in the finish. This is a particular concern when you apply the finish outdoors.
Practical method
The practical method is a twist on the wet-on-wet method. You apply all but the last coat using the wet-on-wet method and allow the second-to-last coat to cure for 12 to 36 hours. You can then sand the finish with 220-grit paper to remove any runs, drips, or incorporated dust. Once you have achieved a smooth and uniformly dull surface, you remove the sanding dust with acetone and, prior to applying the final coat, wipe it lightly with a tack cloth. This method offers both a fast build-up and the chance to remove any defects with a minimum of labor.
Proper preparation
I know from experience that proper preparation and application account for 90 percent of the final appearance and performance. And even though this urethane-based finish may be applied over existing finishes that are in good condition, I elected to remove my current finish completely and start with bare wood. To obtain the best results in the shortest amount of time, I also decided to use the practical application method.
The two items of brightwork on our boat that see the most UV exposure and that most needed refinishing were the handrails and toerails. I refinished the handrails while they were attached to the boat and in the somewhat controlled environment beneath the winter cover. However, I elected to remove the toerails and refinish them at home.
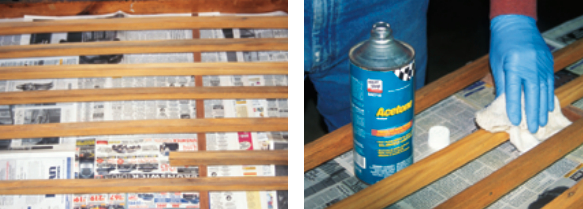
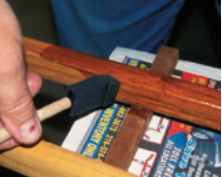
Beginning with 120-grit and ending with 220-grit sandpaper, I used a vibrating palm sander to remove all traces of the old finish. I did this outdoors. Once I had a smooth and uniform surface, I vacuumed the toerails and brought them indoors. There, I removed all traces of sanding dust with acetone. At the prescribed 8:1 ratio — using a polyethylene container and measuring spoons — I mixed what I calculated to be just enough material for one coat. Immediately prior to applying the first coat, I lightly wiped each piece with a tack rag. Then, using a high quality foam brush, I laid down the first coat, all the while being mindful to apply the finish as evenly as possible to avoid runs and drips.
One day, five coats
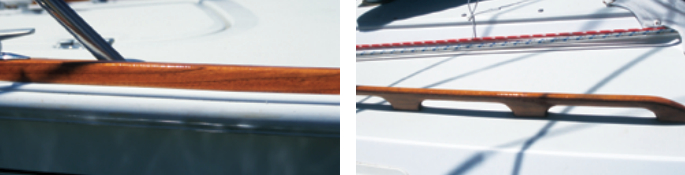
After approximately 90 minutes, the first coat had dried to a firm tack and was ready for the second coat. Over the course of one Saturday, I applied five coats. With each coat, I used light pressure to avoid brush marks and lifting of the underlying coat while at the same time applying just enough pressure to spread the fresh coating. Drying time between coats ranged from 90 to120 minutes. The next day, approximately 16 hours after application of coat number five, the finish was hard to the touch. I checked for imperfections and found none. I had taken great care when applying each coat and, as a result, the surface was quite smooth. Since the material can be recoated without sanding at any time up to 24 hours after the last coat was applied, I elected not to sand and applied the final coat. The end result is just as I remember the brightwork on that Cheoy Lee . . . WOW!
I forgot to mention earlier that the first mate on the Cheoy Lee informed me that Bristol Finish is a bit pricey, but the results in quality and finish longevity are well worth it. She also said that, unfortunately, since she switched from varnish to catalyzed acrylic urethane, her tan isn’t what it used to be.
Gregg Nestor’s sailing bio appears on page 35. In addition to the information noted there, Gregg is also the author of three marine books: All Hands on Deck: Become Part of a Caribbean Sailing Adventure (2005); Twenty Affordable Sailboats to Take You Anywhere (2006); The Trailer Sailer Owner’s Manual: Buy-Outfit-Trail-Maintain (2009).
Thank you to Sailrite Enterprises, Inc., for providing free access to back issues of Good Old Boat through intellectual property rights. Sailrite.com