New life for a good old boat’s wheels
Issue 98: Sept/Oct 2014
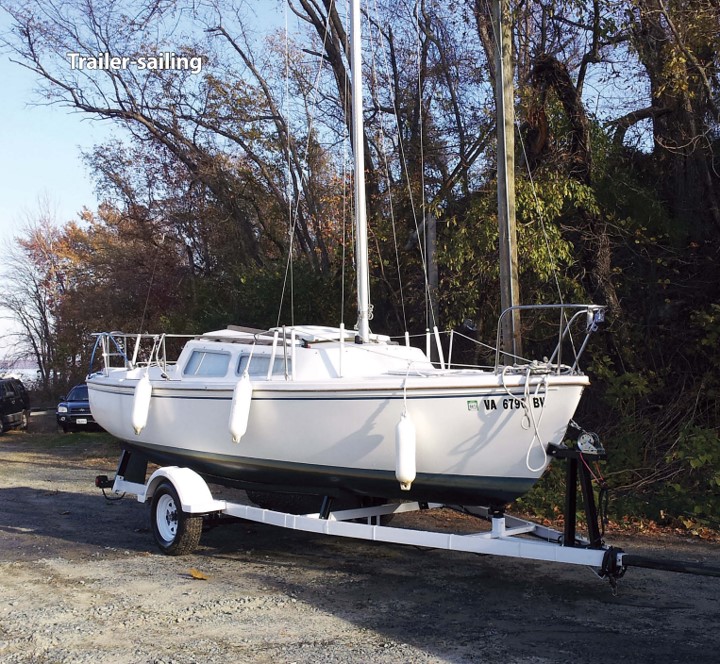
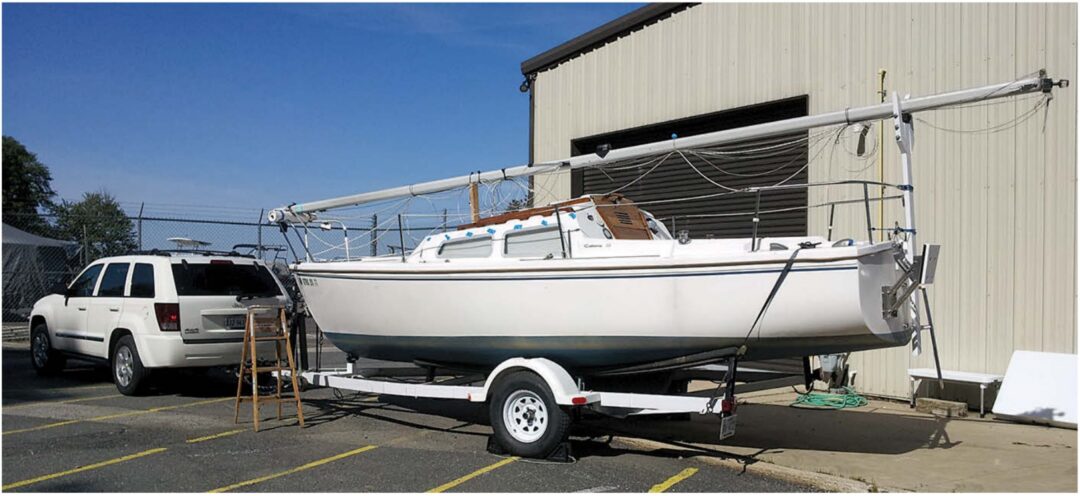
Three times we went to look at the Catalina 22. Under the grime and moss she seemed to be in overall good shape, if just a little neglected. Weeds were growing up through the trailer. She had apparently sat there for two years, just waiting for a new owner to show her some TLC. My wife and I were convinced we wanted this boat.
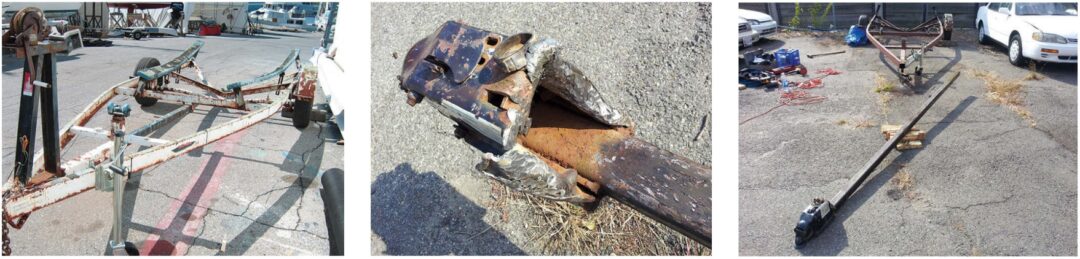
One of our concerns, however, was whether the 1984 Trail-Rite trailer that was part of the deal could successfully transport our boat 115 miles to where we planned to keep her docked. We had good reason for concern. The trailer was missing a fender and had more rust than paint on its surface. The tires looked well past their prime, the trailer jack was broken, and the telescoping hitch extension was rusted solid within its tunnel and could no longer be extended.
So on this third visit, after making a more thorough inspection of the trailer’s structural integrity, inflating the tires, and using a floor jack to hook the coupler to the hitch, we took the trailer and boat for a test drive. We returned to the owner’s house with no issues, completed the transaction, and promised to return the following weekend to pick her up.
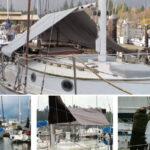
Towing the boat home turned out to be uneventful and so was the launch. Months later, near the end of the sailing season, thoughts of what to do about the trailer weighed heavily on my mind. After inspecting it once more and compiling a list of replacement parts, I decided it would be cheaper to rebuild it than to buy another one.
The challenges included cutting off every rusted nut and U-bolt with an angle grinder and beating out the telescoping hitch extension with a sledgehammer, an act that totally destroyed the surge brake. But after working off and on for approximately two months, I had a good old trailer for about $800 invested in new paint, brakes, tires, bunks, surge brake, winch, and stainless-steel hardware. One year later, I still get compliments on how it looks.
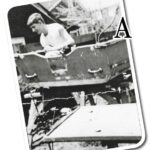
When I towed my rusty trailer into the auto hobby shop at the military base where I planned to undertake the restoration, the doubting looks were obvious on the faces of the weekend hobbyists there. The manager let out a guffaw when I told him I planned to complete the job in about eight weeks. One hobbyist later confided that, when I arrived with the trailer in tow, he thought I should have continued to the junkyard. But weeks later, when I towed the restored trailer out of the shop, the same hobbyists nodded in admiration and approval. Here’s how I tackled the restoration.
Prep, prime, and paint
I divided the frame into sections and sanded each one to bare metal using an electric drill with a circular sanding disc attachment. I started with the easy sections: those that didn’t have leaf springs, bunks, or a trailer jack attached. Eventually, though, I had to remove these items and face the associated challenges.
Wrenches were useless for removing the leaf springs, bunks, and other attachments because all the hardware was so utterly rusted. After a time-consuming attempt to cut off a U-bolt with a hacksaw, I armed myself with a 7-inch angle grinder and cutoff wheel from Harbor Freight Tools and sliced through the rusted metal with little effort. Prior to this, though, I had been careful to inventory, measure, and take pictures of each nut, U-bolt, and screw. I thanked myself later when it came time to search for replacement hardware.
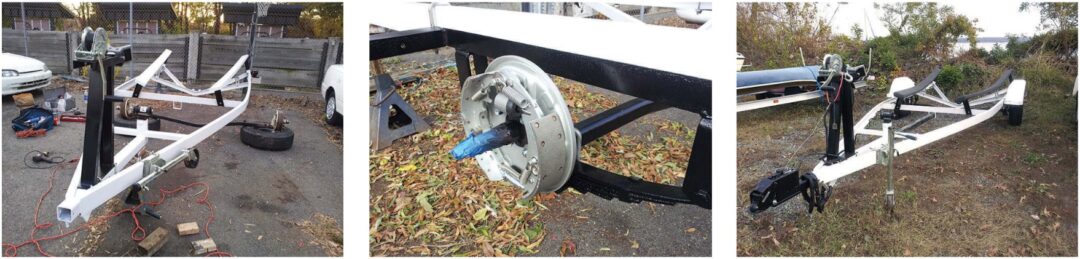
After sanding each section, I wiped the surface with acetone to remove the dust and any residual grime and applied the primer. When I had primed every section of the frame, I applied a second coat of primer to the entire trailer. I prepped and primed the parts I had removed — leaf springs, axle, bunk supports, winch tower, and hitch extension — the same way I prepped the frame. I used brushes and a small roller to apply the paint to the frame and the attachments but used spray paint to get into the tight corners where a brush couldn’t reach. For the base, I used Rust-Oleum Rusty Metal Primer and then applied three coats of Rust-Oleum Protective Enamel oil-based gloss white to the frame and gloss black to the attachments.
Hitch extension
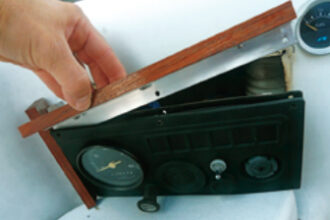
A telescoping hitch extension comes in handy for launching and retrieving sailboats. Unfortunately, mine was firmly rusted within its tunnel. I had no luck during an earlier attempt to extract the extension by pulling against the trailer with my SUV while the trailer’s wheels were chocked. It still refused to budge when I sledgehammered against the surge brake after spraying WD-40 and Liquid Wrench down the tunnel. But the extension slid out half an inch one early morning with a strike of the sledgehammer after I’d sprayed Sea Foam Deep Creep into the tunnel and tilted the trailer down to let the solvent seep overnight through the grime. Once the extension broke loose, it grudgingly came completely out after a few dozen more sledgehammer blows. I used a circular wire brush normally used for cleaning out ductwork to remove the rust within the tunnel, then rammed rags coated in white lithium grease through it to clean out the residue.
Brakes, wires, and tires
Having destroyed the surge brake when extracting the hitch extension, I hired a local welder to cut off the old surge brake housing and weld a new one onto the extension. I purchased the new Atwood surge brake actuator, rated for 6,000 pounds, from etrailer.com. The old brake assemblies at the other end of the trailer were rusted and beyond repair, so I installed Titan 10- x 2 1⁄4-inch free-backing drum-brake assemblies and then routed new brake lines purchased from the online Trailer Parts Superstore.
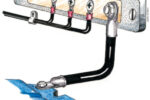
I also installed a brake line quick-disconnect coupler so I could detach the surge brake from the brake system when I extended the hitch extension during boat launches and retrievals. After adjusting the brake shoes, I bled the brake lines by using the trailer ball and ball mount inserted into the coupler to pump the actuator until the brake fluid came out clear of air at the brake assembly bleeder fitting. I installed new submersible tail- and sidelights from etrailer.com and routed the wiring to the front of the hitch with wiring harnesses epoxied to the trailer frame every 30 inches.
The tires that came with the trailer were worn, weathered, and actually meant for light trucks. When selecting new tires, it’s important to know the weight of the boat and any gear likely to be carried inside it. When selecting the rims, I had to match the pattern, dimensions, and number of lugs on the brake drums. My drums have a five-lug pattern on a 4 1⁄2-inch hub circle. I ultimately selected Loadstar ST225/75D-15 tires with a “C” load range mounted on white painted rims from Trailer Parts Superstore. According to the BoatU.S. website, the “C” load rating indicates each tire can carry up to 1,820 pounds, but the actual tires were rated at 2,050 pounds, or a combined capacity of 4,100 pounds for a single-axle trailer like mine. Trailer Parts Superstore delivered the tires to my home conveniently mounted on the rims and inflated.
Once I decided on the tire size, I ordered 15-inch white plastic fenders with pre-molded steps, also from Trailer Parts Superstore. While these fenders are plastic, they are strong and durable and the steps are convenient for climbing into the boat. Using galvanized metal, I fabricated simple adapters to fasten the fenders to the original attachment points.
Other hardware
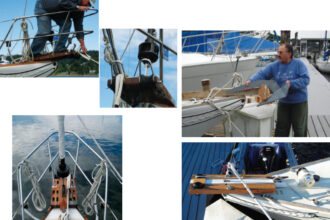
I replaced all the trailer’s nuts, bolts, screws, and U-bolts with stainless-steel hardware, most of which I found locally at Ace Hardware and Home Depot. I found the square U-bolts that attach the leaf springs, axle, and winch tower online at Trailer Parts Superstore and Champion Trailers.
I coated the threads on all the hardware with Permatex anti-seize lubricant as an added protection against rust. For the trailer beds, I used two 11-foot-long 2 x 6 pressure-treated planks that I primed and painted with Rust-Oleum Painter’s Touch, Ultra Cover, premium latex semigloss paint for extra protection from water damage. I drilled holes for the attachment points in the planks and then counter-bored the tops of the holes so the bolt heads set below the planks and wouldn’t damage the hull during launch and retrievals.
I loosely bolted the fore and aft ends of the planks to the trailer bunk supports and used a ratchet tie-down strap to bow the plank in the middle so I could bolt it to the middle bunk support. After tightening the bolts, I laid 12-inch by 12-foot marine-grade bunk carpeting from Trailer Parts Superstore over the bunks and stapled the overlap to the bottoms of the planks to secure it. Along the way, I purchased a new winch, trailer jack, and galvanized adjustable middle bunk supports, along with rubber bow and keel rollers and a bow stop, all from my local West Marine store.
Rocco Dryfka and his wife, Carolyn, normally sail their 1984 Catalina 22, Carolyn’s Eyes, on the Potomac River near Quantico, Virginia. They look forward to exploring Albemarle Sound, Lake Champlain, and other locations in the future since they can now confidently trailer Carolyn’s Eyes anywhere.
Thank you to Sailrite Enterprises, Inc., for providing free access to back issues of Good Old Boat through intellectual property rights. Sailrite.com