. . . buys megayacht looks for a small outlay
Issue 101 : Mar/Apr 2015
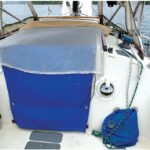
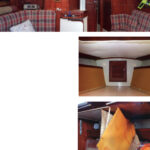
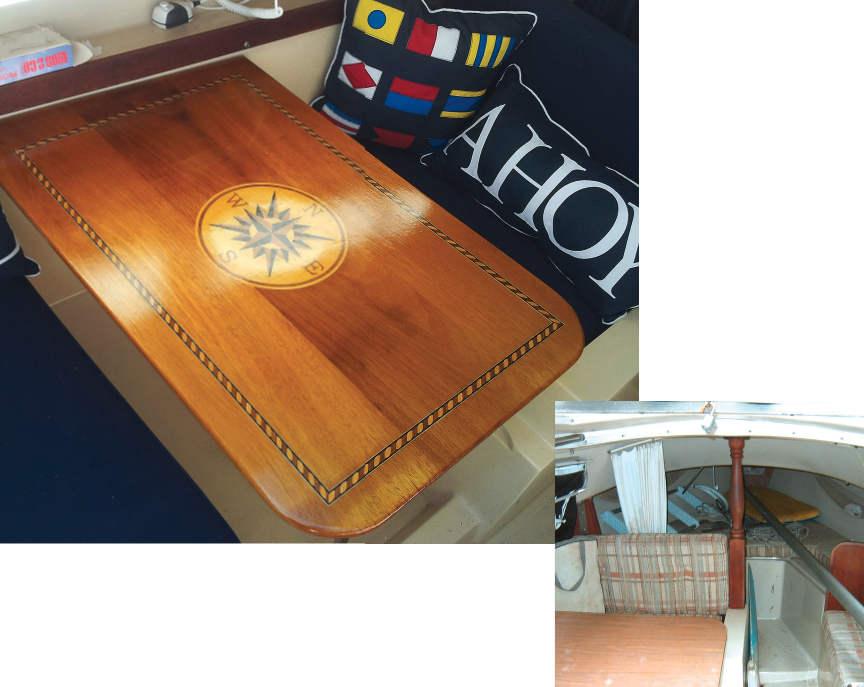
“You owe my father $175,” Carolyn told me one day when I came home from work. “What for?” I asked. “For the wood to make the boat table.” That’s how I learned from my wife that our 1984 Catalina 22’s original and perfectly good Formica table and its rusty support leg were suddenly no longer acceptable. “We,” apparently, had decided that a new table was in order now that our interior renovation was complete with new cushions, blinds, privacy curtain, and Porta Potti. So my wife and her father, a skilled woodworker, had conspired to purchase some Iroko wood.
With no choice but to embrace the idea, I accepted as truth that the old table made the boat’s interior look shabby. A quick Internet search for sailboat interiors showed beautiful examples of tables with inlaid wood trim and insignias . . . all on high-end boats. While no one could ever mistake our boat for one of those, I was confident that rope inlays for the table’s perimeter and a compass rose in the center would be within our budget.
I found exactly what I wanted at Inlay Product World and, with a vision of creating not just a functional table but a piece of nautical art, I consulted Jim Mattavi, my father-in-law, to see if we could incorporate inlays into the project. Jim, who has created legacy-quality furniture and other items in a basement shop most woodcrafters would envy, assured me it could be done. I had the inlays — a compass rose and four 3-foot strips of rope — delivered to his house in Tennessee. They were waiting when Carolyn and I visited from Virginia for a long weekend. Before jetting off, I had measured the original table’s length, width, and depth and made a paper template of the shape, since the edge of the table that attaches to the hull is angled to follow the form of the boat.
Preparing the wood
Jim had procured the Iroko (sometimes referred to as African teak) from Jeffries Fine Lumber in Knoxville, Tennessee. Although it resembles teak, Iroko is unrelated to teak and costs substantially less. I learned through Internet searches that Iroko is native to the west coast of Africa and is tough and dense but weaker in structure than teak. It is also moderately resistant to marine borers an decay. It was perfect for my purposes.
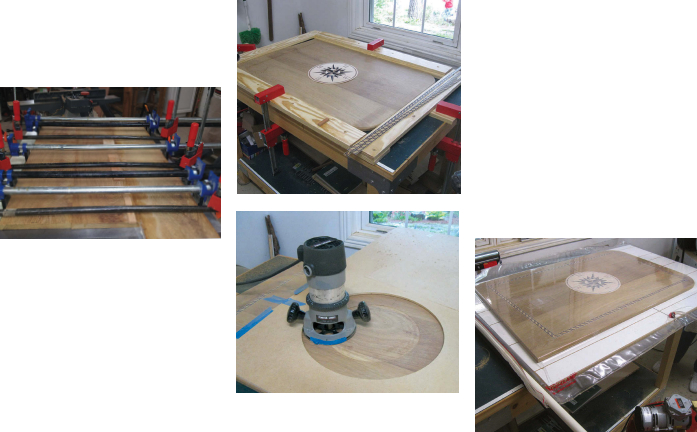
Jim and I cut the single Iroko plank into three pieces roughly the length of the original table. We then fed them through a planer until we had nearly the correct thickness. Next came a jointer to achieve straight edges. We selected the plank surfaces with the most interesting grain to be the table’s top surface, applied waterproof Titebond III wood glue to the edges of the planks, and clamped them together on a flat surface to let the glue set.
The next day, we ran the now merged planks through a wide drum sander with 180-grit sandpaper to trim them to the correct thickness and smooth the surfaces. We finish-cut one end of the table and Jim used a circular saw with a metal straightedge guide to make the angled cut for the table edge that attaches to the hull on the port side of the boat.
He rounded the two inboard corners with a band saw to match the template I had made and used a spindle sander to smooth them out. Then we rotated the table against a router mounted vertically in a router table to produce a 1⁄4-inch roundover on the top and bottom edges. We did not make a roundover on the table edge that would mate with the hull interior.
At this point, Carolyn and I returned to Virginia and left Jim to do the complicated inlay router work, for which he was eminently qualified.
Recessing the inlays
We planned to use the rope inlays to highlight the table edges and frame the compass rose, but the angled edge for the port side led to some discussion. In placing the inlay around the table’s perimeter, should we follow the angled edge, creating a sort of right-angle trapezoid, or ignore the angle and go with a simple rectangle? Since the goal was to frame the compass rose, we ultimately settled on a rectangle with the rope inlay 2 inches from the edge of the table. The rope inlays were narrower than the conventional router bit Jim planned to use to cut the inlay groove, so he had a friend grind the bit to the correct diameter.
To ensure the inlay grooves remained a consistent 2 inches from the edge and intersected each other at 90-degree angles at the corners, Jim made a router jig that fit over the table and precisely guided the router. He set the cutter to make a cut slightly less deep than the thickness of the inlay, leaving the inlay a little proud of the table. Following a light sanding, the fit was perfect.
The next challenge was how to rout out a 10-inch-diameter circle for the compass rose. A computer-controlled xyz router found in industrial shops would handle this task nicely, but Jim’s woodshop lacks such an expensive piece of equipment. After some head scratching, he came up with a simple, but effective, approach.
First, he cut a circular hole into a sheet of 1⁄4-inch particle board using a router mounted on a pivot arm. The radius of the circle equaled the radius of the circular inlay plus roughly the radius of the router base. He then made an adjustment for the radius of the router cutter. Once again, he set the cutter depth at a little less than the inlay thickness to leave the inlay slightly proud of the table. Next, he placed the circle template on the table and positioned the plunge router at the center of the circle. He moved the router in a spiral path outward from the center until it contacted the template edge.
In this way, at least half of the router base was supported by the top of the table at all times. While accomplishing our goal, this approach is very “sporting,” in that Jim only got one crack at it. Unlike when routing the rope inlay groove, he wouldn’t get a second chance to re-rout the circular inlay cavity if he found out the initial pass had rendered the cavity too shallow.
Seating the inlays
When the routing was complete, Jim glued the rope and compass inlays to the table and used a vacuum bag to seat them firmly. The vacuum bag applied the equivalent of 6 tons of evenly distributed force to the top of the table, or 1,150 pounds to the circular inlay alone.
After the glue dried, he removed the table from the vacuum bag and hand sanded the inlays with 180-grit sandpaper to bring them level with the table surface.
Varnishing
Once the woodworking was complete, Jim shipped the table to us so I could begin the varnishing. After considering several varnishes, I took the recommendation of an old salt who worked at my local West Marine store. He used West Marine’s Five Star High Gloss Premium Varnish by Epifanes to varnish the wood in his den. After he showed me pictures of the result, I was sold.
For the initial varnish application, I lightly sanded the table’s top surface and edges with 220-grit sandpaper, then wiped the surfaces with a tack cloth to remove the dust. I diluted the varnish with mineral spirits to 50 percent, poured the blend through a paper paint and varnish filter, and applied it to the table’s surface using a high-quality paintbrush. After letting the varnish dry for 24 hours, I repeated the process, but this time I used 400-grit sandpaper and diluted the varnish with 25 percent mineral spirits.
For the third and fourth applications, I again used 400-grit sandpaper, but diluted the varnish 15 and 5 percent, respectively. For coats six through ten, I sanded between applications with 400-grit sandpaper and used 100 percent varnish, waiting 24 hours between applications.
I repeated the process for the table’s bottom surface, but only applied five layers of varnish.
Two weeks later, I applied Meguiars Flagship Premium Marine Paste Wax to the surface to complete the high-gloss finish.
A focal feature
During the varnishing phase, it became clear to me that this project was turning out better than expected and that we were creating something we’d be proud to have as a keepsake. With that in mind, I didn’t need Carolyn to tell me that reinstalling the original rusted table leg was out of the question.
With additional Internet research, I ultimately ordered from Catalina Direct a stainless-steel table leg manufactured specifically to replace the original. After fastening the new table leg and other attaching hardware onto the table, I couldn’t have been more pleased with the results.
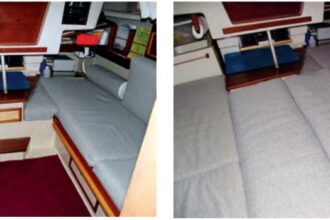
Later, when I installed the table in the boat, it dramatically transformed the appearance of the cabin even beyond the effect created by the new cushions, shades, Porta Potti, and privacy curtain. The table became the signature piece of our boat’s cabin and probably the boat itself, creating a more interesting and welcoming place to loiter after evening and weekend sails. Now visitors and passersby can’t help but take notice and compliment the high-end table in our low-budget boat.
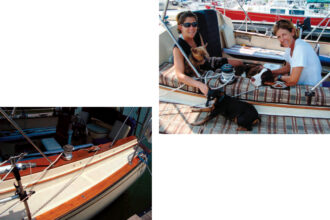
Rocco Dryfka and his wife, Carolyn, sail their 1984 Catalina 22, Carolyn’s Eyes, on the Potomac River near Quantico, Virginia. They offer special thanks to Carolyn’s father Jim Mattavi, a retired General Motors mechanical engineer who now enjoys woodworking, music, his grandchildren, and numerous other interests. He and the love of his life, Mary Ellen, live near Knoxville, Tennessee.
Thank you to Sailrite Enterprises, Inc., for providing free access to back issues of Good Old Boat through intellectual property rights. Sailrite.com