Easy on the eye, exacting in the making
Issue 106 : Jan/Feb 2016
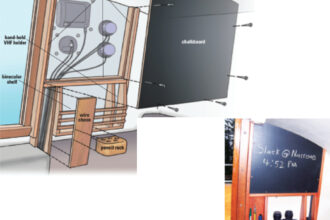
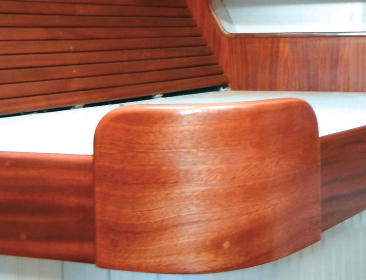
While constructing a forward stateroom for a customer, my husband, Dave, was given mostly free rein to design and build what he thought would look best. The owner’s only request was that the berth have a rounded corner. Because of the substantial amount of time involved, Dave postponed that part of the project until the rest of the designing, planning, and building was nearly finished. Only then did he tackle the problem of how to bend a 1 1⁄4-inch-thick piece of sapele 7 inches high nearly 90 degrees around the corner of the berth.
Laminating in a mold
Dave decided to build the corner by curving and laminating thin pieces of wood. He bought flat-sawn sapele for the grain pattern and had it milled into a dozen 3⁄32-inch-thick slices. Since he wanted the corner to be 1 1⁄4 inch thick, and knowing the layers of epoxy between each laminate would add thickness, he planned on using 12 pieces.
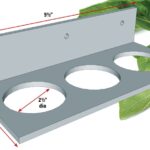
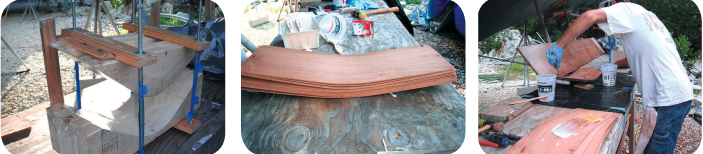
In order to bend these pieces, Dave first built a jig. He patterned the inside curve of the corner on a piece of 1⁄4-inch pattern-stock plywood. Using The Gougeon Brothers on Boat Construction as a guide, he adjusted this curve for springback, based on the number and thickness of the laminates. To this curve he added 1 1⁄4 inch for the outside curve. He cut on both of these lines, creating a flat plywood equivalent of the shape he wanted. He transferred one of these lines to a 2 x 6 and cut along that line.
Five pieces of 2 x 6 were needed to make the jig wide enough to accommodate the corner’s 7-inch height. Dave glued them with Gorilla Glue, and screwed them together to form the base, or outside, of the mold.
He repeated this process with another five pieces of 2 x 6 to form the mold’s inside curve. To align the two halves of the mold, he used threaded rods with washers and nuts at the corners.
A critical test
Dave would eventually use the rods to clamp the sapele pieces together while the epoxy cured, but first he tested a couple of the sapele strips to ensure that they could bend to the shape of the jig. He placed the test pieces in the mold and slowly clamped down the top, prepared to stop if he heard fibers break with a quiet snap. When the test pieces did not shatter or break, he knew he could bend them without having to soak or steam them first.
Once Dave was sure the wood would conform to the curve, he prepared the rest of the strips. He drilled a bolt hole in one corner of each piece of sapele to keep the pieces in the stack aligned as they bent. This alignment end would be cut off later. He bolted the pieces together, placed them in the jig and — as he had done in the test run — slowly tightened the top of the mold using the threaded rod at the corners. It took several days to bend the wooden strips to the point where the two halves of the mold met. Once he had achieved that, he left them in the mold while he worked on other parts of the project.
Glue, stack, and compress
After about a week we were ready to laminate the bent pieces. While the strips were still in the mold, Dave marked several alignment lines on the edges of the sapele strips and continued these lines onto the side of the mold. We used these lines later to verify the positions of the strips in the mold. We marked the mold and each strip with an “A” and a “B” to ensure they would not be put in backward.
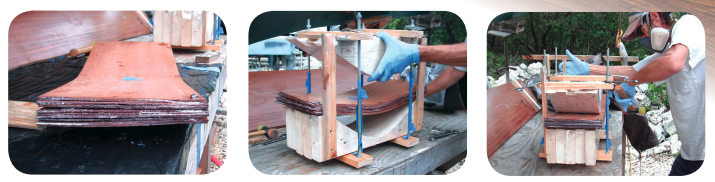
Once everything was ready, we assembled epoxy, colloidal silica, gloves, respirators, mixing pots and stir sticks, mallet, chip brushes, rollers, and tape. With the sapele pieces removed, we covered the mold in packing tape and the threaded rod in blue tape to act as mold release. We removed the bolt holding the strips together and started an assembly line. We coated one side of a piece with epoxy thickened with colloidal silica, then flipped it over on top of the previous piece and coated the other side. This continued until all 12 pieces were coated and stacked in order, held in rough alignment with the bolt.
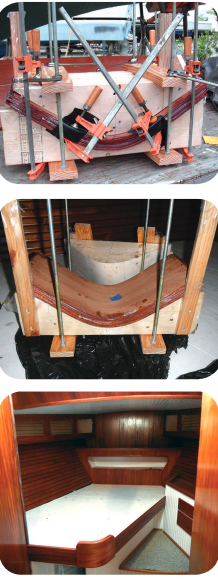
We inserted the pieces into the jig, verifying that the A and B ends were correctly placed. Then, with a wrench on the four nuts at the corners of the jig, we applied equal pressure to the top of the mold, using a mallet to adjust the alignment of the sapele pieces as necessary. Where more pressure was required on the edges even after the mold was completely tightened, Dave used clamps to ensure that each strip was in contact with the strips above and below it.
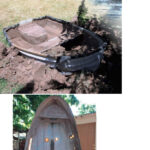
Dave allowed several days for the epoxy to completely cure before removing the wood from the jig. He shaped the curved wood to the desired dimensions and assembled the corner of the bed, completing the most challenging part of the project.
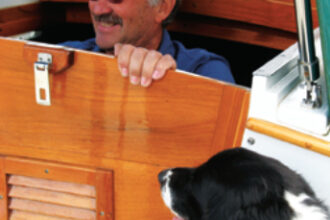
Connie McBride and her husband, Dave — after 15 years, 3 kids, and 20,000 miles — are still sailing simply aboard their 34-foot Creekmore, Eurisko, currently on a return meander to the Caribbean. To see more of their tips and DIY projects, go to www.simplysailingonline.com.
Thank you to Sailrite Enterprises, Inc., for providing free access to back issues of Good Old Boat through intellectual property rights. Sailrite.com