After pushing up daisies, a whole new life
Issue 106 : Jan/Feb 2016
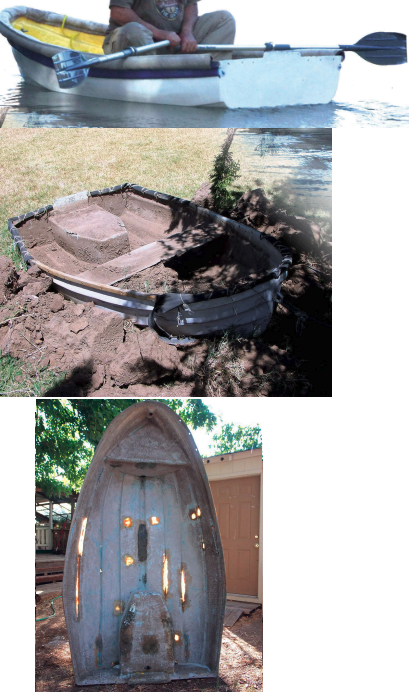
I recently moved aboard a 30-foot trawler yacht and needed a dinghy for shore excursions. It had to be small to fit on what passes for a boat deck on my trawler. After looking at new craft on the Internet and the usual marine stores and balking at paying $500 or more (usually more) for a new boat, I stumbled across an old fiberglass dinghy that had been buried in the front yard of an apartment building and used as a planter for better than 10 years. This looked like a less expensive way of getting into what I saw as an experiment in ship-to-shore transport in my, new to me, river environment.
I suspected there might not be a bottom in the dinghy/planter. The only way to find out was to dig it out and take a look. After obtaining permission from the property owner to take the boat for free, I started the excavation. The firm adobe soil of the Sacramento River Delta made it harder to extract than I expected, but the job was done in a couple of hours.
On disinterring it, I was pleasantly surprised to find only wear holes from too many drags up a beach or gravel shore. It fit into the back of my little pickup truck so off it went to a friend’s backyard for a refit.
A thorough pressure washing made the extent of its required repairs obvious. Luckily, it could be repaired with resin, glass, a little putty, and elbow grease. The top edge or gunwale of the hull was missing any kind of caprail that would protect it from damage, make it easier to handle, or save users from harm.

Patch, paint, and protect
The first order of business was to repair all the holes. Using standard techniques with polyester resin and fiberglass, I patched the holes in the bottom. Starting on the inside, I sanded the rough parts away and laid in several layers of glass and resin. I finished each patch from the outside of the hull with a layer or two and sanded both sides reasonably smooth. Once the 14 holes in the bottom were patched, it was a simple matter of painting it with outdoor latex house paint.
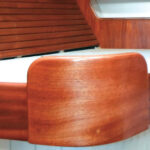
The caprail required some thought, and I am not a talented woodworker. I bought eight lengths of 1⁄4-inch batten. Using existing screw holes in the hull’s top edge, I screwed one piece inside to one piece outside, using 3M 5200 as glue. Permanence is good! One by one, I added three more layers of batten to the outer rail, gluing, screwing, and clamping along the rail and letting it set for a day or two before going after another layer. The thin and flexible quality of the battens allowed me to bend them to compound curves, though not to a level that steaming could have done. However, a homebuilt steamer would have cost too much! The tension in the wood bent around the gunwale helps stiffen the whole boat so it holds its shape.
With the gunwale rail in place, I used penetrating epoxy on the wood to help set the shape. When all was cured and dry, I covered the wooden rail with old fire hose over regular foam pipe insulation from the hardware store. I used contact cement and staples to hold it to the rail. The staples had to be driven wit a pneumatic stapler. Luckily, I already owned a compressor, so I only had to purchase an inexpensive pneumatic stapler from everyone’s favorite cheap hardware store.
My friend fabricated a deck and seat from plywood and pine and fitted it to the interior of the boat. I painted it well with latex house paint. After installing it, we reloaded the boat into my pickup and took it down to the marina for launching.
I spent about $150 dollars on materials and it took about three weeks of hit-and-miss time to get the job done. I could not be happier with how it turned out and it will serve me well for the next few years. By that time, I may have saved enough money for one of the new Cadillac models of small dinghy.
Robert Neefus learned to sail at 14, raced to Tahiti at 17, and returned to Tahiti in his own boat 36 years later. He currently operates a ferry for the state of California.
Thank you to Sailrite Enterprises, Inc., for providing free access to back issues of Good Old Boat through intellectual property rights. Sailrite.com