Before the snow comes, build yourself a simple, economical boat shelter
Issue 39 : Nov/Dec 2004
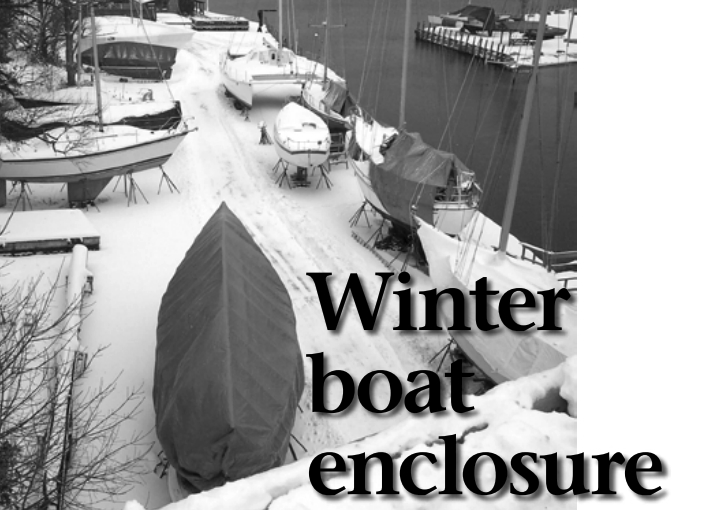
Covering our boat marks the end of a season here on the coast of Maine. Warm colors have given way to the cold shades of winter on this overcast November day. The shoreline, islands, and even the waters of Penobscot Bay have taken on a steely shade of gray. This season leaves no doubt about what is next. It’s over. Like a freight train rumbling, you can feel it: winter is right around the corner.
Any boat that will be outside for the off-season needs a cover. Rain, ice, snow, and sun take their toll. Gelcoat, paint, wood, and varnish all degrade in our harsh winter climate. Not only is the New England winter the harder season on an exposed boat, it is also, sadly, the longer season.
There are many ways to protect a boat from the elements. Indoor heated storage is the most effective, of course; a haphazard tarp thrown over the cockpit, the least. In between, there are a lot of systems with varying degrees of success.
I need a little more than just a cover. I want to protect our boat from the elements, but I also want an enclosure that will act as a temporary boathouse for the ongoing restoration and maintenance of a 43-year-old fiberglass boat . . . an enclosure capable of shedding rain and snow, one that will provide a dry temperate work site, warm enough in late winter and early spring to allow comfortable working conditions with good natural light and plenty of ventilation.
Ongoing project
Working on my boat is not a full-time venture, but it’s an ongoing project. My enclosure allows me to extend the seasons. As winter begins to wane, milder temperatures enable me to perform many tasks under the enclosure that would otherwise wait until spring. Some things require a warm spring day, but when those days begin to bloom, we launch the boat. Sailing in Maine is oh so sweet and way too short.
The enclosure that protects me, my tools, and any ongoing tasks from the elements is also very good for our boat. It is well ventilated, making it pleasant to work under on a sunny late-winter day. This same ventilation keeps the boat drier during the long winter layup. The cover floats on the frame, and air enters under the tarp’s hem as wind pulls it away from the hull. I leave a loose opening on each end as well.
I once had the boat shrink-wrapped. It was done improperly, tight to the hull. The boat remained very moist inside; lockers were sodden. Worst of all, when the wrap was cut off in the spring, buckets of water that had been trapped against the hull splashed out. The result: blistered Awlgrip.
Late fall and early spring sun will warm the enclosure enough to be comfortable underneath for working. In spring I roll up either or both ends during varnishing or painting to take advantage of the sun and a ventilating breeze. Rolling it back down in the afternoon protects the coatings from the late-day dew. I can leave tools and supplies safely inside. While performing tasks like this in the off-season, I realize the extra effort spent to build my enclosure pays great dividends in time saved when working on the boat.
Steep pitch
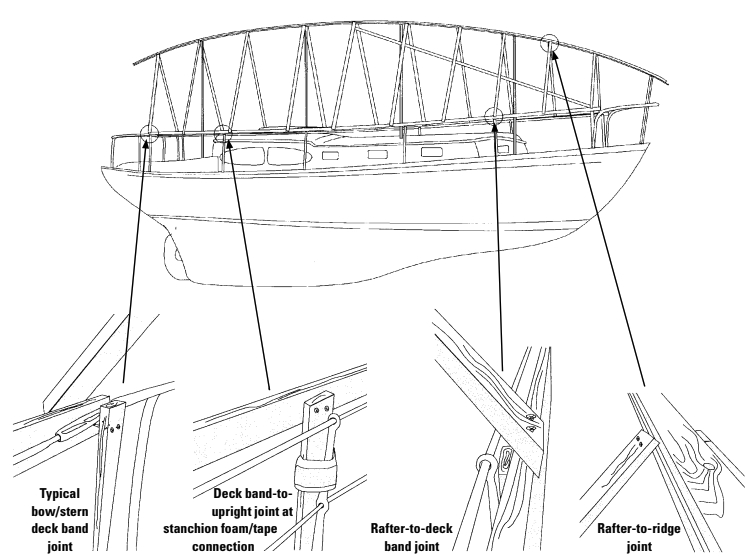
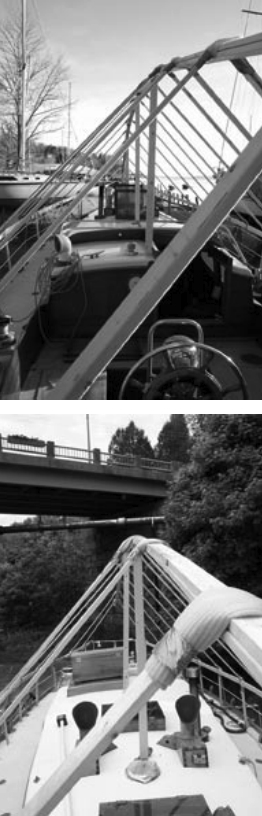
The lightweight frame is the heart of this system. It is designed to carry little more than the weight of the tarp. The steep pitch helps keep ice and snow from sticking to it. Even sticky snow will loosen and slide off when a light breeze shakes the tarp. It’s flexible and will stand up to a lot of wind. The ridge and center posts carry most of the weight. The uprights carry very little weight and don’t push or thrust against the stanchions, due to the center supports. The three-dimensional shape, like a hull shape, adds to its strength. Although this frame sheds wet snow and ice better than any I have used, if a lot of heavy wet snow falls, it should be checked as any cover should in those circumstances. Wet snow can add up to a lot of weight fast, and any frame, even buildings, can collapse under the weight.
This system is suited to a boat with the spars removed. You can’t seal a boat with tarps that must be adapted to a spar and rigging.
Time and materials
Making my frame from scratch takes nearly a full day from start to finish. It takes half that long to build an inadequate cover so why bother? Materials, including a 30-foot by 50-foot tarp, just right for my 38-foot by 11-foot yawl, cost about $150. The frame can be reused. Covers vary and can last one, two, or more years depending on quality. The framing parts are easily stored and reused.
I use a 1-inch x 3-inch spruce strapping for the frame. It takes 3 bundles (30 pieces) of 16-foot strapping to build the frame. Also about a pound of 1 1⁄4-inch and a pound of 2 1⁄2-inch galvanized Sheetrock screws, 1 roll of 6-inch foam foundation seal (50 feet), a roll of duct tape, and the cover are needed.
Tools include a cordless drill/driver, a Phillips bit, a sharp handsaw or Sawzall, and a utility knife. Also an extra set of hands or a few large spring clamps are useful. Let’s get started.
Step 1: Uprights and deck band
Cut a few uprights. These should be about 2 inches longer than the tops of the stanchions. Now the deck band. Spruce strapping is flexible. If a piece has a lot of big knots, put that aside for cutting into shorter pieces (it could snap at larger knots). Start at the bow. I usually use a spring clamp to hold a piece of strapping where the lifelines connect to the bow pulpit. Run the band outside of the stanchions. Another temporarily holds the other end of the rail to a nearby stanchion.
Screw a leg to the end of the rail at the bow pulpit. In some instances it is possible to use the two pieces as a clamp around the lifeline or turnbuckle. If that isn’t possible, screw the leg and rail together. Simply secure the upright/band connection around the lifelines or bow pulpit. Use some foam followed by duct tape.
Add a leg at every stanchion or about 6 feet apart. Legs go inside the deck band. Secure the leg/band connections at stanchions or lifelines using a wrap of foam followed by duct tape, being careful not to tape lifelines or stanchions. The foam and duct tape make a strong connection that doesn’t chafe, doesn’t stick to the boat, and is easily removed.
When you get to the end of the band, lap a new one over about a foot and put a few screws in the joint. Continue along the rail until you reach the stern pulpit.
At the stern pulpit again cut the band where the lifeline connects to the pulpit. Look for a way to clamp the band, leg and pulpit together with a long screw. If not possible, attach with foam and duct tape.
Now, install the band and legs on the other side. The object is to get the deck band attached to stanchions any way you can; each boat is different. When complete, you can remove the attachments to the stanchions if you need to. Remember, weight is carried mostly by the center posts. Removing stanchions is just the sort of thing you can do under a cover like this on a sunny day in late winter. Painting the decks this spring?
Step 2: Ridge setup
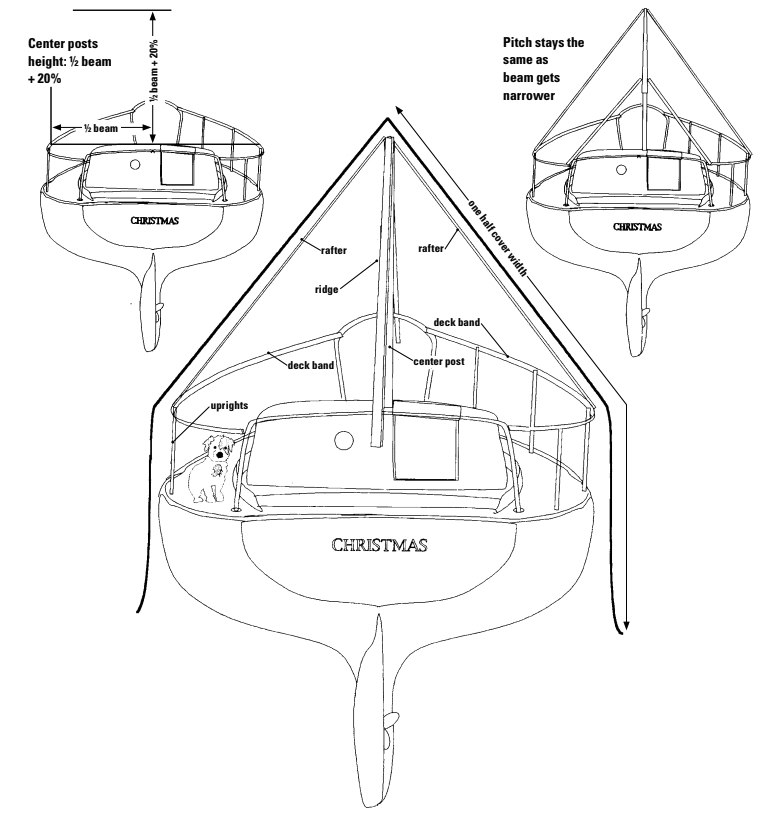
The ridge is made up of two pieces of sandwiched strapping with joints staggered by at least 3 feet. Start from the bow. Place one piece of strapping over the bow pulpit, lay another on top but overlap the end by about 3 feet. Leave this 3 feet overhanging the bow pulpit. Cut and screw together two pieces of strapping for the short center post at the bow pulpit, following the drawing to establish height. All pulpits vary. It needs to be secured to the pulpit with lashings (or whatever works) and the two-piece ridge screwed into the top of the post. Use extra lashings, if needed, which can be removed later. Add two more pieces of sandwiched strapping to the staggered end for a ridge now about 32 feet long. If you are past your LOA, leave it to cut off later.
If you’re alone, add a lashing long enough to go from one lifeline around the ridge (with a clove hitch to hold it) and to the other lifeline. Attach the clove hitch about two thirds of the way back from the bow. This will simply keep the ridge from falling over, when you raise it on the center post, until it is secure. Leave enough slack over each lifeline for this.
Step 3: Center posts
Posts are made of two pieces of strapping, sandwiched together. The length is determined by the beam of the boat. Cut and screw together the center post. Raise the ridge and slip the post underneath in the center of the boat at the widest beam. Drive a long screw through the ridge into the post. Keeping this from toppling over, move aft and loosely tie the ridge to the lifelines temporarily with the line you secured for this purpose. Another person is helpful for this step. If it is too wobbly, lash it in another spot to the lifelines.
How long to make the center posts? From the top of your deck band, at your widest beam, cut and place a post this long: half your beam, plus about 20 percent. If your cabintop is higher than the band, you can deduct roughly this amount; if lower (not likely), add that amount. This is just a guideline. The more pitch the better. This same rough formula will give you the lengths of the rest of your posts. This will maintain the pitch over the boat. Keep them less than 8 feet apart. You should be able to easily reach the ridge on most boats under 40 feet.
At this point it may occur to you that the shape of the ridge is similar to the shape of your deck from bow to stern; that’s because it is.
With the ridge now secured, cut and place the other built-up posts. They should be less than about 8 feet apart. Screw each one through the ridge from above. I use a scrap of foam under each post to protect the cabin, cockpit, and so on. Let the ridge run long over the stern as well as the bow for now.
Step 4: Rafters
I usually secure the ridge at the widest beam of the boat first. Cut two rafters oversized, long enough to overlap the rail by a few inches. Secure these at the ridge with a couple of screws. Screw these rafters into the top of the band at the same distance from the ridge, also with two screws. This will keep the ridge in the middle. I cut all the rafters a few inches oversize. After screwing them to the ridge and the deck band, I trim them at the deck band, being careful not to hit the lifelines or stanchions. A little long is fine; the padding will cover it. Push the top of the rafter, cut square, against the ridge, and drive two screws at each joint at enough angle to hit the ridge.
Finish installing the rafters. With this steep pitch, 60 degrees or more, rafters 3 feet apart should be sufficient. If you anticipate heavy, wet snows in your area, spacing rafters closer to 2 feet will be even better.
This is a light frame, designed to hold little more than the tarp and stand up to the flexing caused by high winds. As long as pitch is sufficient, it will shed most snow and ice. Placing a diagonal brace on the underside of the rafters from deck band to ridge in a convenient place will add extra strength for high winds.
Step 5: Installing foam
The top joints require about 8 inches of foam laid across the joint and taped to the strapping at each end. Rafter-to-rail joints just get a piece of foam folded in half and taped to the rafter. Lap joints and the ends of the deck band also require foam padding. Any sharp corner requires padding.
Step 6: Cover
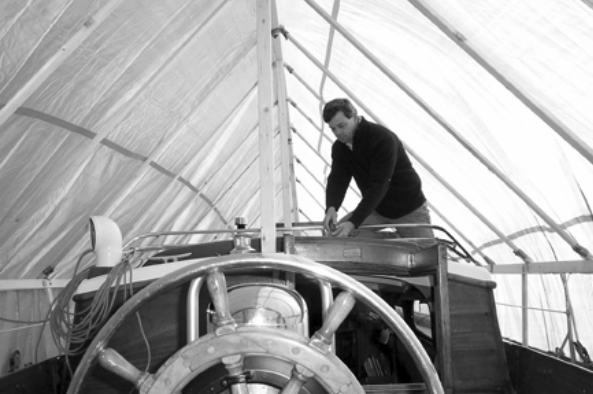
As you work the cover over the frame, you will begin to see how this system works. The steep pitch and extra tarp reaching down past the topsides pulls the tarp down on the ridge. This extra material and weight help to hold the cover in place. The more overlap, the better. After it is centered on the frame, lash the grommets very loosely.
Don’t lash to your jack stands. This could loosen and pull one out. Lashings that run under the keel and hull to the other side should have a bungee cord between the lines for longest tarp grommet life.
To close the bow, I take a scrap of 1 x 3 and roll some of the excess material up around the wood. Then, from the inside, I lock it with a spring clamp. The stern can be treated similarly with a shorter piece of wood. These ends should just be rolled up enough to loosely contain the hull. I leave an opening around the bow and stern pulpits. They still are able to float on the frame as wind shuffles the cover. The opening at the stern pulpit is where I enter the enclosure.
The ends should encapsulate the hull. Loosely rolled up under the bow and stern, middle lashings buffered with bungee cords, the cover tends to stay put even in quite a bit of wind. There aren’t many places for the wind to get a grip.
I have used the cheapest blue tarps. They generally last one season. Their cost is often so low that this is a viable option. Even though I may only get one season out of a blue tarp, I recycle it and get further use in some other application. The next grade up is usually a light green tarp. These are more tightly woven, which gives them more strength. Two seasons are the norm for these. Some will get more with a well-designed frame and careful tying down. The heaviest dark green tarps have the tightest weave and are usually a double layer. They give the longest life and cost the most. For severe climates, their added stiffness and strength will shed the most snow and ice and give the best protection.
Best light
What you will be doing under your tarp may help you to decide. I prefer the medium-quality green tarp. It gives the best light, a soft green, not quite as stark as the blue. The heaviest dark green is too dark for working under without artificial light, but these tarps are tough and would offer the best protection.
Use your enclosure in the spring to best advantage. Open the cockpit area for ventilation and good light while you are working on the boat. Roll back the bow area as well for more ventilation and light. Best of all, roll it down at night to cover your work area and tools. A building that opens — the best of all worlds.
When it is time to remove the tarp in spring, roll it up for storage. Mark your frame parts, slice the duct tape with a knife, remove the foam (save it for the next season), back out the screws, and bundle the framing parts up for next fall, then forget about it.
Feel the sun? There is no doubt that summer is just around the corner.
Thank you to Sailrite Enterprises, Inc., for providing free access to back issues of Good Old Boat through intellectual property rights. Sailrite.com