Relax or snooze in a custom-built recliner
Issue 41 : Mar/Apr 2005
It was a beautiful late-winter sail. The stout westerlies following the cold front had blasted me east. I dropped and furled my sail at the entrance to one of my favorite coves. Before motoring in, I checked the fire I had started in my stove while hove to for lunch. With a low in the 20s forecast, I looked forward to a quiet and warm night at anchor. Once all was secure for the night, I retired to my toasty cabin.
The long downwind runs and tacks were marvelous sailing to remember on days too calm, windy, or hot to sail, but they were also pretty tiring for an old man. A cat running off the wind can be most demanding of the helmsman. I was tired, but not sleepy, and my back wanted to relax a bit before supper.
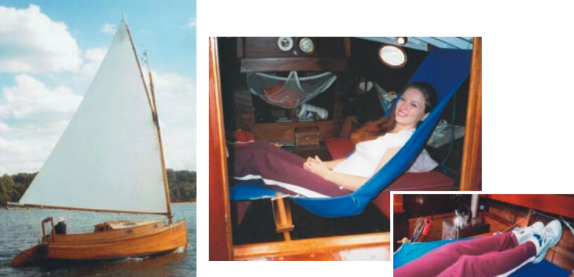
There was time to recline in the cabin, perhaps to toast one or both of my heroes (Joshua Slocum and Sir Francis Chichester). I sliced some cheddar, sectioned a Granny Smith, and poured some wine. Then it took me all of 30 seconds to set up my onboard La-Z-Boy, which I have dubbed my “Catnapper.” This addition was inspired by the discussion and a drawing in L. Francis Herreshoff’s The Compleat Cruiser. With my back wanting support not available while sitting erect on my bunk, I made my first and very modified prototype of what his narrator described as “ . . . a comfortable place in her to sit and read.”
Knowing my shortcomings as a designer and upholsterer, I used some old canvas and fashioned my first version of a “comfortable place” in my small cabin. One-inch and 1⁄4-inch hardwood dowels, scraps of mahogany from the shelf under my garage workbench, and odds and ends of braided Dacron small stuff make up the other required materials. My prototype was OK, but just barely. It needed more thinking.
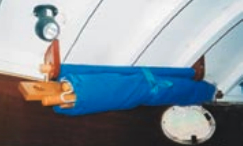
New blue canvas
I checked off the many faults in my design, refined them, and then sewed up a nice new piece of blue canvas. Lacking a sewing machine, I hand-stitched everything. The end result is a satisfactory cross between a recliner and a hammock for comfortable reading and catnaps aboard my old wooden cat.
Jealous? You should be. Check out my concept, then make your own. Plan on making a prototype first to fully refine the design for your cabin and personal size. Then make the final product. Perhaps you may want to design one to be used by two? I don’t know how, but it would be cozy. Two separate but side-by-side ones might be more practical.
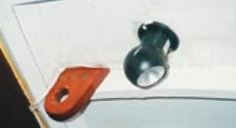
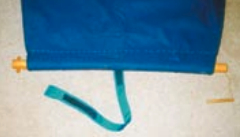
Since each boat will present different design problems, I’ll explain mine in general terms. The canvas should have finished dimensions long enough and wide enough to accommodate the largest user. I found 25 inches to be a comfortable width for me. I tapered the head to fit neatly between the ribs of the cabin overhead, where it is supported, and narrowed the foot the same for uniformity. To add strength, I sewed some small stuff in a hem on both sides and secured it well at the ends. Both the head and foot have large hems to allow a 1-inch dowel to be easily slipped through them. A nylon strap sewed to the canvas, with appropriate Velcro pieces
sewed to it and the canvas, holds the Catnapper securely out of the way when not in use.
Where my knees were located in my Catnapper, I sewed in another stout piece of small stuff to the hem, very firmly secured, and with a loop just big enough to slip over a 1-inch dowel. Don’t skimp on the stitching here; there will be a lot of strain on the cloth transmitted to the dowel via the small stuff. I added an extra piece of cloth there, like sailmakers do at stress points.
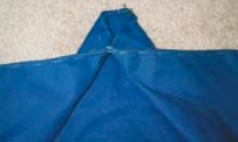
Puckered up
I also sewed in a big pucker on each side, in the area of my ample butt. I suppose there is a good seamstress word for the pucker, but I sure don’t know it. (Reverse gusset? Dart?) This shortened the sides by about 6 inches or, viewed the other way, allowed the material to be fuller and sort of making gunwales to contain me if (when?) I should nod off.
The head is fastened securely to the cabin overhead by two 1-inch mahogany blocks, securely screwed to the cabin’s rafters, and having a 1-inch hole to accept the dowel that runs through the hem in the head. To prevent it from slipping out, while allowing for easy removal if I ever desire, I passed a 1⁄4-inch dowel through each end of the big dowel. At one end it was glued in, but the other had a slightly oversize hole so the small dowel could be pulled out. A fine piece of small stuff fastened the small dowel to the large one so it wouldn’t go adrift.
The foot is tethered by a long length of light line passing through loops of nylon webbing screwed to the ribs. A loop in each end of the line slips over the dowel passed through the hem in the foot. Adjustment of the length of this line determines the amount of droop in the hammock. As with the dowel through the head of the Catnapper, each end of this dowel has a 1⁄4-inch piece passing through and glued in securely. This contains the loop and prevents “fallout.”
In Herreshoff’s book, the character, Weldon, had what he called a “folding deck chair” in his canoe yawl, Rozinante. It was neat, but I wanted something more reclining, not as erect. So I devised a leg support system that makes the difference between a yard hammock and a folding deck chair . . . more like a recliner with the footrest pulled up.
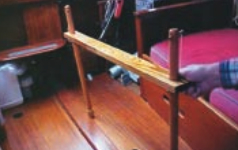
Fairly tight stretch
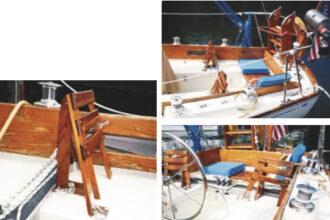
The support is sort of a wooden “H” with the crosspiece close to the top (see illustration below). The uprights’ rounded ends go into the loops on the Catnapper’s sides, and the crosspiece holds the uprights apart, thereby stretching the cloth fairly tight.
Both of the feet of the uprights have 1⁄4-inch stainless-steel bolts turned into them and their heads then cut off. These slip into holes drilled into the floorboards and anchor the H-frame in place, but still allow some motion. The feet are wrapped with small stuff to strengthen them.
The crosspiece rests on small dowels running through the large dowel uprights to keep it from sliding down. And, after the crosspiece is installed on the uprights, small dowels are placed in their holes near the tops of the uprights. This keeps the loops in the edges of the canvas from sliding down. All the wooden parts were sanded smooth and given several coats of polyurethane varnish.
Setup is quick and easy. The nylon strap is pulled loose and the canvas unrolled. The three pieces of the H-frame, stored in the rolled-up canvas, are assembled: the feet in the holes in the sole and the crosspiece placed over the tops. Then the small dowels are placed through the tops of the uprights, and the loops on the canvas are stretched over them. Lastly, the dowel through the foot of the Catnapper is tethered to the two lines. Stowing is just the reverse, and it really does take much less than a minute to erect or stow.
One last instruction: enjoy yours; just try to stay awake!
Thank you to Sailrite Enterprises, Inc., for providing free access to back issues of Good Old Boat through intellectual property rights. Sailrite.com