A long and difficult repair made while in Mexico — was it worth it?
Issue 18: May/June 2001
There are a few pieces of equipment on our boat that we are never too sure about, especially in the middle of the night in a blow. After a rough passage from Mazatlan to La Paz last year, we noticed that one of them wasn’t getting any better. So, after finding a good yard in La Paz, and returning to the States for a couple of months to prepare for the battle, we finally began to pull our rudder apart.
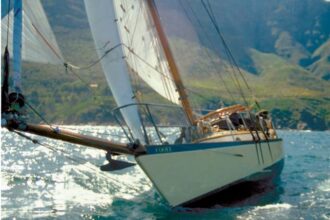
Our boat is a 1968 35-foot Spencer sloop built in Richmond, B.C. We have owned her for five years and finally took off in 1998 to go cruising. She is a stout fiberglass boat of the same build that Hal and Margaret Roth made famous in their travels around the world. We bought her because she was a well-tested bluewater boat and built like a rock.
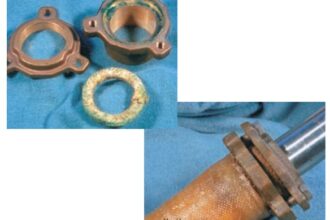
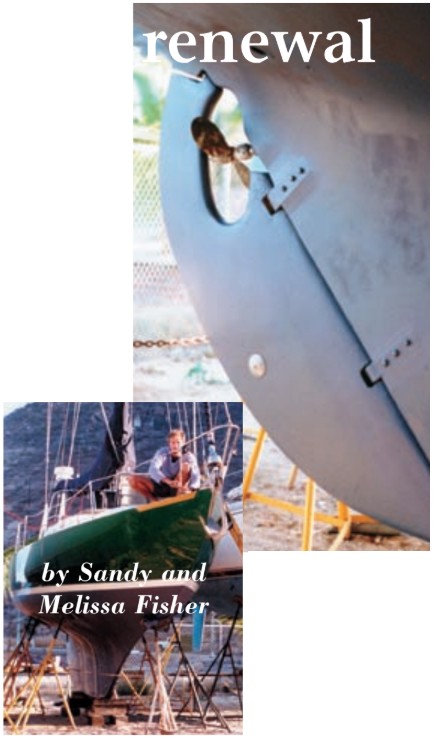
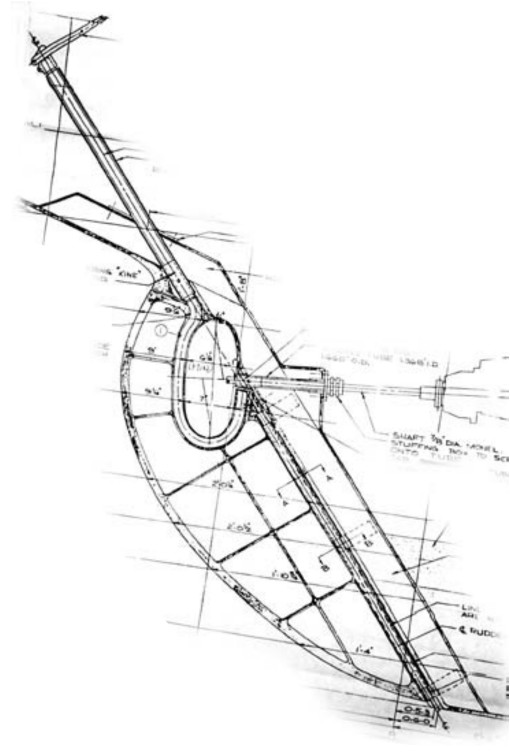
When we bought her in 1995, there was a little play in the rudder but none to be overly concerned about. Our rudder is of the “barn door” type, built of fiberglass with two internal bronze shafts. The upper shaft, connected to the tiller, runs through the stern into the rudder and bends partway around the prop cutout. The second shaft continues down below the propeller with three bronze strap hinges or pintles bolted and then glassed into the keel. The upper shaft enters the boat through a bronze bearing and a stuffing box and then goes through the cockpit floor where it is capped with a tiller fitting.
While back in the States, we got plans for our rudder from a friend with a 1963 Spencer 35. Ironically, after returning to La Paz, we received an email message from him saying that his rudder just fell off. Luckily ours hadn’t suffered the same fate, but we began wondering what kind of project we were in for.
Major cracks
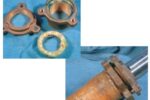
Once back in La Paz, we started grinding away the glass covering the pintles. It was soon apparent that they were not salvageable. Each hinge was corroded with major cracks on the aft edge and had bolts with non-existent heads. With the hinges removed, we were able to examine more of the upper shaft and noticed that it was deeply pitted. Given the condition of the shaft and the hinges, we knew we’d have to drop the rudder. That went fairly smoothly, although we realized we were creating a lot of work for ourselves. We had to dig a hole under the boat to allow the upper shaft to clear the bearing. Luckily, the yard was mostly sand, and this was fairly easy. After cutting off the strap hinges, we worked the rudder down but discovered we would have to cut off 3 inches of the prop shaft tube for the rudder to clear.
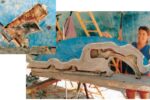
In order to salvage the shell of the rudder, we ground out one side to expose the shafts. We found that the rudder is actually hollow with reinforcing webs running fore and aft, made of resin and a heavy filler that appeared to be wood chips. The shafts were encased in resin, and when we cut them out there was no outward evidence of corrosion. Both of the mystery sections, the part between the bearing and the packing gland, and the glassed sections, looked fine. Besides finding tabs on the upper shaft that were not shown in the plans, the only other difference we found was that the upper shaft did not follow the curve of the prop cut-out as drawn. Instead, this shaft bent partly around and then continued down for another 6 inches.
Now that we knew what we had, we were faced with what to do about it. Bronze is not widely used in Mexico. So we were unsure as to whether we would need to import it and, once it arrived, would we be able to find someone who knew how to work with it? We were also a little skeptical about using the old shaft. Given the difficulty of dropping our rudder, we did not want to do this again soon. The story of our friend’s rudder falling off influenced our decision. After much deliberation, we decided to change to stainless steel since it is widely available in Mexico, and there were many shops in La Paz qualified to do the work.
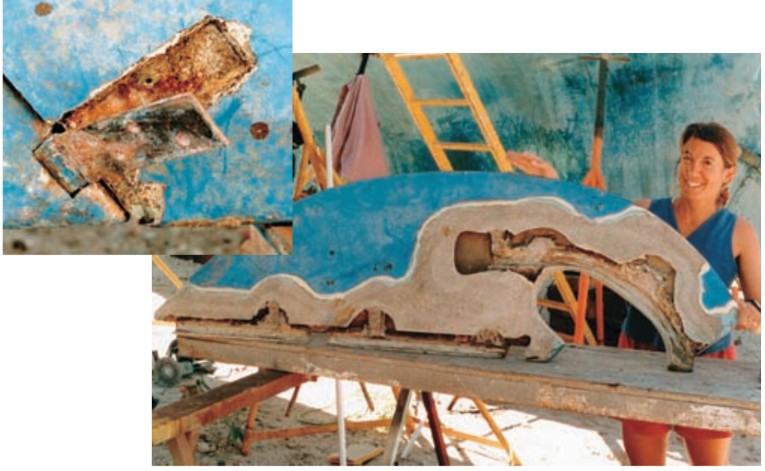
Upgraded hinges
Making the new shafts was relatively easy for the shop we selected, since we had the old shafts to work with. We went with the same size stock for each shaft, 1 1⁄4 inches, using 305 stainless steel. Where each hinge or pintle was attached to the lower shaft, the shaft was turned down to 1 inch. We decided to go with the bomber attitude and upgrade from 3⁄16-inch to 1⁄4-inch stainless for the hinges. We used wood to make templates for the hinges to give the shop the correct angle and width of each one. We also decided to change the bottom hinge to a cup or boot type to help carry the load better. We had the shop make the middle hinge. It would be cut in half and then welded together in place. On the original, tubing was used for the lower shaft with 1-inch pins brazed in where each hinge attached.
We encountered problems when we began to put it all back together. Both shafts were slightly bent, and any bend meant binding. The lower one was bent due to heat, after the shop welded the tabs and middle hinge into place. The upper shaft started its bend an inch higher than the original . . . hardly noticeable, except that meant it would bind in the upper bearing. Ultimately, there was also the challenge of how to line up both shafts and slip the rudder into place.
To solve the problem of the upper shaft binding, we ground off an inch of the upper bearing. The upper bearing was about 5 inches long, and we felt that 4 inches would be enough to hold the rudder with the addition of the three pintles below. The original bearing was actually two pieces, a bronze bushing inside a bronze sleeve. Not feeling comfortable with stainless riding on bronze, we ended up taking out the old bronze bushing and installing a rubber-sleeved Cutless bearing used on prop shafts. The rubber would enable the shaft to seat itself and also allow some water flow to the upper section to prevent corrosion. We were unable to find the correct size bearing with the same outer diameter so we found a larger size with a thick wall and had the shop turn it down.
Wits’ end
Solving the problem of the lower shaft was not as easy as the upper shaft. Taking the shaft back to the shop three times was not an easy task, especially without a car. We were just about at our wits’ end when a friend and fellow cruiser said he would help us out. He told us, “Oh, no problem, we will have that straightened out and in place within a few hours.” He was actually going to leave the next morning for Mazatlan but promised to come over early to help us out. Rick Cummings, on Cape Starr, is kind of like a patron saint of cruisers in Mexico.
At 7 in the morning, we brewed a pot of coffee, Rick showed up with his bag of tools, and we went to work. We found a new I-beam in the yard and to this we clamped two consecutive pintles to see where the bend was occurring. Finding that the lower section was out of true, we clamped the middle and upper hinges and then set the dial gauge to the lower section, above the bottom hinge. After about half an hour, and a couple of healthy whacks to the shaft with a 2-pound sledgehammer, using a Delrin block in between, the shaft was ready to install. The upper shaft was also slightly out of true and for this Rick stuck the shaft under the blocks of the boat and leaned on it a couple of times. It worked! Now confident that the shafts were true, we were ready to hang the rudder.
The only way to install the shafts was in two stages. The first stage would be to bed the lower shaft in place, remove the rudder, and do the finish glassing. The second stage would be to reinstall the rudder and glass the upper shaft in place. We couldn’t simply glass in both shafts and stick the rudder on the keel. The difficulty of lining up the six bearing points (three lower pintles, the Cutless bearing, the stuffing box, and the cockpit bearing) would make things nearly impossible with the rudder not in place. Even if we didn’t have the problem of alignment, it would be impossible to slide the hinges up the keel from the bottom because each hinge or pintle was of a different dimension.
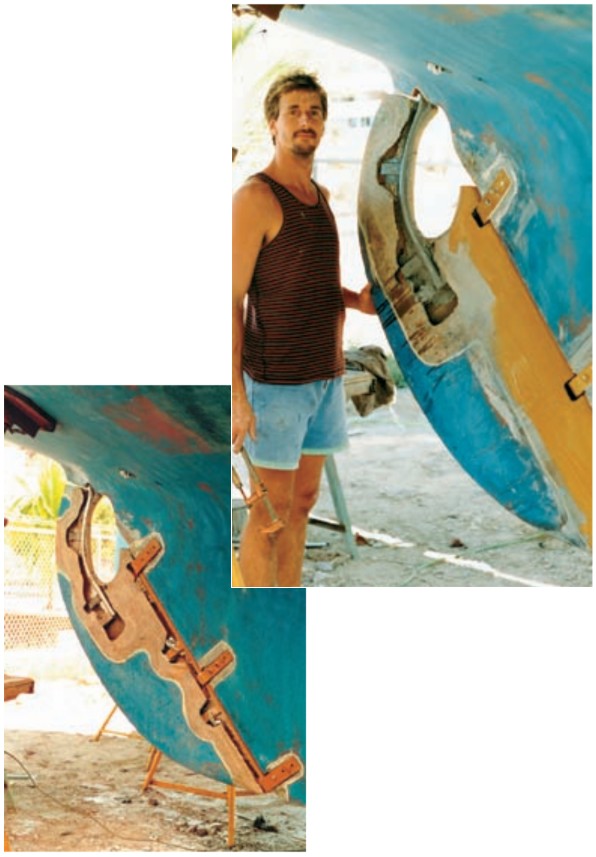
A misfit
We began by sliding the upper shaft into place, and then we temporarily swung it out of our way. The lower shaft was clamped into the rudder shell with the hinges in place and then slid onto the keel. When we brought the upper shaft into its place in the rudder shell, it did not fit exactly into the original groove. Rick used a die grinder to enlarge and grind out any high spots in the shell to enable a perfect fit for the shaft. Clamping the upper shaft into place, the rudder was swung back and forth in order for us to find the “sweet spot” in the alignment.
The perfect spot was found when the rudder was adjusted to result in no movement in any of the pintles. Once the position was established, bedding compound was applied liberally to the shaft and hinges. The hinges and bolts were waxed before insertion to enable easy removal before the bedding compound completely adhered. After two hours, we pulled the rudder off and cleaned the bolts and hinges to remove any excess filler before it had set up. Removing the rudder just before the bond took place gave us an exact mold, enabling us to position it again once the shaft had been properly sealed into the shell.
With the rudder on the workbench, now came the task of sealing in the shaft and making it look pretty. We used epoxy mixed with fiber filler to achieve a rough shape of the original rudder. Next, we laid on multiple layers of 6-ounce fiberglass cloth to strengthen and join the new area with the original shell. Content with the final fairing, it was time again to stick the rudder onto the keel.
Once the stuffing box and Cutless bearing were in place, we installed the upper shaft into the boat, using Teflon grease, and then rotated it out of the way. Next we slid the rudder into place, bedding the hinges and bolts in 3M 5200. The upper shaft was fit into the groove, and the rudder was rotated to make sure we were in the right spot. Filler was put around the exposed shaft to seal it in place. Once the filler cured, it was followed by fiber filler and fiberglass cloth, the same process used for the lower shaft.
Foam filling
There were some large voids in the upper section of the rudder that had been ground out in order to install larger tabs. To fill these voids, we used polyurethane insulation foam as a base on which to lay the fiberglass cloth. The next day we trimmed the foam and laid on layers of glass. Checking our work a few hours later, we found that there were bubbles underneath the cloth that we had to cut out and glass again. There were probably some “wet” areas on the inside of the foam that, when cut, reacted again and expanded more.
Along with fairing the rudder, we also built up the areas around the pintles to achieve a smooth surface. We decided against covering the bolts, so we could inspect them periodically and, as Rick’s motto goes, “the fish don’t care what it looks like.” The only area left to work on, was the bump out at the prop Cutless that we had cut off. For this we only filled and faired enough to cover the new Cutless bearing.
For all of the exposed metal, including the whole lower shaft before it was bedded, we used a two-part metal primer that was given to us by a friend. This was a navy surplus paint that he bought in San Francisco and has been using on his boat for years. The paint seemed to key into the metal well, along with the newly epoxied surfaces. With Rick’s advice, we also filled some of the voids in the welds of the pintles by damming up the area and dripping it in. To prime the rudder, we used regular epoxy, which we had on hand, instead of an epoxy barrier coat, which was hard to find in La Paz. Everything was ready to launch except for a final coat of bottom paint and one more important part: the zincs.
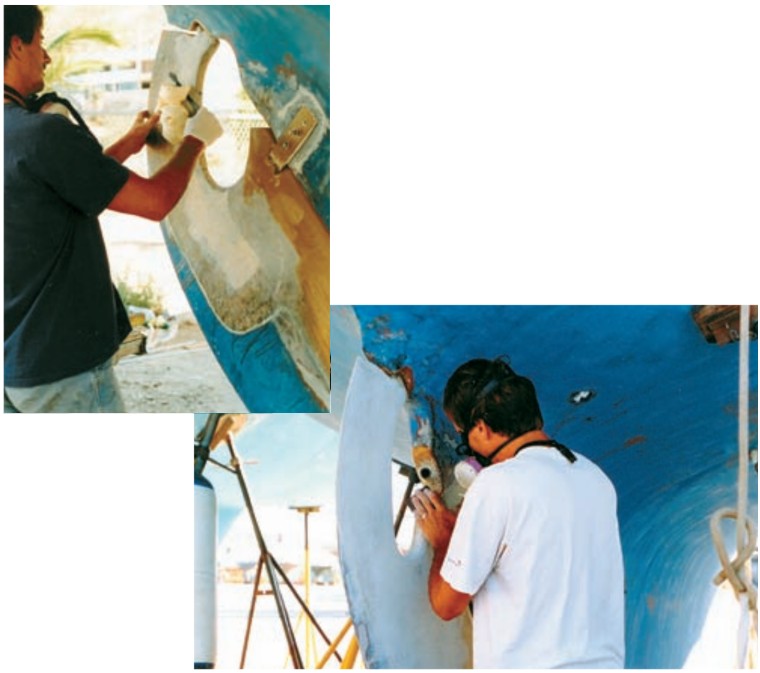
Zincs installed
There was no mention of zincs earlier because there were no zincs on the rudder. The only zincs we had on the outside of the boat were the one on the propshaft and a guppy tied to the block when we were in a marina. Using the vast pool of knowledge of the cruisers in the yard, we decided to stick another zinc on the rudder shell. Rick and other cruisers in the yard advised us to use the six-foot-radius theory. The theory is: everything within six feet will be protected by the zinc, whether it is tied into the metal or not. Rick also suggested that since our boat had gone for 30 years with nothing more than a propshaft zinc, anything in addition to that would be “gravy.” (Since we have been in the water, we have now tied in the upper shaft to the external guppy that we hang over the side when we are not under way.)
For all of the work, our major materials list included 2 gallons of epoxy resin; 4 yards of 6-ounce fiberglass cloth; 40 ounces of West System 403 Microfibers; 1 large tube of 3M 5200; 2 gallons of acetone; assorted rubber gloves; and other personal safety equipment.
An indispensable product that was supplied by Rick was Devoe’s Adhesive Filler, of which we used a total of 3 quarts, mixed. This was a two-part, epoxy-based product, mixed 1 to 1, which had a consistency of peanut butter and a working time of two hours, even in 80-degree weather.
Our time spent on this project, not including the numerous days spent looking for shops and products needed, was:
• Pulling the prop and dropping the rudder, 8 hours.
• Cutting out shafts, cleaning up shell, prep work for installing rudder to keel, 20 hours.
• Truing and so on, 6 hours.
• Glassing in lower shaft, 16 hours.
• Cutless bearing for upper shaft, stuffing box, fitting and installation of upper shaft, 20 hours
• Bedding hinges in 3M 5200 and bedding upper shaft into shell, 6 hours.
• Glassing in upper shaft, 10 hours.
• Finish work/fairing and painting, 16 hours.
Total: 102 hours.
The shop took a total of two weeks to make the shafts and hinges.
Not perfect
Although the cost of fabricating parts and being on the hard in Mexico was a great deal less than doing the same project in the States, we were faced with working in “mañana time.” The Mexican shops do good work, but are not geared to match a part perfectly: if it looks right, it will probably work, hence our problem with the shafts. Some of our days were spent walking from shop to shop all across town looking for one specific part. If a shop didn’t have it, they would give us the name of another shop that might carry it, and off we would walk in 100-degree weather. Often we gave up our search and settled for a cold beer and an alternate solution.
Finally, after a month and a half on the hard in La Paz, we launched. A few days later, we headed out into the Sea of Cortez for our sea trial. The first few days out brought us light winds with no complaints. The real test was an unforeseen northerly on our crossing to Mazatlan. Under trysail and mostly furled jib, we headed out in 8-foot seas with 30 to 35 knots of wind and completed 140 miles in 24 hours, a great day for our boat. Needless to say, given our mileage, the rudder was strong and responded flawlessly. Although we felt a little green from being out of the water for so long, our rudder didn’t seem to mind at all and has been doing great ever since.
Would we attempt another big project like this in Mexico? For us, the cost factor outweighs many of the hardships encountered, but it is definitely not as convenient as working in the States. The yard we were in had no restroom facilities to speak of. Luckily, there was a marina next door that had nice bathrooms and showers. It was a bit of a walk, but doable. We were in an area of the yard that did not have power or water. The water problem was solved by using jerry jugs to fill our tanks. Water wasn’t always available, so we filled our tanks when we could. For electricity, someone in the yard bought a 200-foot extension cord that was run from an outlet on the other side of the yard. At one point there were five boats tapped into it. Now and then the power would go out in the yard, but no problem, the yard manager would come over and wire a cord into the light fixture on the street side of the fence.
Toxic dust
There was no problem when it came to digging a hole to drop our rudder since the yard was mostly sand and dirt. When the northerlies picked up however, they created huge toxic dust clouds throughout the yard. Fortunately we were upwind of most of the churned-up dust.
We had our share of battles with critters. One night we were attacked by a giant flying cockroach that landed in the cabin. We tore the boat apart chasing him down. Mosquitoes plagued us nightly. The absolute worst was waking up in the morning and finding that something had taken a bite of our bananas while we were sleeping. Somehow we ended up with two rats on board. We were able to catch one in a trap, but the second was larger and wiser. He ended up on the end of a Hawaiian sling, not a fun thing to have to do.
What were the major costs that might entice someone to attempt a project south of the border, given all of the other factors? Our two shafts and hinges cost us about $600, and we provided the bar stock for the tabs. The yard bill was a little more complicated. We had left the boat for a few months while we returned to the States. We had negotiated with the office manager so that when we returned we would be able to work on the rudder and only be charged for extra dry storage time. This was a verbal agreement, unfortunately. Five days before we were to launch, the manager quit and disappeared. All deals were off. We had to work out a new deal. We ended up launching a few days early and were charged for our extra month and a half of dry storage, plus one work day. The bill for this was $160 for the dry storage and $45 for the work day.
We’re not sure if the aggravation involved in getting things done in these conditions would be worth it again but, the price was sure right. Our friend in Seattle who completely lost his rudder helped us keep our perspective. He said, “At least you aren’t working under a blue tarp in the pouring rain wearing three layers of clothes.”
Sandy and Melissa Fisher have lived aboard Onrust since they purchased her in 1995. Deciding to cruise now and work later, in 1998 they sailed from Seattle to Mexico and spent a year and a half exploring the mainland and the Sea of Cortez. They sailed south from Mexico and explored Costa Rica and moved on to Panama last July. In no hurry, they continue to explore uninhabited islands in that area.
Thank you to Sailrite Enterprises, Inc., for providing free access to back issues of Good Old Boat through intellectual property rights. Sailrite.com