A Balance Lugsail Primer
It has been five months since the OzGoose kit arrived. The boat has been assembled, epoxied, and varnished. It is ready now for rigging. First it should be noted that there were some options outlined in Michael Storer’s plans. My choices should be made explicit.
First, he suggests that a 2.5 inch aluminum mast might be used instead of the hollow wood one. I have several Laser masts in storage – Laser hulls always seem to self-destruct well before the masts. It turns out that the lower section of the Laser 2-part mast is 2.5 inches – just what the doctor ordered! The upper section is 2 inches. Both sections together tower 20 feet. The OzGoose mast is designed to be 13’ 3-3/4”. So I lopped off all but the first 32 inches of the first Laser mast section. That, plus the 10’ 9” top section (this does not include “socketed” portion of the spar) makes the modified mast assembly (10’9” + 2’8”) 13’5” — a little extra.
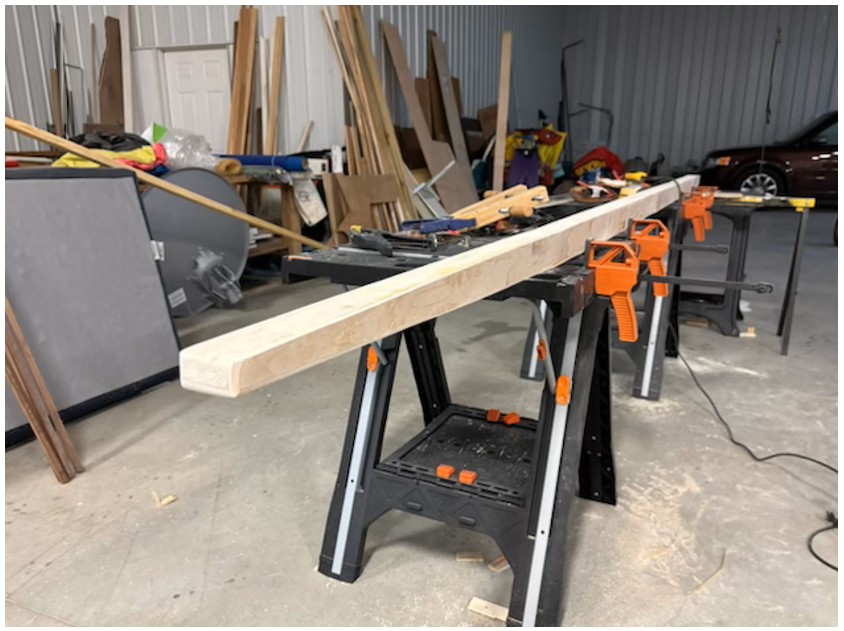
The second option I choose was a hollow boom in place of the solid version. The solid lumber choices in Indiana are limited. Sitka Spruce is very expensive and would require shipping long sections – also expensive. Douglas fir is an option but long lengths free of knots are hard to find. Even so, I was able to find a 2×4 12’ fir of decent quality. I used this for the Yard. And I cut the remainder into 3/8 x 1-1/2 inch widths for use as the top and bottom of a hollow boom. The shipping container that John Owens made included top and bottom pieces of 2×8 foot 3mm plywood. I cut that into 2-5/8 inch widths for the boom sides. Each 12 foot long hollow boom side is made of an 8 foot and a 4 foot length of these plywood widths with butt joints.
In all other matters I followed the plan suggestions. This includes using a minimum of expensive hardware: blocks from old lasers. I did succumb to the lure of stainless gudgeons and pintles for the rudder from the Allen Company in England. Other than that, the rig is mostly tying ropes around spars just as it was before the modern era.
There are online videos that explain how to rig the boat and they are helpful. Here I want to present that information in a somewhat more straightforward manner (sometimes a little text is clearer than the flash of a thousand pictures).
1. Install the rudder
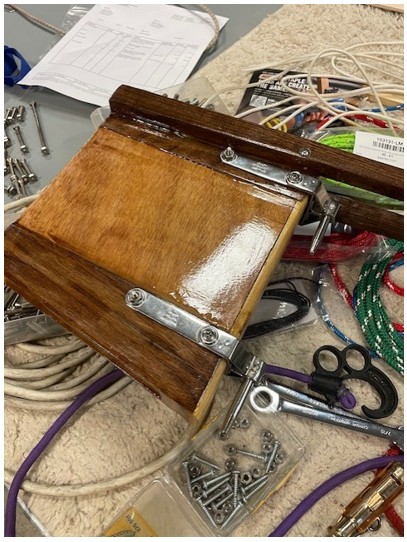
Secure the rudder so the tiller is roughly ¾” above the transom top. If using pintles with gudgeons as I am, install the top pintle on the rudder box first – It should be mounted as high as possible under the tiller but carefully aligned so the pintle itself runs parallel to the leading face of the rudder box. Then mount the gudgeon on the transom to provide for the proper ¾” tiller clearance BUT lower it an additional ¼” so the lower pintle can be inserted in its gudgeon prior to locating this one properly. This should put the bolts securing the gudgeon low on in the timber cleat that runs across the length of the transom top.
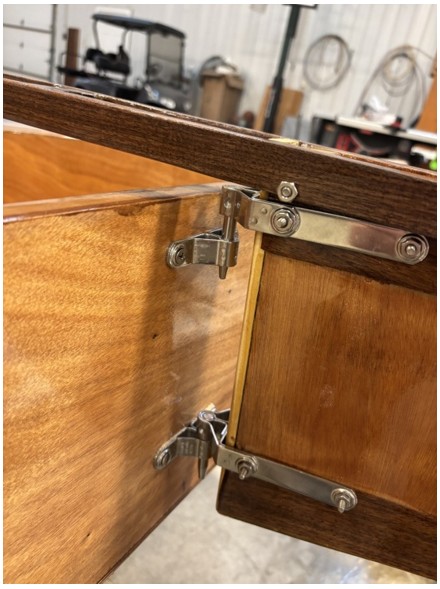
Mount the lower pintle near the bottom of the rudder box but high enough so the bottom of the pintle is above the bottom edge of the box. Then mount the lower gudgeon on the transom so the tiller is roughly ¾” above the transom top as it should be – note that the rudder will be held at proper height by this gudgeon. The top gudgeon will be about ¼” below the shoulder of its pintle. This enables a much easier rudder installation – the lower pintle can be inserted first before lining up the top one.
2. Install the hiking strap
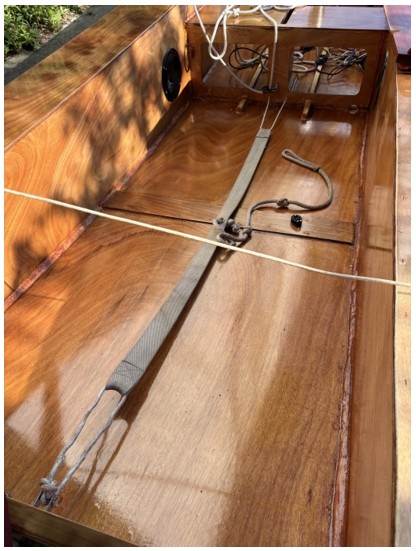
A length of webbing is used to enable safe hiking. The “hiking strap” is normally installed only in the cockpit aft of the seat. It is secured to a stoppered loop run through holes low in the center bulkhead on either side of the centerboard box at its forward end and to a strap eye secured by the bolts securing the lower rudder gudgeon at its aft end. The line in the center of the strap is to aid in hiking and to assist recovery in case of capsize.
3. Secure the sail to the yard
The head of the sail (the upper of its four sides) is secured to the yard. Position the yard so that the end with two holes is down and forward – the other end with one hole is up and aft. Like all traditional rigs, the Goose uses line to lash everything together. The size of the line — the kind of knots used — the number of wraps in the lashing – all this is optional. Tighten the sail so it is snuggly secured fore and aft. Also use the same line to secure the sail firmly to the yard at its ends by wrapping round the yard itself and through the grommets. Finish the wrap by tying it off.
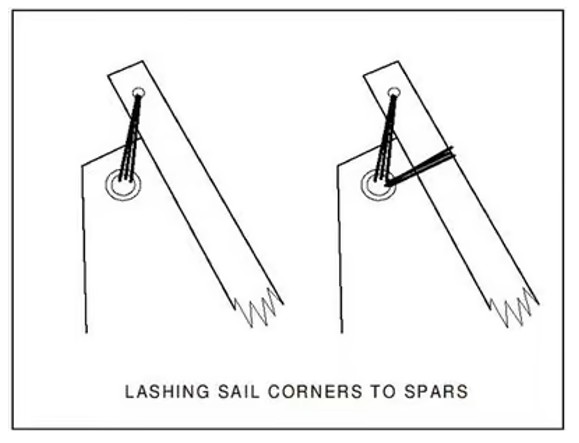
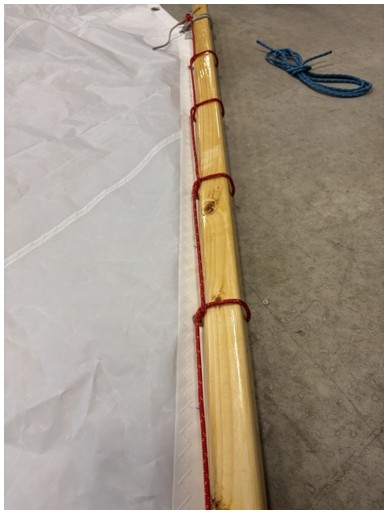
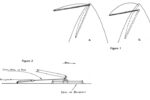
Then use a marline hitch to secure the entire length of the sail head to the yard. A light line is secured to the same holes in the yard but run down the length of the spar and round it at each intermediate grommet and over itself on to the next grommet (see below). Tie the line fore and aft.
4. Secure the sail to the boom
Secure the boom to the foot of the sail to the straight side of the boom. Once again, the end of the boom with two holes is forward (use the aft one of these here) while the end with one hole is aft. Lash the tack with forward wraps and with wraps round the boom to hold it down. The aft end, the clew, is wrapped simply aft – the mainsheet will anchor it to the boom. The bottom of the sail, the foot, is loose – even though the sail is slightly rounded on the foot, the sailmaker should have added shape so that it does not flutter in the wind. It is best to use the bowline knot here pulling the sail aft since this should be easily untied to adjust the sail draft as conditions change.
5. Rig the halyard
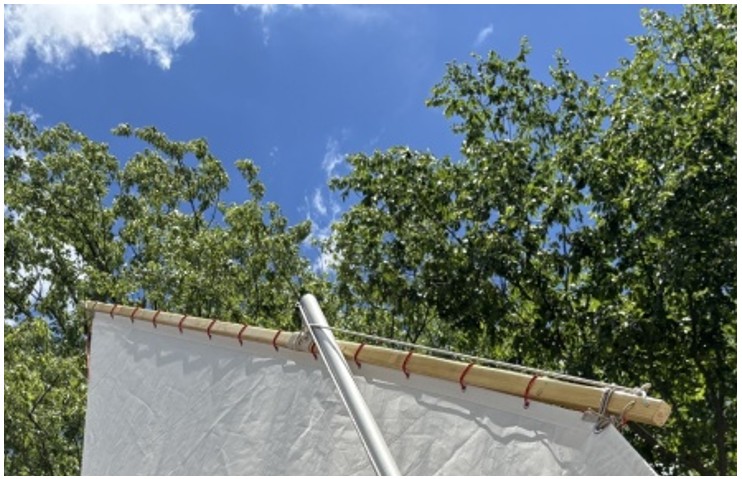
The halyard in a balance lug rig serves two purposes: first, of course, it is used to raise the sail. But it also serves to keep the yard tightly against the mast (as a parrel). This is accomplished by securing the halyard to the first hole in the yard then running it back on the far side of the mast (opposite the side the yard is on and under the halyard coming down the mast, which traps it on that side of the mast) to a point on the yard about half way along its length and from there to the fairlead at the top of the mast. Tuck the halyard under two of the three wraps of a short length of line round the yard at its center before running it to the mast head (the center point for halyard attachment is a good place to start but adjust as necessary to improve the set of the sail).
It is a good idea to whip the yard where it abrades against the mast – this also serves to lock the three halyard wraps in place on the yard. Whipping entails laying a “U” of 3/16” leech line about 10 inches long on the spar. Then wrap the long end of the line round and round over the “U” till it is nearly covered. Tuck the end of the line into the loop at the end of the “U” and pull it under the whipping with the free end of the “U” at the other end of the length of whipping. Trim the ends away.
6. Rig a downhaul
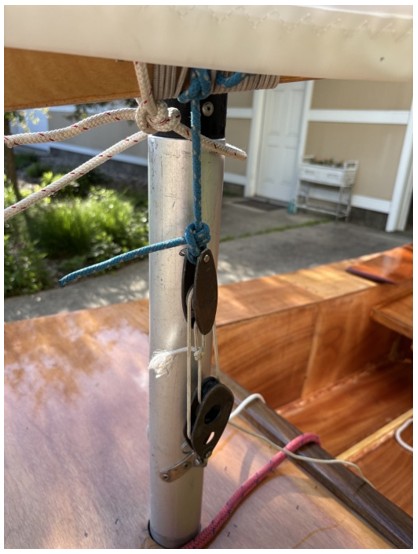
The downhaul is permanently tied to the boom 10 inches or so behind the grommet at the tack. Use a clove hitch with a stopper knot to secure the downhaul round the boom at that point. The free end of the downhaul is used to tension the leading edge of the sail. It is normally wrapped two or three times round a loop of small line that is secured through two holes in the deck on the port side of the mast with stopper knots. In my case, I used the Laser downhaul tackle system instead of simple rope loops – it is more easily adjusted.
7. Rig a preventer
Like the halyard, the preventer serves two purposes. First, it acts as a parrel keeping the mast next to the boom even when it is on the lee side. Second, it serves to keep the boom from moving forward as the sail is sheeted. Secure the preventer with a stopped clove hitch just in front of the downhaul (before the whipping described above). Run the free end round the back of the mast and tie it to the first hole in the boom end.
Whipping over this knot and the one for the downhaul just behind it as described above in the halyard section will protect the boom from abrasion and lock the downhaul and the preventer in place.
8. Rig the sheet
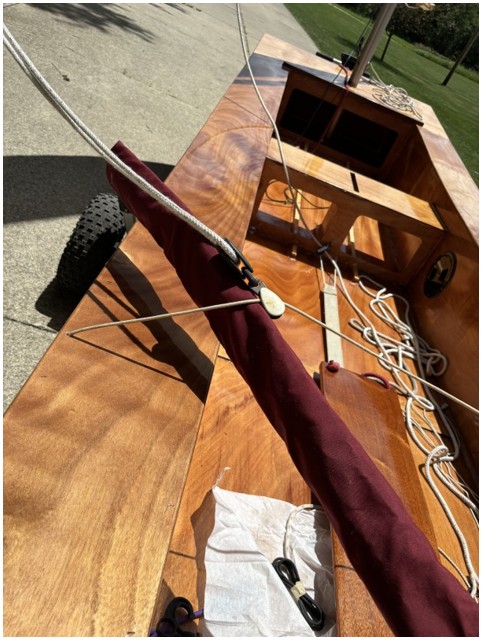
The sheet is secured with one loop round the boom and the cringle in the sail. The lashing at the clew of the sail is used to ease or tighten the foot of the sail by just adjusting the lashing that only pulls aft.
Then take the sheet down to a block that slides back and forth across the boat on a traveler that is just a stopped line run from drilled holes in the gunnels roughly 16 inches forward of the transom on each side of the boat. From here the sheet goes back up to a block lashed with a couple loops of line through the sail clew grommet and round the boom (just like the loop that secures the sheet initially to the sail and boom).
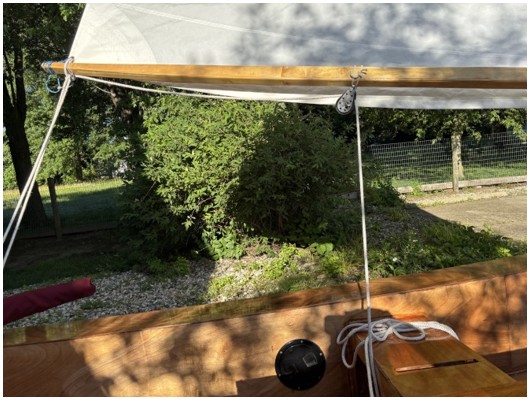
The sheet runs from the back of the boom to a similarly lashed block just above the aft edge of the seat (tie both blocks so the sheaves run parallel to the boom). The lashing for this center boom block may require that a stopper screw be inserted in the boom to prevent it sliding. I opted for a ratchet block here to ease the sheet loads. From here the sheet drops down to a small block at the base of the center bulkhead. The sheet can be managed either by gripping it as it comes down from the center boom (ratchet) block or gripping it as it comes up from the base of the center bulkhead.
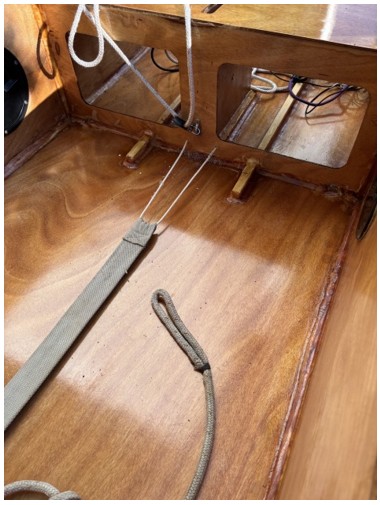
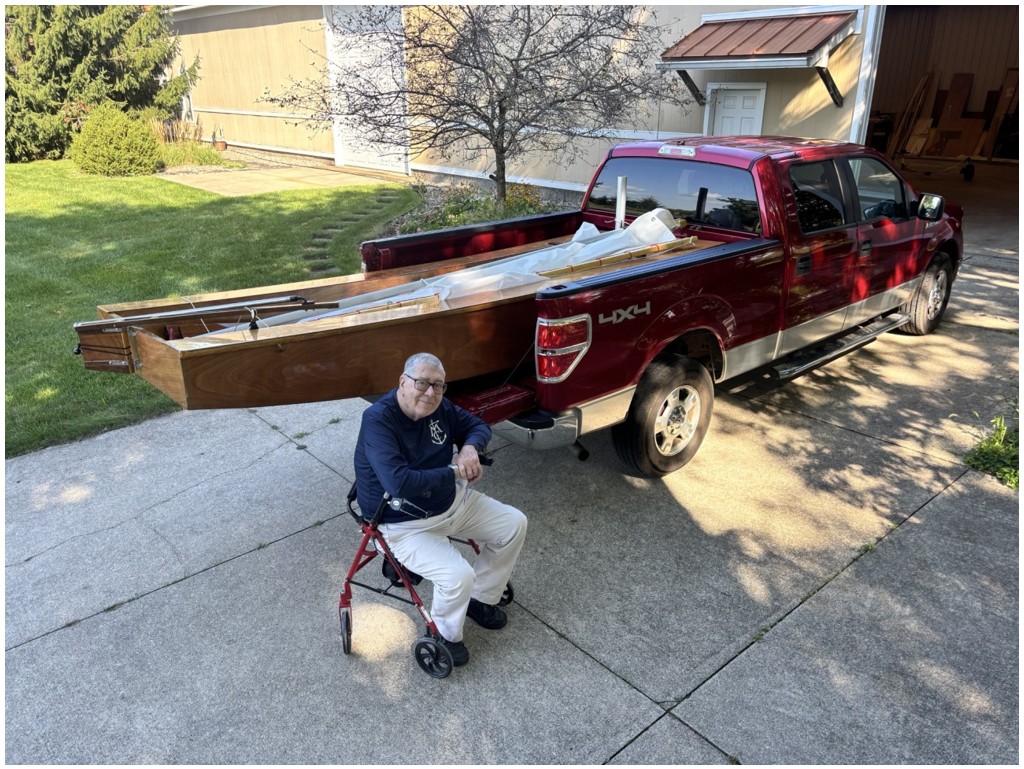
The Oz Goose fits nicely in the bed of my F-150. The bottom panel in the boat is, after all, just 1 and ½ sheets of 4×8 plywood panels (flush at the bow and on the sides; trimmed 4 inches or so at the transom). All the spars with the sail rigged fit nicely within the hull. The rudder slides down into the rudder box and is held in place with shock cord.
The first sail will take place soon and we will assess the Oz Goose’s sailing characteristics. That will be the subject of the next article.