Swageless terminals were a hands-on sailor’s choice
Issue 119: March/April 2018
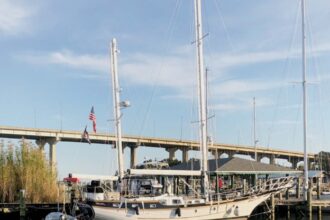
When I purchased Pelorus, my Paceship PY26, she had suffered damage to the bow and starboard side during Hurricane Bob in 1991. Among the new things I had to learn in a hurry was how to replace the damaged headstay and starboard upper and lower shrouds. Happily, there was only one of each.
I was told by the usual experts to be found at any boatyard east of the Delaware River that wire rarely fails. Instead, it’s the swaged terminal fitting that lets go, usually the one at the lower end of the wire. The reason, I was told, is because the lower fitting is subjected to a lot more salt spray than the upper fitting. This leads to corrosion, including crevice corrosion forming unseen inside the swage fitting, which could let go without warning. It’s for this reason that some cruisers carry a length of wire, sized for the longest shroud on their boat, with a terminal already in place on one end and a swageless compression fitting on hand for the other end.
With all this in mind, I had a shop fit swaged eyes on the upper ends of the wires and put Norseman (aka Navtec) swageless fittings on the lower ends. The great advantage with swageless fittings is that they can be opened up and inspected at regular intervals. Every five years or so works for me. Provided the wire hasn’t rusted and remains unbroken inside the eye, all it needs is to be tightened up again after inspection. So far, they’ve held up nicely. A fitting can also be reused as long as the inner cone is replaced.
A few years ago, I replaced the lower fittings on the backstay, leaving the upper swaged eye fitting in place, as it was essentially rust-free. However, from the day I acquired Pelorus, I never liked the look of the port-side upper, and this year I replaced it.
I have a hand tool for do-it-yourself swaged fittings. It’s somewhat like a handheld, two-piece metal vise. I place the wire and fitting into the correctly sized hole and, with a wrench, tighten a screw on both sides of the hole. The swage has to be made in at least three places, each at 90 degrees from the adjacent one. I’ve used it for lifelines and halyards, but I couldn’t bring myself to trust a hand-applied swage on standing rigging, at least not one applied by my hands. I decided to go with a swageless fitting.
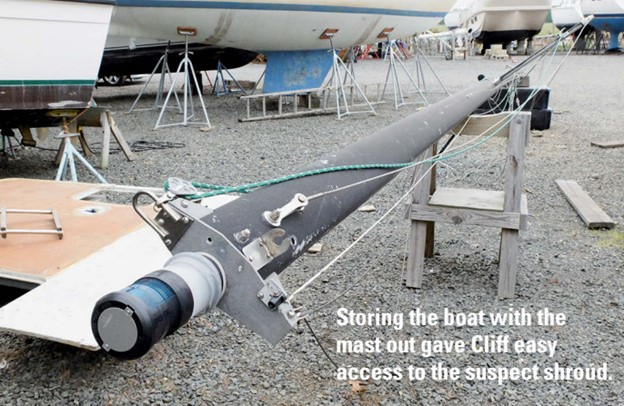
For several years now I have been removing my mast for winter storage. It’s good policy here in New Jersey, as it reduces the chance of the boat being blown over during a big Nor’easter. It also allows me to inspect every inch of it on the ground and makes repairs easier. Over time, I’ve replaced the windvane, the masthead lights with LEDs, a burned-out VHF antenna and wire (a Memorial Day lightning strike), all the running rigging, and the heel of the mast.
With the mast on the ground, it was an easy matter to measure the old shroud. All I needed then was the new wire and terminals.
As well as the old turnbuckle, I had a bunch of turnbuckles salvaged from Hurricane Sandy wrecks at my local boatyard. After washing them thoroughly in kerosene, I gave the port upper shroud the longest turnbuckle in the bunch. I bought an eye terminal for the top of the shroud, a stud terminal with the correct thread to match that on the top of the turnbuckle, and a locking nut to go on the stud.
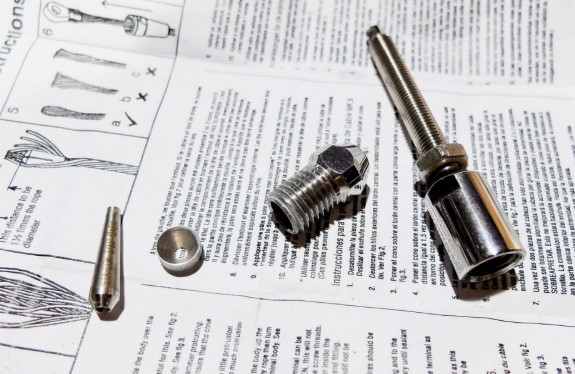
I ordered wire from P2 Marine, which was selling the 3⁄16-inch stainless steel wire I needed at a huge discount. P2 Marine was also offering Sta-Lok swageless fittings at a decent price, but didn’t carry Norseman. I had no particular preference for either brand. They both work about the same way, differing in that the Norseman has three parts and the Sta-Lok has a fourth: a small cap that goes over the cone/wire combination before the fitting is tightened down. This adds one layer of complexity and may be a problem for the ham-fisted.
Assembling the fitting
For swageless fittings to work properly, the wire needs to be cut cleanly and evenly, with no ragged ends. Bolt cutters will only mash the ends. A hacksaw with a fine-toothed blade, or even something like a Dremel tool with a diamond blade, is a better choice.
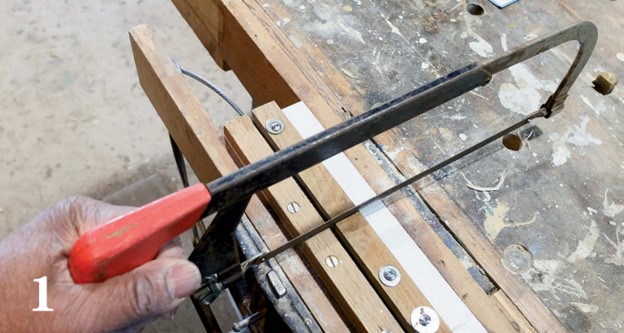
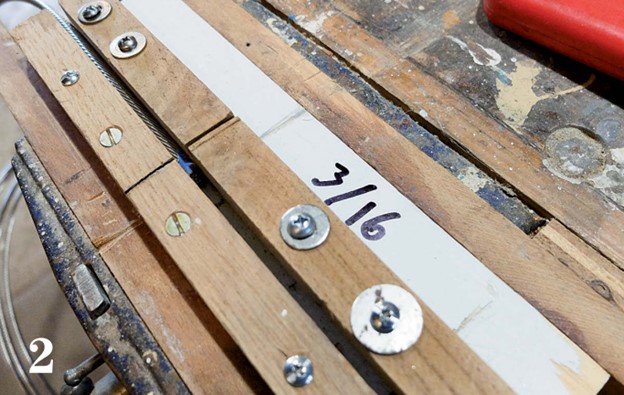
This time, having struggled with cutting wire in the past, I made an adjustable miter vise from scrap wood, purpose-built for cutting rigging wire, Photo 1. That took maybe 20 minutes to make. Better yet, I made the miter vise adjustable (the screw holes under the washers are oversized), so I could also cut heavier gauges of wire if need be, Photo 2.
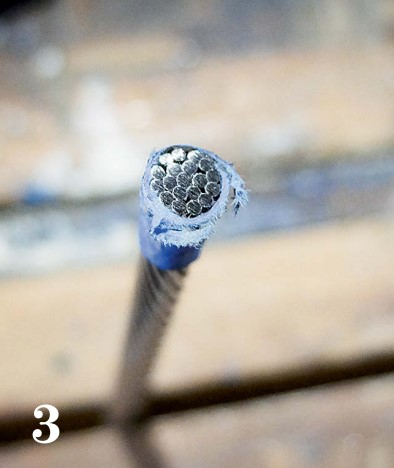
I always wrap the wire at the cut with blue masking tape, but any tape would do. Then, after measuring carefully and marking the cut with a marking pen, I cut it with a hacksaw in the adjustable wire vise. (Cutting even small-diameter stainless steel wire is a fine aerobic workout, but a new blade helps.) I then touched up the cut wire end with a sander. The result, Photo 3, was much better than any cut I’d made in the past when using an ordinary vise.
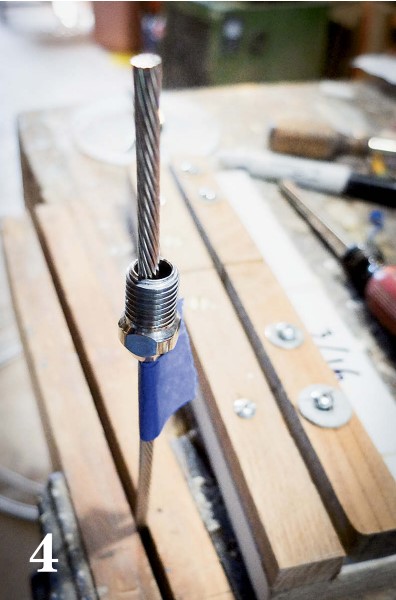
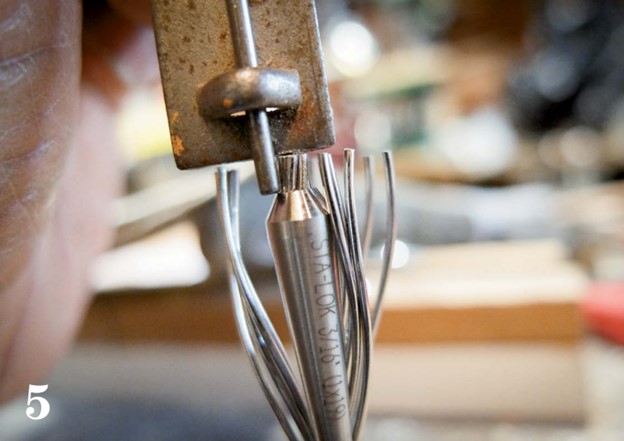
With the wire supported in the vise, I slipped the base of the fitting over it, Photo 4, then separated the outer wire strands so I could slip the cone over the inner six strands. I used a caliper to measure the distance — specified in the assembly instructions — the core strands must extend beyond the cone, Photo 5. I then slid the base up over the wires and, using a fingernail, made sure that the strands were evenly spaced and that no strand slipped into the slit in the side of the cone, Photo 6.
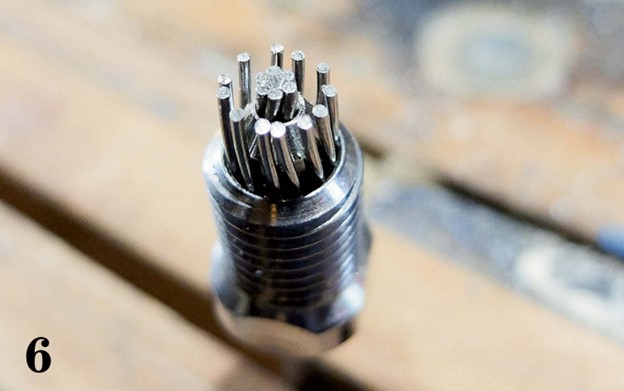
In the case of the Sta-Lok fitting, a cap covers the ends of the wire strands, Photo 7.
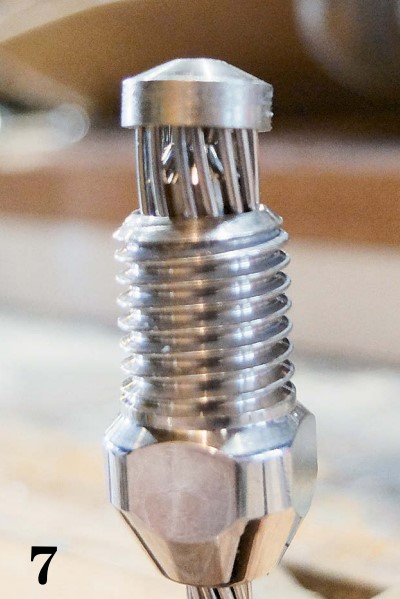
As the fitting is ultimately tightened, the outer body compresses the strands, bends them over the end of the cone, and closes the slit in the cone, which grips the core strands ever tighter. Any outer wire caught in the gap would prevent the cone from gripping the inner core properly and would lead to failure.
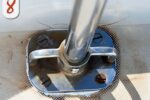
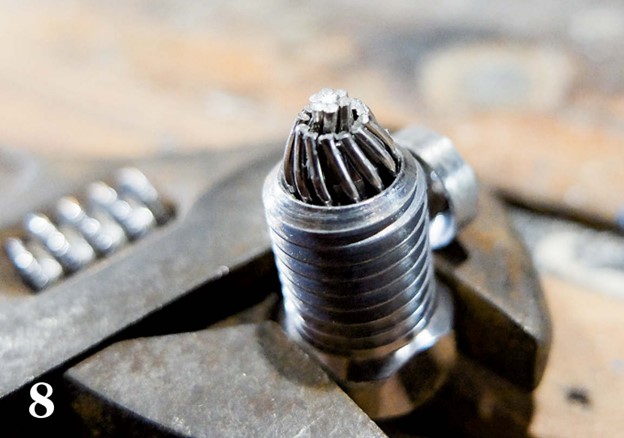
The fitting should not be over-tightened. After tightening it, I unscrewed it to inspect the strands to make sure that none were distorted and they all lay uniformly around the cone, Photo 8. I then reassembled it with a little silicone caulk inside the body (not household silicone, which has acetic acid in it, but marine caulk) to keep water out. I don’t recommend adhesive caulk, like 3M 5200, as it won’t allow easy disassembly of the fitting. I also used blue Loctite Threadlocker, as recommended by Sta-Lok, because it can be unthreaded without a torch, unlike the red stuff.
Finishing up
When I was satisfied with my work on the terminals, I fitted the new shroud. I secured it from jumping off the spreader in a seaway by wrapping a soft stainless steel wire keeper around it. To protect the sails against chafe, I covered the spreader tip with a rubber boot held in place with tightly wrapped self-amalgamating tape.
The cost for a swageless fitting is about the same as the cost for having a shop fit a swaged fitting, and assembling one Sta-Lok fitting took me about half an hour. The only tools necessary are a hacksaw with a sharp fine-toothed blade, a screwdriver, pliers, and two wrenches — one each to hold the upper and lower parts of the fitting when screwing them together.
Resources
Norseman swageless fittings, also sold as Navtec, are no longer available since Navtec closed its US manufacturing facility in 2015. However, many rigging shops still have “a drawer full of cones”, so existing fittings can still be reused.
Sta-Lok and Hi-MOD swageless compression fittings are available from a variety of suppliers, including:
C. Sherman Johnson Company – www.csjohnson.com
Hayn Marine – hayn.com/marine/rigging/himod.html
P2 Marine – www.p2marine.com
Rigging Only – www.riggingandhardware.com
Sailing Services – www.sailingservices.com
Sta-Lok – www.stalok.com
Cliff Moore is a Good Old Boat contributing editor. His first boat was a Kool Cigarettes foam dinghy with no rudder or sail. Many years and many boats later, he’s sailing Pelorus, a 26-foot AMF Paceship 26 he acquired and rebuilt after Hurricane Bob trashed it in 1991. He is the editor of a community newspaper.
Thank you to Sailrite Enterprises, Inc., for providing free access to back issues of Good Old Boat through intellectual property rights. Sailrite.com