Reinsulating means rebuilding
Issue 111: Nov/Dec 2016
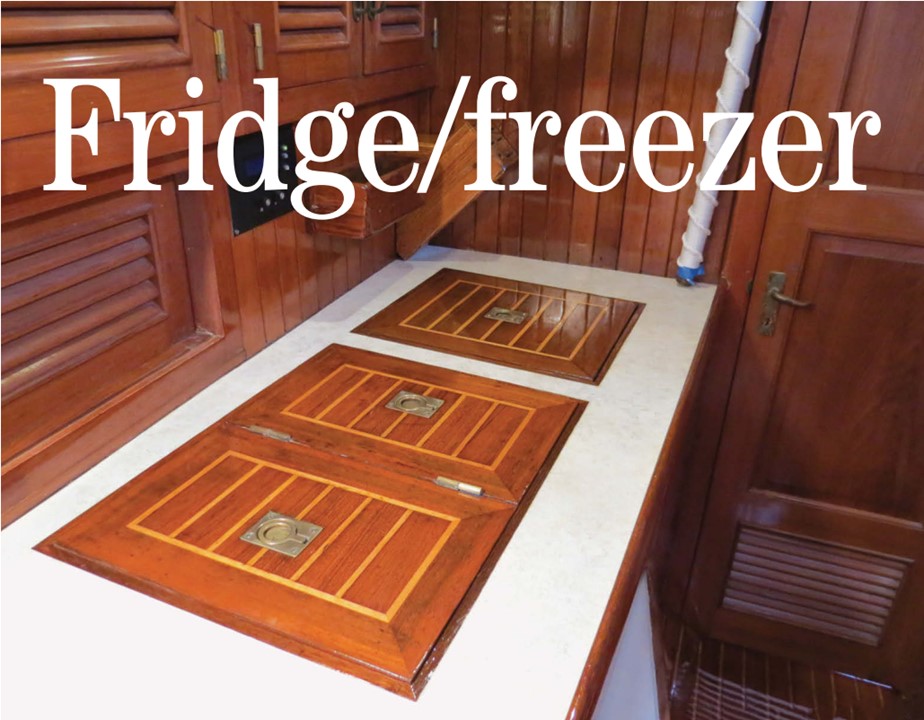
As is the case aboard many good old boats, the refrigerator/freezer insulation aboard Nine of Cups, our 1986 Liberty, was less than perfect. Our cold box was built with 2 to 3 inches of foam insulation surrounding it. This insulation was marginal when new, and when we purchased Nine of Cups 14 years later, it was pretty much useless.
Reinsulating the cold box had been on my to-do list for years. Then, a few years ago, I found myself moored off South Australia for a few months while Marcie flew home to take care of some family issues. This seemed the perfect time to tackle the project.
Nine of Cups has a 12-volt system. The condensing unit sits under a settee in the saloon. Copper tubing runs behind the galley sink and stove, through the refrigerator, and to a cold plate evaporator in the freezer. A partition separated the refrigerator compartment from the freezer. Two thermostatically controlled fans mounted in the partition circulated cold air from the freezer compartment to the refrigerator compartment, a typical spillover arrangement.
My plan was to remove the old countertop, the fridge/freezer compartments, and all the old insulation and start anew. Because the evaporator, condensing unit, and temperature controllers were all fairly new, I planned to reuse them. I had Don Casey’s book, This Old Boat, for guidance. What could possibly go wrong?
This project would require me to demolish the better part of the galley and convert the saloon into a workshop. I’d be without a refrigerator for the duration. I would also have to disconnect and remove the stove and the sink for much of the time. Yes, this was a project best done while Marcie was away.
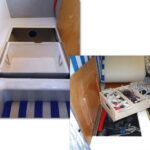
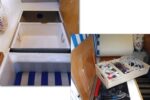
“Extract the old”
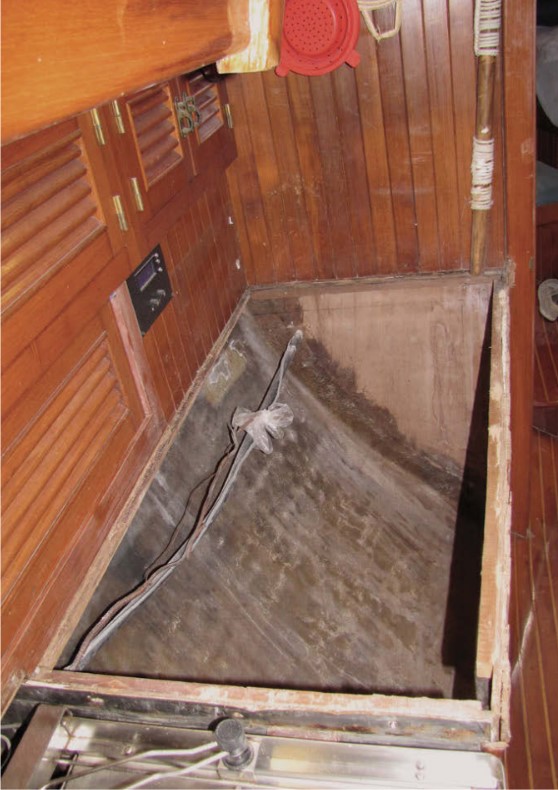
In his book, Don devotes 12 words to the demolition part of the project: “. . . extract the old ice chest. Remove all traces of the old insulation . . .” It took me three days to accomplish that phase. The old insulation dripped water and there were gaps between the foam sections. The insulation in any old Coleman cooler is probably more effective.
There were only a couple of glitches in this phase. I wasn’t able to extract the copper tubing without kinking it, so I had to cut it. I would have to repair it with new couplings when I put it back together. And although I tried to be very careful, I wasn’t able to remove all the teak trim without cracking a couple of pieces. I hoped I’d be able to repair them as well.
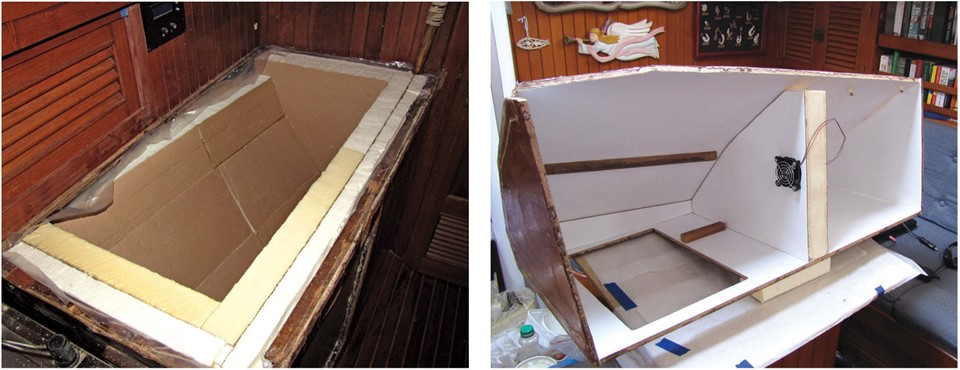
This was the worst point of the project. As I looked at the large cavern where the old refrigerator/freezer box had been, self-doubt crept in. What the heck was I thinking? I’d never get it all back together and working . . . and even if I did, it would look like crap. Thoughts of burning Cups to the waterline to destroy the evidence cropped up. “So sorry, Marcie. I don’t know what happened. The boat just burned down.”
New lining
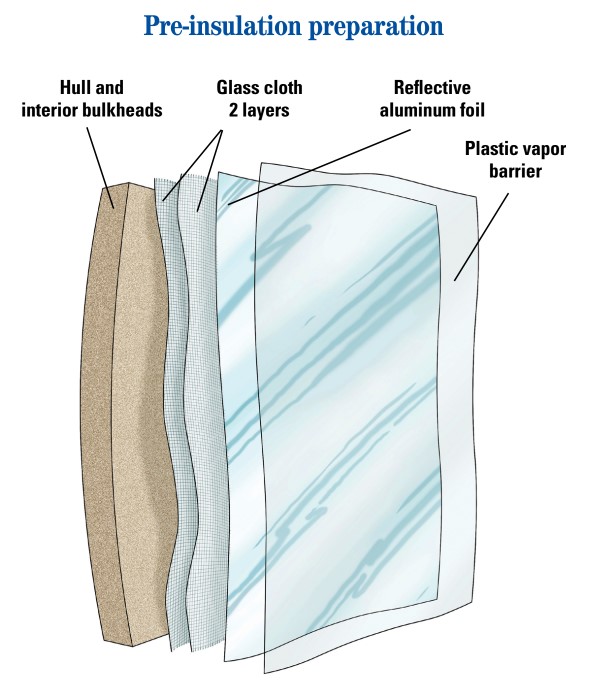
I got past my feelings of self-doubt by breaking down the project into small sub-projects. The first of these was to create a new lining on the inside of the empty box. It would consist of two layers of epoxy-impregnated glass cloth, a layer of heavy foil, and a layer of plastic sheeting to act as a vapor barrier (illustration on facing page).
I sanded the cavern walls with 80-grit sandpaper, then donned a chemical-grade respirator, opened all the ports, and turned on as many fans as I could before I stuck my head into the cavern to clean the sanded surfaces with acetone.
Next, I measured and cut all the fiberglass cloth pieces I would need. I wanted every section to overlap its adjoining section by an inch, so I cut them all slightly oversized. Because I was applying two layers, I cut the pieces for the second layer so the joints would be staggered. I stacked the cut sections of cloth in the order I would be using them.
I next cut pieces for the foil layer, again allowing for a 1-inch overlap at each joint, and stacked these in the proper order. Finally, I cut the plastic to size, with the same overlap at the joints and enough extra at the top to overlap the top of the foam.
I knew the job would be messy, so I taped waxed paper and plastic drop cloths on the teak cabin sole and around the work area. I donned latex gloves and an old long-sleeved shirt. Alcohol is a benign solvent for epoxy, so I poured some into a container and set it nearby in case of a spill. I placed rags in strategic locations.
I used the wet method for applying the glass cloth. I mixed the first small batch of epoxy and rolled a coat of it onto a section of the cavern, pushing it into the corners with a chip brush. When the epoxy was tacky, I applied the first section of glass cloth, working out the wrinkles by lifting the edges and smoothing the cloth from the center. Once satisfied with it, I rolled more epoxy onto the cloth until it was thoroughly wetted out. I removed the excess epoxy with a squeegee and worked it until the glass was consistently transparent. After the first piece of cloth was done, I applied the second piece, overlapping the first by an inch or so, and continued until the entire first layer of cloth was in place.
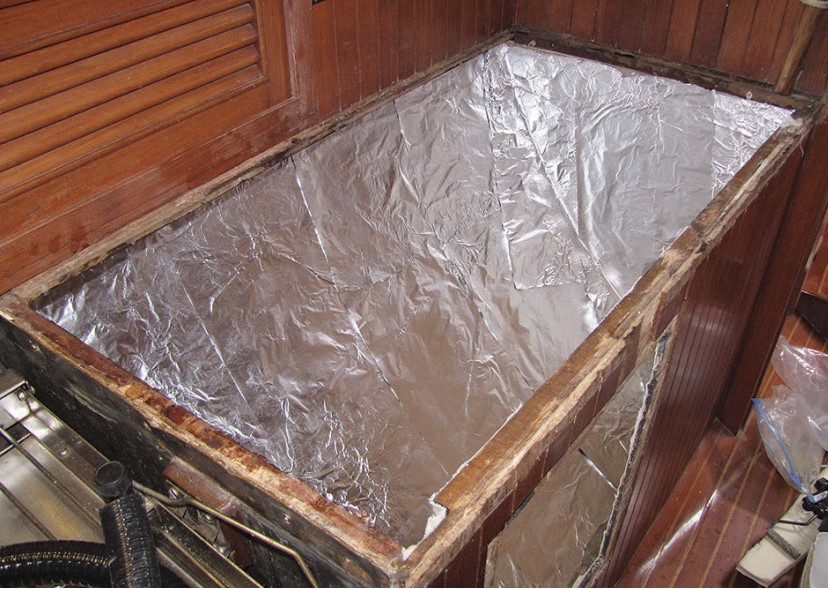
I repeated the process for the second layer of glass cloth. When that layer was completed, I rolled on another coat of epoxy and, while it was still tacky, pressed the aluminum foil into place over the glass cloth. I stopped the foil short of the top edges of the cavern, just enough to leave a surface I would use later to bond the countertop edge. On top of the foil, I layered the plastic sheeting, leaving the top edge high enough that I could later fold it inward over the foam.
I accomplished all of this in one day and, by applying each layer of epoxy before the previous layer cured, avoided having to sand between layers. If this were a segment on This Old House, the camera would now pan out to the workers cracking open cold brews. In my world, it didn’t go exactly like that. Removing the waxed paper and plastic from the work area didn’t take long but, during the course of the day, close encounters with wet epoxy had left the sleeves of my shirt glued to the hair on my arms in several places. It took another hour to remove the epoxy from my arms and the rest of my anatomy. Worse, without a fridge there was no cold brew.
New insulation
My goal for the new insulation was a minimum R-value of 20 for the refrigerator section and a minimum R-value of 30 for the freezer section. I did a lot of research and learned about several different insulation materials, each with its own pros and cons. I distilled what I learned in the sidebar “Insulation choices”, below, and the table “Comparison of insulation materials”, below.
Aerogel insulation was not readily available and vacuum insulation panels (VIPs) at the time were either exorbitantly priced or new and untested technology (or both). In addition, every panel would have to be specified and fabricated in advance, increasing the delivery time and expense, not to mention the high probability of an error on my part.
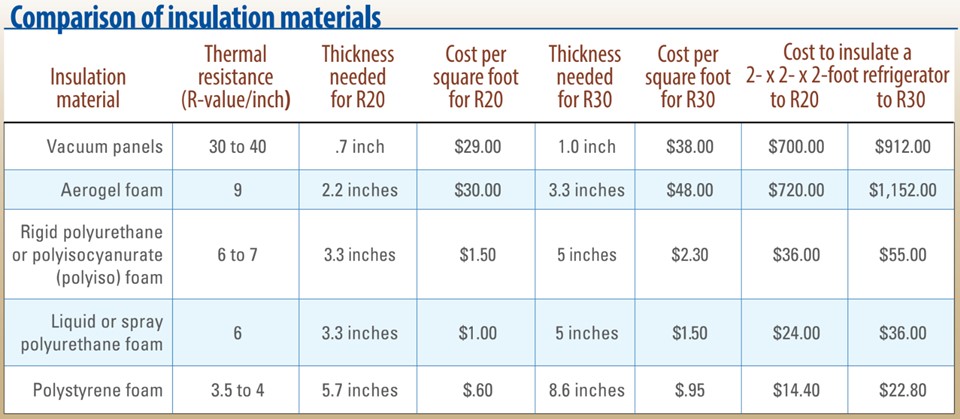
I chose to use rigid polyurethane sheets. I was able to find a local source for 2.4- x 39- x 30-inch polyurethane panels at a reasonable price. A double thickness of these panels should result in a thermal resistance of about R33. Even if, after 15 years, the polyurethane were to lose 50 percent its initial thermal resistance, its R-value would still be equal to or greater than that of the equivalent thickness of polystyrene over the same period.
Installing the insulation was straightforward. I cut each section of the rigid foam to size and installed it against the plastic liner on the interior of the box, tacking it in place with a small dab of hot-melt adhesive. I then cut the sections for the second layer of foam, making sure to stagger the joints, and installed these sections, using hot-melt adhesive as necessary.
The box
I built the interior box from 1⁄2-inch marine plywood with plastic laminate bonded to the inside surfaces. I started by cutting the plywood sides, top, and bottom, and assembled the box using small dabs of hot-melt adhesive to hold it together temporarily. Once I was happy with the fit, I disassembled the parts and cut the openings for the front access hatch and small cutouts in the corners for routing the copper tubing and electrical wiring. Then I laid the plywood pieces flat and bonded the laminate to each section with contact adhesive. Using my handheld router with a laminate-trimmer bit, I trimmed the laminate flush with the edges of the plywood.
Next, I re-assembled the sides and bottom of the box, again tacking the plywood pieces together with hot-melt adhesive. I used epoxy and glass cloth to seal and bond all the outside edges of the box, and sealed the entire exterior of the box with two coats of epoxy.
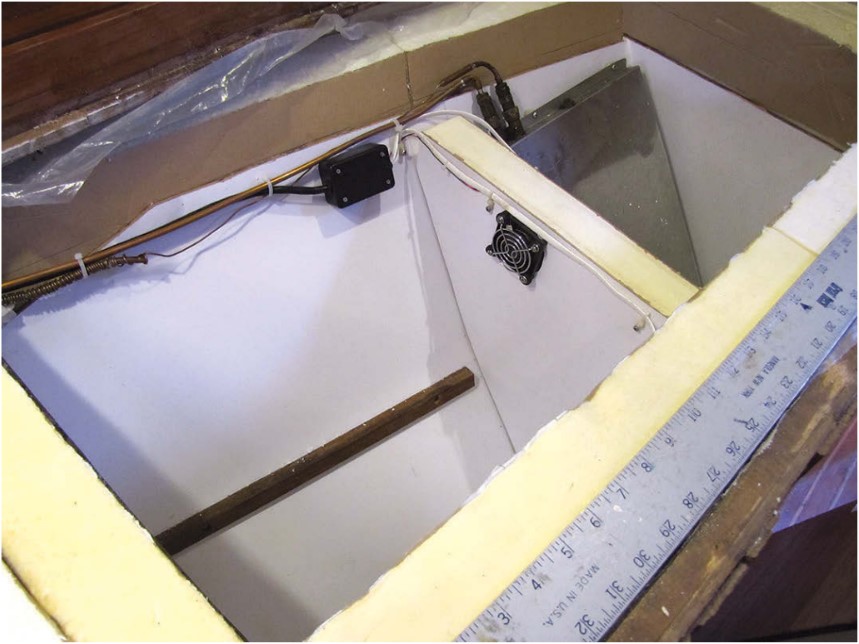
I made an insulated panel to separate the freezer section of the box, which would house the cold plate, from the refrigerator section. To make the panel, I cut a single thickness of foam to size and bonded laminate to both sides. I cut a circular hole in the panel for mounting a small computer fan. The fan would be temperature-controlled to blow cold air from the freezer into the refrigerator section as needed. Warm air would return to the freezer side of the box through a small opening in the top corner of the panel.
I slid the completed panel into place and applied a bead of white silicone adhesive to its edges on both sides and to all the interior corners of the box. I used a wet finger to remove any excess adhesive and to smooth the bead before it set.
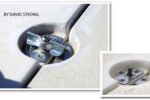
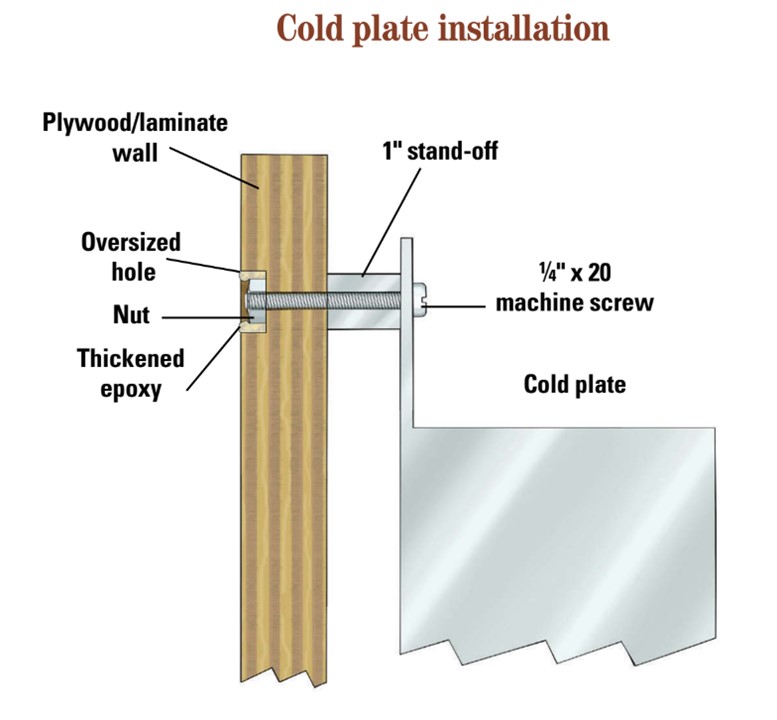
My next step was to mount the cold plate to the inside of the freezer section. I marked the hole locations and drilled the four mounting holes. Because there might come a time when I will need to remove the cold plate, I secured the nuts to the outside of the box with epoxy and used standoffs and screws to mount the cold plate (see “Cold plate installation”, below).
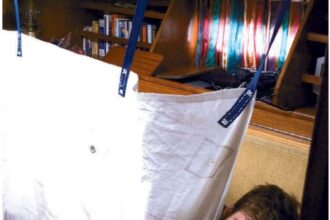
Once everything was complete, I lowered the box into the insulation. Getting all aspects of the box just right required lowering it into and removing it from the insulation several times, and it was quite difficult to get a grip on the box after it was in place. Don Casey suggests taping two long lengths of 50- to 75-pound fishing line underneath and up the sides of the completed box before putting it in place, to make it easier to pull the box back out. This worked well.
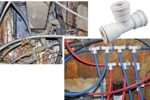
Copper tubing and charging
I routed the copper tubing between the condensing unit and the cold plate. As noted, I had kinked a section of the tubing while removing it. Now was the time to cut out the kink and splice the tubing. I used a short section of copper tubing one size larger for the splice. Since everything had been open to room air, allowing water vapor to enter the system, I also soldered a new dryer in place.
The next step was to pressure-check the system. Over the years, I have gathered a fairly complete set of tools and supplies for repairing our refrigerator/freezer in places far from a professional technician. I used nitrogen gas to pressurize the system to 100 psi. Nitrogen is preferable to room air as it has a very low water content and is available in disposable bottles. I checked for leaks by brushing each connection with a solution of water and dishwashing detergent, knowing that any leak would generate soap bubbles.
When I was sure the system was not leaking, I began the process of evacuating the system and removing any water. I used the old-fashioned low-tech triple-evacuation method. While it takes considerably longer than other methods, it is just as effective and requires a much smaller investment in equipment. When done, I pumped the system down one last time and recharged it with 134a refrigerant.
Electrical wiring
I routed the wiring for the temperature sensors in the freezer and refrigeration compartments and for the spillover fan. I ran the wires along the top of the compartments, securing them with cable ties as necessary.
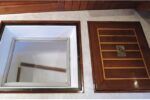
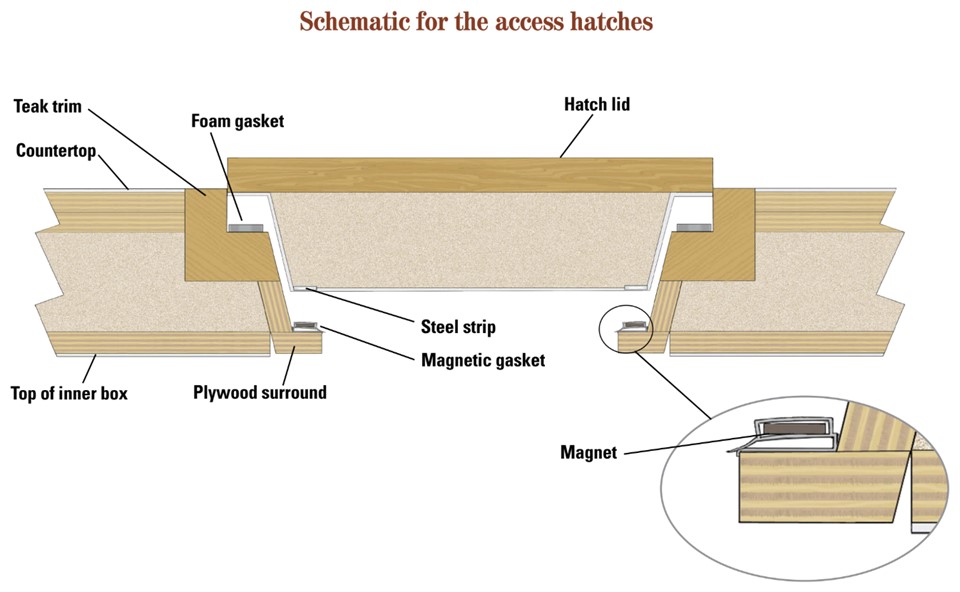
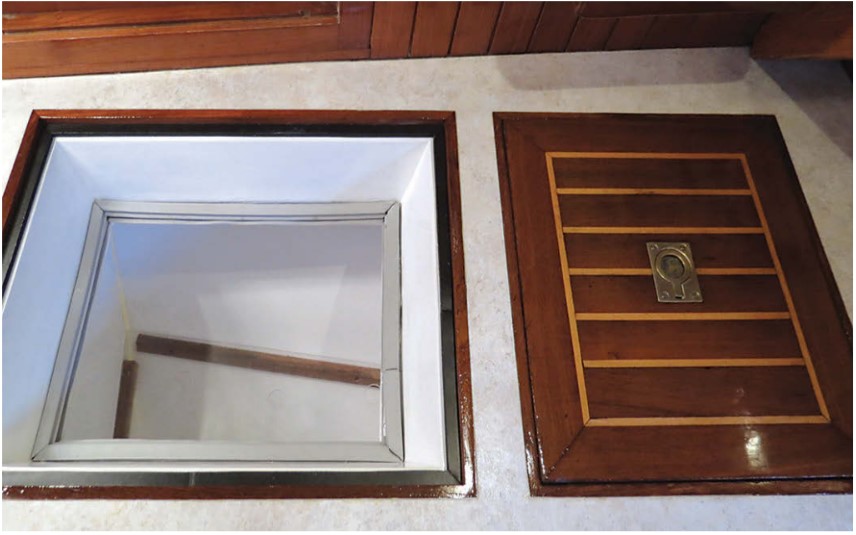
The hatches
The refrigeration compartment had a shelf that divided the compartment into two sections. We stored most of our food in the upper section and bottles and cans in the lower section. This necessitated having an access hatch in the side as well as one in the countertop. The freezer had one access hatch in the top. Each hatch consisted of 4 inches of rigid polyurethane encapsulated in fiberglass with a teak exterior.
To build new hatches, I started with the teak exteriors salvaged from the original hatches. I used a hacksaw blade and sandpaper to shape the foam to the correct size and epoxied it to the underside of the teak. Then I epoxied two layers of glass cloth to the foam using the technique described earlier. I faired it using an epoxy-based fairing compound and, once it was smooth, applied several coats of primer, sanding between layers to make the surface absolutely perfect. Finally, I rolled and tipped three coats of a good marine enamel onto them. It was a lot of work but the end result was quite nice.
I constructed the interior surface that mates with the hatch from plywood epoxied to a teak trim piece I salvaged from the original hatch. I filled, faired, and painted it in the same manner as the hatch.
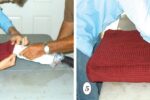
Each hatch is double-sealed. The upper seal is a rectangular gasket of soft foam. The lower seal is a gasket with an embedded magnetic strip, like a refrigerator door gasket, and a mating steel strip I embedded in the bottom of the hatch. I cut the gasket material to size and attached it to the hatches using contact adhesive. I encapsulated the steel strip in epoxy and attached it to the mating surface.
Countertop
I made our countertop from 3⁄4-inch plywood and laminate. I cut the plywood to size, cut openings for the hatches and, once I was happy with the fit, glued the laminate to the plywood with contact adhesive. After trimming the laminate, I flipped the countertop over and attached the interior mating surfaces for the hatches to the underside.
I treated the underside of the countertop to two layers of epoxy and glass cloth, a layer of reflective foil, and a plastic vapor barrier just as I had done for the enclosure walls. I stopped the foil 2 inches from the edges and, again, left enough plastic vapor barrier exposed so I could fold it underneath. That left a nice bonding surface around the countertop perimeter. I cut the rigid polyurethane to fit inside the box insulation and around the hatches.
Once I was convinced everything fit together, I completed the interior box by bonding the top to the sides. After the epoxy set, I used a can of expanding polyurethane foam to fill the opening in the side of the box that was used to route the copper tubing and wires, as well as a few small gaps in the rigid foam. I then laid the foam pieces for the top in place.
Now came the final step. I bonded the countertop to the top edges of the cavern perimeter with thickened epoxy, using weights to hold the top in place until the epoxy kicked.
Finishing
I was able to repair the old teak trim pieces and reuse them to finish the edges of the countertop. I attached them with screws and covered the screw heads with teak bungs.
I refinished all the teak with 12 coats of Epifanes, my varnish of choice for interior teak. As long as I was at it, I refreshed the varnish in the rest of the galley and redid the galley sole.
What I’d do differently
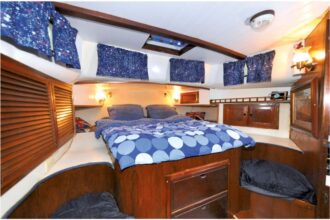
In general, I am happy with the results. The insulation is far superior to the original and the freezer actually gets cold enough to freeze ice cream in a warm climate, something it wasn’t able to manage before. If I were to do it again, however, I would do several things differently.
Silica aerogel wasn’t readily available when I began this project and vacuum insulation panels were new and untested. If I were to do the project today, I think I would use a combination of aerogel and polyurethane foam, at least for the top and the hatches. The added cost might be worth the gain in interior space. I’m not sure I’m quite ready to trust the VIPs yet.
I would put the gaskets on the hatches rather than on the mating surfaces. We’ve found that spills on the countertop have a tendency to run down onto the gaskets, and it’s difficult to keep them clean.
I used a thin steel strip embedded in epoxy to attract the magnet in the gasket and make an airtight seal. The epoxy did not prevent the steel from rusting. I think I would paint the steel first, then embed it in the epoxy.
Finally, I would construct the refrigerator section differently and eliminate the large hatch on the side. It took a lot of time and effort to construct the hatch and we rarely use it. Opening it lets most of the cold air out of the refrigerator section.
Insulation choices
Insulation materials range from the exotic to the mundane, and the more effective the insulation, the more expensive it is. One trade-off is the gain in cool-box volume achievable with thinner but more expensive panels.
Aerogel insulation – Silica aerogel is an extremely low-density foam made from a silica gel. Only 3 percent of its volume is solid, while the remaining 97 percent is composed of tiny nanopores of air. Since the air cannot move, heat transfer by convection and by conduction is very low. Commercial insulation made from aerogel has a thermal-resistance (R-value) of about R9 per inch of insulation. Its drawbacks are that it is difficult to cut, working with it produces a lot of dust, and it is very expensive.
Vacuum insulation panels (VIPs) – Several companies have attempted to develop insulation panels that successfully incorporate a vacuum, the perfect insulator. These panels encase a core material inside a membrane. Air is pumped out until the core is at a near total vacuum, and the panel is sealed. Manufacturers of these panels claim that their products have insulation ratings of R30 to R50 per inch.
Before its demise, the Glacier Bay company specialized in refrigeration systems for boats and offered a type of aerogel as the core for its VIPs. The panels were expensive.
Rparts makes its own vacuum panels using a silica-based low-density core much like aerogel. These panels can be encapsulated in fiberglass-reinforced plastic (FRP), making them less fragile. Rparts offers a 20-year warranty on its FRP-encased panels. While priced comparatively lower than Glacier Bay’s products were, these panels are also quite costly.
Aside from the cost, vacuum technology has two potential drawbacks. One is the possibility that the panels will, over time, lose their vacuum, due to molecules of air passing through the membrane or from out-gassing of the core material. The other drawback is that the panels cannot be cut or drilled; they must be ordered to the correct size, including any cutouts for tubing or wiring. If custom-sized panels are needed, expect a 6- to 10-week delivery time.
Rigid polyurethane and polyisocyanurate (polyiso) foam insulation – Polyurethane and polyiso foam insulation have almost identical properties and thermal resistances of R6 to R7 per inch of thickness. Both are produced in rigid sheets, are often laminated with aluminum foil, and are used extensively in the building industry. The foam sheets are easy to cut and shape. Critics claim that the thermal resistance of these materials declines with age and that the useful life is around 15 years.
Liquid polyurethane foam – Liquid polyurethane foam insulation comes as either a two-part liquid or in aerosol cans. Once applied, it expands to two to 20 times its initial volume. It’s great for filling gaps and the closed-cell version has, in theory, the same insulation characteristics as the equivalent rigid polyurethane foam sheets. In practice, however, I am skeptical. Our boat’s fridge/freezer was insulated with this material. It became saturated and pretty much useless sometime between its installation and 14 years later when we bought her. (See also “Two-part Polyurethane Foam,” below)
Polystyrene – Polystyrene insulation has been used in the building trade for decades. It has a thermal resistance of around R3 to R4 per inch of thickness, is readily available in most building supply stores, and is less expensive than polyurethane foam. It is also easy to cut and shape. Proponents claim it loses its thermal resistance more slowly than polyurethane foam insulation.
Fiberglassing materials
- Epoxy: West System Epoxy with 206 Slow Hardener
- Glass cloth: 10-ounce fiberglass cloth, enough for two layers
- Aluminum foil: heavy duty, 75-square-foot roll
- Plastic lining: 6-mil plastic sheeting
- Disposable 2-inch chip brushes
- Foam roller covers for epoxy
- Plastic mixing bowls: plastic ice cream or yogurt containers (they can be reused by flexing the sides of the container and peeling off the cured epoxy)
- Plastic squeegee
- Mixing sticks
- Disposable gloves
- Open container of alcohol (no, not that kind!)
- Rags to clean up drips
Two-part polyurethane foam — Jerry Powlas
Why not use two-part polyurethane foam for all the insulation? In my 29-year career as a refrigeration engineer, the several companies I worked for made several million refrigerators, freezers, and display cabinets with two-part polyurethane foam insulation and most of those products will enjoy excellent insulating properties throughout their long lives.
Most of the units will be good, some will not. Two-part polyurethane insulation is said by some sources to be a closed-cell foam and, for the most part, the cells are closed . . . but some are not. To make “good foam,” the structures should be preheated in an oven and the measured “shots” of foam should be applied to various openings in the cabinets while the cabinets are restrained in a mold that supports all the walls and floor (doors made separately). The mold is necessary because as the foam expands it applies considerable force to the walls. Foam not expanded under pressure does not have anywhere near the structural and insulating value.
Finally, all the open exposed edges of the foam must be sealed so water does not enter the foam and migrate through the cells that are not closed. One company I worked for had a full-time engineer who monitored the foaming process. Others I worked for should have had an engineer doing that and some paid the price for not having this process closely monitored.
Short answer: it is possible to use two-part polyurethane foam as insulation for a refrigerated cabinet, but the process required is probably beyond the ability and means of most individuals (and small manufacturing operations) to execute effectively.
David Lynn and his wife, Marcie, have been living aboard Nine of Cups, their 1986 Liberty 458 cutter, since purchasing her in Kemah, Texas, in 2000. In 16 years they have sailed her nearly 90,000 nautical miles and visited some of the more remote places in the world in their ever-so-slow world circumnavigation. Nine of Cups and crew returned to U.S. waters in April of this year and spent some of the summer cruising Chesapeake Bay. Find the Lynns on their website at www.nineofcups.com or their blog at www.justalittlefurther.com.
Thank you to Sailrite Enterprises, Inc., for providing free access to back issues of Good Old Boat through intellectual property rights. Sailrite.com