It’s simple, really: Just cut a bit off, add a bit on
Issue 44: Sept/Oct 2005
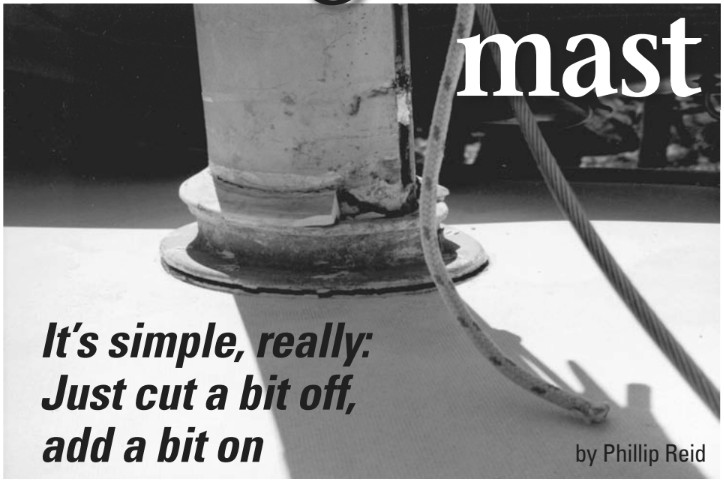
WHEN WE HAD OUR BOAT SURVEYED before purchase, the surveyor noted “yellow moisture readings” on the moisture meter at the mast partners. The mast collar had pulled away from the deck, leaving a gap of broken caulk. At the mast butt on the keel, he found extensive corrosion damage, where the aluminum mast had sat in a pool of salty bilge water (kept higher than normal by the leaking mast collar) for who knows how long. He said we weren’t in danger of a catastrophic failure, but the mast butt would need to be sawed off at some point. He was matter-of-fact about it, but it sounded like an awfully big deal at the time . . . and wouldn’t it screw up my rig to have my mast a few inches shorter?
When I got around to facing it three years later, I did the work myself, I did a fine job, my rig’s the same height, and it cost me very little.
There’s a chance that any older keel-stepped mast is corroded at the butt, but chances are it’s no big deal. You pull the mast, saw off a few inches, and make a riser to compensate for the lost mast height. Then you screw the riser to the keel and the mast step to the riser. The mast is no longer sitting in bilge water. If you have leaks and some water penetration of the deck at the partners, you address those at the same time. When you put it all back together, your boat’s probably better than new.
Before pulling the mast, make a list of everything you want to do to the rig and to mast-mounted equipment while the mast’s down, and budget the time and money for the entire project. If the standing rigging’s due for inspection, this is a good time to do it. I even pulled all the chainplates for inspection, cleaning, and rebedding, since I had no idea what kind of shape they were in.
Pulling the mast
If your mast butt’s badly corroded, the mast and step may be corroded together. Locate a supplier for a replacement step casting before you pull the mast, in case the step casting is too far gone to repair. Also make sure you’ve located the exact position of the step casting before the mast is pulled, in case the step bolts are so corroded that the step casting comes up with the mast. The position of the mast — up and down, fore and aft, and side to side — must be the same when the repairs are done as it was when the boat was built. Mark things, drill pilot holes through mating parts, make jigs. Do whatever it takes to position the mast as it was before.
When the mast is lifted, you should be below to keep the butt of the mast from scraping the bulkheads or other interior surfaces and to tend to the electrical wires coming out of the mast butt. Have some rags handy to forestall a potential mess. Have a hammer handy too. If the casting sticks in the mast tube, you will have to tell the lift operator to stop. If you can’t pull the step off, you’ll have to smack it off with the hammer. It may break, hence my advice to locate a replacement source in advance.
Repairing the mast partners
Even if you don’t have access to a moisture meter and there’s no external evidence of a problem, you’ll be able to tell pretty quickly what kind of shape the mast partners are in once the mast is out. Many fiberglass production boats of the 1960s, ’70s, and ’80s have balsa-cored decks. Some builders used marine plywood instead of balsa in high-stress areas, especially anywhere something passed through the deck. Your deck sandwich probably consists a top fiberglass laminate (with non-skid gelcoat or paint), wood core, bottom fiberglass laminate, a thin layer of adhesive (or gap), and finally the headliner.
What many builders didn’t do was seal the edges of the opening to prevent leaks from working into the deck core. Over a few decades, there’s probably been some water intrusion. If the boat’s been reasonably well cared for, it probably isn’t anything major — a few inches of penetration all around — and it’s pretty straightforward to fix.
If the boat was seriously neglected, there may be extensive rot in the deck core, and this may require a more extensive repair than the one described here. If you can’t gouge out the wet core back to dry material by working through the mast hole, you have a much bigger problem. Tap the deck with a plastic hammer to see how much wet core there is. Good core has a sharp sound; wet core makes a thud. The two sounds are quite different. You’ll know.
If, like me, you are looking at yellow readings on a moisture meter and you know your mast collar has been leaking, but without softness or bulging above or below, you’re probably looking at gouging out some rotted core to a depth of a few inches, cleaning out the void, and putting in new material. This should make (at the risk of getting too technical) one heckuva strong mast partner.
The whole scenario
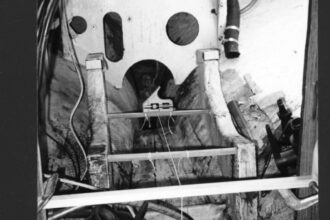
Here’s the whole mast-partner scenario: a cast-aluminum collar fits around the mast on deck. It may or may not have a flange that goes through the opening and it may or may not have a lip for a mast boot to fit around. The mast passes through a cutout whose edges are not sealed. The only thing keeping water out of the deck is whatever mast boots have been used over the years. Underneath against the overhead, you may find a trim piece (teak-veneer plywood, in my case) that fits around the mast. Over the years, water may have gotten well into the deck core, rotting some of it around the opening. It may have rotted out the interior teak trim piece (if present) and stained liners. It’s possible that water could have damaged the tops of bulkheads. Inspect any wood in the general vicinity.
Here’s what needs to happen to this setup, if it has become waterlogged: Once it’s all taken apart and cleaned up, you may want to prime, fair, and paint the aluminum collar, then clean out the rot and fill the void and screw holes with thickened epoxy. Use the rotten interior trim piece as a template to make a new one out of teak, the hardwood of your choice, StarBoard, or exterior-grade plywood saturated in epoxy and painted with two-part polyurethane (my choice). Drill through the epoxy and interior piece so you can through-bolt everything from the aluminum collar down, bed the aluminum collar and the interior piece in sealant, through-bolt all of it with stainless bolts bedded in sealant, and end up with mast partners from hell. Whatever might keep you lying awake in your bunk worrying in the future, it won’t be your mast partners.
Sealing the edge of the hole
With a flat-bladed screwdriver or chisel, scrape out all the wet core. If you are finding soft, rotten, easily-removed core material as far back as you can reach, you are going to need to take a different repair approach, perhaps involving the injection of liquid epoxy through the upper laminate or removal and replacement of the top deck laminate and core around the partner. If the water has migrated that far, it is a much bigger project.
If there’s loose, crumbling adhesive between the headliner and bottom deck laminate, chip it out with a knife blade or the edge of a screwdriver. You’ll pack epoxy in there too. The safest way to dry the remaining core that is not rotted or delaminated is with low temperature heat and air circulation. Acetone will help water flow through the core but in all directions, and it is extremely flammable. Drying will probably take several days. Once the core is dry, drill out the screw and bolt holes to twice the diameter of the fasteners and clean out the void.
Wearing safety glasses and gloves, brush epoxy on the edge of the exposed core to seal it. Make up plywood pieces to fit in the void where the core has been removed. These should be a good fit with the remaining core and each other. Remember to leave at least 1⁄4 inch between the front edges of the plywood and the opening; the edge of the finished opening needs to be filled epoxy, not plywood.
Mix up thickened epoxy to fill the gaps. Thicken it to the consistency of peanut butter. Use the proper hardener for the temperature you’re working in. Pack your first batch into a cardboard caulking tube. Whatever you do, don’t forget to put the cap into the end of the tube before loading it into the caulking gun and applying pressure. (Don’t ask.) Jam a piece of clear vinyl tubing over the caulking gun nozzle; this will allow you to get the epoxy into the back of the gap.
Squirt thickened epoxy into the gap, all around. Put in enough to fill the gap between the old core and the new core. Don’t leave voids. A good fit for the new plywood core will help. Coat the plywood all over with unthinned epoxy as you put it in.
Large volumes of uncured epoxy will get too hot as they cure. This damages the epoxy, ruining its properties, and is a fire hazard. Let each small batch get through its exotherm before adding more. You may need to work in stages so the filled epoxy does not “go thermal,” as it surely will if you put too much in at a time. Work in the shade even if you have to rig awnings. Smooth the edge of the hole to knock off peaks, but make sure it completely fills the gap with no indentations. Err on the side of too much; you can grind it off after it cures.
After the epoxy has cured, use a file bit on a drill (a powerful drill works best) and carefully smooth the epoxy at the edge of the opening, making sure to keep the edge vertical.
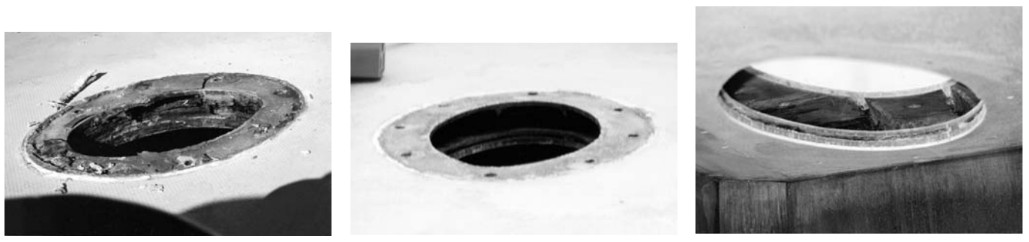
The deck collar assembly
When you’re not on the boat, you can be working on the mast collar and its backing pad. The mast collar is probably aluminum and may be significantly corroded. After I wire-brushed mine down to clean metal, I washed it with acetone, prepped it with a two-part zinc chromate-based self-etching primer wash for aluminum (the marine paint companies make this), faired the pits with epoxy, sanded it smooth, washed it again, and painted it with four coats of two-part linear polyurethane paint. Make sure it’s straight (not bent or warped) before you finish it.
If you already have an interior trim piece under the mast collar, you can use it as a template for your backing pad (or use the piece itself if it’s still strong and intact). If there’s no such piece, use cardboard to make a template.
You’ll want the opening to match the opening in the deck exactly when the piece is through-bolted. To ensure this, put the deck collar in place (after you’ve finished and cleaned up the mast partners) and mark the screw-hole locations exactly on the deck, making sure the deck collar is centered exactly over the opening and doesn’t move while you’re marking. Remove the deck collar and clamp the interior piece or template exactly in place underneath. Drill the holes the correct size for the machine screws or bolts you’re going to use, all the way through the interior piece below. Make sure they’re as straight as you can possibly drill them. Replace the deck collar and check all the screws to make sure they fit. Make sure the interior piece fits exactly — opening and screw holes — before finishing it. The only way to do that is with a complete dry-fit. Once you’re satisfied, over-drill the screw holes in the interior piece, clean out the holes, and fill them with epoxy. After the epoxy cures, re-clamp the piece in place and re-drill the correct size holes from above. Dry-fit it again. Then you’re ready to finish the piece. My interior piece was rotted, so I used it as a template and made a new piece out of plain old exterior-grade plywood saturated in epoxy and painted with two-part linear polyurethane.
Make sure all surfaces are clean, then apply bedding compound to seal everything. Clamp the parts together lightly. Don’t fully tighten until the caulk has started to tack; this helps form a better seal. Smooth out the edge of the caulk where it squeezes out into the opening; you want a flush-walled opening.
The mast butt
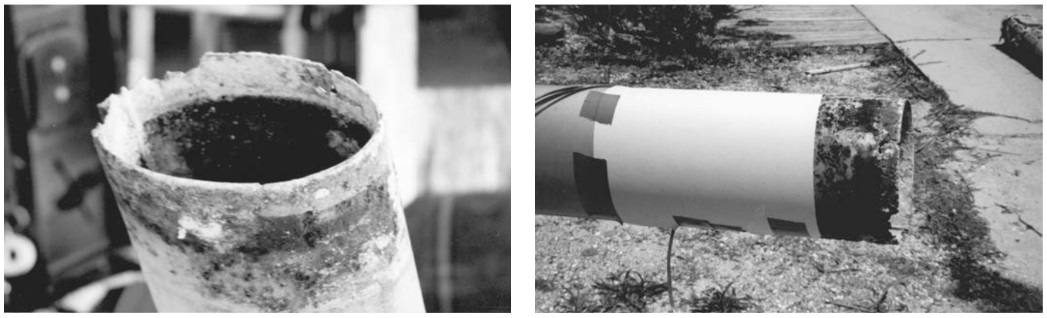
The first thing to do is to examine the mast butt itself. This is much easier when the mast is out of the boat and the butt is dry. Wipe the crud off and examine the metal for severe pitting (large in area and penetrating well into the wall thickness of the metal). On my mast, significant areas of metal had been completely eaten away. Establish how far up the mast the bad corrosion goes. Minor superficial pitting that looks like pockmarks doesn’t count. Unless your bilge is really deep, you should get away with cutting off just a few inches. But before you cut, figure out what you’re going to use for a riser. On my Pearson 28, 4 inches seemed to be the rule, which is why I used a scrap of 1⁄4-inch x 4-inch-square aluminum tubing.
Stuff like this is available from scrap metal (and new metal) dealers who may have small pieces lying around. Scrap metal is really cheap. New metal dealers may be willing to cut you a piece. Other owners of your type of boat are a gold mine for leads on stuff like this. If you can’t find or can’t use a piece of square tubing, you can have a metal shop put something together for you for $50 or so. You don’t need stainless steel or bronze; aluminum is fine. If you have something custom made, an I-shaped structure will work.
Use the step casting base as a template. An alternate take on the I-shaped riser will work if your step casting is salvageable; clean it up and have the metal shop weld the step casting directly to the vertical piece, eliminating the top plate of the riser (and a welding joint).
If you use tubing, your life will be easier the closer you can match the footprint of the step casting. The surface of the keel may be uneven, and if the footprint of the new riser is wider than the step casting, it may not sit down completely, causing your mast to be just a little bit taller and your stays and/or shrouds to be just a little bit shorter, which is irritating and expensive to remedy.
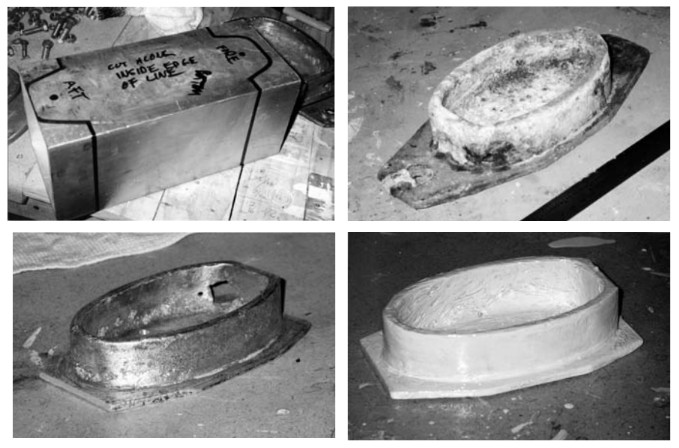
Cutting off the mast butt
The principle is simple: cut off exactly the same amount of mast butt as the height of the riser you’re going to use. Measure up from areas of the bottom edge that are still straight and intact. Use the edge of a file folder wrapped around the mast to connect the dots, and tape it in place to use as a guide. You can cut through the mast pretty handily with a good hacksaw with a sharp blade. Be careful to cut it straight. File or sand the cut edge smooth.
Optional, but recommended: clean up the section of the mast that lives below the cabin sole and apply a full aluminum treatment of zinc chromate primer wash, epoxy barrier primer, and two-part polyurethane paint to the area — inside and out — to protect the mast from further corrosion. If you’ve always wanted a painted mast in the cabin, go all the way up to the overhead.
Keel-stepped masts may be stepped in a variety of ways. In some cases, the butt of the mast sits in a casting on the keel. In other cases, the butt of the mast sits in a casting that rests on floors or stringers or both. These may rest on the keel but commonly do not. They attach to the keel sump, or rein- forced area above the keel. If any parts of the structure that supports the mast are made of wood, inspect them for rot, delaminated plywood, or other kinds of failure. If the structure is metal, inspect for corrosion. If any of this structure needs replacement, it must be done with a plan to bring the new surfaces to the same point in space as the old ones so the mast butt will be in the same place. If you designed the new step to be higher than the old one by the amount you cut off the mast, that must also be taken into account. Do not assume that the loading is all compression, straight down. With a keel-stepped mast there is considerable side loading and there can be loading fore and aft, particularly if there is any mast bend in that direction. Study the original mounting for clues to the designer’s intent.
Nice feature
Shims are a nice feature if you can work them in, because you’ll have recourse if the mast needs to be raised or lowered a bit. This may happen if the mast was already short from wearing in the step casting.
In all cases, there should be a direct metal path from the mast to the metal keel. This can be either metal structure or wire. Use at least #8 wire to ground the mast to the keel, unless there is a direct metal structural path for the lightning bolt you hope you never meet. If wire is used, it should make as few bends as possible to reach the keel. Even a partial turn or bend in the wire adds inductive reactance to the circuit in a lightning strike. Any resistance to current flow increases the likelihood of side flashes, which are a danger to the crew.
The moment of truth is when the mast is back on the step and the turn-buckles are reattached. If something is a little off, one or more shrouds or stays aren’t going to go back on. In my case, I had to add an eye-jaw toggle to my headstay. No hanging matter — the mast is straight — but it was irritating and stressful. I think the bottom plate of the riser, a little wider than the step casting, sat up a little higher, which is why I strongly recommend making triple-sure the riser sits exactly the way the step did, even if that means a custom-made, welded, I-shaped riser.
I put in some temporary wedges at the partners, tuned the rig, and used Spartite to chock and seal the mast partners. I covered that with a rubber mast boot and covered that with a Sunbrella mast boot cover. I don’t expect to ever worry about the mast again.
Author’s note: Even when I do a boat project “alone,” I don’t really. Thanks to Michael O, Lou, and Cap’n Ron of the Pearson 28 Forum (www.geocities.com/CptinRn) for getting me started on this, and thanks to Jack for helping me finish it.
Thank you to Sailrite Enterprises, Inc., for providing free access to back issues of Good Old Boat through intellectual property rights. Sailrite.com