Trays organize the upper regions of deep lockers
Issue 111: Nov/Dec 2016
Cavernous lockers are handy when you have something bulky to stash: a spare sail, a sun awning, or a folding grocery cart. But the small stuff I store in large lockers mostly slips down into the darkest recesses, only to be found when I dive in headfirst, making the mess far worse than it was. My solution — rather than banning all clutter from the boat — was to make the available space better fit the stuff. I didn’t accomplish this by dividing up the space so it can never again hold anything large, I added topper trays, like those found in the traditional seaman’s chest. Best of all, to add topper trays, I did not have to cut or drill into the boat.
Specific storage problems beg for custom solutions. I started by carefully considering what items I wanted to make more accessible, where they should be stored, and which of them should be grouped together. Once I knew what I wanted to stow and where, I determined the dimensions each tray needed to be.
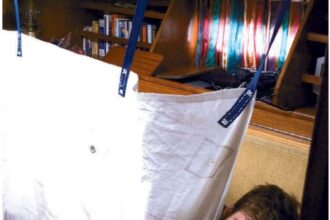
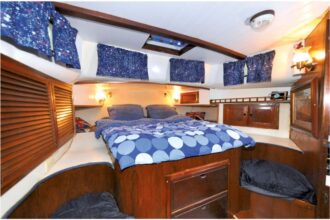
Under-the-bunk trays – Bedding and clothing would be stored in the sleeping cabin in trays as deep as a typical drawer in a chest of drawers. For the last 8 years, the under-the-bunk trays I made to fit atop these lockers have kept extra bedding dry and easy to get to.
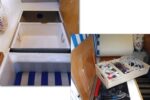
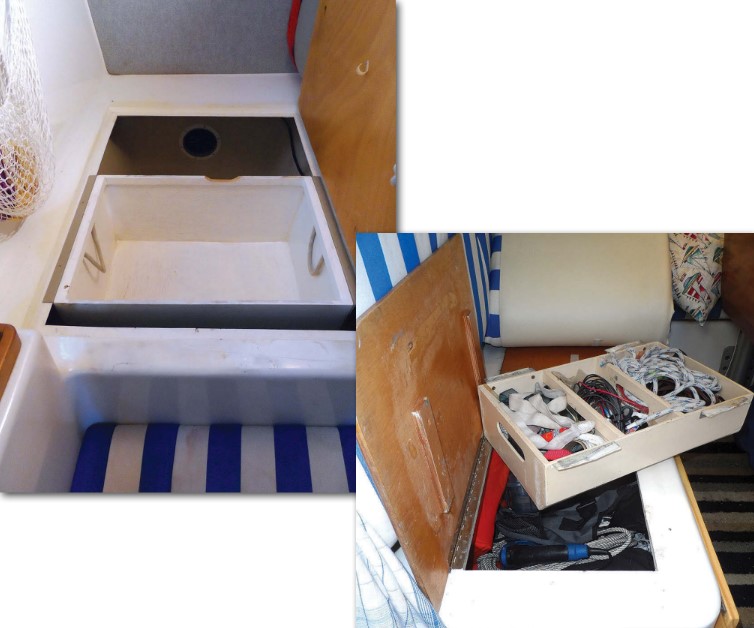
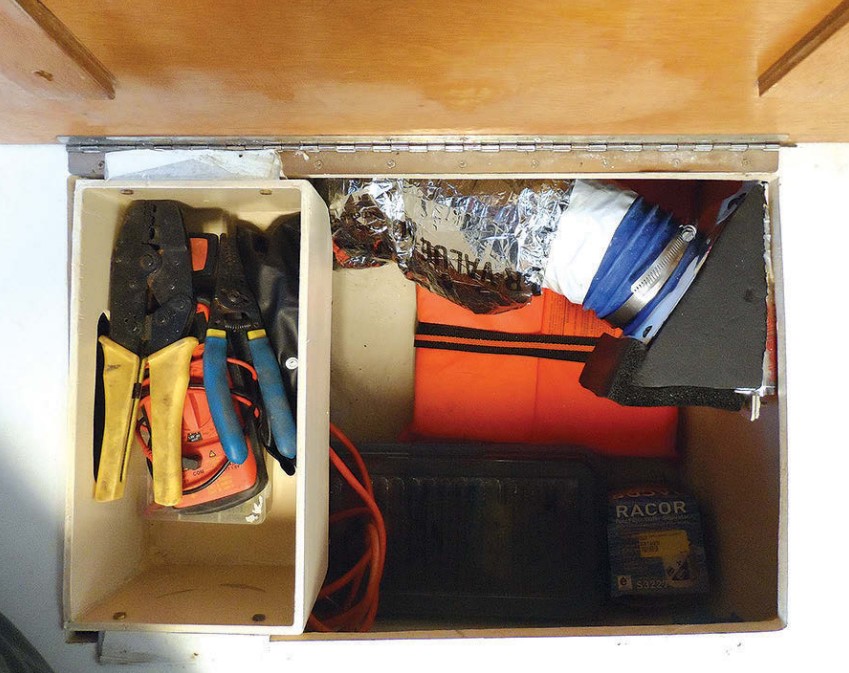
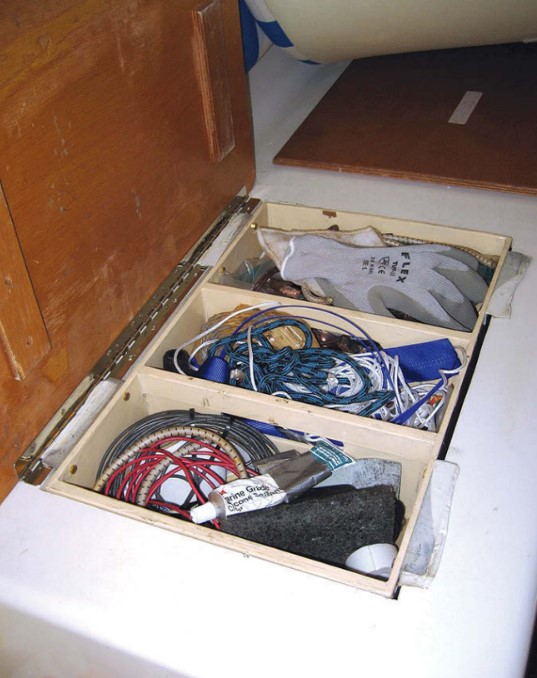
Under-the-seat trays – Much is permanently lost in lockers under the saloon seats, some of which house air conditioning ducts and plumbing and are unsuitable for storing heavy boxes or loose parts that could roll around. One of my under-the-seat trays contains only electrical parts and electrical tools and I’m able to carry it around the boat as a toolbox — quite handy.
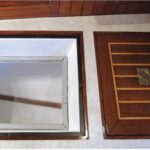
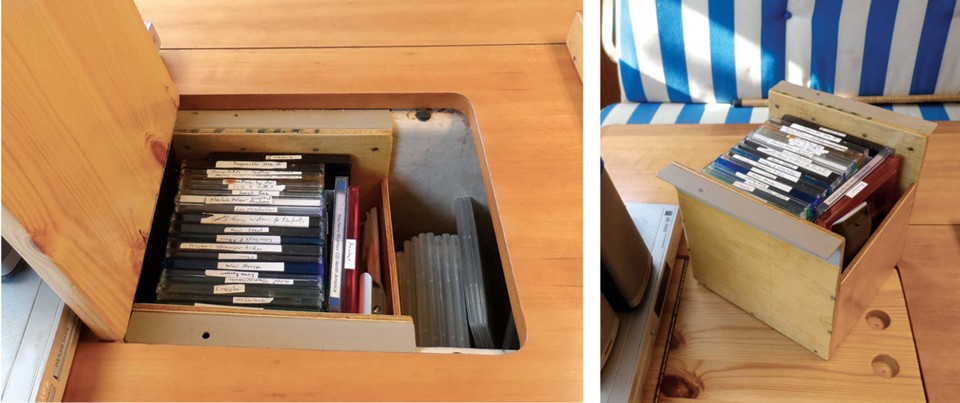
Saloon table tray – The deep and narrow center storage area in the saloon table was hopelessly cluttered. For this locker, I built a tray specifically to stow DVDs and the remote, dimensioned to fit the DVD cases on-edge for easy viewing, and with the tray sides cut down so the DVDs can be easily grasped and removed.
Construction
I built my trays light, in part because weight is only useful in steamrollers but mostly because I know I’m more likely to use them if they are easy to heft. I fabricated all my trays from thin plywood and epoxy, using a few wire brads to hold things in place while the epoxy cured. As a result, the trays weigh ounces rather than pounds. Because all of the spaces in which I added trays already had plywood covers, I found no need to build separate lids for my trays.
Nominal 1⁄4-inch plywood, either hardwood or underlayment, is sufficiently strong and stiff for making the trays. For each tray, I first cut rectangles to create the bottom and the sides needed to make a box of the desired depth. I made their length and breadth about 3⁄8-inch smaller than the opening at the top of the respective storage space (this margin allows for the sliders that support them and for comfortable wiggle room).
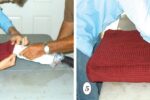
After dry-fitting the plywood pieces, I coated the edges with thickened epoxy (West System 105/205 resin and hardener thickened to a peanut butter consistency with fumed silica), and then tacked the edges of the box together with 3⁄4-inch wire brads every 3 to 4 inches. Although the brads lack the strength to hold such a tray together in use, they provide the firm, even pressure needed to hold the shape while the epoxy cures, thus eliminating the need for numerous large clamps.
The 1⁄4-inch plywood is strong enough to make a box, but lacks the beef on the edges needed to accept strong corner fastenings. The traditional solution is to add cleats in each corner, but I knew this would add unacceptable weight to a tray that should slide and might need to be lifted out. Instead, I bonded the tray corners with fillets of thickened epoxy, using my gloved finger to smooth the epoxy to a 1⁄4-inch radius. I used the same thickened epoxy to fair the outside corners, hiding chips and tiny misalignments.
After all the epoxy had cured, I sanded and faired the joints to attain the degree of finish I wanted. I could have coated the entire box with epoxy, but I decided painting was sufficient for this interior application. Before painting, I scrubbed the epoxy surfaces with TSP (trisodium phosphate) and warm water to remove any amine blush (the paint would otherwise never dry). I used four coats of Interlux Brightside polyurethane enamel.
Dividers
For the trays that fit over the lockers beneath the saloon seating, I had specific tool stowage in mind. I fitted dividers in these trays to organize the space (bearing in mind that too many dividers restrict storage of larger items). I used the same plywood-and-epoxy construction method to create the dividers.
Reinforcement
The trays for stowing bedding are quite large, so I reinforced the upper edges of the sides to stiffen them and prevent them from pulling inward under load. After building the tray box, and after the epoxy set (but before it cured, to avoid the need to remove amine blush and to sand), I used thickened epoxy to bond 1⁄2- x 1-inch strips of plywood to the longer sides and 1⁄4-inch strips to the shorter ends, tapping in a few brads to hold them in place while the epoxy cured. The trays with dividers did not need additional reinforcement as they were shallower and the dividers provide considerable stiffening.
Handles
For the large trays I built to stow bedding, I installed rope handles for easy lifting. But I seldom use the handles as I can slide the trays out of the way when I need to access the depths beneath. For the trays that fit over the lockers beneath the saloon seating, instead of making rope handles, I conserved space by cutting handholds into the ends. I used a hole saw to drill two 1-inch holes set on 3-inch centers and made the straight connecting cuts with an oscillating multi-tool.
Sliders
Next, I installed sliders on on two sides of each tray. These allow me to hang the trays from the lip of the locker opening. For the under-the-berth bedding trays and the DVD tray in the saloon table, I created sliders using thin PVC angle cut from the outside corner trim of household vinyl siding. In both cases, the plastic angle is sufficient because I am unlikely to place my body weight on these suspended trays and I am not using them to stow anything heavy. When using the plastic angle as a slider, I attached it along the full length of the tray. For the trays that fit over the lockers beneath the saloon seating, in which I stow heavier items, I made sliders from 3⁄4- x 1⁄16-inch aluminum angle. While unquestionably more durable, the aluminum angle can scratch the gelcoat. To prevent that, I covered these sliders with athletic tape.
On trays with reinforcement added to the sides, I attached the plastic angle sliders with countersunk #6 x 1⁄2-inch brass screws every 6 inches. The sides of the trays that are not reinforced are too thin to screw into, so I attached the aluminum angle with countersunk flathead #8 x 1⁄2-inch bolts.
The aluminum angle sliders attached to the trays beneath the saloon seating do cause the plywood covers to be proud by about 1⁄16 of an inch, but under a seat cushion this isn’t noticeable. The thickness of the plastic sliders on the DVD stowage tray would ordinarily cause the saloon table filler to sit a fraction of an inch too high, but the original filler board was supported on felt pads, and removing the pads from the area beneath the tray provided the required clearance for the sliders. I think if I’d not had the option to remove the pads, I could have solved the problem by cutting recesses in either the filler or the cabinet, or by supporting the tray on narrow cleats lower in the locker.
Odd-shaped locker openings
Locations where stowage lockers don’t have parallel sides, such as under a V-berth, might require an imaginative approach. The trays could be made to fit the existing supports, or the supports could be modified to acccept trays with parallel sides.
Living with topper trays
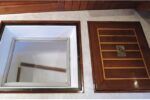
After using the topper trays over a period of time, I got tired, every time I accessed a tray, of removing the large heavy plywood locker covers and then having to find a place to set them aside. Because the cabin is dry, I bought inexpensive piano hinges at Home Depot, lightly coated them with Corrosion Block anti-corrosion spray, and attached them so the plywood covers are easy to lift in place. I have yet to see a spot of rust on these hinges and access to the topper trays is much easier.
The week before I wrote this article, I removed all of the saloon trays to give me access to install air conditioning. When the project was finished, I replaced the trays just as quickly as I’d removed them. When one tray needed to be made smaller to allow space for a duct, it was easy to cut the tray back to the first divider, refinish it, and drop it back in place. Imagine the hassle a fixed installation would have presented: demolition, head scratching, rebuilding, refinishing, and all the associated stress.
I built and finished all of these trays at home during otherwise wasted evenings. It’s great that they can be removed in seconds to allow access for maintenance. And because the trays have tight lids when the locker covers are in place, no bits and pieces stowed in them have rolled into the inaccessible corners of deep lockers while under sail. Much better.
Atop-the-table tray
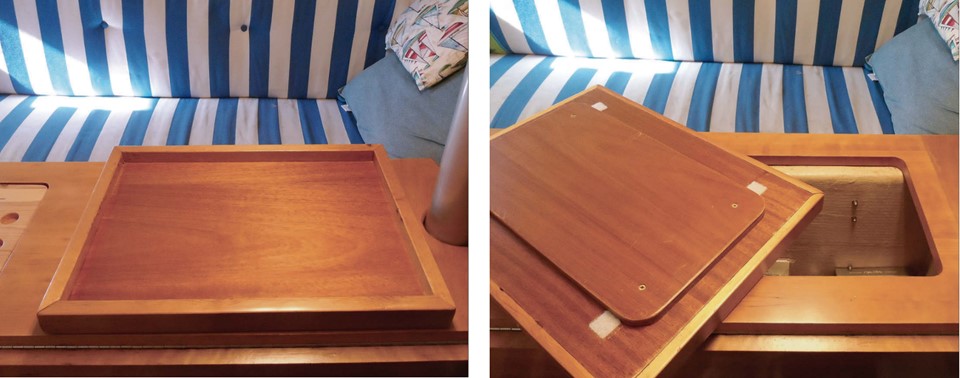
Every time we prepared for sea, we’d have to put away all of the bits and pieces that had accumulated on the saloon table; there was no fiddle to prevent them from sliding off. Adding a fiddle would have made the table less comfortable in port and created lumps under the cushions when it was converted to a berth. Instead, I attached a fiddled tray to a new cover I made for an existing storage locker in the tabletop. It’s easy to lift out when we want to access the locker and we can stow it and replace it with the original plain cover when we convert the table to a berth. We have even used this fiddled lid as a serving tray.
I used similar methods to construct the table tray as I did the topper trays, but because this tray is exposed to view, I gave greater attention to fit and finish when building it. I used 1⁄4-inch plywood for the base (a rectangle about 5 inches longer in each dimension than the locker cover), and framed it with 1 1⁄4- x 3⁄4-inch pine. I mitered the corners of the frame and cut a 3/8-inch x 1⁄4-inch rabbet in the pine edges to bring the bottoms flush with the plywood rectangle. This gives my tray 1-inch-high fiddles, which are sufficient for my catamaran (taller fiddles may be more suitable for monohulls). I bonded the plywood rectangle to the pine with thickened epoxy, tacked the pine to the rectangle from underneath with wire brads, and clamped everything together.
I cut a board from pine lumber to match the size of the original cover and screwed and glued it to the underside of the tray. I attached felt tabs to the exposed underside of the tray to prevent it from scratching the table. I could have attached the tray to the original cover, but I wanted to preserve the original cover for a future owner, and we need a plain panel when the table is converted to a berth.
I finished the tray with 4 coats of semi-gloss varnish to match the rest of the woodwork, lightly scuffing between coats with 400-grit paper.
The same effect could be achieved with mimimal carpentry — just add a few felt pads to the underside of a store-bought serving tray and fasten it to a locker cover with screws.
Drew Frye cruises Chesapeake Bay and the mid-Atlantic coast aboard his 34-foot catamaran Shoal Survivor, searching for out-of-the-way corners known only by locals. A chemical engineer by training, 40-year climber and 30-year sailor by inclination, he brings a broad mix of experiences to solving boating problems and writing about his solutions.
Thank you to Sailrite Enterprises, Inc., for providing free access to back issues of Good Old Boat through intellectual property rights. Sailrite.com