Worldwide connections give a 50-year-old sailboat a new lease on life
Issue 123: Nov/Dec 2018
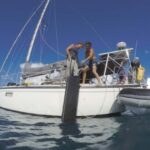
It’s midafternoon in late August 2015, and the wind is howling at a near gale. We’d put two deep reefs in our mainsail hours before, and our smallest headsail is set and standing as rigid as a sheet of tin. Rita is screaming along, at least to the degree that a 26-foot Danish-built sloop from 1968 can scream along. My wife, Lene, is at the helm and we’re both amazed at how little effort it takes her to keep Rita steady and on course. The deck is awash, and that’s exhilarating . . . except that too much of that deck water is seeping down below, soaking our bedding and cushions and causing the bilge pump to do what bilge pumps are there to do. As it’s late in the Danish summer, we’ll have little if any sunshine to dry things out when we reach port in another hour.
A few days earlier, in a quiet little marina on one of our neighboring islands, I was sipping coffee in the cockpit when a fellow on a rather grand-looking 55-footer alongside looked down and said with a sincere, nostalgic smile, “You know, I can remember back when that was a big boat.”
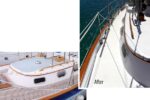
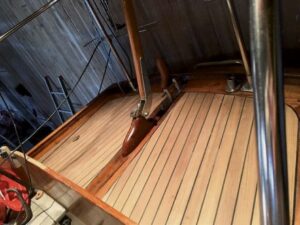
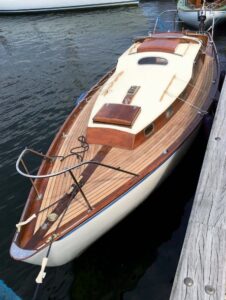
How true. Rita is a Bandholm 26, one of the more popular little coastal cruisers of the mid-1960s. A generation of families sailed through Scandinavian waters in Bandholms and similar boats through the ’60s and ’70s, but their numbers have dwindled and we’ve become more a spark of nostalgic reflection. But Bandholms come with a serious pedigree. Their designer and builder was the late Knud Olsen, famous for his design of the little OK sailing dinghy and his contribution to the design of the Folkboat. Though not clinker-built of wood, Rita clearly shows the best of those antecedent lines. She was one of the early fiberglass hulls in Denmark, but with a mahogany cabin and a ply deck covered by Burmese teak.
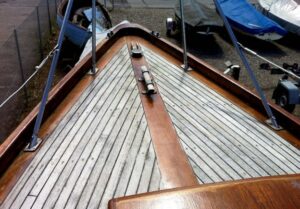
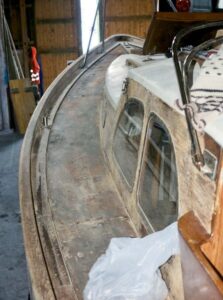
Earlier that summer, Lene had tried to stop up some gaps in the deck with caulk and a magic anti-seeping elixir from a local chandlery, but to no avail. Rita continued to weep below. Across the old teak deck, wooden bungs were missing and the old caulking had peeled and disintegrated to the point that Rita’s deck was little tighter than a sieve, and the longer water sat trapped between teak and plywood, the bigger our problems would become.
We knew we had to do something, because Rita is so much part of our lives, but our options for restoring her deck were few. Synthetic “teak” decking looks very good on a modern boat, but it just didn’t seem the right answer for a boat of Rita’s vintage, and having a Danish yard lay a new teak deck would have been beyond our budget. But . . . because of my job, I had a very special connection.
The Wizard of Oz
A couple of weeks after that wet sail, under the remote guidance of our good friend Peter Taprell, the shipwright from Sydney Harbour Boatbuilders in Yangon, Myanmar, we assessed the current state of the deck. As Rita has no headliner, we were able to inspect the underside of the plywood under the sidedecks. We saw no sign of rot or extensive water damage there, just staining. When we carefully lifted a few teak planks from on top of the plywood, we also found solid material.
With notes and photos in hand, and with Rita on the hard in our home port of Præstø, under a tarp, winterized, and out of harm’s way, I returned to Yangon, where I work for a candinavian aid organization. Peter and I discussed Rita’s deck, and I asked him to fly to Copenhagen with me on my next work break and make a professional evaluation. If she passed his critical review, we’d make a template of her deck from which his team in Yangon could construct a new one.
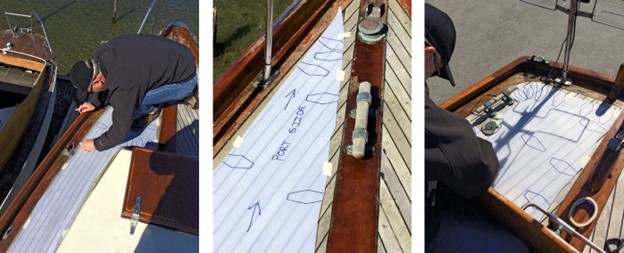
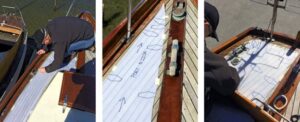
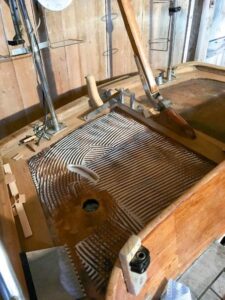
By following Peter’s instructions, and having seen how this was done in the Yangon shipyard, I could have drawn up the templates myself, but Peter wanted the opportunity to visit Denmark and see Rita for himself. He assessed her as restorable, and set about drawing up the templates that would become the deck. He traced the deck outline on Mylar sheets, at the same time mapping the placement of all the fittings and any characteristics that needed to be incorporated into the construction. (The cabin tops on Rita are painted, so were not included.) The beauty of using Mylar was that Peter could roll up the sheets, slip them into a cardboard tube, and carry them home to Yangon.
Making the deck tracing was quite elegant in its simplicity, and for such a small deck the process took only a few hours. Peter cut the Mylar to fit just inside the perimeter of the teak deck and secured it with masking tape tabs to prevent it from shifting in the wind. Then he took out of his bag of tricks a palm-sized five-sided wooden form (I called it a “fish”), which he placed so that about three-quarters of it was on the Mylar panel and the pointy end came to rest at the very edge of the old teak deck. He marked the leading edges and traced around the “fish” onto the Mylar, repeating the procedure again, and again, and again, especially at curves and anywhere deck hardware was placed. The more marks he made, he said, the more accurate the patterns would be.
The result was a remarkably accurate fit that could be lofted and then built in the boatyard in a controlled environment.
Made in Myanmar
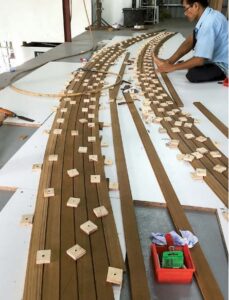
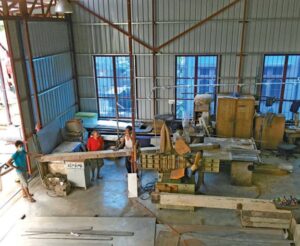
At the yard in Yangon, the Mylar patterns were laid out on sheets of particle board onto which, using the same wooden fish, we transferred their shapes. When done, we had before us the traced outline of Rita’s deck. This would become the platform on which the new teak decking would be assembled.
The team at the yard responsible for crafting the decks have been trained and supervised by the guys from Sydney over the last 12 years, and their ability to assemble a deck is a sight to see. While most decks they work on are much more complicated than Rita’s, this was still a job beyond my capabilities as an amateur.
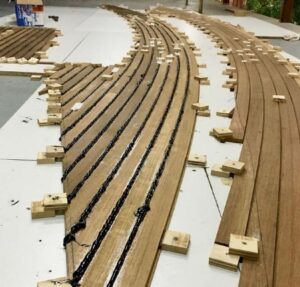
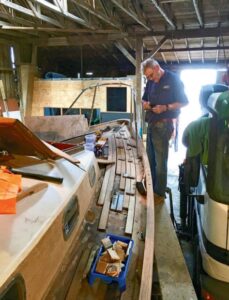
Because I would be taking the deck to Copenhagen as excess baggage, it had to be built in sections to meet the package-size limits. The port and starboard sides were each made in three sections, the aft deck in two panels, and the cockpit sole in two panels.
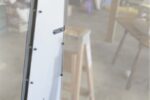
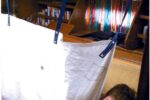
When all the sections had been assembled, the crew “flat-packed” the entire deck into two packages that could be loaded according to the airline’s restrictions on length and weight. The weight wasn’t too great of a concern as the prefabricated replacement deck weighed in at about 35 kilos.
Ironically, preoccupied with the delay in exporting our deck from Myanmar, we neglected to pay attention to our Danish importation paperwork. When we got to the freight-collection point at the Copenhagen airport, we discovered that our documentation clearly indicated that we were collecting a live crocodile from the Munich Zoo! Fortunately, we sorted that out and didn’t have to lead a snapping croc out of the airport and into our car. Peter had a different take: “Mate, you should have stone-face accepted the croc, sold the bugger on eBay, and with the earnings bought yourself a new boat!”
Stripping the old deck
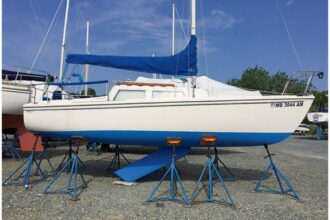
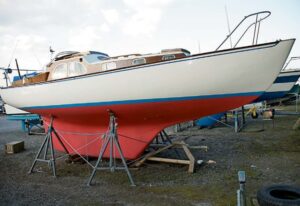
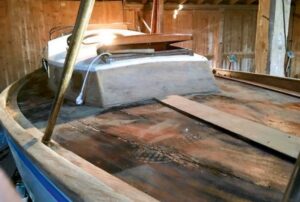
While the deck was being assembled in Yangon, we moved Rita into one of the 19th-century warehouses at the harbor in Præstø, where she could dry out. Lene and I began removing all the deck fittings, which after over almost 50 years of service had tarnished. On my business trips back and forth, I was able to bring a lot of them with me to Yangon, where I asked the metal shop at the boatyard to polish them.
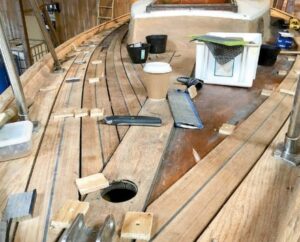
Removing the teak from the deck took almost no time — about three days — and we were surprised to see how little wear it showed when we measured the thickness of some of the strips. They were down to about 10 or 11 millimeters from the 13 or 14 millimeters I estimated they had been when installed. It appeared that the bungs were popping out because the screws were not countersunk deep enough.
Peter was due to arrive in six weeks, during which time we let the exposed plywood dry out, a process we boosted by running an electric dehumidifier belowdecks for about 10 days. Where we did find a couple of palm-sized areas of surface deterioration and small patches of softening wood, we ground out those few millimeters of bad wood. When they had dried further, we filled them with thickened epoxy.
During this drying period, using a heat gun and a hand scraper, I began removing the varnish from the cabin sides, toerails, and cockpit coamings. I’d hoped to have it all down to bare wood and revarnished before we fitted the new deck, but between short visits and meetings at the home office in Copenhagen, I ran out of time. This in itself wasn’t a big problem, other than requiring me to take more care when masking and varnishing than if I had stuck to the original timeline. They say the first casualty of war is the battle plan, and so it seems also with boat work.

packed and ready for shipping.
Fitting the new
When we were finally ready to begin installing the deck, we used Peter’s first day to build a scaffolding around Rita from old pallets and planks stored in the shed. This reduced the risk of falling off the boat by letting us work at a comfortable chest level and reach almost across the deck without too much crawling about.
While the deck panels were being prefabricated, we’d discussed how we would bond them to the plywood substrate. We considered vacuum bagging, which would have best ensured the strongest bond, but Peter decided that plugging all the old screw holes to make pulling a vacuum possible would have been too much work. In the end, we made up dozens of wooden pads measuring about 2 inches square, used them to hold down a section as we bonded it with thickened West System epoxy, and removed them once the epoxy had set. We then had to touch up the places where we’d screwed the brace pads through the Sikaflex 290DC holding the teak strips together, but that wasn’t too much of a problem.
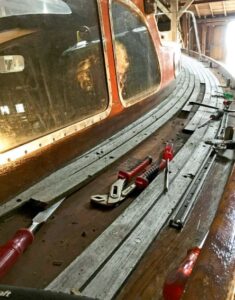
All in all, it took us about 10 days to install the deck. We began with a lot of cleaning and sanding to ensure the surface was ready. Then, area by area, Peter troweled out the thickened epoxy, laid in the panels, and braced them in place with the screwed-down temporary pads.
The work would have gone more quickly, but we ran into an unfortunate problem. Without explicit instructions, when the team in Yangon packed the panels for my flight home they didn’t attach them to temporary backboards. Consequently, the curved panels began to straighten out more than would allow the larger sections to drop neatly into place. We had to cut some of the panels along the Sikaflex seams and separate them, then flex them back into shape as we positioned them on the deck. It all went well, but that error cost us another five days’ work and more Sikaflex to lay into the seams of the panels we’d separated.
Finishing up
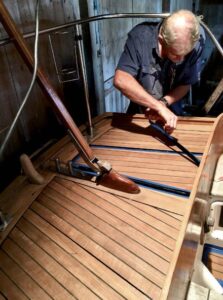
Before Peter left, he showed me how to use a very sharp chisel to trim down the excess new caulk. While I had to take care not to gouge the new wood, once I found the right angle of attack, I amused myself by trying to get the longest continuous slice of caulk. I wouldn’t win any awards for my cuts, but the sensation was akin to the pleasure of popping bubble wrap.
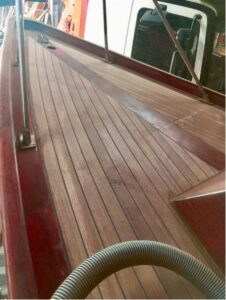
As good as the deck looked then, it still needed a thorough sanding with 80-grit paper and working up to 240-grit. Eight hours later she was just about done. All that was left to do was touch up the Sikaflex caulking in a few spots . . . then the daunting task of drilling and cutting holes in the deck for cleats, tracks, and deck fills for the diesel and fresh water, which we accomplished with frequent references to our drawings and photos.
By that time, summer had passed and I was back and forth to Yangon through the fall and winter. Between visits, I was able to reinstall the polished deck fittings, bedding them with Sikaflex and butyl tape.
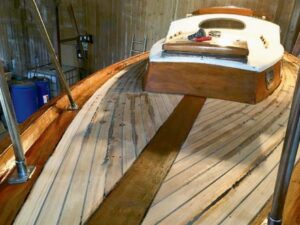
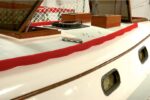
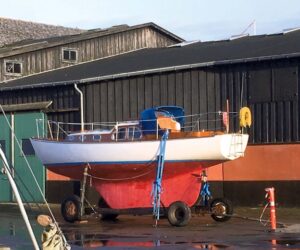
It was late May 2017 before we finally launched Rita. Her 18 months on the hard were transformative, and she now looked lovely and proud.
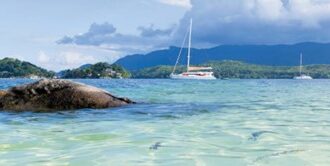
After installing new rigging and fitting some new sails from the sailmaker in Phuket, we were off for a summer around the eastern islands of Denmark. It was a great sail, and although the decks were dry, we did find a couple of leaks that we were able to trace to the caulking where the cockpit meets the cabin edge. This was the one area where we did not upgrade, so cutting out the old caulk and recaulking the seams went on the task list for winter.
Overall, I’m chuffed that Rita has a new deck and a new lease on life. As she approaches her 50th year, the old girl now has a serious chance to sail on for at least another 40 years — and look good as she does so.
The Myanmar Connection
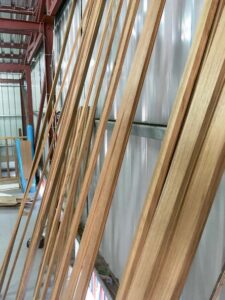
I work in Myanmar as country manager of a Scandinavian aid organization. There in Yangon, I share a large apartment with Peter Taprell and a team of Australians at Sydney Harbour Boatbuilders who do extensive restoration work on high-end yachts. With their support, I was able to give Rita a new deck made of reclaimed Burmese teak, at cost.
One of the many troubling aspects of Myanmar’s political transformation is the rapid pace at which buildings in Yangon and other major cities are being torn down. These old buildings had been constructed using old-growth wood with strong, even grain growth, and the massive seasoned timbers were being torched on burn piles at the construction sites. Boatbuilders began tracking down construction sites to identify the quality timber and, whenever possible, ensure it was not damaged during demolition. The wood they reclaim is superior in quality over faster-growth plantation wood offered elsewhere.
While my circumstances were possibly unique, my experience shows how a deck can be made for a reasonable sum, even when taking into account, on top of materials and labor, shipping, taxes, and other costs associated with importing a similar prefabricated deck from Yangon. Even including flying a shipwright to the boat to supervise and assist in the installation (as I did), I estimate the cost would still be half what a yard in the developed world would charge. Of course, this approach requires careful dialogue with the pros in Yangon, to establish the scope of the project, and patience, as it could span a few months.
It wasn’t all smooth sailing. At one point we hit a wall that almost stopped our endeavor. As the deck neared completion on the workshop floor, the new Myanmar government, as a way to curb illegal cutting, placed a temporary restriction on the export of teak. Rita’s new teak deck, constructed from reclaimed timber, was exempt from the restrictions. But due to widespread insecurity of government clerks, who went into a state of near-panic trying to understand the scope of the new restrictions, it became virtually impossible to export almost any wood products from Myanmar during this time.
My office staff really put their backs into helping me wade through the quagmire of getting all the necessary certificates and signatures for export. Perhaps I could have taken a more “streamlined” approach, but in more than 25 years of working in countries with emerging democracies, I’ve learned the value of standing by a rule of never, ever paying bribes or “tea-money”. Circumventing petty bureaucrats with informal fees only contributes to the entrenchment of processes that can’t be rolled back — pulling back from graft is like trying to unring a bell. So it was through patience and persistence that we received authorization and certification for export so that we could load our deck onto the flight to Copenhagen. In the end, the deck arrived just a day before Peter was to arrive to begin overseeing its installation on Rita.
Points to Ponder
On a smaller boat, the cost of a new teak deck is proportionately higher than the value of the boat and will probably never be recovered. We paid about $1,200 for the teak, and the total for the epoxy, caulk, and other materials was about the same. We also paid $2,400 for two round-trip tickets from Yangon to Copenhagen for Peter. Fortunately for Rita, and for us, we could afford and absorb that cost in the belief she will now see us out, as there is no reason not to think that Rita has another 50 years in her.
I would caution against the average handyman taking on this challenge. While enthusiastic amateurs could undertake a lot of the steps involved, there were a number of times it was invaluable having a professional shipwright overseeing the project.
Even with professional supervision, there is plenty of room for DIY, especially in the preparation and finish work, both of which are labor-intensive. They are also time-consuming, so that’s a big factor to consider when putting together a timeline for the project. The actual installation of our deck took 10 days, but the prep took almost 20 days, and the cleanup, which included sanding the deck, redoing the brightwork, and reinstalling deck fittings, took the rest of the summer and some weeks into the following spring.
Documentation — lots of photos and measurements of the original deck layout — will mitigate against dumb errors. Even on a small boat, recalling where everything went when faced with the clean slate of a new deck can be daunting.
Glen Swanson began sailing after university, when he was invited on a daysail from Victoria, on the west coast of Canada. That led to a long summer of sailing the West Coast, then onward to Mexico, and in and around Panama. On that trip, Glen met his then-to-be wife, Lene. In the mid-1980s, they moved to Denmark, where they have since shared their passion for sailing. For the last 12 years they’ve sailed Rita every summer in the Baltic, and whenever they can, they sail with friends in Southeast Asia. Glen is currently working from the Bangladesh office and continues to travel frequently to Yangon and other parts of Asia.
Thank you to Sailrite Enterprises, Inc., for providing free access to back issues of Good Old Boat through intellectual property rights. Sailrite.com