A rudder head succumbs to its mixed-metal construction
Issue 112: Jan/Feb 2017
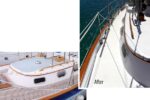
As the proud new owner of a 1985 Gloucester 22, I’m taking time to go over her thoroughly and return her to near-pristine mechanical condition before I set sail. I am not a skilled craftsman, but I can, mostly, follow instructions. I decided to start with the rudder head and rudder, thinking I would fair and repaint the rudder. Not a huge job, I thought, but it turned out to be a little more involved than fairing and repainting.
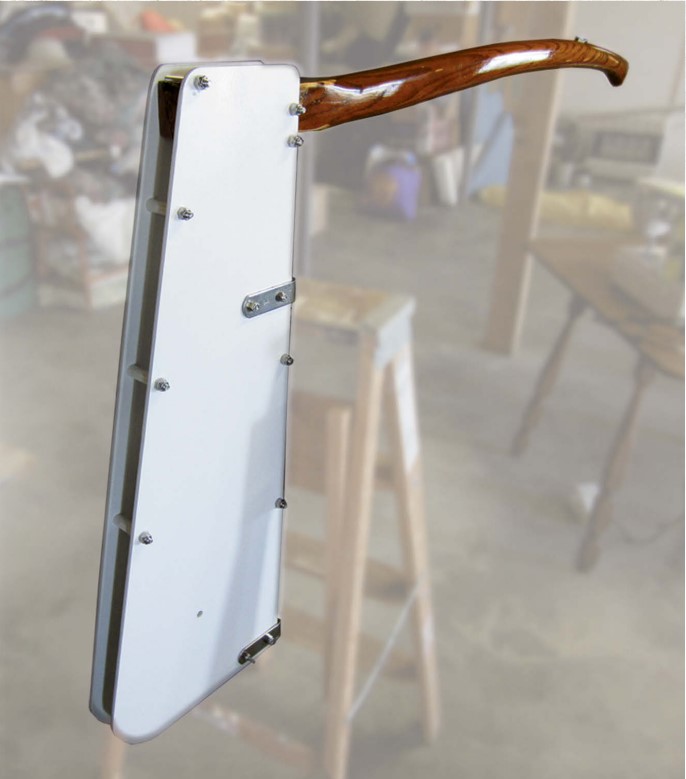
The Gloucester 22 has a kick-up rudder. The blade pivots on a stainless-steel bolt that passes through the rudder head, which consists of a pair of 3/16-inch aluminum plates bolted together but separated by aluminum-tube spacers fitted around the bolts. Stainless-steel pintles bolted to the rudder head engage gudgeons on the boat’s transom.
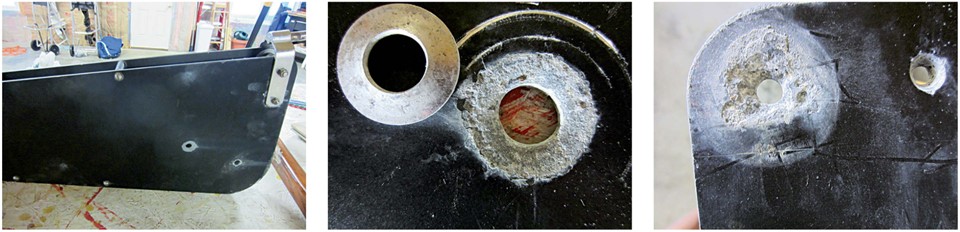
I began the project by removing the 3/8-inch pivot bolt. As soon as I did so, I noticed the telltale white powdery substance that’s a product of galvanic corrosion.
The corrosion mechanism
Sometimes called dissimilar-metal corrosion, galvanic corrosion occurs when two different metals are mechanically connected and/or electrically connected by a conductor and immersed in an electrolyte.
The electrolyte in this instance is salt water, as my Gloucester 22 spent many years in a slip on a tidal river. (Fresh water is also an electrolyte, but is not as conductive as salt water.) The less noble of the connected metals (see any galvanic table) becomes the anode and will corrode, while the more noble metal, which becomes the cathode, will not corrode.
Stainless steel is more noble than aluminum, so when in contact with salt water, it becomes cathodic. The aluminum cheeks of my rudder head became anodes and corroded.
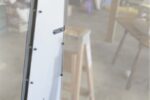
I started to wonder what the unexposed parts of the aluminum cheeks looked like and decided to disassemble the rudder head and inspect it. What I found was downright scary: corrosion on the inside of the aluminum cheeks that was impossible to detect prior to disassembly and was by this time beyond repair. In addition to the galvanic corrosion, some of the holes for the pintle bolts had become elongated over years of use. There was no question; I had to replace the rudder head.
A new rudder head
Gloucester Yachts has been out of business for many years, but I learned I could purchase a complete third-party rudder assembly for around $850. This seemed reasonable, but I decided to build a new rudder head myself.
On eBay, I purchased a sheet of 3/16-inch 5052 aluminum plate, 24 x 36 inches, enough for both cheeks. The 5052 aluminum alloy contains magnesium, which adds strength and corrosion-resistance.
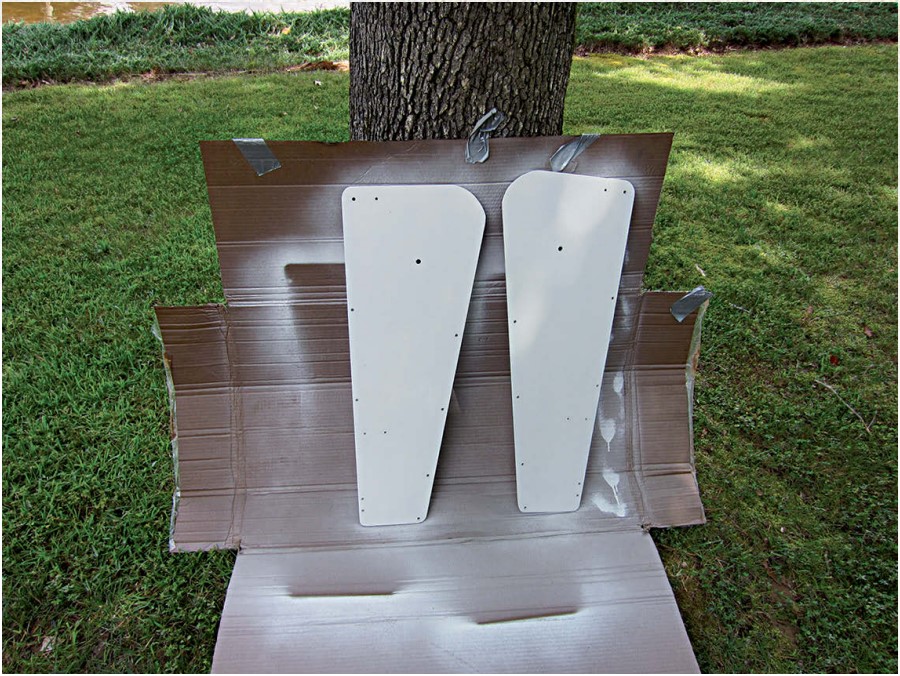
Rather than try to cut the new cheeks from this aluminum plate myself using a table saw, which requires a special blade I don’t own, and a jig saw for the curved parts, I took the plate and one of the old cheeks, for use as a template, to a machine shop. Using a plasma cutter, it took them only 30 minutes to machine new cheeks with nice clean edges. The cost was $40, about the price of the special saw blade.
Back home, I used a drill press to drill the 3/16-, 1/4-, and 3/8-inch holes in the new cheeks. I used an old cheek as a template, clamping it firmly to both of the new cheeks. I took my time, double-checked what I was doing, and everything turned out well. Having ruined a few pieces with a hand drill in the past, I knew a drill press was essential if I were to achieve straight holes that were properly aligned.
The ends of several of the old aluminum cheek spacers had mushroomed and needed to be replaced. I purchased a 6-foot length of 1/2-inch OD aluminum tube from Newegg.com and made spacers by cutting off 1-inch lengths using a miter box and a hacksaw.
The original aluminum cheeks were anodized, an electrolytic process that enhances the natural protective oxide coating that forms on the metal’s surface. Rather than have the new plates anodized, I researched other methods of coating and protecting my new rudder head.
A protective finish
I decided on paint. First I washed the aluminum thoroughly in soap and water to remove any residue left from the manufacturing and cutting processes. I then roughed up the surfaces with clean 220-grit sandpaper.
Aluminum needs to be coated with a special primer to give the paint something to adhere to. I used Rust-Oleum Self Etching Primer in white. Per the instructions on the can, I followed up with two coats of white Rust-Oleum Appliance Epoxy spray enamel. I’ve used this paint before on dinghy rudders and have enjoyed excellent, long-lasting results. I sprayed outdoors as this product is particularly toxic, and to spray indoors would require good ventilation and I would be well-advised to wear a mask.
Tiller troubles
During the same time period, I worked on the tiller. The previous owner had placed the socket for the tiller extension on the underside of the tiller. I found it awkward to use the extension with the socket in this position, so I removed the socket and filled the hole with thickened epoxy. Then I drilled a new hole for the socket on top of the tiller, about 6 inches aft of the end to leave room for my hand when I steer without the extension. I fastened the socket with two brass screws.
Over the years, the hole for the bolt that passes through the tiller and attaches it to the rudder head had become elongated. The original bolt had threads along its entire length, and they had slowly chewed away at the tiller. To prevent this from happening again, I purchased a 1/4-inch bolt with a smooth shank and threads only at the very end.
After taping over one end, I filled the bolt hole with thickened epoxy. Once the epoxy was cured, I drilled a new 1/4-inch hole through the epoxy, again using the drill press. To finish, I sanded the entire tiller and gave it three coats of spar varnish.
Reassembly
Once the paint was dry and the tiller was ready, I reassembled the rudder head using new stainless-steel hardware. After cleaning the pintles, I applied a thin layer of silicone to the inside sections that would come into contact with the rudder head. I placed nylon washers beneath the stainless-steel nuts and bolt heads so the stainless steel would not be in direct contact with the aluminum. The washers, combined with the enamel paint and silicone, will act as insulators to impede galvanic corrosion.
The finished rudder head looks great and I expect it to perform well. I urge anyone who has a good old boat with an aluminum rudder head to take a close look at it, and even disassemble it to inspect hidden areas. Doing so might reveal some surprises.
Anodizing — The Editors
It’s interesting that the same process that degrades aluminum is used to protect it. As the name suggests, the metal to be anodized is the anode in a process where an electric current is passed between a cathode and an anode immersed in an electrolyte, usually sulphuric acid in the case of aluminum.
Aluminum oxidizes naturally on exposure to air, and the oxide froms a thin protective layer that prevents futher oxidation . . . until it is damaged. The product of anodization is a thicker oxide layer that improves protection and cosmetic appearance. It does not, as Jerry found out, prevent galvanic corrosion, especially if the aluminum is cut or drilled after it has been anodized.
For DIY instructions on anodizing aluminum parts, see “Need Anodized Parts? Make Them Yourself,” March 1999.
Jerry Thompson is an information systems professional who works and lives in eastern North Carolina. He learned to sail more than 25 years ago at the Armed Forces Recreation Center, Lake Chiemsee, Germany. North Carolina’s milder winters keep Jerry on the water year round.
Thank you to Sailrite Enterprises, Inc., for providing free access to back issues of Good Old Boat through intellectual property rights. Sailrite.com