Issue 18: May/June 2001
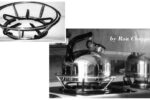
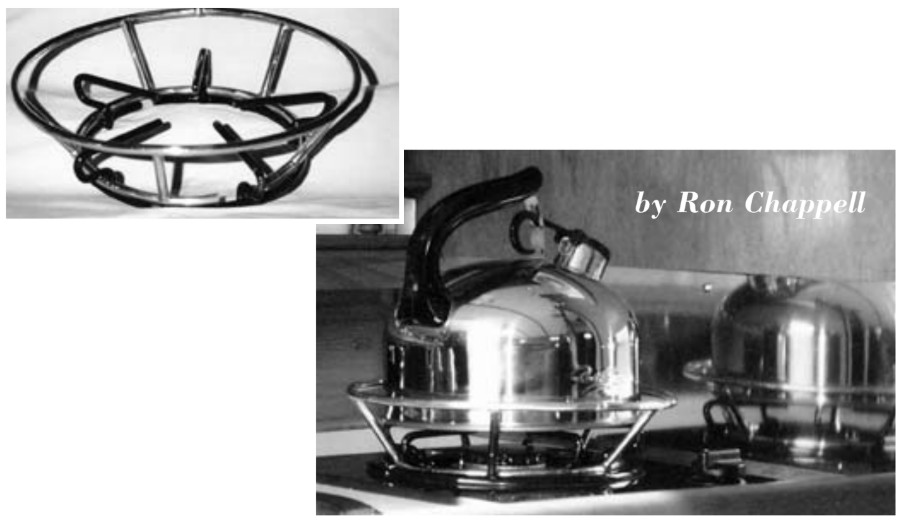
This was one of the simplest projects we have undertaken, requiring an equally low skill level. We chose brass for its corrosion resistance, ease of forming, and salty good looks. We chose the 1⁄4-inch rod stock that is readily available at most hardware stores, and used silver solder as a “welding” medium, as it works particularly well for brass at the comparatively low temperatures encountered on a stove.
Materials included a 4-foot stick of brass rod, a small stick of silver solder, flux, and a 1⁄4-inch brass ferrule, such as those used on copper tubing. Total cost: just over $8.
It took only a few minutes to come up with a design suitable for our particular stove, and it turned out to be one I like better than the factory model, as it did not involve drilling holes in the countertop.
We started by taking our largest onboard cooking vessel (a small pressure cooker) and rolling the uncut brass rod around the base to form a circle just slightly larger than the pot. (Form it as tightly as possible, as a certain amount of spring-back will occur.) Next, we trimmed off excess rod and placed the remaining circle in a vise with each end of the circle inserted into the brass ferrule. We applied flux and used heat from a common propane torch. It’s best to use the solder sparingly and to let it cool naturally to avoid stress cracks.
With the top ring finished, we moved on to the bottom ring, which we formed around the base of the stove burner. This ring is not soldered together but rather left with a half-inch gap which can be adjusted for size and to allow some spring, which provides a bit of tension around the burner base, making for a tight fit.
We placed this bottom ring around the burner, placed the pot on the burner with the previously made upper ring around its base, and measured the distance between the two. This was how long our connecting rods had to be to give us the cone-shaped configuration that allows smaller pots to be used on the burner with equal security.
The most labor-intensive part of the project was next. We ground a shallow trough in the ends of each ring support with a moto-tool (you could use a round file to hand-file the troughs) to help them mate up with the round ring sections. The connecting rods were then aligned between the concentric rings and secured with just a dab of 60-second epoxy (just to hold things together until we could make our solder joints).
What we had at this point was a really ugly, heat-discolored, flux-stained searail. But not to worry . . . a few minutes with some fine-grade steel wool and a final hand buffing with a good brass polish on a soft cloth made the creator truly proud. The silver solder, by the way, will take on the patina of the brass and be invisible.
Thank you to Sailrite Enterprises, Inc., for providing free access to back issues of Good Old Boat through intellectual property rights. Sailrite.com