Turning an old daysailer/weekender into a self-sufficient modern cruiser
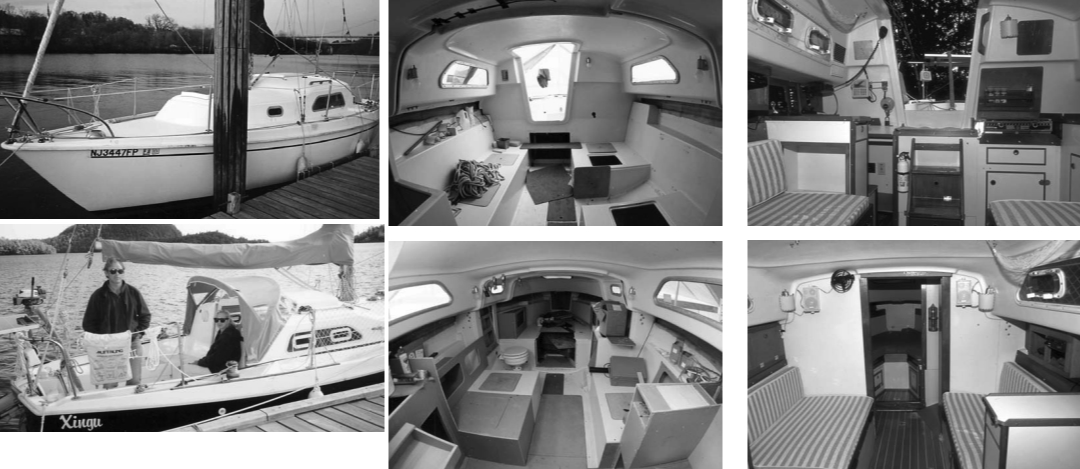
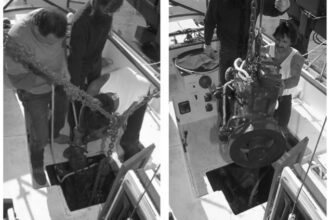
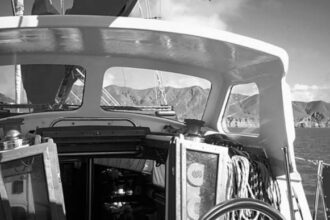
Facing page, Douglas and Bonnie removed most of the interior and hull liner to begin the refit. The completed interior at far right.
Issue 26 : Sept/Oct 2002
For years I dreamed of seeing the world from the deck of a sailboat. My mind was filled with images of anchorages near and far. Three years in the Canadian Navy reinforced my passion for the water and gave a new meaning to “it’s in my blood.”
I grew up sailing dinghies in Canada and had longed for the day when I could purchase my own boat. But I had neither the finances nor the right partner to bring my dream to fruition. Similar to the change in current or the ebb and flow of the tides, 1993 introduced me to Bonnie (now my wife) and gave us the ability to finance a sailboat we could fix up and sail.
In the fall, after scouring the area for a 22- to 26-foot boat, we settled on a 1973 Pearson 26. Its condition was far from perfect, but the price was right. She had been raced for years and neglected for many more. The signs were everywhere: faded and damaged gelcoat, bent stanchions, broken or missing hardware, and a dated and worn interior. Yet the potential was there. We just had to make it happen.
Bonnie is a teacher, and I am self-employed. Since most of our summers would be spent cruising, we wanted our new boat to be as comfortable as possible. I have been around boats for most of my life and have my own cabinetmaking business, which made me a little less fearful of the upcoming refit. Once the boat was out of the water and home, we erected a plastic-and-wood enclosure to protect the boat and us from the elements.
Because of the age of the boat and the fact that some blistering was found during the pre-purchase survey, we opted to sandblast the bottom. The bottom could dry out during the winter. Meanwhile, we stripped every piece of hardware from the deck and interior. We even removed the ports and the interior fixtures right down to the hull
Cardboard mockups
The next couple of months were spent drawing up plans of what we wanted the interior to look like. Making up fullscale cardboard mockups was the key to a successful interior layout, giving us a feel for how everything would fit and function before building the real thing. We spent the remainder of the winter gathering information and purchasing necessary items.
By the middle of March, the refit began. I was in for three hectic months. To me, a Pearson 26 interior is not very functional. As with most boats designed for daysailing, little thought had been given to cruising amenities, and a lot of space was wasted between the hull and the liner. Making the most of the interior was a challenge. I had to cut away a fair amount of the hull liner prior to making modifications.
In the bilge I epoxied fir stringers to help stiffen the hull and provide support for the new teak-and-holly sole. I also epoxied new partial bulkheads and cabinets to the hull, adding even more strength. With this done, in went the modular cabinetry, two iceboxes, a bookcase, cabinets for pots and pans, a storage cabinet in the head, clothing storage in the V-berth and cabinets across from the head. I notched a section of the V-berth to create more room in the head area and to make accessing the V-berth easier. I added cabinets in every space I could get to.
We replumbed the boat with a stainless-steel sink and a foot pump in the galley, a bladder tank for fresh water under the starboard settee, and a bladder-style holding tank under the port settee. We installed one manual and two electric bilge pumps along with new seacocks in the bilge and, for the chef, we fitted an Origo 3000 alcohol stove.
New everything
The wiring was outdated and required a major overhaul. The installation of a new electrical panel, the heart of the system, was followed by tinned copper wiring, halogen reading lamps in the V-berth, DC outlets throughout the boat, a Loran, VHF radio, new Autohelm Bidata speed/log/depth instruments, a solar panel to charge the batteries, a gasoline fume sniffer/bilge blower and a large plywood/epoxy battery box under the cockpit.
Pearson 26s were built without opening ports. To improve ventilation, we installed Beckson plastic opening ports in the V-berth and head. We used 3⁄8-inch Lexan with cutouts for opening ports in the large main saloon windows. The overhead hatch in the V-berth was another weak spot, which we replaced with a new Lewmar Ocean hatch (definitely a wise investment).
I consider the mast-step support beams to be problematic in many Pearson 26s. Our beam was cracked when we bought the boat, and I have since seen many others in poor shape. Ours was made of laminated pieces with a contact-paper covering. A small deck leak is all that would have been necessary to turn that support into sawdust. I made our new support by laminating white oak strips and putting in three pieces of threaded rod for additional strength. This may be overkill, but I could sleep like a baby knowing it was not going to collapse.
Besides helping me whenever possible, Bonnie finished out the interior. She did a wonderful job, making new cushions and painting the interior woodwork and hull liner.
Wave protection
Tackling the exterior was the next step. Since the companionway on a Pearson 26 is low, we decided to add 12 inches to the bottom of the hatch to prevent potential boarding waves from making their way belowdecks. Under both cockpit lockers, I epoxied in shelves for the 5-gallon outboard tanks. These were plumbed to a three-way valve and a Racor filter, which made changing fuel tanks a breeze. To ward off the potential for hazardous fumes in the cockpit lockers, we put in a sniffer/bilge blower along with plenty of natural ventilation. We never had the alarm go off. It is unlikely to have an ignition source problem in the bilge with an outboard for power.
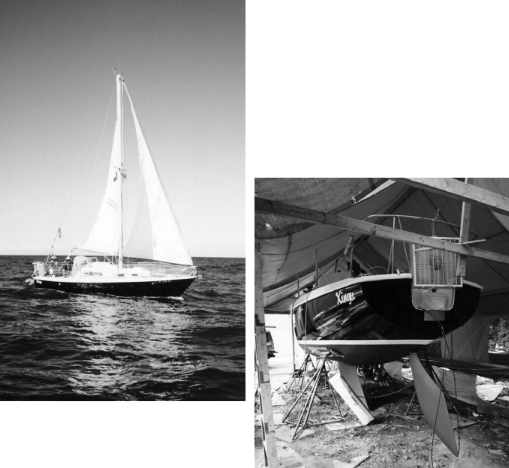
We knew we had to paint the deck and topsides — a job I was not looking forward to. We chose white for the deck and black for the topsides. As with any painting project, 90 percent of the work is preparation. For what seemed like weeks, we filled, faired, sanded, primed, sweated, and cursed the day we bought this scrap pile. Eventually we prevailed. Interthane Plus two-part polyurethane made painting a breeze after the preceding torture. When we finished rolling and brushing three coats, the boat looked like it had just rolled out of the factory. The yard workers were sure we had sprayed the boat. That’s how shiny it was.
For the first time since this tremendous undertaking had begun, our spirits were renewed. A light was rising on the horizon. With the painting completed, drilling holes for hardware was a bit unnerving. But with careful measuring, everything went together without a hitch. New stanchions and lifelines with opening gates, a small teak anchor platform and roller (nonexistent on the original Pearson 26), rope clutches, organizers, roller furling, genny tracks, and a mainsheet track were some of the additions. On the cockpit sole, seats, and coamings, we put Treadmaster non-skid, which we consider an excellent choice. On the remaining decks we added sand to the final coat of paint. With hindsight I would opt for something else for non-skid. The decks wound up being a little more slippery than I would have liked.
Bottom painting
Our anticipated summer vacation was fast approaching, and we had yet to tackle the bottom. More filling, fairing, sanding, priming, sweating, and cursing was followed by the barrier coat and bottom paint. Weeks before, we had made plans to take a vacation on our new boat with another couple who owned a Beneteau. We were running out of time; the boot stripe and bottom paint were still wet when we launched our pride and joy. We named her Xingu after a tributary of the Amazon and also one of our favorite beers. Although we spent the trip meandering down the Hudson installing last-minute hardware, we had a most memorable vacation.
Over the next few years, we added many other items: a dodger, a larger holding tank, and, amazingly, more storage. We have cruised the coasts of New England and New Jersey and up and down the Hudson River. Then, with about $9,000 depleted from our bank account and more than 600 hours of work behind us, we left our home on the Hudson River to cruise up to Thunder Bay, Ontario, on Lake Superior, where I grew up dreaming of far-off harbors. To celebrate the dream becoming reality, I thought it fitting that we should sail our new summer home up there to visit.
For two years, Xingu wintered in Thunder Bay. The second summer was spent cruising Lake Superior, and the third summer we sailed her back to the Hudson. In those three years on the Great Lakes, we put more than 3,500 miles on our revamped Pearson 26. She came through with flying colors.
Back when we first purchased Xingu, our humble ambitions were to fix her up and do a few overnighters aboard. Cruising has turned into so much more for us. It’s a way of life we have come to enjoy immensely. We have since sold Xingu and are refitting a 32-foot Westerly Fulmar which we hope will take us a little farther afield. In the meantime, our thoughts still go back to the wonderful times we had on our modest little Pearson 26.
Thank you to Sailrite Enterprises, Inc., for providing free access to back issues of Good Old Boat through intellectual property rights. Sailrite.com