A simple fix for a spongy hatch cover
Issue 39 : Nov/Dec 2004
The challenge came when the marine surveyor finished his inspection of my 1983-vintage Catalina 27. “The boat’s in good shape, but you might want to do something about that foredeck hatch cover. It’s spongy, no doubt due to moisture absorption through the edges of the hole cut for the owner-installed ventilator. The moisture causes the plywood core to delaminate, and the composite loses its stiffness and integrity. I suggest you fix or replace it.”
Being very frugal, my course was clear: fix it. Soon thereafter, an article by Bill Sandifer, “Check Those Vents,” appeared in the July 2000 issue of Good Old Boat. Bill accurately described the problem I was facing when it had been in its initial stages . . . comforting in an odd sort of way.
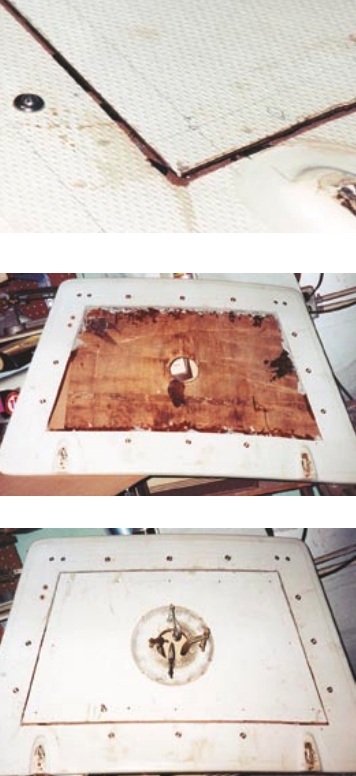
My first step was to determine the extent of the problem. This was done by tapping the top of the cover and listening for a “punky” sound. Unfortunately, most of the top sounded that way. I decided to remove the top fiberglass layer to within about an inch of the edge of the plywood. I figured the remaining plywood could be injected with polyester resin and a new stiffening plywood sheet inserted.
I removed the top fiberglass layer with a router, and the distressed area was exposed. What I found was the top and bottom plies of the plywood had bonded very well to the fiberglass surfaces, and could not be easily removed. This would probably provide a good medium for bonding a stiffening sheet, but the available space for such a sheet was now 1⁄8 inch, instead of 3⁄8 inch. Time to regroup.
Other candidates
With plywood out of the question, I considered other filler candidates: aluminum or steel panels, counter topping, fiberglass sheet, woven roving and resin, and Masonite. I undertook testing for bondability to resin, water resistance, and general durability. The Masonite sheet provided the best properties after the smooth side was roughed up with coarse sandpaper.
The assembly plan was to put the cut-to-size Masonite sheet in the sandwich, cover, and secure in place with clamps and machine screws. Having positioned the piece, I disassembled the laminate and prepared it for fiberglass bonding.
I estimated that about 30 minutes of open time (time before the resin becomes unworkable) would allow for spreading the resin on the hatch cover, placing the Masonite stiffener on top, spreading more resin and reassembling the whole thing with the clamps and stainless machine screws.
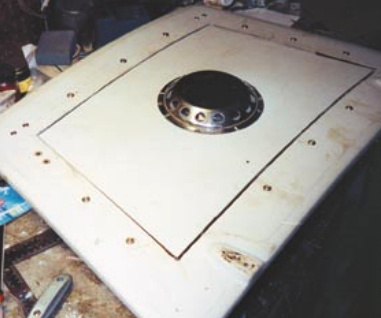
This done, I set the whole thing aside for a few days in a warm place, and went about the task of filling the groove left by the router. I wanted a flexible sealant and could have used silicone or polyurethane. I settled on the latter on the basis of claimed good adhesion to fiberglass and the fact that it was available in a color very near that of the hatch. A nice, neat bead of sealant laid in the groove would complete the job — NOT! The sealant would not dispense except in a wide ribbon. It was Sunday evening. The stores were closed. So I cut into the tube, and buttered the stuff in with a spatula. There was a cleanup to be done, but after that the job was complete. I got my sealant money back. After reinstalling the hatch cover, I found that the urethane sealant did not weather well. It darkened in color and, probably because of the poor application job, did not seal well. I scraped out the urethane and replaced it with a good bead of white silicone sealant smoothed out, with excellent results. I would also use this sealant to bed the machine screws.
Thank you to Sailrite Enterprises, Inc., for providing free access to back issues of Good Old Boat through intellectual property rights. Sailrite.com