A 20-year-old 47-footer gets new rigging and spruced-up masts
Issue 40 : Jan/Feb 2005
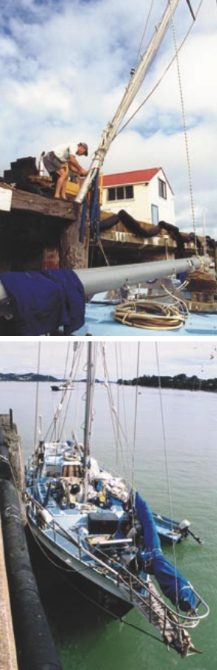
There comes a time in the life of every vessel when it needs more than routine annual maintenance. Our 47-foot steel ketch, Sea Quest, now nearing her 20th birthday, had been our home for 11 years as we cruised the Western Pacific. To prepare for our next long voyage, my wife, Tere, and I decided the engine had to be rebuilt. This entailed pulling the mizzenmast to get the engine out from under the dog-house roof. With one mast already out, it seemed a good idea to pull the mainmast as well and refurbish them both.
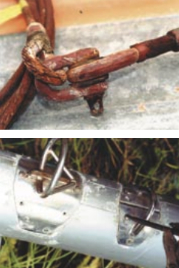
The old galvanized standing rigging had stood up well for nearly two decades. Only the forestays, abraded by the sail hanks, and a mizzen shroud showed any serious rust. Over the years I had come to appreciate galvanized wire over stainless steel because it does not work-harden and break when you least expect it.
Galvanized wire is cheaper than stainless, although the actual savings in cost would only amount to a small part of the total bill for a re-rig job. Big savings, however, can be made on the galvanized fittings, along with the fact that the preparation work would be done not by a marine rigging shop but rather by a wire rope company.
More important to me than the cost of the job, however, was peace of mind that results from knowing that any deterioration in the wire would appear only gradually. The rusted mizzen shroud, though looking bad, had plenty of sound strands of wire at its core. The chance of losing our rig, as happens all too often with stainless through the failure of a perfectly good-looking stay due to work-hardening, was slim.
The best wire
Tracking down the best-galvanized strand is imperative. Experts we consulted considered English wire the best. Chinese strand they said, was to be avoided at all costs. I found an industrial wire rope company that could supply me with both 1⁄2-inch and 3⁄8-inch 1 x 19 wire made up from good quality galvanized English strand.
The first vital step when the masts were laid horizontal was to accurately measure the rigging. I removed the old stays with all their shackles, links, and turnbuckles and laid them on flat ground. After winding the turnbuckles back to their previously marked “tight position,” Tere and I measured the length from clevis pin to clevis pin, checking, comparing, and re-checking the measurement of each port and starboard shroud. This became our reference “overall length” from which I could calculate the correct wire length.
The old turnbuckles had, at one end, a clevis pin that went through the chainplate. At the other end, an eye was shackled to the thimble on the stay. I wanted to eliminate the extra bulk of these shackles if I could. After re-galvanizing the old turnbuckles, my plan was to splice the new wire directly to the eye.
In order to accurately calculate the length of each wire from thimble to thimble, I needed to deduct the length of the turnbuckle from the “overall length.” But by how much? I took both the maximum and the minimum length of the turnbuckle and arbitrarily allowed 70 percent of that for setting up and stretch. The remaining 30 percent of the turnbuckle length would, I hoped, cover any shortfall the opposite way.
Two hand-splices
As a child I had watched a rigger spend half a day laboriously making two beautiful hand-splices on a new shroud for my dad’s boat. Today the industry uses Nicopress splices. This involves bending the end of a wire around a thimble and then squeezing the tail onto the standing part with a Nicopress sleeve. A giant press, using tons of pressure to mold the sleeve around the wire, does this work. It now takes hours, not days.
When ordering wire, I allowed an extra 3 feet to bend smoothly around each thimble. If cut too short, the worked end of the wire tends to unlay itself on the bend. The tail would later be cut off and discarded.
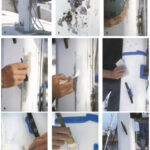
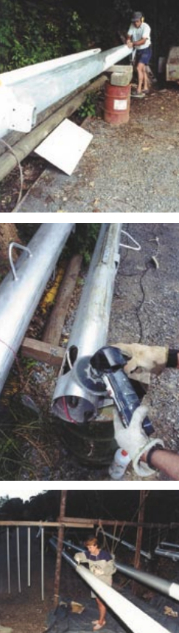
While the stays were being made, we set to work on the aluminum masts. Tere and I stripped the hardware, then we removed the old paint with scrapers. Next we sanded the masts with fine paper on a random- orbital sander.
The amount of paint required took us by surprise. The total surface area of two masts, booms, and spinnaker poles totaled as much surface area as the topsides of the boat. The constraints of re-coat times for the different paints had us worried. The paint company representative had said, “If you don’t complete Step 3 without a break, you must scrape the primer off and begin again.”
This was the schedule:
Step 1. Wash with an acidic cleaner. Wait till dry, a maximum of four hours.
Step 2. Coat with aluminum primer. Wait a minimum of three hours and a maximum of 24 hours.
Step 3. Coat with polyurethane, silver for the bulk of the spars and white for the top quarter of each mast.
Wait 4 to 24 hours.
Step 4. Overcoat all the polyurethane with high-gloss clear finish. Recoat in 12 to 24 hours.
Despite the fact that we were working outdoors and dodging autumn squalls, we somehow squeaked through all the steps within the allotted time frame. The spars were ready. The turnbuckles had been re-galvanized, and the wire was being spliced.
I began to rebuild both masts. This involved a lot of fiddly work: refitting the spreaders, winches, cleats, electrics, and other fittings. Fortunately, I had made careful notes as I dismantled things. Now I slavishly followed these notes. Tere and I checked each item, cleaned it, and refitted it. Where screws were tapped into the mast section, I cleaned the threads using a tap in a slow-speed cordless drill. To prevent electrolysis between stainless and aluminum, I coated the screws with an insulating paste and bedded all fittings in Sikaflex.
Many of the bands and fittings were originally fixed with 1⁄4-inch round-headed machine screws. I screwed these home with a large flat-bladed screwdriver. During our next cruise a small but significant problem revealed itself. Metal burrs, almost imperceptible to the eye, had formed around the slots of the screw heads. The sharp edges caused significant chafe on halyards lying against them. I had to go up the mast to file each screw head smooth.
I also discovered later at sea, when the masthead light failed, that it is as important to let water out of the light fittings as it is to keep it out! The fitting had probably leaked from the beginning. Now I made a drain hole at the lowest point. Fortunately I had remembered to clear the drain at the foot of the deck-stepped masts.
Crevice sealer
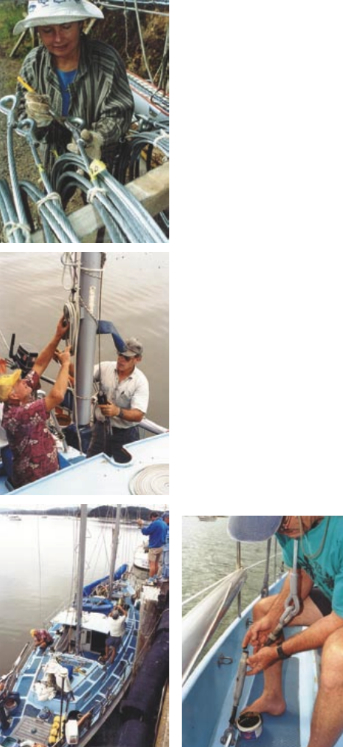
The masts were ready when the new wires arrived. Into each thimble, Nicopress sleeve, and worked wire end, we applied an epoxy metal crevice sealer, followed by a high-build epoxy coating, hoping to prevent water from pooling there. Later we coated the lower part of each stay — which is subject to heavy wear and salt corrosion — with the same epoxy coating. We discovered that the paint had an unexpected added advantage of making the wire less abrasive to the sails.
All our careful planning and tedious attention to detail paid off the day the crane lifted the masts aboard. With many hands to help, the masts dropped neatly into place. We fed the labeled electrical wires through the deck. We fixed the turnbuckle clevis pins to the chainplates. The crane was on its way in less than an hour.
Tensioning the rig took a little longer. I made sure the masts were plumb. Starting with the cap shrouds, forestay, and backstay, I adjusted them using the turnbuckles. After both masts looked right I tensioned the triatic stay, the intermediate shrouds, and finally the lower shrouds. How relieved I was to find nothing too short and each turnbuckle with a few spare turns left.
After I was satisfied with the tension of the stays, I packed each turnbuckle with a lanolin-based preparation, Lanacote, then wrapped the exposed threads with Lanacote-impregnated bandages and a covering tape.
I checked the lead of all ropes and halyards to minimize wear and chafe. In the next few weeks Tere and I made new baggywrinkle and wound it onto the backstays at the chafe points.
The mast refit turned out to be far more complicated than it had first appeared. The masts were heavier and longer than I realized. Getting them on and off the trailer required the help of at least eight other shipyard volunteers with good backs. I built simple frames to support the masts, but turning them to scrape and paint required the use of a block and tackle.
The notes and dimensions I took as the mast came apart proved essential during the rebuilding process. Containers of such things as winch parts or spreader-light mounting screws, each marked to show its specific contents, helped to ensure that parts were not mixed up or lost.
A re-rig in a vessel’s mid-life should outlast the cruising years of most couples. We now have a brightly shining pair of masts and hardy rigging that we expect will last us another 20 years with luck. Now that we are out cruising again, the exertions of the job have been forgotten, but when that ol’ wind starts to blow, we bless those bright new shrouds and are glad we undertook the task of renewing them.
Thank you to Sailrite Enterprises, Inc., for providing free access to back issues of Good Old Boat through intellectual property rights. Sailrite.com