A new old compass goes in the right surroundings
Issue 67: July/Aug 2009
When I purchased my good old Hallberg-Rassy Mistral 33, I knew I was in for a lot of work. All the wood above deck needed to be replaced, but luckily many of the components required to restore her classic look were present. However, she came without a compass.
Originally, a solid-brass Sestrel binnacle compass had been mounted on the steering pedestal. It’s easy to see why a previous owner kept this as a souvenir. So, for more than a year, I searched unsuccessfully for a Sestrel compass. Eventually, an old Ritchie design with a nice bronze bezel appeared for sale on eBay. It had a crazed globe, no light, and no binnacle mount, but it was the right 5-inch size and had a classic look. I thought it had real potential, so I placed a reasonable bid and (Oh, what joy!) I won it.
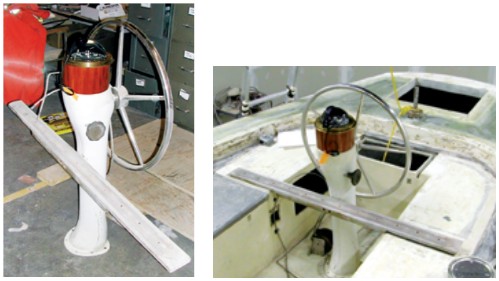
When it arrived, I wasn’t disappointed. It was a compass of exactly the right quality and type to enhance the classic appearance I was looking for. I contacted Ritchie and was very impressed with the extra effort the company’s customer-service department put in to assist me. Based on the serial number on the compass, they informed me that it was part of a D-515 model manufactured in 1968 — just the right age for a boat manufactured in 1970. Ritchie had changed its design since then but still had spares available. The customer-service representative also calculated the amount of oil I would need to refill the compass and informed me that I should put the oil in the freezer for 4 or 5 hours so all the micro-bubbles would come out of suspension. Micro-bubbles?
Aha! Maybe that’s why in all my other compass repairs I’d had a bubble appear after a few weeks, although no oil had leaked out. I ordered the required spares from Ritchie, but I wasn’t able to get a binnacle from them.
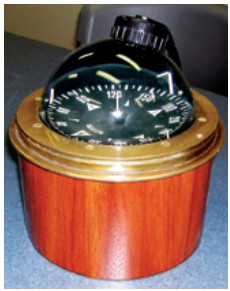
My rebuild of the compass went very well, thanks to that very useful oil-cooling trick. I removed the remaining old black paint from the bezel, exposing all that beautiful bronze. Then I replaced the crazed globe with a new one and assembled the compass with new O-ring seals. After a few attempts at refilling it, I discovered that, when adding the last little bit of oil, you need to slightly depress the bellows. Further, you should continue to depress the bellows as you insert the plug. By doing this, I managed to get that last nasty and persistent little bubble out during the final filling stage. And, yes, the freezer trick really does work.
The compass was now reconditioned and looked great, but I still didn’t have a binnacle mount. I located a few after-market products but they were either stainless steel or ABS plastic, both of which lacked that classic nautical appearance. I came to the conclusion that I would have to build my own out of wood.
A pillar of inspiration
While I was at the lumber yard looking at what was available, I saw some 8-foot pillars intended for use in home decoration. It was the sort of material I needed, but the yard was not going to sell me just 5 or 6 inches. However, on closer inspection, I noticed that these hollow pillars were constructed from sections of wood formed into a polygon.
Since I had purchased a few router bits from Lee Valley Tools to do this sort of thing for boxes and chests, I thought I should have a go at making the binnacle myself in a similar manner.
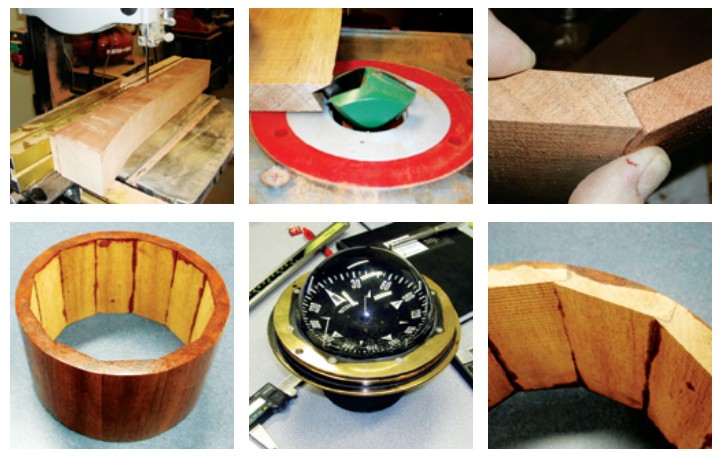
I looked around and found some nice solid mahogany blocks of the right color. The sales agent informed me that they were cutoffs and end pieces of Honduras mahogany from the Fender guitar factory in British Columbia. My lucky day! I bought a block and took it home to have fun making sawdust.
I started by cutting the block into strips on the bandsaw. Then I squared up the edges of the strips and sized them into board sections on the table saw. I used my router with a bird’s-mouth cutting bit to create the pieces for a 12-sided polygon (formally called a dodecagon but I prefer “clockagon”). Finally, I cut the boards to a width that would give my finished clockagon a 7-inch diameter across the flats. Rather than making a gluing jig, as suggested by the instructions that came with the router bit, I decided to epoxy the pieces together in small groups where I could control the progressive shape.
The first night, I glued the sections into pairs. The second night, I glued the pairs into three arcs of four sections. And the final night, I finished the circle by gluing the three remaining arcs together. This worked very well and created a true and even polygon. I then sanded the points down and, using a random-orbit sander, blended them into the flats. Finally, I cut the cylinder to length on the table saw and finished it with two coats of Epifanes Rapidcoat.
The boat still has a year or so to go before I finish my total refit, but she now has a compass with a story and a classic nautical look. Now I have to rebuild the rest of the cockpit around it to the same standard. What was I thinking?
Stephen Thompson, a professional mechanical engineer, sailed on inland lakes as a boy. At 50, he successfully built a small sailboat from scratch and caught the bug once again. He has since undertaken the complete restoration of a 1970 Hallberg-Rassy Mistral 33 in Houston, Texas.
Thank you to Sailrite Enterprises, Inc., for providing free access to back issues of Good Old Boat through intellectual property rights. Sailrite.com