At bottom, it’s a matter of technique and good planning
Issue 107 : Mar/Apr 2016
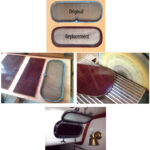
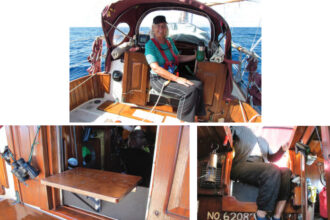
Our 1978 Creekmore, Eurisko, had her original interior when we purchased her. After 14 years of cruising and raising three sons aboard, we could no longer deny that she, and we, deserved new cushions. Though we had been compiling criteria for the perfect replacement fabric for many months, in the end, we decided that the best materials to use were those we could find.
Our primary concern for the fabric was that it be durable. The original cushion covers appeared to be an automotive upholstery fabric and had worn remarkably well. Sunbrella is a popular material for re-covering cushions, but we are not impressed with how it feels, the available colors, or the price, and therefore chose a less traditional route. We wanted to be able to touch the fabric before investing in it, so we shopped in person at a large nearby warehouse.
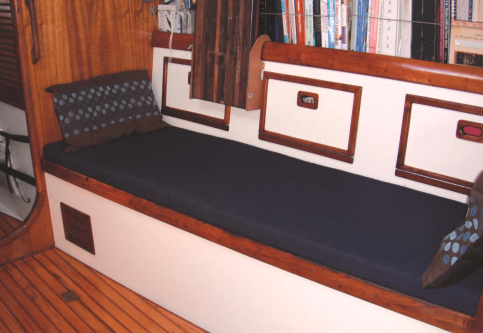
There are several considerations when choosing interior cushion fabric. Color and pattern are of equal importance. A light color will show dirt and stains more easily than a dark color, but depending on the interior of the boat, a dark fabric may make the interior seem like a tomb. We’re fortunate that our boat’s builder used light woods and our hatches provide an enormous amount of light, so we can use dark fabrics with no ill effect.
Though it is said that stripes and some patterns can induce or exacerbate seasickness, it’s not a good idea to choose a “flat” color, especially if you have a large settee to cover. Fabrics with no variation fool the eye, making objects look two-dimensional. Even a small change in color or weave gives a cushion “depth,” making it look more cozy and inviting. It’s important to take this variation into account when figuring the amount of cloth to buy, since you may not be able to use the fabric “sideways.”
Materials and methods
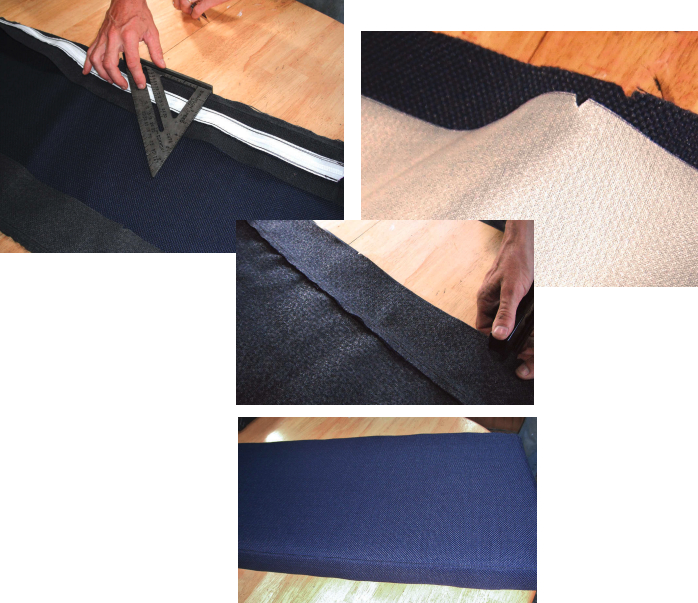
We measured and made patterns for the four cushions to be covered and chose a fabric for the top and boxing and vinyl for the bottom. Boxing is the strip of fabric that runs around the edge of every cushion between the top and bottom panels. Some cushions are finished with piping, a thin fabric-covered cord sewn around the top and bottom panels. Our original cushions had piping but I found this uncomfortable when using them as sea berths, so we opted to topstitch them instead. The topstitch we chose looks professional, is more comfortable on the backs of our legs, and is much easier to sew.
For the fabric, we chose a navy tweed used in automotive interiors. It has enough variation in the weave to give it texture and depth. The matching vinyl is sold as suitable for all outdoor use. This is important since winter in northern climes occasionally brings us condensation.
Foam is available in different densities, thicknesses, types, and sizes. We had measured the thickness of the original cushion foam, keeping in mind that it breaks down and “shrinks” a bit over time. For this reason, although our cushions measured just over 2 inches thick, we bought 3-inch foam. For sitting areas, a density or firmness of 50 to 60 IFD (Indentation Force Deflection) is recommended.
We expected to buy a large sheet of foam from which we would cut all four cushions, but our calculations showed that we would need a little over one full sheet. Smaller rolls were also available, so we bought three 24 x 82-inch rolls of foam for interiors. We bought a quarter pound of black V-92 thread, the fabric, vinyl, and foam from the same warehouse. The total cost: $350. All we to spend now was time.
Patterns
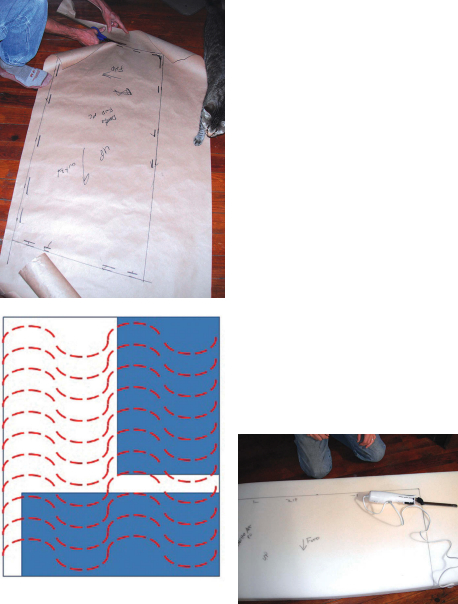
Because he had worked for years in a canvas shop, my husband, Dave, was familiar with patterning cushions, though he had never built a set. We used a roll of kraft paper (found in the postal section, rather than the craft aisle, of some stores) and a Sharpie to make our patterns for the settee and three dinette seats.
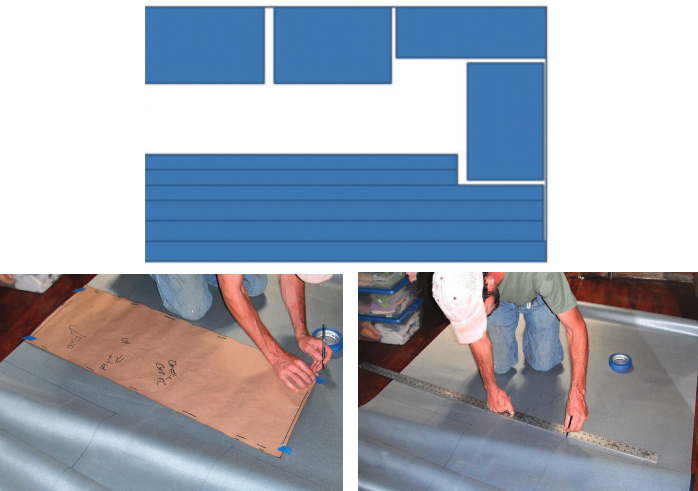
Dave left at least 1⁄2 inch of paper on all sides of the patterns. The reason for this became obvious later. He cut oversized pieces of paper off the roll to make them easier to handle, then laid each piece flat and placed a cushion on it. With a Sharpie, he carefully marked the angles at each corner of the cushion and made a series of marks along each edge several inches apart. He pointed out that, even if you know a line is going to be straight, it is nearly impossible to draw a perfectly straight line while making a pattern. Besides, we were marking the size of the current cushions rather than the new ones that we would be covering.
We carefully labeled each pattern piece with orientation notations: UP, FWD with an arrow, OUTBD with an arrow, PORT/STBD (if necessary), ZIP to indicate where the zipper would be, and any other information we’d need later. Indicating the zipper placement is easy to do in situ, but once you have the pattern paper laid out on the floor, 50 miles from the boat, it isn’t always as easy to picture. It’s best to write it down.
Dave laid each pattern flat and, rather than connecting the marks, drew the shape 1⁄2 inch bigger on all sides. He did this because, to ensure that the foam continues to fill the cover even after it starts to deteriorate, it is cut 1 inch longer and 1 inch wider. This is more easily accomplished by adding 1⁄2 inch all the way around the pattern. This 1⁄2 inch also represents the sewing allowance for hems, so the patterns used for the foam will also be used to cut the fabric and vinyl.
Cutting the foam
Once we had cut the patterns out along the “1⁄2-inch too big” line, we could arrange them this way and that way on the foam to see how to cut all four cushions out of our three pieces of foam before we marked anything. While arranging these patterns, we knew that a pattern can be turned upside down on the foam for a better fit. We would not be able to do this with our cloth or vinyl fabric. Where possible, we aligned the edge of a pattern with the edge of the foam to reduce the amount of cutting.
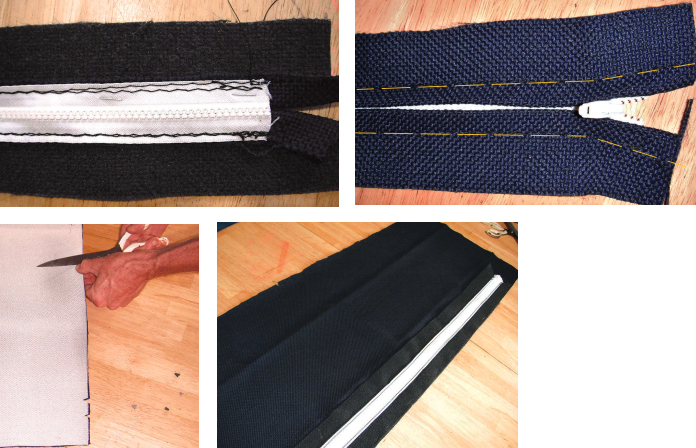
Dave marked the corners and several spots along each edge on the foam sheets, then used a Sharpie and a long straightedge to connect the marks. Though a Sharpie bleeds a bit on foam, it’s more important to be able to see it very well when cutting than to have a thin line to follow. We transferred all the identifying marks to the foam before cutting it out: UP, FWD, PORT, ZIP, OUTBD. We added $11 to our investment when we bought an electric carving knife to cut the foam. Although a specialized tool exists for cutting foam, Dave has never found anything that works better than an electric knife. He was careful to hold the knife perpendicular to the foam for a square edge.
Vinyl and cloth
After cutting the foam, we proceeded to the vinyl. In order to be able to mark it without worrying, we placed the vinyl good side down. Because the vinyl will be the bottom of the cushion, we used the patterns good side up on what is essentially the back side of the vinyl to mark it. (This is easier to visualize if you imagine there is foam between the pattern and your upside-down vinyl.) If you have the space, it’s best to lay out all the patterns on the fabric so you can be certain that you have enough material. Our space was too small so we relied on the accuracy of our measurements.
Because there was no repeating pattern on our vinyl or cloth, we were able to turn our fourth pattern 90 degrees from the others to reduce the amount of material we used. As we did with the foam, we placed the patterns along the cut edge of the vinyl when possible, marked the corners and a few places along each edge, connected the lines with a straightedge, and transferred all the identifying information to the back of the vinyl.
It’s best to tape the pattern to the material, but not at the corners of the pattern, since it’s important to mark those corners accurately. We found that tape did not stick well to the vinyl or the cloth, so we had to copy the pattern very carefully. Depending upon your fabric, you may want to experiment with different writing instruments to find what will mark best. On our vinyl, a ballpoint pen left a clean thin line. A white fabric pencil showed up best on the dark fabric.
We repeated the process with the cloth, with the good side down so we could mark on the back. This meant that we had to put the pattern’s good side down as well. When deciding how to position the patterns on the cloth, we left lots of room for cutting the long strips of material that would be used for the boxing.
Boxing
At this point, Dave’s memory failed him and we consulted some reference material. Don Casey’s Canvaswork & Sail Repair has an excellent section on building cushions, including the trick for determining the width of the boxing.
The boxing can be made of the same material as the top or the bottom of the cushion. The boxing around our original cushions was vinyl. Years of creasing it to fold the cushion back as we accessed the lockers underneath had cracked it, leaving sharp edges against the backs of our legs. We decided to make our boxing out of the cloth.
Because the foam will eventually shrink, we wanted 2 3⁄4-inch boxing for our 3-inch cushions. After taking into account a 1⁄2-inch sewing allowance on each side, our initial boxing measurement ended up 3⁄4 inch wider than the thickness of the foam. For the boxing length, we measured the circumference of the four cushions minus the part where the zippers would be and rounded up to be sure we had enough.
Next we had to determine the size of the boxing where the zippers would be. This boxing will be a different width because each zipper will have a hemmed and finished edge that will enclose and hide the zipper itself. For a common zipper width of 1 1⁄4 inch, making the boxing 1 inch wider than half the thickness of the foam gives you the additional cloth necessary to cover the zipper.
Since we had 3-inch foam, our zipper boxing was 1 1⁄2 inch plus 1 inch, a total of 2 1⁄2 inches wide. (Another popular-sized zipper is 1 1⁄2 inch. In this case the boxing would be 1 1⁄8 inch wider than half the thickness of the foam.)
We added the lengths of the four zippers and doubled it, since there would be cloth on both sides of each zipper: toward the top of each cushion and also toward the bottom vinyl. Our measurements showed that we needed 432 inches of 3 3⁄4-inch boxing and 354 inches of 2 1⁄2-inch boxing. Since our fabric for cutting the boxing was 180 inches long, we cut three strips of each width to be sure we had enough.
Sewing the boxing
It was time to set up our sewing area. From experience, we knew that it’s best to have a long, flat surface to the left of the machine when sewing large items like cushion covers, so we put the sewing machine on a dining room table. It is possible to put the machine on the floor to sew and some prefer it that way, but it’s important to us to be comfortable in order to sew a long, straight line.
We used our Sailrite machine for making the cushions, but since a project like this involves sewing fabric and vinyl, rather than multiple layers of heavy sailcloth, most sewing machines will do the job. When I built our V-berth cushions 14 years ago, I used a 1940s-era Singer bought at a yard sale for $1.
We first sewed the zipper boxing strips to the zipper, good side to good side, aligning the edges. With certain materials, basting tape will hold the two pieces together, but our tweed was too rough, so we used staples instead. After sewing each strip to the zipper, we flipped the fabric over, leaving the appropriate amount to cover half the zipper, and topstitched along the same line. It is best to leave the two halves of the zipper together so they are guaranteed to line up. If you have measured and sewn correctly, the finished boxing with the zippers in it will be the same width as the other boxing.
Once we had sewn the finished zipper boxing to a length of regular boxing, we had a strip much longer than the circumference of our cushion. To be sure he had enough fabric in each strip of boxing, Dave did not cut off the extra length until he neared the end.
Boxing to top
Next, Dave placed the top and bottom of each cushion good side to good side and cut a few small notches in several places along the edges. He would use these notches later to ensure that he had not built a twist into the cover.
He centered the zipper boxing along the cushion’s top fabric, placing the boxing and fabric good side to good side and verifying that the identifying marks (FWD, OUTBD, etc.) agreed. Though you can sew either the top or the bottom first, Dave chose to sew the top to the boxing first since he would be topstitching the top panel but not the bottom. (If he had sewn the bottom section to the boxing first, topstitching, especially the corners, would have been nearly impossible.) With the zipper closed, he started sewing at the zipper pull, then along the back edge of the cushion, sewing the zipper on first.
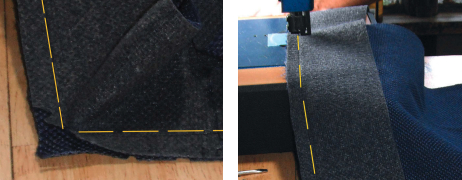
Corners are the trickiest part to sew if you want professional-looking results. Dave remembered to cut notches into the boxing to ease the fabric hem where it would round the corner. His trick was to sew to within 1 inch of the corner and stop. Then he turned the material about 30 degrees, hand-cranked one stitch, turned it 30 degrees a second time, hand-cranked another stitch, and turned it 30 degrees a third time. At this point he had rounded the corner and could continue sewing along the next straight edge.
Covering the zipper
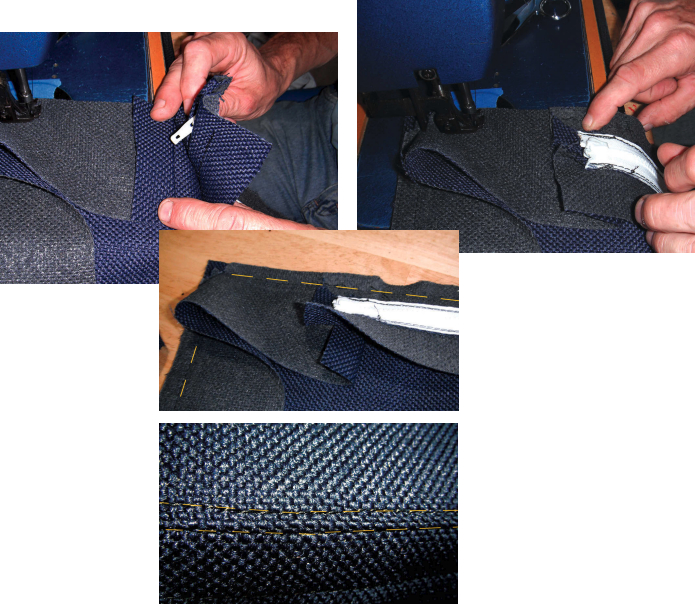
When he had completed the circuit, sewing the boxing completely around the top piece, he left the boxing long so he could make a small flap to cover the end of the zipper. He folded over the extra length of fabric and placed it under the zipper boxing. Then, with all the layers flattened, he continued sewing until he overlapped where he’d begun.
The next step was to topstitch the top of the cushion, running a line of straight stitches 1⁄8 inch from the outside edge of the cushion top. As he did this, Dave pulled the top fabric firmly away from the boxing while he sewed through the top fabric and the sewing allowance (or hem) fabric underneath. This strengthens the seam and leaves a professional-looking edge that’s comfortable to sit on.
Sewing on the bottom
With a square, Dave transferred the notches from the top of the fabric to the edge of the boxing that would be sewn to the bottom. These notches need to be aligned when sewing the boxing to the bottom in order to keep the cushion cover square and not twisted.
As when sewing the boxing to the top, Dave stapled the two pieces good side to good side, verifying with the identifying features written on the back that they were positioned correctly. As with the top, he started at the zipper pull, cutting notches at the corners to ease the fabric hem where it rounded the corner and overlapping the two ends where they met. Since he did not plan to topstitch the bottom vinyl, the cushion covers were now completed.
Tight-fitting foam
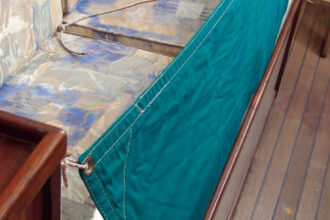
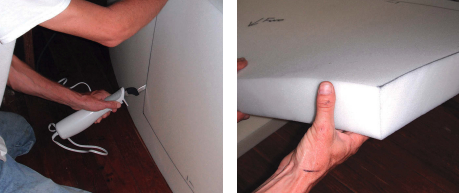
If you have measured correctly, stuffing the as-yet-unshrunken foam into the covers should be nearly impossible. After flipping the covers right-side-out, we pushed the corners outward as far as we could with our fingertips. That left nice, nearly square corners. Then, with one end of the foam in the cover, we pulled two corners as tightly as we could across the corresponding corners of the foam. We folded the foam to stuff it inside the zipper opening and then unfolded it and worked the resulting bulge into each corner as we worked the other corners of the cover toward the foam.
Before closing the zipper, we compressed the foam evenly so the edges of the cover lined up with the edges of the foam, and we ran our hands around inside to be sure the sewing allowance lay consistently on one foam face all the way around.
A satisfying project
Patterning four cushions took less than an hour. We cut out the foam one evening after dinner and the vinyl and cloth the next day. The entire sewing process took one long day. In theory, replacing four cushions could be a weekend project. It probably took us longer to choose the materials than to build the cushions. If you are careful to eliminate measuring, cutting, and sewing errors at every step, the end result will be attractive, comfortable, affordable cushions that liven up your boat and make it more comfortable.
Connie McBride and her husband, Dave, after 15 years, 3 kids, and 20,000 miles, are still sailing simply aboard their 34-foot Creekmore, Eurisko, currently on a return meander to the Caribbean. Learn more about their onboard lifestyle at www.simplysailingonline.com.
Thank you to Sailrite Enterprises, Inc., for providing free access to back issues of Good Old Boat through intellectual property rights. Sailrite.com