Make holding-tank chemistry work in your favor
Issue 115: July/Aug 2017
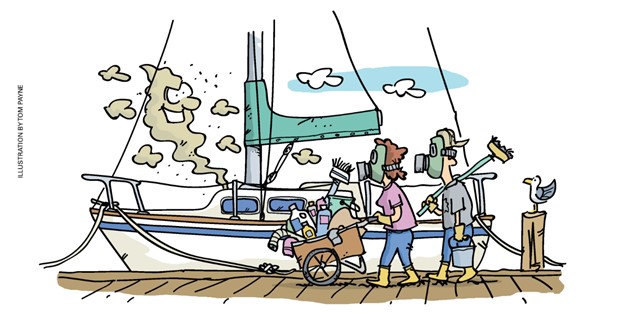
You’ve polished the gelcoat, cleaned the seat covers, and put out matching towels, and yet when guests visit the head, their reaction is still “ew . . .” It’s not a basket of fruit. So you bleach and scrub with products that claim to remove every odor, but odors keep coming back. That’s when it’s time to get to the root of the problem.
I’ve struggled with sanitation systems on new-to-me boats and I’ve gone further than most, experimenting with hoses, chemicals, and simple design changes. (In fact, for four years I kept five matching holding tanks in my backyard, along with an assortment of hoses, treatments, filters, and vents, as part of my research for a Practical Sailor article.) In the end, I’ve learned that heads can be dependable, robust, and odor-free, but only if all of the parts are optimized and work together. Don’t settle for good enough, aim for best.
Sources of odor
While the offending odorous chemicals are mostly produced and contained in the holding tank, they can escape by paths anywhere in the system.
Surface contamination – Scrub the head clean and watch for any return of staining. Are there leaks? I secure every hose connection with double clamps opposed to each other (the screw heads facing opposite directions) and ensure that the clamps are tightened around the barb rather than hanging off the end. Examine all flanged connections, including the joker valve, to check that they are tightened evenly and not cocked to one side. Look for signs of leaking around shaft seals. Post a sign suggesting male guests sit down in rough conditions so they won’t miss their target.
Chafe – Take a close look at where hoses pass through bulkheads. The first time I replaced sanitation hoses I found one that had chafed through on the sharp edge of a balsa-cored bulkhead, resulting in a slow leak, a phantom odor, and rot in the balsa core. To prevent chafe, I now drill oversize holes for hoses and apply polyurethane caulk from both sides of the holes to cushion the hose or prevent it from moving.
Inadequate flushing – It’s tempting to stretch pump-out intervals by minimizing the amount of water used to flush. Bad idea. Inadequate flushing can leave waste sitting in a hose, increasing the likelihood that odorous gases will permeate the hose or bubble back past the joker valve and into the bowl. Flushing with too little water also leads to scale formation in the head, joker valve, and hose, particularly when urine left in these areas reacts with calcium in the seawater. Finally, difficult pump-outs, and even clogs, are more likely when the ratio of solids to wastewater is too high. Sanitation systems rely on excess water to liquefy the waste so it will flow. After each use (even number 1), it’s best to flush the head with enough water to move all the waste to the tank and pump the bowl dry, leaving just a small amount of water in the hose, held back by the joker valve and serving as an odor block.
Permeation
The time-honored procedure for evaluating whether a hose has become permeated — or a tank for that matter — is to wipe the surface with a warm washcloth and to smell the washcloth. Simply sniffing the hose also works, assuming there are no leaks and that you first give the hose a few weeks from the last good scrubbing for gases to permeate it. Yet another method is to wrap the suspect hose tightly in aluminum foil for a few days, and then smell under the foil. A quick temporary trick for eliminating permeation stink is to wrap the offending hose smoothly and evenly with aluminum-foil duct tape. But at the end of the day, a permeated hose (and any white marine sanitation hose more than 10 years old has probably become permeated) is due for replacement.
Replacing hose
I’m a firm believer in fixing things, whenever possible, so that I don’t have to fix them ever again, or at least not for a very long time. I’ve used all sorts of hoses over the years and I’ve reached a few general conclusions regarding what works and what doesn’t.
Avoid clear vinyl hose, even for vent lines; it will become permeated within a few months and is prone to kinking, compromising the vent. The builder of my boat used clear vinyl hose for the vent and it had become well and truly permeated. I replaced it with more of the same hose and it failed again by the end of that summer. Now I use generic white sanitation hose for vents.
Other hoses to avoid are common water-service hoses; stink will permeate even the best-quality heater hoses within a few years. I’ve used all sorts of hoses on boats, often side-by-side, and have a few recommendations.
• Trident 101/102. A very heavy-duty and durable sanitation hose; I have not heard reports of permeation or other failure. The 101 is black, the 102 is white, and both are solid choices. The downsides of the 101 are that it is a stiff hose, it’s slightly larger in outside diameter than white sanitation hose, and the rough outer surface is prone to mildew and can be difficult to clean.
• Raritan Sani/Flex Odor Shield. With a slim profile and superior flexibility, this hose can snake anywhere a hose needs to go, but its flexibility means it can kink. Where more than gentle pressure is required to make a turn, install a 90-degree PVC elbow. Easy to slide onto sanitation barbs, this hose is a pleasure to work with.
• Shields Poly-X. The most expensive and perhaps best sanitation hose, it comes with a lifetime anti-permeation warranty that you won’t need. It is of medium stiffness and external diameter, installs easily, and the slick surface is easy to clean.
• Dometic Odorsafe Plus. An upgraded white sanitation hose, it has considerably greater permeation resistance than generic white sanitation hose and the surface is reasonably easy to clean. However, it is a stiff bear to install and doesn’t like fitting over standard hose barbs at all.
There are other products out there, some of them considerably less expensive, but don’t waste your time unless you like doing messy jobs over (and over). I’ve done that for you.

Attacking stink at the source
While the waste in the system has a certain foulness of its own, it gets worse over time in an inadequately vented tank that contains waste and salt water. This is because the bacteria in the tank, once they have consumed most of the oxygen, begin converting common sulfates to sulfides. At that point, even the best efforts to contain the hydrogen sulfide and the organo-sulfer thiol compounds that give aged waste its bite are destined to fail. At high concentrations, only tiny amounts of these gases need sneak out of the vent or bubble up into the bowl to be noticeable.
The solution is to either eliminate the sulfate or keep the chemistry under control by maintaining a constant supply of oxygen to the bacteria in the tank. In other words, make sure the airspace in the tank is regularly exchanged with outside air, such as by running a relatively straight oversized vent hose. While the same ventilation is indicated for boats operating in and flushing with fresh water, the concentration of sulfates in, say, the Great Lakes, is 100 times lower than it is in seawater. This means that the odiferous consequences are not as dire for sailors on inland lakes or rivers.
To test your flushing water, fill an empty drinking-water bottle with seawater, close it, and leave it in a dark corner for a few days. Then pop the top and discover that it now smells awful. This is because the salty-smelling seawater you used to fill the water bottle was filled with living things that first consumed the free oxygen in the water and then oxidized the sulfate in the seawater to sulfides.
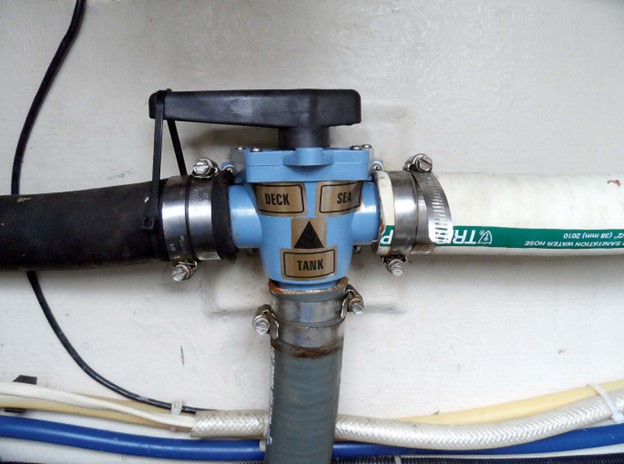
This same process goes on in the inlet pipe to your head. This is why, when you flush the toilet for the first time after having been away from the boat, you notice a foul smell as soon as you pump the handle and draw that stale seawater into the bowl. The solution? Flush the toilet with fresh water before leaving the boat for more than a day. This can be done with a showerhead or a jug. A more permanent solution is to tee the sink drain into the head inlet, with a valve upstream of the tee. That gives you the option of closing the intake seacock and pulling clean tap water from the sink.
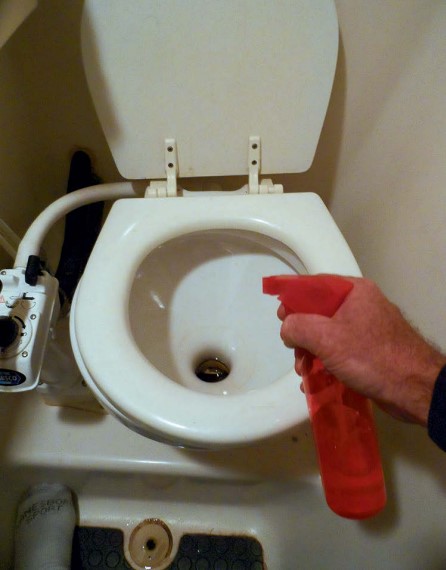
Still unpleasant? The fresh water at my home marina is sufficiently high in sulfate to stink when stored or used in a head. Accordingly, I have found that a few squirts from a spray bottle filled with a 4:1 dilution of holding-tank treatment chemical does the trick. Additionally, a few spritzes in the bowl for the final freshwater flush will provide the necessary extra oxygen in the bowl and up the discharge hose. What is not consumed will be moved to the holding tank, where it will provide treatment. Two holding-tank treatments that have a pleasant smell are Forespar Refresh (my favorite) and Camco TST Ultra Concentrated.
Scale Control
For those of us who sail in seawater, the formation of scale on the insides of head valves and hoses is a common condition. Seawater is nearly saturated with calcium and carbonate ions, and these readily react with chemicals in urine to create rock-hard scale deposits. Scale formation can be inhibited by occasionally flushing vinegar (or another weak acid) down the toilet and allowing it to soak in the hoses for an hour before flushing it through. Stronger acids (muriatic or commercial scale removers) can eat thicker deposits, though success is usually limited and mechanical means will be needed (take the hoses off and beat them on the ground). But all of this can be avoided by flushing with enough water to move all waste through the hoses and into the tank before it has a chance to react with the seawater. This simple practice can generally limit scaling to the point where hoses are replaced during maintenance before it becomes an issue.
Chemical treatment
For a long time, treatments for holding tanks were made from harsh chemicals intended to sterilize the holding tank. This approach was never very effective at controlling odor, as confirmed by countless unspeakably foul portable toilets and holding tanks.
A far better approach, incorporated in all successful modern tank treatments, is to encourage the existing bacteria to operate in an aerobic manner, naturally preventing the conversion of sulfate into sulfide. Some products claim to introduce beneficial live cultures or enzymes, but the workhorse products simply contain sodium nitrate. The nitrate performs as an alternate oxygen source, more easily accessed than sulfate. With proper dosage, nearly all odor is eliminated. Popular products include Odorlos, Camco TST Ultra, and Forespar Refresh, though anything with nitrate at the top of the ingredients list should work. Flush the recommended amount through the head after every pump-out.
Ventilation
The most accessible source of oxygen is the air around us. Unfortunately, the most common vent size is 5⁄8-inch, and the routing is often less than optimal. For oxygen to reach the tank, there must be free flow within the hose. This requires a hose with a minimum inside diameter of 3⁄4 inch (1 to 1 1⁄4 inch is better) and a maximum run of about 4 feet, routed on a gentle slope with no loops. Finally, the vent must be cleanable, to avoid pump-out problems. A blocked vent can result in a collapsed or exploded tank, although the more common problems are difficulty pumping the head, a geyser when the deck cap is removed, and waste and foul bubbles being forced past the joker valve and back into the head bowl.
Those nifty little screened fuel-tank vents that are sometimes installed on holding tanks are a huge mistake. While they keep insects out of the pipe, they prevent cleaning and inhibit good ventilation. The vent should always be fitted at the center of the top of the tank, a location that offers the best protection from getting clogged by tank contents on either tack and when pitching. Of course, every effort should be made to empty the holding tank before it gets filled because, once it’s filled, waste is likely to back up into the vent line no matter where it’s located. Finally, it is good practice to back flush the vent every few pump-outs to ensure the hose is clear.
There are systems available that use a small compressor to force small amounts of air into the bottom of the holding tank. Although effective, they are not worthwhile aboard smaller boats due to their power demand and complexity.
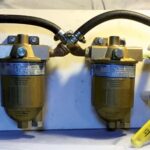
Vent filters
Sometimes the holding tank vents to an unfortunate location, such as upstream of opening cabin portlights. In these cases, a carbon vent filter might be necessary. Of course, an undesirable and unavoidable consequence of using a vent filter is that it will reduce ventilation in the tank, so regular chemical treatment will be imperative to prevent the anaerobic activity that results in worsening odors that may find their way into the boat.
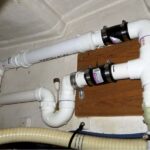
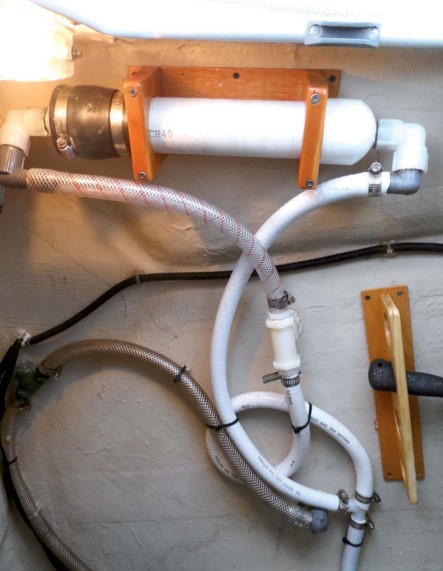
I installed a carbon vent line filter on Shoal Survivor. Because carbon filters are vulnerable to clogging with waste and soaking with seawater (potentially ruining them in a single incident), I installed my filter at a high point in the boat and isolated it from the holding tank using a bypass. (For one take on this, see “Holding-Tank Vent Filter,” Issue 115)
I’ve used a number of filter brands over the years. I made the one I use on Shoal Survivor from common PVC pipe and fittings and a bit of foam, but I can recommend the Dometic Sealand ECO as a single-use carbon-filled tube (often sold as part of a complete tank system).
Big Orange sells two models I recommend, the Big Orange Original, which contains nearly twice as much carbon as standard carbon-filled tubes, and the Big Orange OEM, which matches the physical dimensions of the common Dometic filter. Both Big Orange units have integral vacuum breaks to prevent tank collapse during pump-out and are refillable with fresh carbon when spent, promising a very long and economical lifespan. Big Orange sells refill carbon, but bulk carbon from an aquarium store works fine.
Use every weapon
As always, a belt-and-suspenders approach yields the most robust result. Maximize ventilation so that bacteria in the tank have every opportunity to use air as a source of oxygen in place of sulfate. Consider increasing the size of the vent hose and relocating it if need be. Use a nitrate-based holding-tank treatment. While you’re at it, spritz a little holding-tank treatment into the bowl; this will treat the bowl and waste piping, trickle into the holding tank, and freshen the compartment. A freshwater flush can reduce odors in both the bowl and the holding tank, though how effective this is depends on the freshwater source. With fewer odor-causing chemicals in the tank and hoses, permeation-resistant materials have a good chance of being permeation-proof for the long haul. Making sure all of the parts and practices work together will ensure long-term reliability.
Will your boat’s head ever be as fresh as a bathroom in your home? It’s more compact but, with attention to detail in both design and operation, you can keep your guests focused on the lovely scenery, instead of the realities of sanitation.

Tips for installing hose
- Where possible, replace standard hose fittings with sanitation-hose fittings, which are smooth, not barbed and, though slightly smaller in diameter, are secure when double-clamped. Aboard a boat (outside fuel systems) a seacock is the only place for a barbed fitting.
- Warm the work area. In cool off-season air temperatures, hoses become stiff, which can turn a reasonable job into an awful job. I run a space heater for a while to get everything toasty warm.
- Lubricant can ease the task if a hose seems willing to slide onto the barb but needs a little encouragement. Avoid petroleum products as they react with the materials used in most sanitation hoses, in some cases dramatically. Specifically, any hose with a liner that is butyl or ethylene propylene diene monomer (EPDM) rubber-based must never be lubricated with petroleum products. Fortunately, a glycerin-based lubricant (such as K-Y Jelly) can be safely used with any hose type and will dry out over time, resulting in a good connection.
- Rubber-faced gloves really help with grip and can prevent busted knuckles. A hose-removal hook can help too.
- White sanitation hoses are quite stiff. If lubrication isn’t enough, heat the ends to soften them. I like dunking the ends in near-boiling water for about 20 seconds, which heats them completely without any risk of damage, although I do take precautions to avoid dumping the hot water into my lap when working in tight spaces. A hair dryer can be somewhat effective and heat guns will certainly do the job, although there is risk of scorching the hose.
- I never heat a hose for the purpose of making it more flexible for bends; the hose will either be damaged or later collapse. A better solution — and this is true for all hose installations — is to install a 90-degree elbow.
Basics not to be overlooked or forgotten
I’ve found it helpful to post advice in the head, since many guests don’t like discussing the subject. In addition to head-specific operating instructions, try to remember the following:
- Use appropriate toilet paper. There’s no need to pay a premium for specialized marine or RV paper from your local chandler; any single-ply store-bought toilet paper should work fine. Test a candidate tissue by soaking a few squares in warm water for a few minutes and then stirring gently with a stick. The paper should fall apart into pulp in a few seconds.
- Never flush facial tissue or paper towels. Anything that can survive a trip through the laundry in your pocket is not going to fall apart in the holding tank. Don’t keep it in the head compartment.
- Annual disassembly and lubrication with grease is the best way to keep your head pump operating effectively. You can keep the pump lubricated by periodically adding vegetable oil to the bowl before flushing. Shore-based sewage ordinances restrict oil and grease to 100 ppm because of problems with clogging collection pipes, so don’t overdo it. I’ve done studies with holding tanks and chemicals, and the only holding tanks I’ve seen that accumulated sludge or had gunk sticking to the walls were those that contained vegetable oil used to lubricate the pump. Moderation is the key. A good rule of thumb is no more than 1 teaspoon per full tank. Olive oil and canola oil cause the least damage to joker valves and other neoprene pump components.
Drew Frye cruises Chesapeake Bay and the mid-Atlantic coast aboard his 34-foot catamaran Shoal Survivor, searching for out-of-the-way corners known only to locals. A chemical engineer by training, and a 40-year climber and 30-year sailor by inclination, he brings a mix of experiences to solving boating problems and writing about them.
Thank you to Sailrite Enterprises, Inc., for providing free access to back issues of Good Old Boat through intellectual property rights. Sailrite.com