Rescuing a rare classic: a Cape Dory Typhoon daysailer
Issue 47 : Mar/Apr 2006
I retired in July and, after clearing up a few projects around the house, I began searching for a new summer project. As one who enjoys working with my hands and loves the water, I began thinking about building or restoring a daysailer.
I had previously built a kayak from a Chesapeake Light Craft kit, and I had restored an old 14-foot Hobie Cat. My husband and I have a Ta Chiao 35, but I wanted something that I could take out by myself for an afternoon sail. I had given thought to building a little catboat from one of Dynamite Payson’s Instant Boats book. I even went as far as to order a book of plans.
One evening in October, as I was scanning the classifieds in the marine section of our local newspaper, this ad caught my attention:
“FREE. 1975 Cape Dory Typhoon for a donation to charity. Call . . . ”
I called. A friendly young man answered and said, “Sure enough, the Cape Dory is free if you are willing to donate $500 to the American Heart Association.” He went on to say that the boat had belonged to his dad, who had died 10 years previously.
He initially thought he and his wife would use the boat, but they had other interests and the years slipped by. The boat had been left unused on a lift at a pier at his parent’s summer home for at least 10 years, but Hurricane Isabel came along and destroyed the pier and dumped the little boat into the water. As a part of her fury, Isabel had torn a portion of the toerail off and added many scratches and dings to the hull. The owner was pretty certain that no structural damage had been done, but he realized it was time to find a new home for the little boat. He felt that his dad would have liked the idea of the proceeds of the sale going to charity. He mentioned that there were several other people interested in the boat and he would show her on Saturday morning.
Took binoculars
My husband, Jim, and I made a special trip the day before to see if we could get a look at the little Ty before we met her owner. We took our binoculars, since the boat was tied at the end of a pier that was no longer there.
To my surprise, this Typhoon had no cuddy cabin. I thought to myself, “Someone has made a mistake. This can’t be a Typhoon.” But Jim recognized the Alberg hull. When we were first married, we had owned an early vintage Cape Dory. He knew the lines well.
Knowing how well that boat had sailed and how stable it had been in all kinds of weather, I was sure this would be a fine boat for me to single-hand. She appeared to be a little shabby, but she was floating. I called the owner Friday evening, upped the donation, and begged a little before convincing him that I would take care of his dad’s boat and make her look pretty. He agreed to sell her to me.
The next day a friend towed her by water to my community marina. She was filthy from 10 years of neglect: full of moss, mildew, and debris. There were even old duck eggs aboard. I immediately began cleaning her up; I didn’t want anyone at our marina complaining about a derelict boat in one of the slips. Out came the bleach cleaner and scrub brushes. Soon the mildew and duck eggs were long gone, and she was white again . . . a little beaten up, but clean. The teak bench seats cleaned up very nicely too.
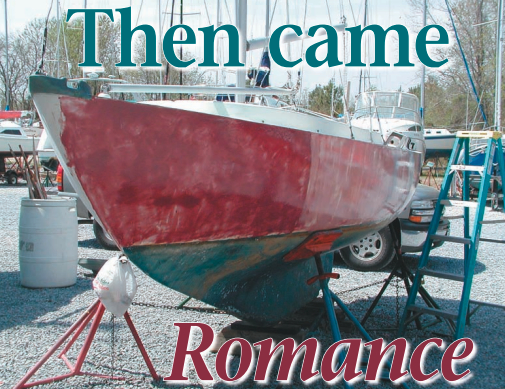
Over the next few weeks I started having doubts about whether I really wanted to keep her. She was an open boat and had that strange-looking faux coaming ridge all the way around her deck. I thought she looked like a big bathtub in a pretty hull. I had always liked the looks of the Typhoon with the cuddy cabin and the little portholes. I had to admit, though, that she sailed like a dream . . . almost effortless with her self-tending jib. I convinced myself, “If I can’t make her pretty, I’ll sell her after I restore her.”
New gear
Jim had other ideas. Christmas came and Santa brought her a new main and jib and a brand-new Tohatsu 3 1⁄2-hp outboard. Now I had to make her look good.
Over the winter I plowed through every marine paint chart I could find, looked at pictures of nice-looking small boats on the Internet, and made sketches using various color schemes.
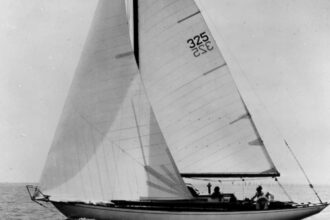
I also inquired of members of the Cape Dory bulletin board whether anyone knew anything about this particular Typhoon design. To my surprise, I received six responses and pictures. I learned that this model is a sought-after boat. My attitude began to change. One of my correspondents sent me an article about this model of the Typhoon daysailer. It seems that there were three deck styles offered on the standard Typhoon hull. Only 30 of this model were produced. It was designed after the Doughdish daysailer, similar in appearance to the Herreshoff 12 1⁄2 but with fiberglass coamings instead of wood coamings. Armed with this information, I searched the Internet for some examples of Herreshoff daysailers and decided on a color scheme from one of these lovely boats.
In April, I sailed her to a nearby marina to be hauled. This was the first time I had seen what was below the waterline. Her rudder was a little ragged but repairable at the bottom, otherwise she appeared to be in good shape. Jim ripped off the old broken toerail and left the rest to me. I was excited. I had a project.
My first task was to fill in the hundreds of scratches and gouges, evidently made as she was scraped and battered in the violent action of the river during the hurricane. To my good fortune, Read Beigel, a friend who belongs to the Alberg 30 Association, as we do, happened to be working on a hurricane-damaged Alberg on stands next to my Typhoon.
Good advice
He took a break that afternoon and looked over my little Ty and asked me if I would like to learn the best way to get rid of all those abrasions, and smooth out those areas on the hull where the weave was showing. He runs a boat repair business and is very good at boat restoration.
“Yes,” I responded quickly. He proceeded to educate me on the correct way to repair and fair a hull. Following his directions over a period of a few weeks, I cleaned and sanded the gelcoat and removed all the old filler from previous repairs. I wiped off the residue with denatured alcohol. Next I applied a thin coat of epoxy with microballoon filler. This was applied over the entire hull with a plastic fid, making sure that the mixture was pressed tightly into all the damaged areas. After it cured I washed the hull with soapy water to remove epoxy blush.
He then introduced me to the “long board sander.” I made my own from 3⁄16-inch plywood cut to a strip 3 1⁄2 x 20 inches. To this strip I epoxied blocks of scraps 1 x 1 x 3 inches at each end to use as handholds. I purchased two rolls of sticky-back sandpaper, 100 and 220 grit, cut strips to fit my new long board, and was ready to begin the process of fairing the hull.
This turned out to be easier than I expected. The hull was easy to sand. By the end of the second day of sand-
ing — back and forth, then diagonally, slowly sculpting the hull — it began to look very smooth. When I thought I was finished with the sanding, Read showed me an interesting way to check the hull for smoothness by wetting it down with the hose and then checking the reflection for distortions. The reflection was almost perfect, I needed to do very little touchup.
Epoxy waterproofing
The next step was to roll on a thin coat of epoxy over the hull for water-proofing. I used a marine-grade foam roller, hand sanded it smooth after it cured, then applied and sanded the primer. This process went very smoothly and only took a few days. Next I made repairs to her rudder and sanded and painted the bottom a traditional dark red.
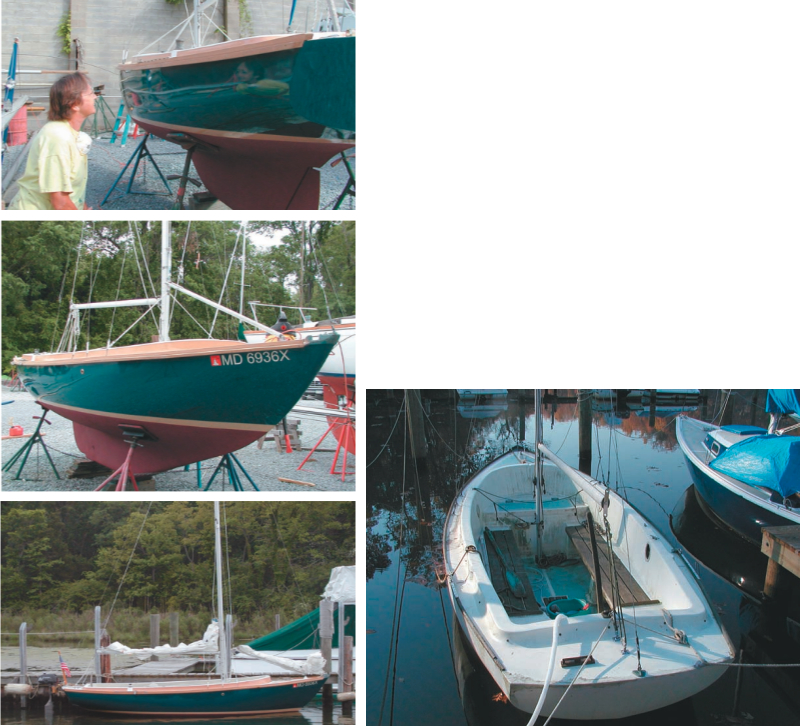
Finally the moment I had waited for arrived: her first coat of paint. I will never forget how excited I was that morning. I used the roll and tip application method, using a marine-grade foam roller and tipping with a 4-inch foam brush. I chose Brightside polyurethane enamel for its ease of handling, durability, and high gloss. I added a few ounces of Penetrol, an additive that enhances the flattening of paint and varnish and slows the drying time. This allows the brush strokes to flow into each other. I could barely find a brush stroke in the finish after it dried. I drove home that day exhilarated. My little boat was beginning to look pretty. After three coats she looked dazzling. I could actually see my reflection in her topsides.
My color choices took some planning. I wanted to paint her a dark teal color, but I could not find the color I envisioned on any of the marine paint charts. Since she was such a rare design, I wanted my little boat to be different but with a classic flavor. I ended up buying Brightside dark green and borrowed a half can of dark blue from a friend. I bought a paint bucket and mixed the color I thought I wanted. I then added some white to lighten the shade. Before I knew it, I had almost three quarters of a gallon of paint . . . a lovely shade of green with a subtle blue tint.
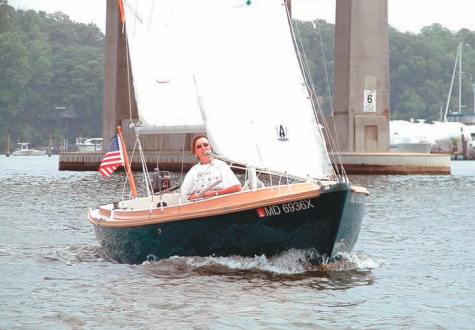
Paint scheme
I painted her deck white with the nonskid areas masked off. Then I painted those areas with a warm beige blend with non-skid filler. I painted her interior a soft beige above the seating to give some definition to this area and to tone down the previous all-white color-scheme, eliminating the “bathtub look.”
I masked and painted the bootstripe. This posed a small problem because there was no previous bootstripe to indicate where the waterline was. Luckily that Alberg 30 was right next her. The Alberg 30 hull is so similar that a friend with a good eye for this sort of thing spent several hours that morning going back and forth from the Alberg to my Typhoon, masking the outline for the bootstripe freehand and hoping that the waterline would be correct. It was perfect.
The most important decision I made in the boat’s color scheme was for the faux coaming. Since the four-to five-inch fiberglass ridge around her deck was supposed to represent coaming, I decided to paint it the color of teak, giving it the appearance of a wooden coaming. The idea worked. My Typhoon didn’t look tubby anymore. She was beginning to look like a little classic.
At last the day came for her to receive her new toerail. Jim had precut the teak to size and scarfed it to fit her 18-foot length, including the curve. With the assistance of a friend, the toerail was caulked and screws countersunk into place. We hammered wooden plugs into the screw holes. After a light sanding, the toerails framed what had become a work of art . . . a rare adaptation of a sweet little Doughdish-style sailboat.
One of my proudest days in many years was when one of the longtime yard employees told me that when I first had my little boat hauled, several of the guys made comments such as, “I don’t know why she wants that piece of ‘junk’ (word substituted).” He continued, “Now when the guys walk by they stop short when they see your boat, and I hear them say, “Holy ‘Cow’ ” (word substituted). I felt that as a novice in the art of boat restoration, I had won the respect of this small group of men who had been doing boat restoration for many years.
Finally it was time to put her name on the transom along with her numbers and registration sticker. What did I name her? Romance, of course. From the moment that broken toerail was removed from her hull, to the moment I proudly tied her up at the slip in our community marina, I found that the romance was there all the time, just waiting to come out.
Thank you to Sailrite Enterprises, Inc., for providing free access to back issues of Good Old Boat through intellectual property rights. Sailrite.com