A neglected vintage sailing dinghy finds love
Issue 120: May/June 2018
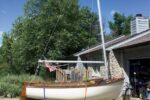
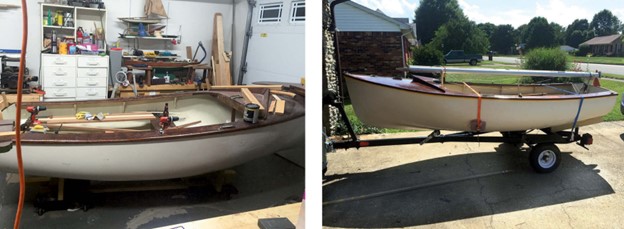
A couple of years ago, I realized that, if I wanted to sail more, maybe I should look around for a smaller boat. I started watching Craigslist and other places, and one day a 1960’s-era Rhodes Robin sailing dinghy found its way into my driveway. I have since been working to refurbish her — “restore” is too ambitious a word — as a simple winter-therapy project. After all, how complicated could an 11-foot fiberglass boat be?
As it turns out, Philip Rhodes, the Robin’s builder, and an unknown number of previous owners handed me a bit more than I expected. My discoveries included an interesting but catastrophically damaged mast system, a crazy gooseneck hack, a hull with a curious lack of internal symmetry, and a couple of surprising design details. I also met some nice people along the way. More on all that in due course.
At 10 feet, 10 inches, the Robin is not the smallest boat in the Philip Rhodes fleet. That spot belongs to the 7-foot, 1-inch Seafarer dinghy designed in 1961. Nor is the Robin as well-known as the 11-foot, 5-inch Penguin-class dinghy from 1939 (more than 10,000 of those little racers have been built). But among the nine Rhodes-designed sailing dinghies that I know of, the Robin may be the most interesting. It was designed in 1960 and manufactured by the P. Evanson Boat Company of Riverside, New Jersey. The company, which went out of business in the late 1970s, also offered the well-known Celebrity Sloop.
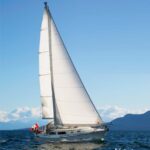
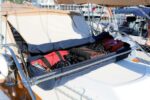
The Robin was marketed as the smallest dinghy that could be rigged as a sloop. It was fitted with a two-piece aluminum mast that could be stored within the boat and two mast steps, so it could be rigged as either a sloop or a catboat. The hull was originally offered in cold-molded mahogany, but the company later switched to fiberglass. Both versions were offered as either finished boats or as kits. To my disappointment, I have not been able to find any original literature about either the factory versions or the contents of the kits.
I believe that my boat, named Half-Pint, was a kit version for two reasons. First, I can’t find a hull number or manufacturer’s identification marks. Second, certain aspects of the fit, finish, and detail (all generally good) are peculiar.
My refresh and refurbish plan evolved into two main issues. The first, and maybe the oddest, involved the two-piece aluminum mast and the boom. The second was the hull, including flotation and seating. This was more conventional, but also presented some unexpected problems and outcomes.
Sparring with the spars
When I purchased Half-Pint, the mast showed evidence of having had a hard life. The two sections had been POP-riveted together to make the mast a single piece, and the joint left something to be desired. I couldn’t figure out why anyone would have bothered to do this. A two-part mast seemed like a pretty good idea to me.
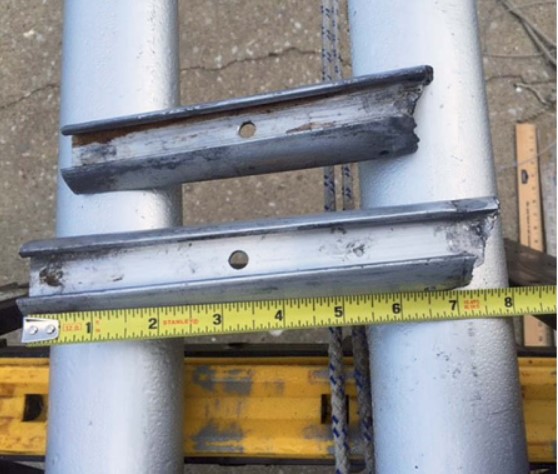
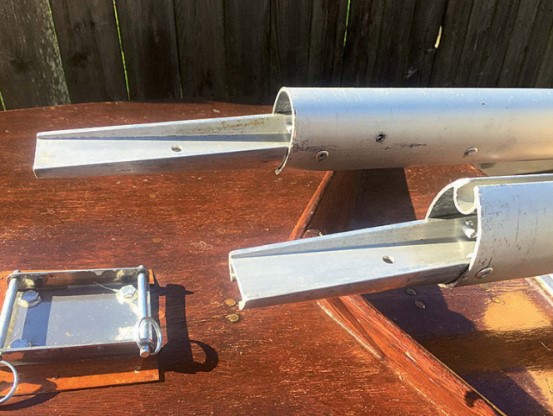
I drilled out all the POP rivets to see what was inside. What I found was the shattered remnants of two heavy-duty tapered aluminum wedges that served to join the two sections. The degree of damage suggested a serious collision with some overhead obstacle. Fortunately, the mast halves, which must have been replacements after the accident, did not seem to be damaged, but I was at a bit of a loss as to what to do next.
At this point, a wonderful company and its CEO come into the story. The boom, but not the mast sections, had a maker’s plate from Zephyr, a division of Cape Cod Shipbuilding. I looked the company up and sent an email with pictures of the mast cross-section and the damaged wedges and asked if they had any information. I wasn’t too confident; after all, the design is more than 50 years old and long out of production. In response, I received a personal email from Ms. Wendy Goodwin, the president of Cape Cod Shipbuilding. She confirmed that the mast was one of theirs and offered to help. After an email or two, she told me she had talked with the “guys in the shop,” and they could custom-fabricate a new set of sliding wedges for a ridiculously low price.
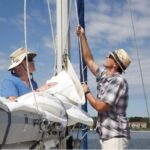
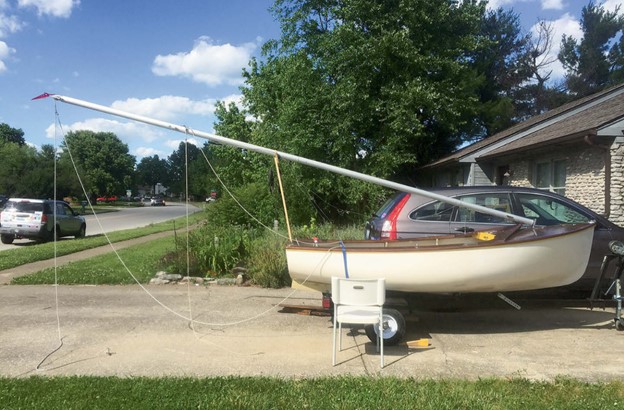
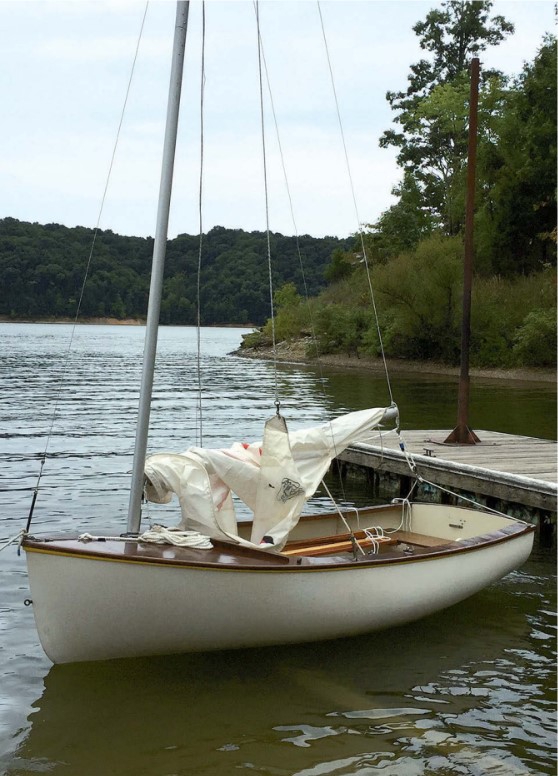
Once equipped with proper wedges from Zephyr, and after a few tries and skinned knuckles, I figured out how to mount the wedges in the mast halves and, lo and behold, everything worked. This led to the next issue. The assembled mast, for a boat a little over 10 feet long, was 17 feet long. That was a bit intimidating, since I had earlier started working on the fact that Half-Pint had almost zero built-in flotation. Apparently, back in the day, Phil Rhodes figured that, if you were going to sail one of his boats, you ought to know enough to keep the boat upright. Well, okay, but that issue was for later. Now I had to figure out how to pick up a 17-foot mast with its shrouds attached and, while standing in a 10-foot-plus boat, hold it perfectly plumb to the foredeck and drop it straight onto one of the tiny original pronged mast steps. Apparently, I should be able to do this for both the step in the sloop-rig position and for the one toward the eyes for the cat-rig position.
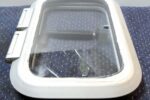
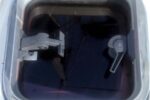
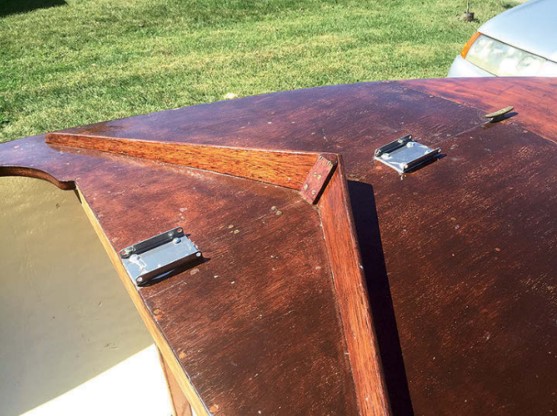
I didn’t much think that was going to go well. In fact, since there were no major dings in the deck and the finish on the mast steps was nearly pristine, I began to wonder if anyone had ever actually sailed this boat. So, it was back to the internet and the checkbook. My solution, and this is one of the reasons why this is a refurbish operation and not a restoration, was to install two Dwyer hinged-plate mast steps. One of the original mast steps became the fixture at the foot of the mast for connecting to the moving half of the hinge plate.
Now I was able to play around with raising the mast. This confirmed my nervousness. A good friend of mine, a sailmaker and no mean sailor himself, looked at a picture of the mast on a crutch preparatory to raising it and said there was no way that mast belonged on that boat. Since I had no original specs, it was back to Cape Cod and Zephyr. Once again Ms. Goodwin answered personally with the proper dimensions. My mast was original to the quarter inch. I had my friend put reef points in the mainsail.
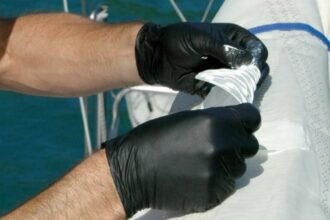
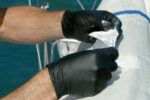
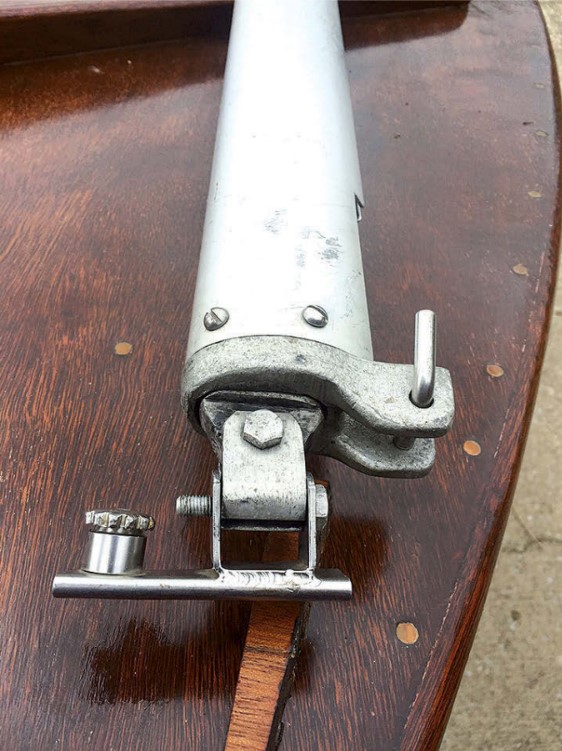
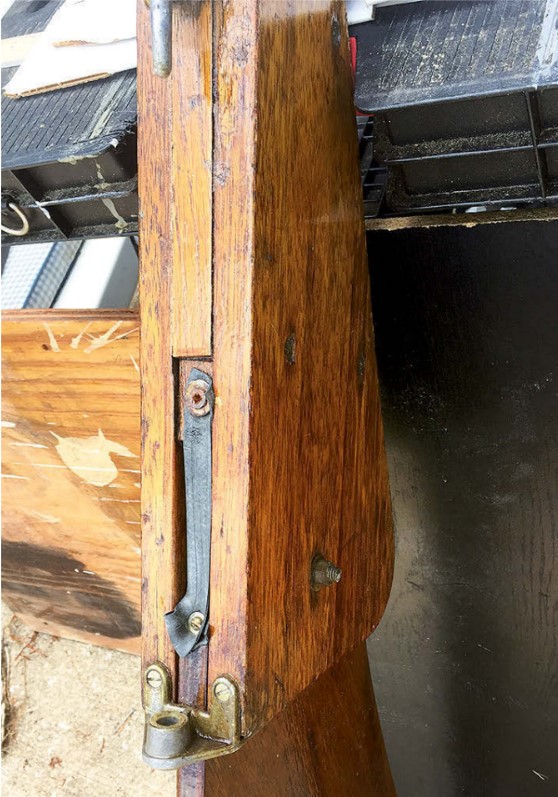
Next, I rigged a topping lift and tried fitting the boom. It refused to stay attached to the mast. On consideration, the whole gooseneck thing looked a bit of a lash-up. It was time to get out the checkbook again and go back to Zephyr with more pictures and questions. I tried to bypass Ms. Goodwin this time, figuring she had better things to do, but it didn’t work. She replied directly with a diagnosis: the original builder had apparently hacked a genoa track into a gooseneck slide, a less than effective solution. She confirmed what hardware I needed to order, including a new downhaul cleat assembly, and gave me another refreshingly low price.
I still have a couple of issues with standing and running rigging, but the tale of the mast restoration is essentially complete. The problems I encountered surprised me, and without the personal help of Ms. Goodwin, Cape Cod Shipbuilding and Zephyr, and the guys in the shop, I am not sure I could have figured out a good way to keep the two-part mast arrangement. This is the kind of leadership and service more companies in this country should strive for.
A photograph I saw of another kit-built Robin that had the same gooseneck lash-up made me wonder if it was a shortcut solution suggested in the original kit instructions.
Hull idiosyncrasies
Work on the hull did not present quite as odd a set of problems as the mast and boom, but maybe more grumbling and sore muscles. There were three major issues: some really bad fiberglass and epoxy work, the near-total lack of flotation, and possible considerations of seating for an old guy with stiff knees. Of the three, the fiberglass and epoxy issue was the most aggravating.
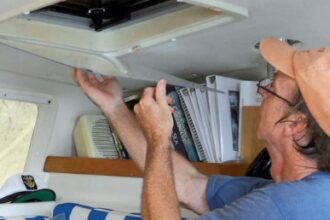
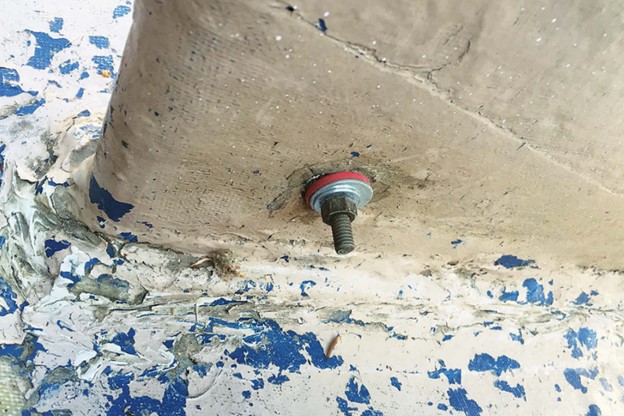
Let it be understood that I can be a 60-grit sort of guy myself sometimes, but there are limits. The structure and fairing around the base of the centerboard trunk looked as if it had been done using a super-sized version of those squeezie things cake decorators use. To add to the fun, apparently, the theory was thicker is better, and maybe two types of putty are better than one. I don’t know if this was from the original builder or some later attempt to stop leaks, but it had to be fixed. It took me hours with rasps, an annoyingly loud multi-tool, and even a Dremel rotary tool to clean and fair the trunk base, after which I applied several layers of overlapping fiberglass tape and epoxy. Tape and epoxy are not my favorite things, which may be why I have never built a stitch-and-glue hull, but it had to be done. It looks somewhat better and doesn’t seem to let water in or out.
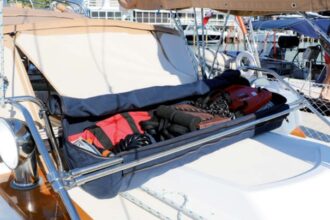
All along, the nearly complete lack of flotation was a nagging concern. I wish I knew what the factory version did for flotation. Half-Pint’s builder didn’t do much. There was one small chamber glassed in the bilges at the bow. It did not reach as far back as the foredeck overhead and was only about 8 inches deep at the max. I decided the first thing to do would be to put a bulkhead all the way up to a deck beam that appeared to line up with the chamber. That’s when I realized that the existing chamber was not symmetrical, nor was it level to the keel, and it didn’t line up with anything. This did make putting in the bulkhead more complicated but, by lying on my stomach in the bilges with my head cranked sideways while trying to lay and fair glass tape and epoxy with my left hand, I did get it done, and now the bow has a large flotation chamber. In retrospect, I think it needs some provision for ventilation during storage. At that point, I was pretty sure that Half-Pint would at least float bow-up like a buoy of some sort.
Next, I glued foam slabs under the remaining accessible part of the foredeck and under the sidedecks the length of the boat. In addition, I boxed in foam blocks under the forward and aft thwarts. I tried to get large blocks in but still leave room to lay boathooks and the like along the centerline. I’m still not sure that she is self-rescuing, so I’m still thinking about that and plan to avoid sailing on really windy days for the time being.
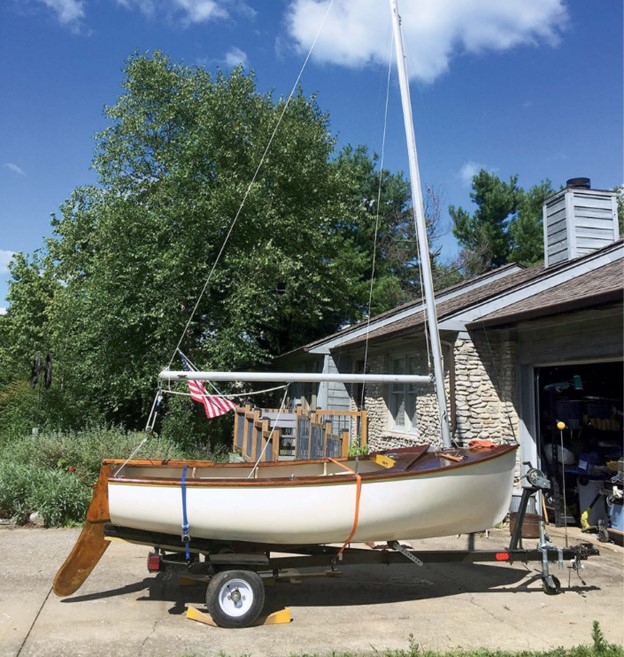
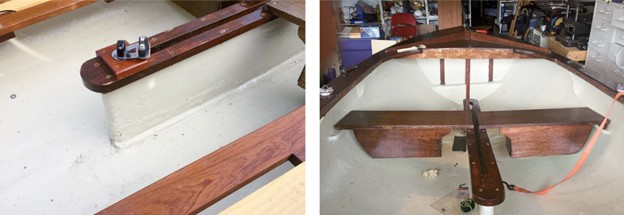
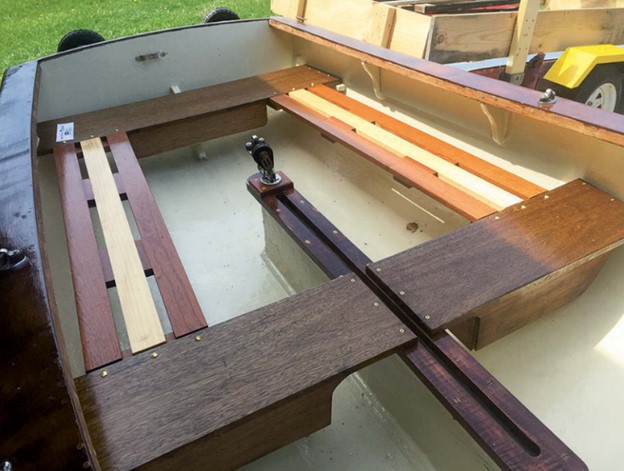
This pretty much left, along with paint and polish and other fiddly bits, the question of the relationships among seating, agility, and my knees. I looked at lots of plans for similar-size dinghies and skiffs and decided to add side benches that could be removed if desired. I had some long pieces of nice sapele and some clear pine, so I decided to get a bit fancy. They turned out to be the feature that actually makes Half-Pint a bit photogenic. I like them. I will see if either my knees or Half-Pint’s stability agree.
The story so far
Along the way I encountered a couple of neat details. The rudder has a really clever built-in rubber band between the cheeks that keeps the blade down as the default position. Hit something that pushes the rudder up and the rubber band pulls it back down. There is none of that awkward downhaul rigging. There is also a metal fairing under the hull that holds a split rubber seal along the length of the centerboard slot. The rubber has deteriorated and needs to be replaced. And I still have a few things to do: a new forestay is probably in order; there are some boo-boos on the hull that I haven’t sanded out yet (a nice new paint job would be nice). And discretion suggests I add some oarlocks.
I am, of course, indebted to Ms. Goodwin and the guys in the shop, to my sailmaking friend Bill Burns, aka Barnacle Bill, and to Mr. Shawn Payment of the Lowcountry Maritime Society, a youth sailing program, who provided information and photos about the Robin and who taught me the meaning of “Thar’s a Hoolie blawin’ in.” Who knew?
Half-Pint has only been in the water once. Sadly, it did not go well. First, I discovered that she really is a lot smaller than she looked in the garage. I also discovered that I didn’t have the drain plug secured correctly. I got my balance to avoid going overboard at the dock, got the drain plug in properly, and bailed her out while answering some rather impertinent questions from a small child in a bass boat. Then, while working on a shackle, I dropped a bolt directly into the centerboard slot, where it jammed the board immovably in the up position.
So, back on the trailer and home we went, where I had to gradually work the pivot bolt loose, drop out the board, and recover the offending bolt. That was followed by remounting the board and reinserting the pivot bolt in its invisible hole. All of that involved colorful language and definitely deserved a beer, not the first and probably not the last of the whole affair.
But I remain cheerful, and the autumn here promises to be mild. Besides, there is still the clapped-out Penguin on blocks in the backyard.
David Arnold is a former army officer and a retired academic administrator. He first learned to sail 60 or so years ago in a Red Cross class in Optimist dinghies on the Tennessee River. In the years since, he has lived in a lot of places and owned more boats than seems reasonable, but those dinghies on the river still remain special. Today, he lives in the Bluegrass region of Kentucky with his wife, Rose, Mosel the cat, and Bonnie the dog.
Thank you to Sailrite Enterprises, Inc., for providing free access to back issues of Good Old Boat through intellectual property rights. Sailrite.com