Reverse the ravages of age or accidents
Issue 121: July/Aug 2018
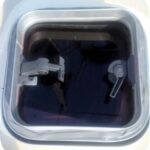
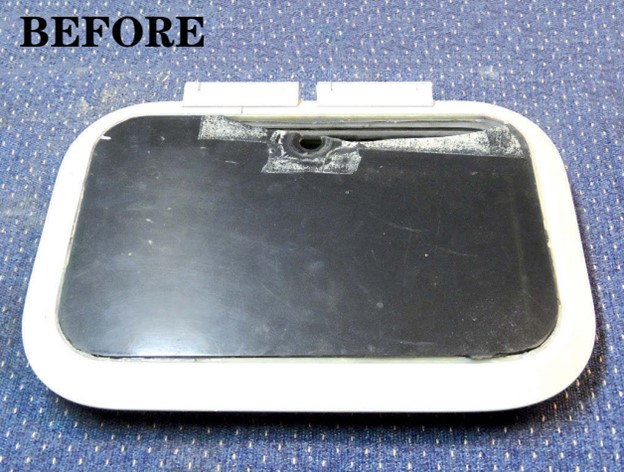
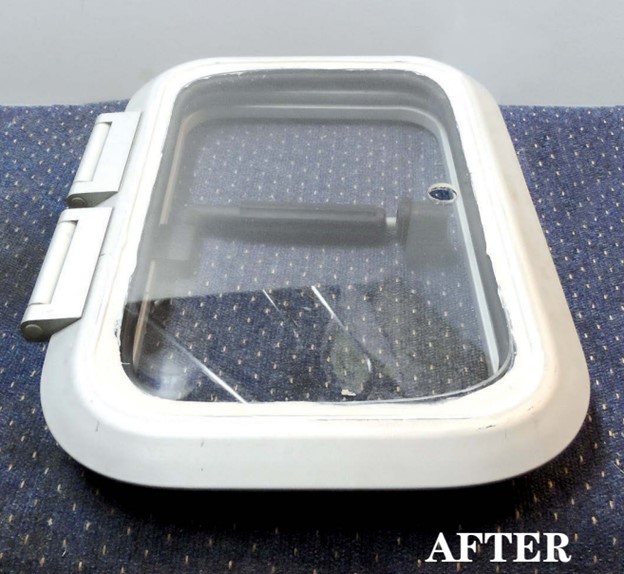
Deck hatches are great for the light and air flow they allow below, and it’s nice to see through them. Unfortunately, subjected to ultraviolet (UV) light and foot traffic, they get fogged, crazed, and scratched over time. Or, as happened to hatches on my afterdeck, they get anchors dropped on them or someone steps on them while they’re cracked open with the latch closed. Given the breathtaking prices of new hatches and the substantial cost of repairs, reglazing a hatch yourself makes sense.
Choose a material
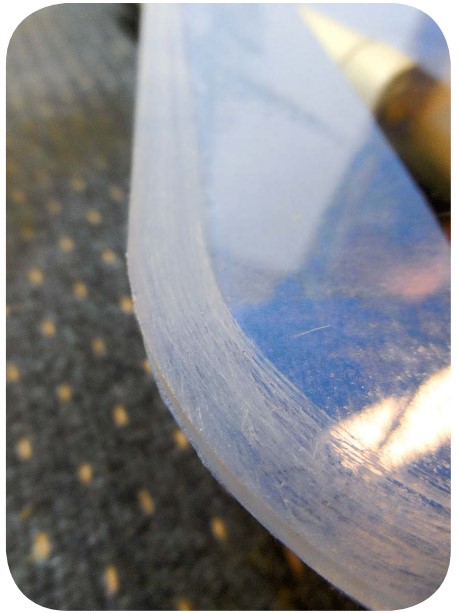
Acrylic is preferred over polycarbonate for hatch lenses because it is more resistant to UV and scratching. It is also stiffer and less likely to sag or flex enough to break the bond in larger hatches and windows. Polycarbonate is more impact resistant (better for dropped anchors) and less likely to crack while drilling and shaping, but it is not stronger. Both materials are available clear and tinted; a dark tint will keep the boat a little cooler, but clear gives a better view. Both are available at the local hardware store in thicknesses up to 1⁄4 inch, sufficient for hatches up to about 18 inches, and thicker material is available through plastics supply houses. If the exact thickness of the original is not available, go slightly thicker. The lens should stand slightly proud of the frame to prevent water from ponding.
Remove the old hatch
It’s best to take the entire hatch and frame home. Don’t be tempted to remove only the glazed lid, as this often means a battle with seized stainless steel bolts and the risk of breaking something. Although it is possible to perform the work in place, I would only do this if removing the entire hatch proves too difficult, perhaps because it was bedded with tenacious polyurethane.
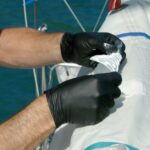
If the hatch was bedded on butyl tape, gentle prying with a pair of putty knives should pop it loose in a few minutes. If a stronger sealant was used, a debonding agent might be needed. I have tested many debonding agents and found Re-Mov or So Brite DSR-5 most effective on silicone, and DeBond Marine Formula most effective on polyurethane, although the latter always puts up a fight.
Apply the agent around the frame perimeter, wait five minutes, then slice close and deep, parallel to each bonding surface, with a razor knife or similar tool. Apply the agent again and wait another 10 minutes. Begin gently working your way around with a pair of putty knives; rocking a sharpened knife from side to side often helps. Although the agent will not soften the sealant, aided by the knives it will substantially weaken the bond. If the frame does not release after a few minutes of effort, apply more debonding agent to the seam you have started and allow it to work an additional 15 minutes. These products will also help when cleaning up the opening. Heat from boiling water can help, particularly in cooler weather.
Extract the old lens
Using the appropriate release agent, cut the old lens free with vertical cuts from a razor knife on the top surface and, if needed, flush cuts under the gasket on the inside surface. The lens should pry out easily with a putty knife, and the gasket should lift out. Remove remaining bits of sealant with more release agent, time, and a plastic scraper and small wire brush. A hose pick is perfect for small grooves. Scrub with soap and water and you are finished. All traces of silicone should be removed from the aluminum frame; a solvent wipe is neither required nor helpful.
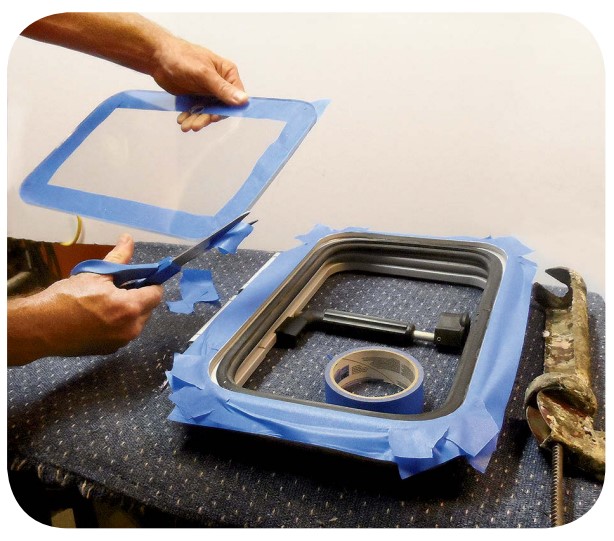
Shape the new lens
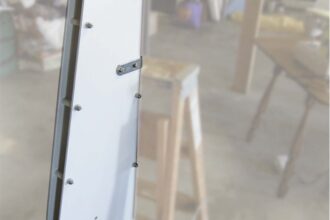
I don’t have a router, which requires jigs for cutting rounded corners. Instead, I cut the blank to size by scribing a clean groove with at least 10 firm strokes of a plastic cutter and snapping the score over a straight edge, such as a table edge. To mark the corner radii, I trace around the old lens with a Sharpie, then remove all of the plastic, including the Sharpie line, with an angle grinder and a 75-grit sandpaper disc. Larger holes for hardware are best made with a hole saw; there is far less risk of cracking than with twist bits. For smaller holes drilled with a twist bit, use a sharp bit, moderate speed, light pressure, and a backing block. Prepare the bonding surface by sanding.
Prime the bonding surface
If you use Dow Corning 795 silicone to bond the lens, skip to the next paragraph. If you use Sikaflex 295 UV, prime the plastic bonding surface with Sika Primer 209D and the aluminum frame with Sika Primer 210, allowing about 30 minutes for drying (24 hours maximum). Sika Primer 210, a thin polyurethane solution costing up to $80 in the smallest size (enough for about 20 windows), will harden within a few weeks even if resealed and adds considerable cost when reglazing a single window. Without primer, UV radiation will attack the bond at the lens surface, causing failure within 6 to 18 months, based on long-term testing. For this reason, I prefer Dow Corning 795 silicone: no priming is required, it will last as long as the lens, and it is more easily removed with Re-Mov or DSR-5.
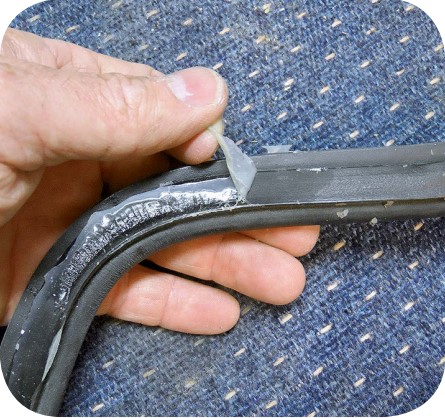
Replace the gasket
If the gasket is in good shape, it can be reused. If damaged, replacement material is available through marine suppliers. Cut to length cleanly with a razor without stretching; it will tend to shrink over time, so cutting it 1⁄4 inch longer is not excessive. Bond the cut edges together with rubber adhesive or contact cement. If the hatch is on a slope, place the joint on the lower side to reduce the risk of leaks.
Apply a coat of paste wax or other release agent to the gasket before installing it; if you ever need to replace the gasket, you do not want it bonded to the frame or glazing.
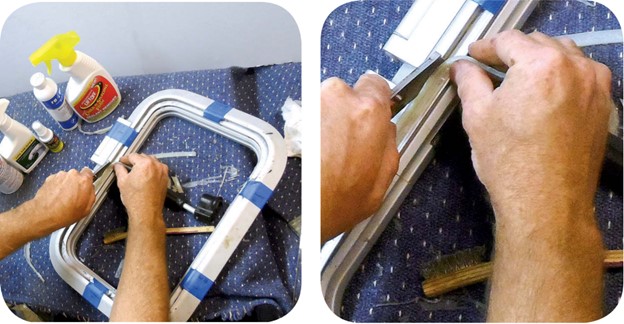
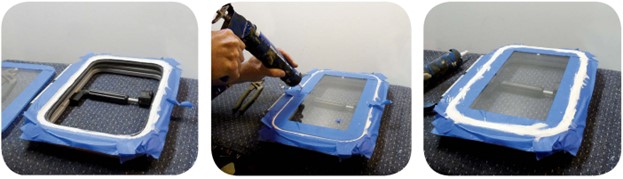
Glue the lens in place. Sand the surface of the lens where it will be bonded, especially if the glazing material is coated with a UV protectant. I have used both Dow Corning 795 silicone and Sikaflex 295 UV polyurethane, and both will easily last more than 10 years. Do not use hardware-store silicone. I once glued a lens in with it while experimenting with Velcro-attached window cover designs and accidentally pulled the lens out with only the grip of a few Velcro squares.
First, mask the lens and frame; it is impossible to work neatly enough to avoid smearing sealant. Run a thick bead along the seating surface, filling any bonding grooves. Place the lens on the bead, maintaining a consistent 1⁄8- to 3⁄16-inch space between the lens and the frame. There should be enough caulk under the lens that it sits slightly above the frame. Finally, caulk the remaining groove, filling all air gaps and pressing the lens into the caulk as needed. To ensure a good gasket fit, leave the hatch frame closed while the silicone cures.
It’s worth noting that most hatch leaks occur where the gasket meets the hull-side frame, not around the lens. Most of those leaks result from accumulated dirt creating a gap or encouraging water to wick past the seal. The first treatment is to wipe the gasket and hatch with a damp cloth, preferably once a month. If that fails, wipe the gasket with a protectant or wax to make it water-repellent and less prone to wicking.
On some hatches, notably the Beckson hatches commonly used on cabin sides, the gasket is easily removed for cleaning and can be replaced without reglazing. Although the gasket may appear bonded to the window, if silicone was used, the gasket will peel loose when stretched without disturbing the lens seal.
Cleanup
Remove the masking as soon as you finish caulking; if it skins, it will pull caulk from the lens and frame. Caulk fingerprints on the lens can be removed after curing by gently scrubbing with Re-Mov or DSR-5 (Debond Marine Formula if polyurethane). Mineral spirits will clean polyurethane and silicone caulk off tools and hands.
In cold, dry weather, polyurethane caulks like Sikaflex 295 UV can be slow to cure. If the caulk does not skin within 24 hours, mist it lightly with water (polyurethanes only) to initiate curing.
Reinstall the hatch
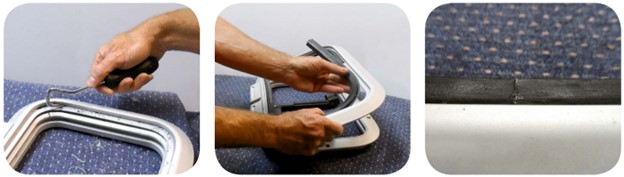
Emotions run high on this topic, but I feel Dante should have designated a special room for those who install hatches with polyurethane. Instead, use butyl tape; the next person working on the boat will be grateful. Apply the tape about 1⁄8 inch thick over the entire bonding surface, using multiple passes as needed and overlapping at joints. Gently tighten the fasteners several times over the next week as the butyl slowly oozes out. Trim the excess with a disposable plastic knife or sharp plastic scraper. Because butyl has no bond strength of its own, the fasteners must be secure. Use large screws into solid material or through-bolts. Do not use butyl in areas subject to fuel spills, as it will soften.
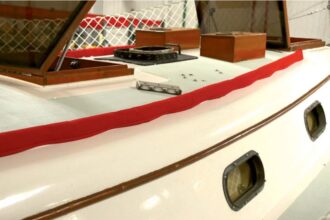
So, with only the cost of plastic from the hardware store, caulk remover, and caulk, a hatch can be restored like new and the crew member who dropped an anchor on it forgiven. The process will be easier next time—and there is always a next time.
Drew Frye draws on his training as a chemical engineer and his climbing and sailing experience to solve boating problems. He cruises Chesapeake Bay and the mid-Atlantic coast in his Corsair F24 trimaran, using its shoal draft to explore shallow, less-traveled waters.
Thank you to Sailrite Enterprises, Inc., for providing free access to back issues of Good Old Boat through intellectual property rights. Sailrite.com