Anyone handy and well tooled can make them at home
Issue 117: Nov/Dec 2017
Over the course of 30 years, the unfinished handrails on my friend’s 35-foot Bruno & Stillman powerboat had become whittled down from scrubbing until they were clearly too fragile to trust a life to. I pointed out the obvious to Bob and told him that, if he paid for the materials, I’d make new ones for him. He jumped at my offer, so I made him four rails, two with 11 loops and two with nine loops.
I’m a woodworker at heart and I’ve made handrails for my boat and others. I enjoy doing it and have improved my technique over time. DIY handrails are quite easy to make and for a fraction of the cost of store-bought or custom-built handrails.
Handrails are commonly made from teak, but I prefer ipe, which to my mind is better for the purpose. It lasts longer than teak, does not have soft grain to “scrub away,” and holds varnish better because it is not as oily. Left untreated, it weathers to a smooth gray finish. Ipe is also one-quarter the price of teak and is readily available. I have also used mahogany decking, pressure-treated decking, and even composite decking for workboat rails.
I am sure countless descriptions of how to make wooden grabrails have made the rounds, but since I’ve done this a number of times and refined my methods over the years, I decided knowledge gained could be shared.
Material
I strongly recommend using 5/4 x 6 ipe decking without tread grooves. Because it’s over an inch thick, it yields a much nicer rail than the 7/8- and 15/16-inch store-bought rails. Besides, nothing on a boat, maybe especially handrails, should appear inadequate to serve its intended purpose.
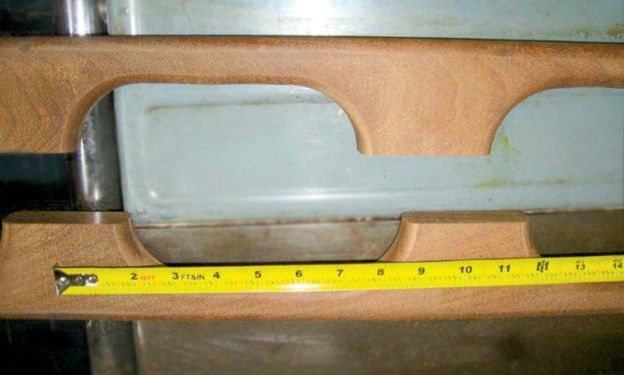
A nominal 6-inch-wide board will yield two handrails. The length of board needed is approximately the number of loops in the handrail times 10 inches, plus 8 inches.
Getting started
Strike an accurate pencil line down the center of the board. Using a compass, dividers, or calipers, starting a little more than 5 1/2 inches in from one end, strike a mark across the centerline. Then from there, mark x inches, then y inches, then x, y, x, y, x, y, and so on along the length of the board (one x y pair for each loop). For rails with standard 10-inch loop centers, x = 3 1/2 inches and y = 6 1/2 inches.
Now take your tape measure and double-check that you have 10 inches from the center of one y space to the center of the next y space all the way down the board and a little more than 5 inches at the far end. This does not have to be exact, it’s just a check.
Next, take a nail or awl and put a center-punch mark at each x and y mark.
That’s the layout done.
The next several steps involve drilling, sawing, sanding, and routing, and it’s a good idea to wear a dust mask when doing this work with hardwoods.
Drilling
Drill a 1/4-inch hole at each punch mark. A brad-point bit is really best because it centers perfectly in the punch mark.
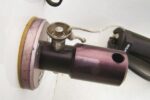
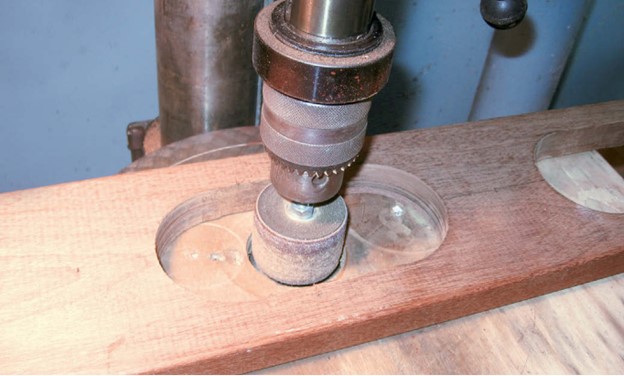
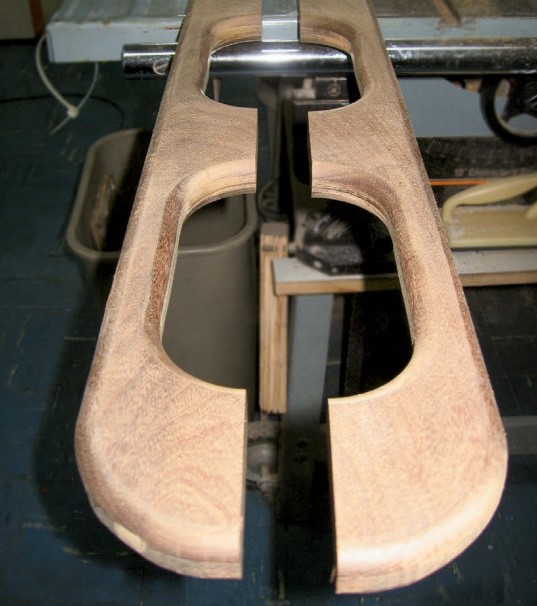
The next step is perhaps the hardest part. Using a 3 1/4-inch hole saw, preferably in a drill press, saw halfway through the board at each predrilled 1/4-inch guide hole. Take your time — focus on all the money you are saving.
Flip the board over and finish cutting the holes from the other side.
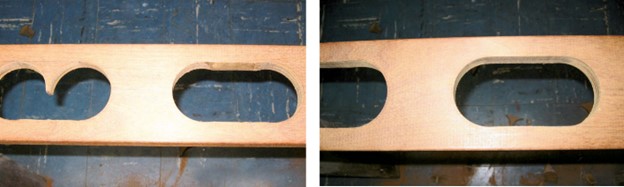
Sawing
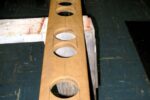
Next, after striking an accurate pencil line top and bottom between each pair of holes, carefully saw down each line with a saber saw to complete each oval hole. If you work carefully, you will save time on the next step.
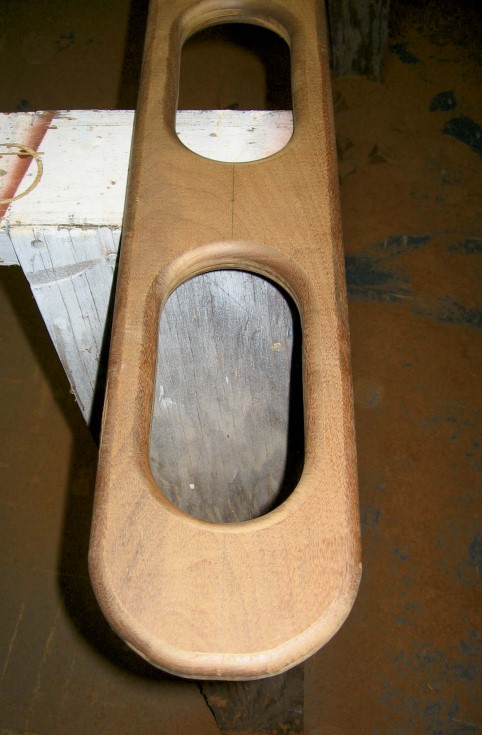
This is also a good time to lay out the ends of the rails and saber saw them out. They can be any pleasing curve you like, but make them beefy enough to hold a fastener well, as the ends see the highest loads when in use. Three to 4 inches is not too long at the base. You can always shorten them if they look too bulky when finished.
Drum sanding
Using a drum sander, preferably in the drill press, clean up each oval where the straight cut meets the circle. A chisel can help if the inevitable “knobs” are large. Or you could do the whole thing with a chisel. You are going to rout away most of what you are doing now anyway.
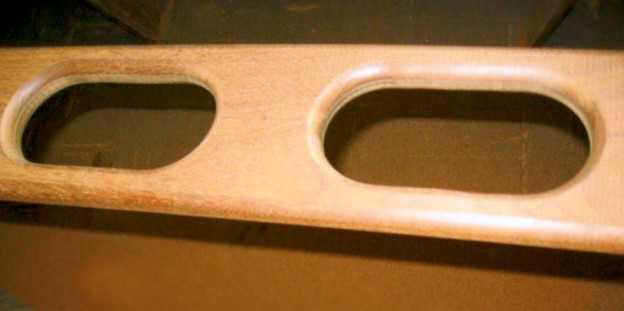
Routing
With a 1/2-inch-radius ball-bearing rounding-over bit in the router, make a light pass over every corner you see. Make a second and even third pass, setting the bit deeper each pass, until the result is a round or nearly round handle at the loops. Depending on the wood species, router power, bit, and operator, anywhere from one to three passes may be needed to get a clean, smooth result. Don’t go too deep, because sanding out this mistake would be very time consuming.
Sanding
Do some sanding at this point if you wish. None should be needed if you chose nice boards to start with and worked carefully.
Rip out
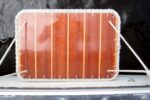
Finally, using a table saw or a circular saw with a good clamped-on guide fence, cut exactly down the center of the board to free your completed rails.
Countersink
This is something I do for store-bought rails too. I like to put a small countersink on the mounting holes where the rails meet the vessel. This leaves a little pocket for caulking to ensure each fastener is surrounded by caulk regardless of squeeze-out elsewhere on the base. I also have a plane blade with a very slight radius ground into it to slightly back out (make concave) each base so it won’t rock on the vessel’s surface.

Cost benefits of DIY
For my pairs of 11- and nine-loop rails, I obtained from my local lumber yard a 10-foot and an 8-foot length of 5/4 x 6 ipe decking without tread grooves. The total cost of the materials was $85. Just one of the shorter rails would have cost much more ready-made, if that length were available at all. A major chandlery lists one seven-loop teak rail (the largest it carries) at $109, and that’s before over-length freight charges.
John Brooke lives on Cape Cod, has been an avid boater all his life, and has owned boats, power and sail, since the age of 10. He has made several trips down the Atlantic Intracoastal Waterway, and has sailed from Bermuda, throughout the Bahamas, St. Vincent and the Grenadines, and Trinidad with his sons. His interests and background tend toward things mechanical as well as philosophical. Now retired, he devotes his time to his grandchildren and things nautical. He currently owns two boats.
Thank you to Sailrite Enterprises, Inc., for providing free access to back issues of Good Old Boat through intellectual property rights. Sailrite.com