Installing a cabin heater for cool cruising adventures in a warm boat
Issue 154: Jan/Feb 2024
Honcho, our 1998 Beneteau 36s7, needed cabin heat. Even though we had given up cruising in the coldest months of the Pacific Northwest winter, we still wanted a warmer boat for those cool early mornings and evenings on damp summer days, and for shorter getaways in the spring and fall.
A popular option for boats of this size is a diesel furnace with forced air or hydronic outlets serving two or three cabins. They are easy to use, warm a space quickly with dry heat, and can run 24 hours a day if necessary. But with the exception of cheap knockoffs, they are expensive and can be complicated to install. They also use a lot of battery power and take up locker space for ducting or hydronic fan units. And in my experience, they can be noisy and fussy, requiring costly expert help and proprietary tools to deal with reluctant starts, unexplained shutdowns, and faulty safety sensors. They also suffer if not used for long periods of time.
The only other safe option is an externally vented freestanding or bulkhead fireplace using solid fuel, diesel, or propane. Honcho doesn’t have the room for a freestanding heater, but it does have one unused bulkhead dividing the salon from the forward V-berth cabin that seemed suitable for such a fireplace. But before proceeding, I needed to answer some important questions.
First, would a bulkhead fireplace provide enough heat? We have excellent bedding and like sleeping in a cool space, so our primary interest is being able to raise the temperature in the main cabin and the head from, for example, 50 F (10 C) to 65 F (18 C) in the mornings and evenings. We close the forward and aft cabin doors but leave the head door open when the heater is on. On Honcho, this gives us approximately 1,050 cubic feet to warm up. The standard Btu calculation formula to create and sustain a desired temperature suggests we need a heater that produces around 2,500 Btus. Given the inadequate insulation on the average sailboat — especially underfoot — and the desire to heat up the area quickly, we would want a heater that produces at least 4,000 Btus. The full range of solid fuel, diesel, and propane bulkhead heaters I considered claimed to produce that and more.
Thus, our second question: Which heater to choose? In my case, it was easy to rule out a solid fuel fireplace. Some years ago I had a rather negative experience on an old wooden boat with an ancient Lunenburg Foundry wood stove. While there are now more efficient and attractive units available and the crackle of a visible wood or briquette fire is appealing, there are serious drawbacks to a solid fuel heater on a small boat. First, you need a long stack to ensure that the heater draws effectively. If the bulkhead space you want to use is not close to the cabin sole, you might be faced with accommodating a chimney and flue cap as much as 2 to 3 feet above the deck. Most of this length must be removed and temporarily capped while sailing.
Second, you must anticipate dealing with soot on the deck, and possibly the canvas, if the burn is inefficient. Damper adjustments can be critical to ensure a clean and efficient burn. Third, there is the challenge of finding, cutting (in the case of wood), and storing appropriate-sized solid fuel. Finally, on Honcho, the anxiety of removing ash from a firebox 6 inches above a white leather- ette settee cushion sealed the deal. So, no solid fuel heater.
Bulkhead or freestanding diesel heaters have been quite popular over the years, but they present their own challenges. If your boat is diesel powered, you would anticipate pumping fuel from your main fuel tank. If that is not practical, or if you prefer to use cleaner burning and less smelly kerosene, you will need to install and regularly fill a day tank inside or outside the cabin, preferably above the heater to allow for a gravity feed. Like solid fuel heaters, diesel heaters require long chimneys. They can also be tricky and smelly to start, sometimes requiring an accelerant such as denatured alcohol to get the diesel burning. The firepot itself requires occasional cleaning, which is a messy business. Finally, diesel heaters don’t like excessive heeling when running underway and can blow out or smoke in strong wind.
A final point applies to both solid fuel and diesel heaters. They both draw air from the interior and therefore require a nearby external vent or open hatch, allowing a constant supply of fresh, and unfortunately cold, air into the cabin.
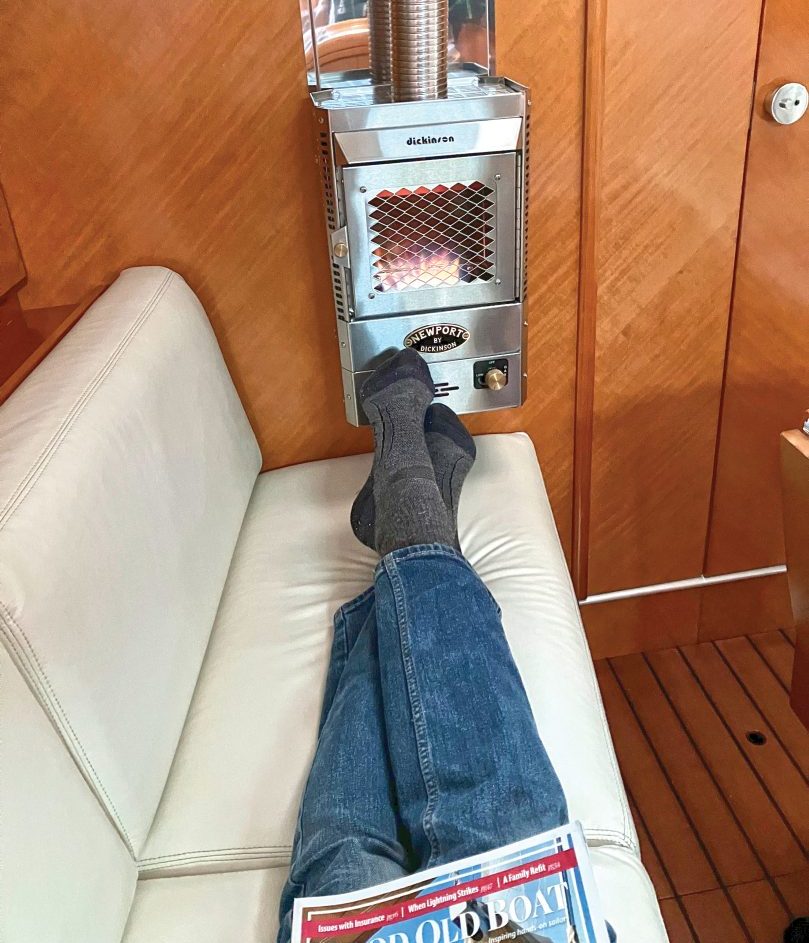
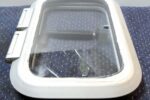
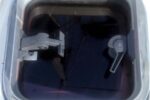
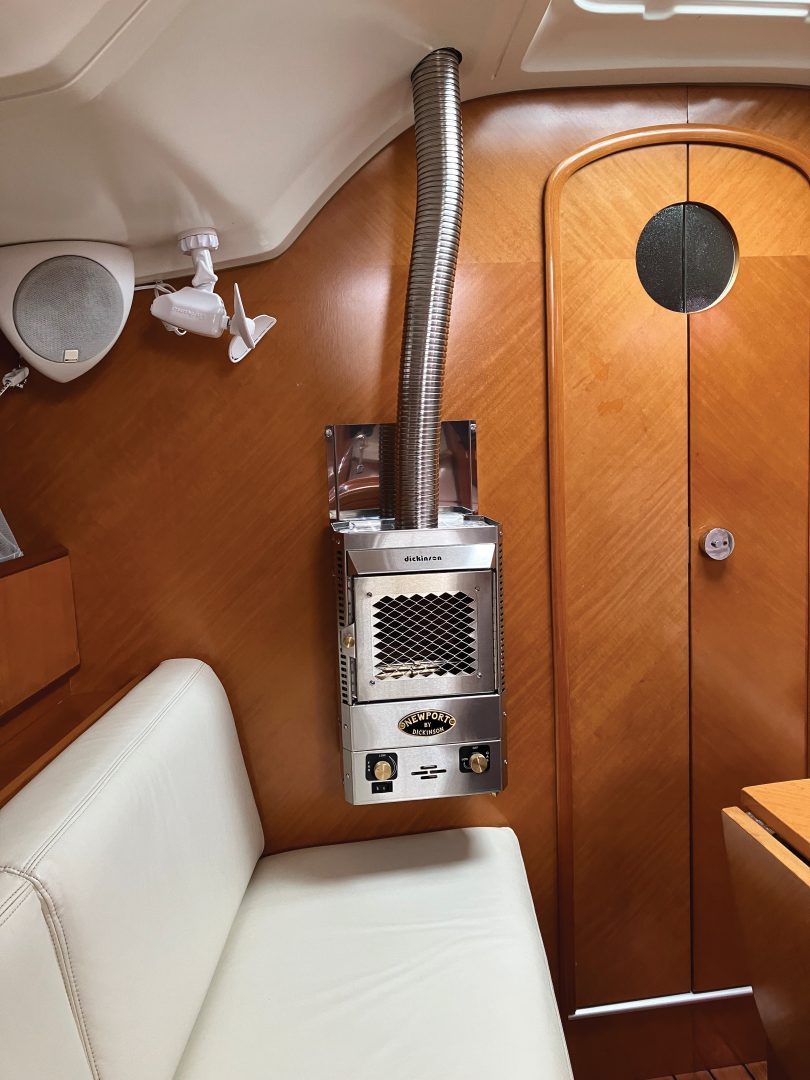
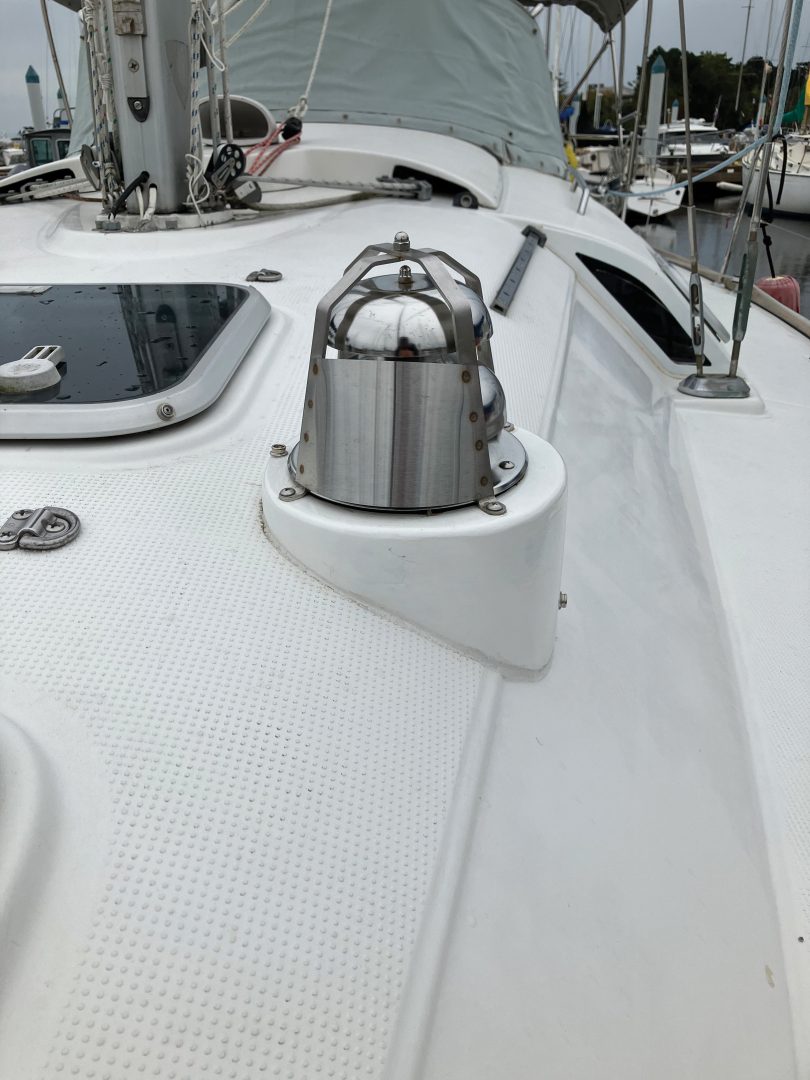
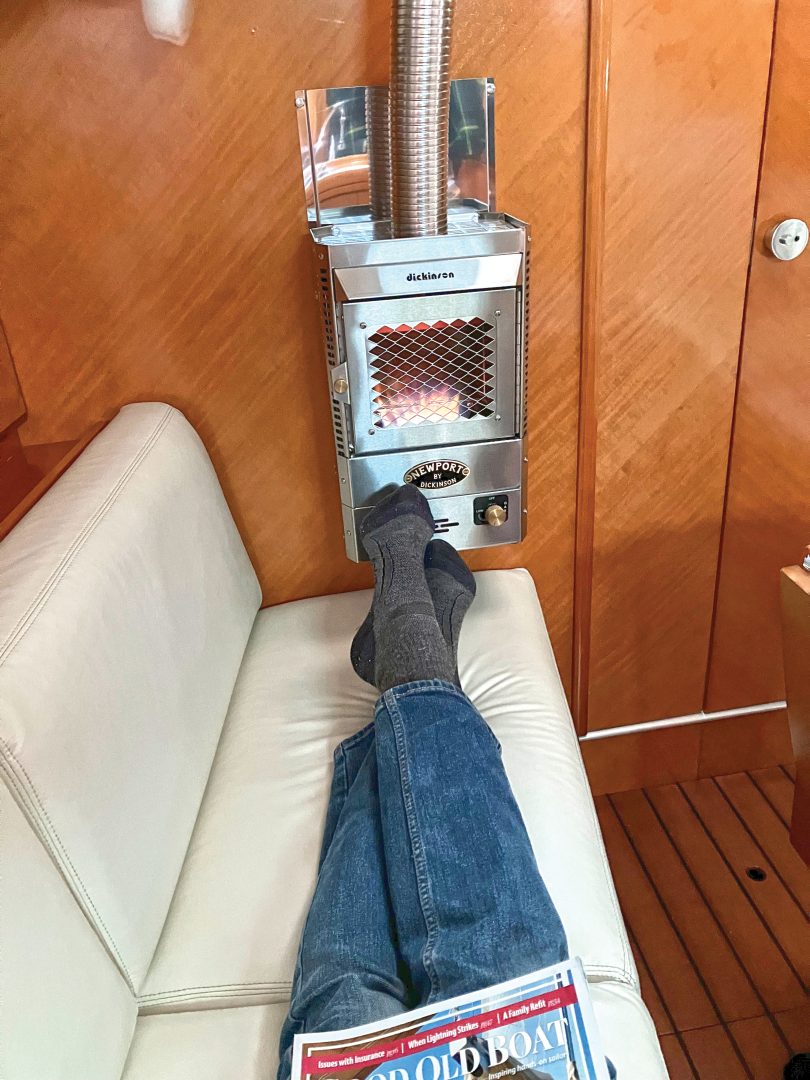
Taking all of the above into consideration, we opted for propane as our bulkhead heater fuel on Honcho. It is clean and easy to light, but requires careful installation and a reliable supply of fuel. Propane is familiar to most boaters. I had a successful experience with a propane bulkhead heater on one earlier boat and already have a propane cooking stove and a dedicated propane tank locker on Honcho. I chose the Dickinson Newport P12000 fireplace, which provides up to 5,500 Btus and features a ceramic glass viewing window, a downward-facing internal fan to distribute heat, good wind tolerance, and a manageable length, double-walled chimney pipe that simultaneously expels exhaust and pulls fresh air into the sealed furnace. The heater comes with the chimney and flue cap. The only accessory we added was a stainless steel guard for the flue cap designed to both shed jib sheets during tacks and further reduce wind impact on the fireplace. The former function is essential; the latter can be helpful in gusty conditions.
But before ordering any bulkhead fireplace, there are questions to address. First, will your bulkhead location work? To answer this question, we had to consider both the space itself and our capacity to deliver fuel and electrical power to the unit.
The space issue can be tricky. The potential locations on many boats will be on a bulkhead at the forward end of a settee. The Dickinson fireplace is roughly 16 inches high, 10 inches wide, and 8 inches deep. Our settee is almost 7 feet long, so the depth is not an issue. If your settee is shorter, stealing 8 inches from the length might interfere with its use as a bunk or even a seat. The unit also requires that the chimney be at least 20 inches long, and there must be at least a 6-inch space below the bottom of the fireplace.
On Honcho, with 47 inches between the settee and the ceiling liner, we could accommodate these requirements, but a smaller boat might not. In some cases, it might pay to mock up the heater in cardboard and tape it to the bulkhead to be sure it won’t get in the way of any normal activity in the cabin.
You also have to be confident that you can safely cut a 3-inch hole through the cabin liner and deck to run the chimney out to the external flue cap. Ideally, you want the flue cap to be located directly above the heater. Some heaters may allow for a chimney offset of up to 45 degrees. But a flue cap sticking out of the cabin side looks terrible, increases the risk of rain or spray intrusion, and might constitute a hazard on a side deck. Be sure there are no wire runs between the liner and the deck where you intend to cut, and nothing on deck to impede the placement of the flue cap. I once heard a sad tale of an inflatable being stored upside down on the foredeck above a flue cap. You can imagine what happened on one cool evening that followed.
The next task is confirming that you can deliver fuel to the fireplace. Before ordering the fireplace and propane hose, I ran a messenger line along the only possible route to establish the exact hose length required to reach from inside the stern propane locker to the fireplace and determine the spots that would require widening to allow passage of a hose with a 7/8-inch-wide flare fitting. Make sure you measure generously when estimating the length of hose required. You can have hoses custom-made to the length you require, but if you are even a couple of inches short, you have to buy a new hose.
The next step is to establish access to 12-volt power for the internal fireplace fan, a propane sensor/alarm installed close to the sole of the boat below the fireplace, and a second fan designed to enhance the circulation of heat from the fireplace and the chimney around the cabin. The total load would be less than 1 amp, easily available on my boat at the back of the bulkhead from the interior cabin lighting circuit.
Having satisfied myself that the project would work, I purchased the fireplace, sheet/wind guard, and propane hose. But despite careful planning, the installation was not without its challenges.
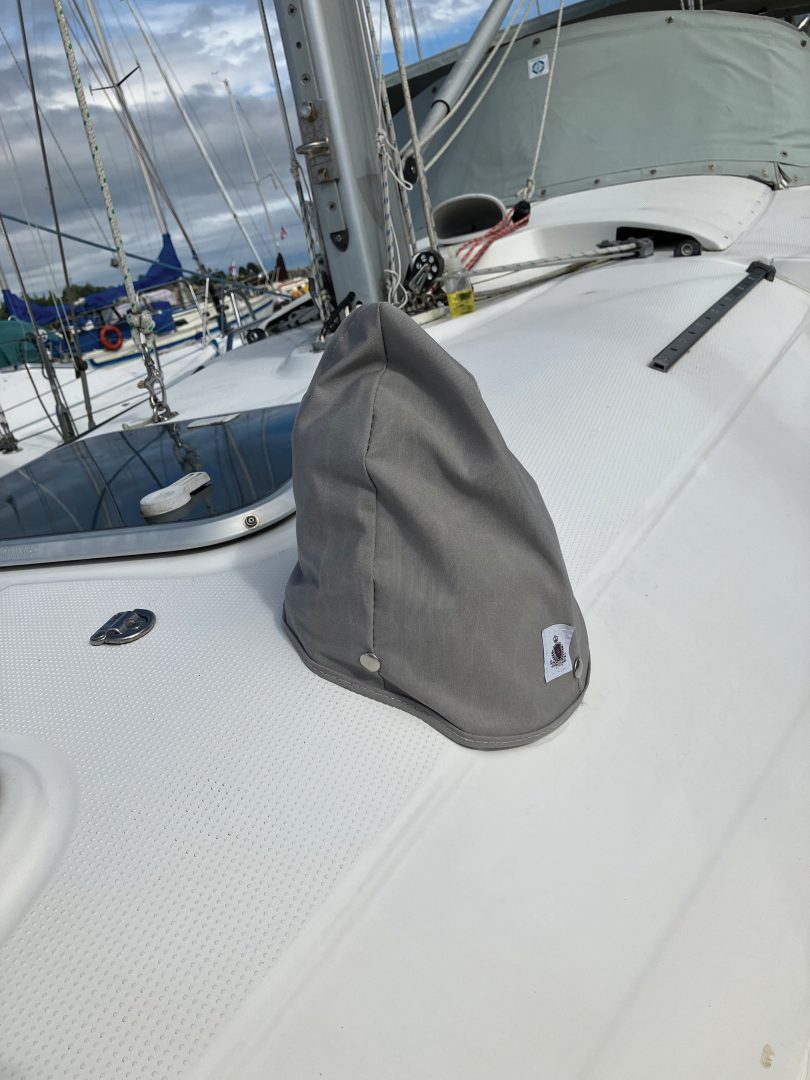
Securing the fireplace to the bulkhead could not be accomplished without first fitting the flue cap. If you have a flat cabin top, this is easy. In my case, however, this could not be accomplished without constructing an 8-inch diameter base for the cap and sheet guard, flat on top and aligned on the bottom to the very steep, complex curve of the deck where the chimney pipe emerges.
Except for the sharp curve of the deck and liner, there were no impediments to my cutting the hole for the chimney directly above the fireplace using a 3-inch hole saw from both directions.
Along the way, I had been building what was intended to be a prototype of the base using laminated pine pieces. I used a band saw to create the 8-inch outside diameter width and the rough shape of the interface with the curved deck. A lot of grinding and sanding was required to fit the base tightly to the deck. I then cut a 3-inch hole through the middle of the pine base with a drill press and hole saw (be sure to drill a guide hole all the way through first) and positioned it on the deck over the hole in the deck. It fit so well that I gave up on the plan to create a second version in teak and instead, soaked the pine construct with several coats of epoxy and high-gloss marine enamel. I then attached it firmly to the deck with 3M Marine Adhesive Sealant 4000. As they say, “Perfect is the enemy of good.”
After screwing the flue cap to the base, I was able to fit the chimney through the deck and the pine base and into the cap from inside the cabin. When I induced a very slight S curve, the 28-inch chimney section provided with the fireplace was exactly the right length to locate the fireplace 6 inches above the settee cushion and at a safe distance from the passageway to the forward cabin. If the gods are not smiling as kindly on you, it is possible, with care, to cut the double-walled chimney to length. Alternatively, smaller sections are available from Dickinson if the provided chimney is too short. It’s best to locate the fireplace as low as possible while maintaining the 6-inch distance from any object directly below it.
When attaching the fireplace to the bulkhead, be careful that it is exactly vertical. If your boat has a chronic heel to port or starboard, you may be disappointed with the results if you use a level to establish your vertical line.
Creating the propane hose route was a bit of a challenge. On Honcho, no PVC tubes or significant open channels from the stern area were available for some- thing as intrusive as a propane hose flare fitting. I was able to get the hose from the propane locker to the forward end of the aft cabin without too much difficulty. From that point, the passage beyond a hanging locker, storage compartments over the stove, the refrigerator, and the forward cabin bulkhead was won inch by inch using a flexible shaft bit holder to drill or widen holes, and files to create smooth edges. The hose needs to encounter smooth surfaces, with grommets or chafe protection at the bulkheads, and be securely supported along its whole length. Fortunately, in the open sections of the hose run on Honcho, the ceiling liner has an upturn at the hull-to-deck intersection that the hose can be tucked into. Remember to plug the ends of the hose flare fittings before working with them to ensure nothing gets into the hose that could later block the flow of propane.
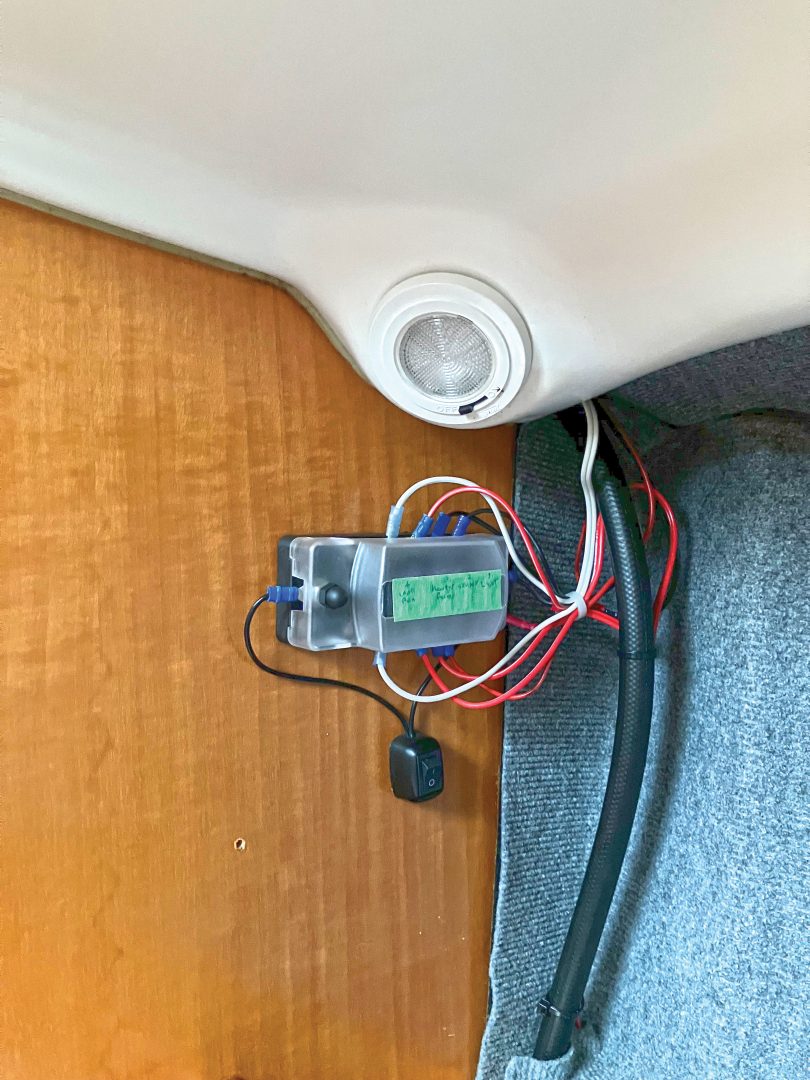
To make the electrical connections tidy, I ran all the wiring to a small blade fuse block holder via a power switch on the back of the fireplace bulkhead. The fireplace wiring runs behind the liner and under the settee base, and only the short run to the fan is visible in the main cabin. The most difficult part of the wiring was getting power down near the main cabin sole for the MTI Industries propane gas sensor and alarm.
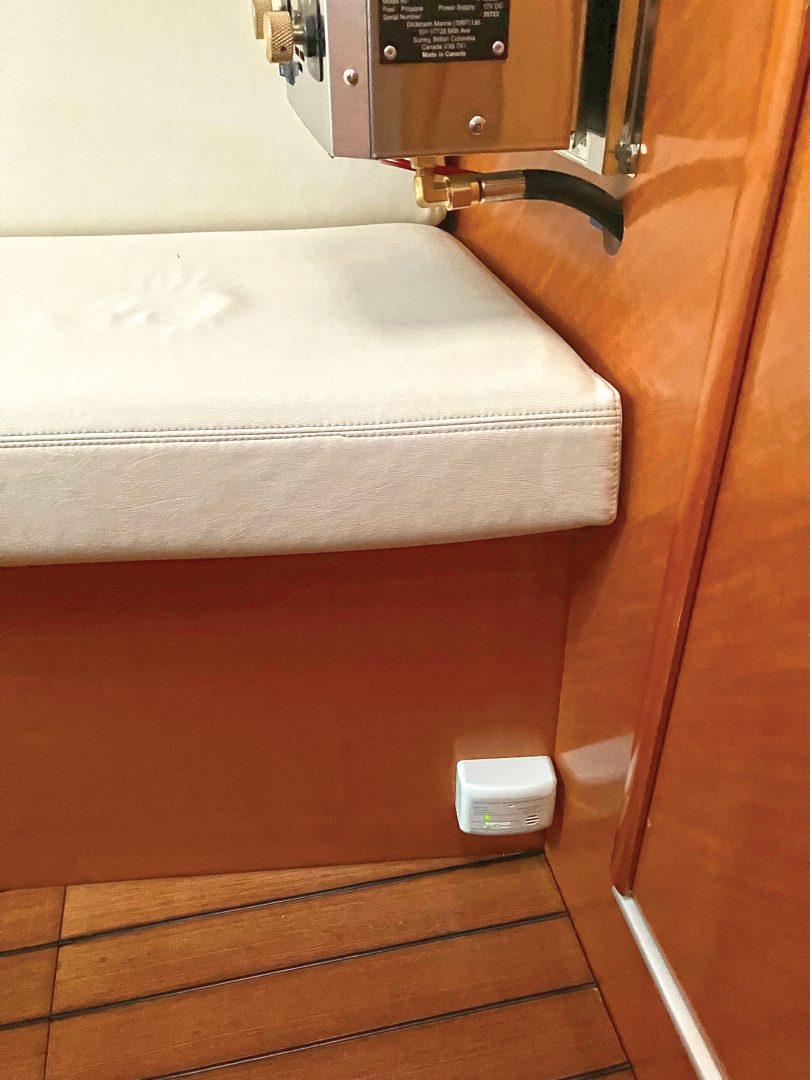
Why did I install a second fan? When I added the Dickinson propane bulkhead fireplace to an earlier boat, I noticed that while the double-walled chimney construction keeps the upper end of the pipe cool enough to touch, there is still a lot of useful heat in the section of the pipe directly above the fireplace itself. So I added a 2-speed Caframo Ultimate fan directed downward across the hottest part of the chimney pipe. It is quiet and is a useful complement to the fireplace’s internal fan in moving heat around the cabin and down toward the cabin sole.
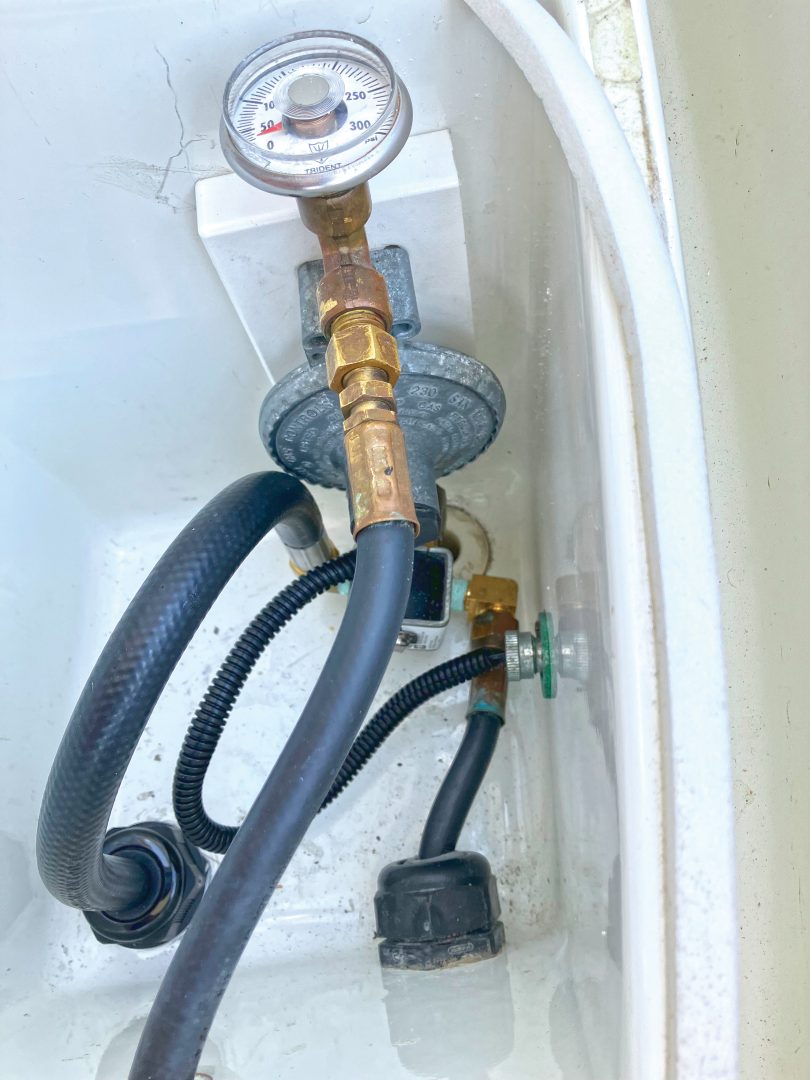
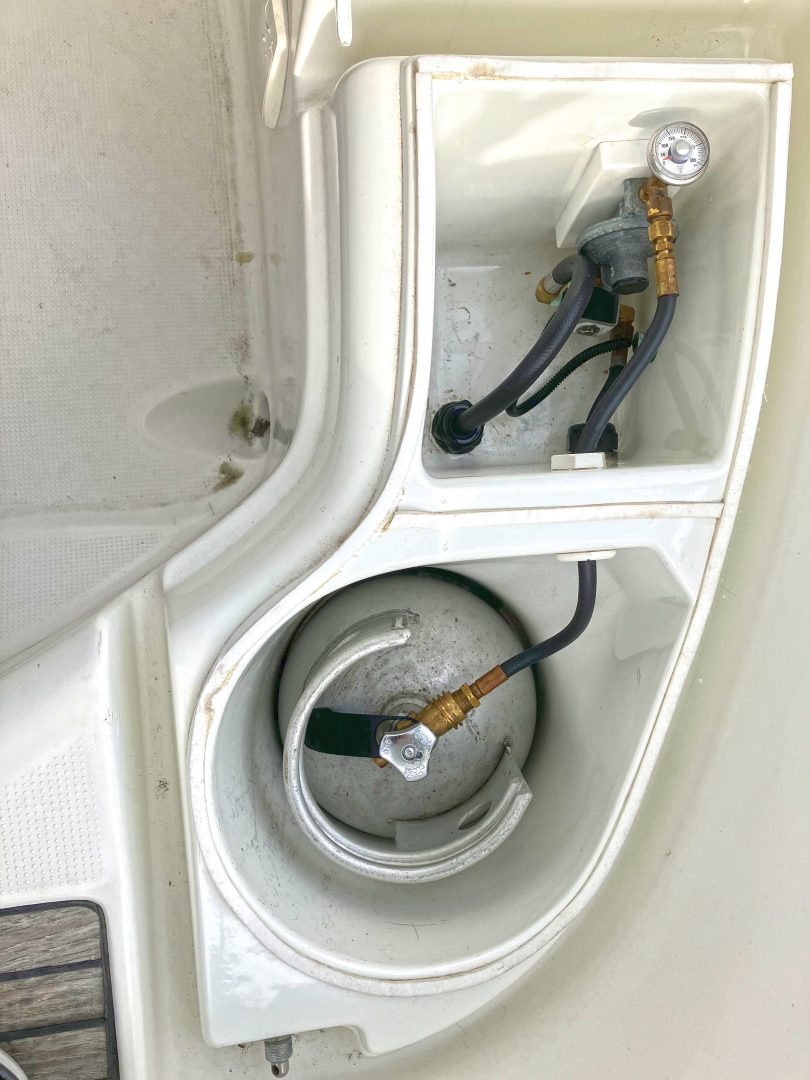
I then connected the new propane line to the tank in the stern locker. The locker is divided into two compartments, with the regulator, pressure gauge, and sole- noid in one and the 10-pound aluminum tank in the other. Both compartments are drained overboard above the waterline from the base. The challenge for some boaters will be to find room in the locker for the appropriate T-fitting required to add the new fireplace line. Make sure to use the correct yellow Teflon tape to secure NPT-threaded connections and install a vapor-tight fitting where the new propane line exits the locker.
Sometimes wrestling the altered system into place in the propane locker can loosen fittings that you thought were tight. So when you turn the rebuilt propane delivery system on for the first time, you must check the various connections in the locker for leaks using soapy water, leak detection fluid, or a portable gas detector. I tried an inexpensive portable gas detector (Yeezou Technology Y201) for the first time with this project and found it invaluable in identifying specific fittings that required further tightening. In addition, I used it to check that the thermocouple devices on the stove burners were blocking the flow of gas when the heater was in use and the stove was not.
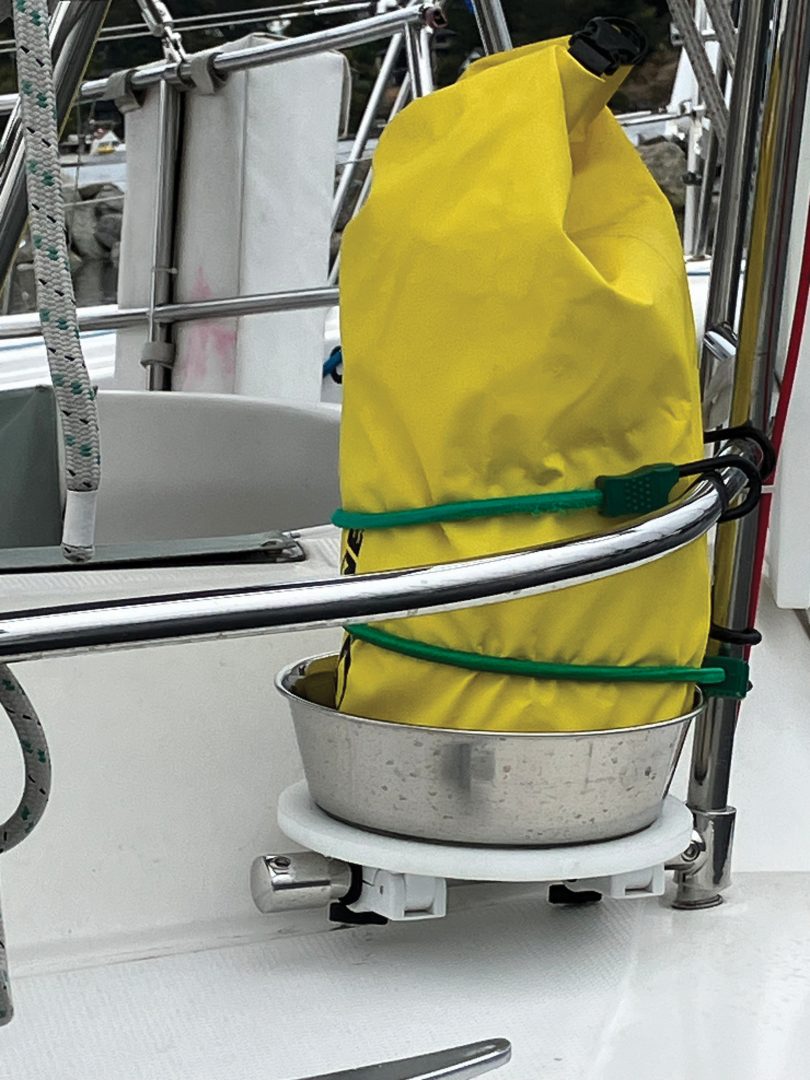
I noted earlier that there was only room for one 10-pound tank in Honcho’s propane locker. The Dickinson heater is easy on fuel, offering five and a half hours of operation per pound of fuel on low setting, which is where I usually end up after a short time at a higher setting to get heat circulating. But to ensure I was never surprised by an empty tank, I decided to carry an inexpensive, steel Flame King 5-pound tank, with the valve closed and plugged, in a dry bag mounted low on a stern rail. The mounting platform consists of a 9-inch diameter stainless steel dog bowl screwed to a 10-inch diameter piece of ½-inch StarBoard plastic board. I drilled drain holes in the base, then secured it with standard rail mounts to a short, 1-inch stainless steel horizontal rail section. I attached that to a vertical stern rail using a 90-degree hinged rail T-fitting. The bag is secured to the vertical rail with one or more bungee cords. Don’t forget, when creating a mounting system for a spare tank, that this platform also has to fit and secure the larger empty tank should you need to change tanks while on a cruise. Even an apparently empty propane tank should not be stored anywhere under the deck.
I hope this account encourages you to consider installing a bulkhead fireplace if you like anchoring out but feel a little reluctant on cool days to stay up after the sun goes down or get out of your warm bunk on a chilly morning. With the click of a power switch and a butane fire starter, you can warm up the cabin and enjoy the pleasant glow of the blue and yellow flame flickering behind tempered glass in the sealed firebox.
John Langford and his spouse, Kate Seaborne, live in Victoria, British Columbia, and have been sailing boats among the many islands on both sides of the border in the Salish Sea and in Desolation Sound for over 40 years.
Thank you to Sailrite Enterprises, Inc., for providing free access to back issues of Good Old Boat through intellectual property rights. Sailrite.com
