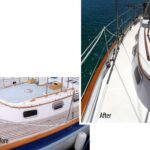
Protect bright-finished handrails with snap-on covers
Issue 112: Jan/Feb 2017
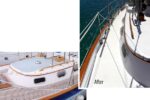
Teak handrails are not just functional, they add a beautiful, classic aesthetic to a sailboat, especially when the teak is newly oiled or varnished. Of course, it’s a lot of work to finish handrails and, once they are done, every sailor is eager to protect and prolong that finish. While many sailors use canvas covers to protect finished teak, few make their own. Perhaps you’ve sewn only a hem and you’re intimidated by the shape of handrails. Perhaps you’ve held off because you don’t want to drill holes in the cabintop for installing the snaps? Well, fear not. It’s easy to sew your own handrail covers that do not require you to install snaps on your boat.
Cover fabric should be UV-resistant and breathable. Sunbrella marine-grade fabric is a great choice because it has both those qualities and it’s colorfast. Sunbrella is soft enough that it will not scratch the finish you’re trying to protect.
Taking measurements
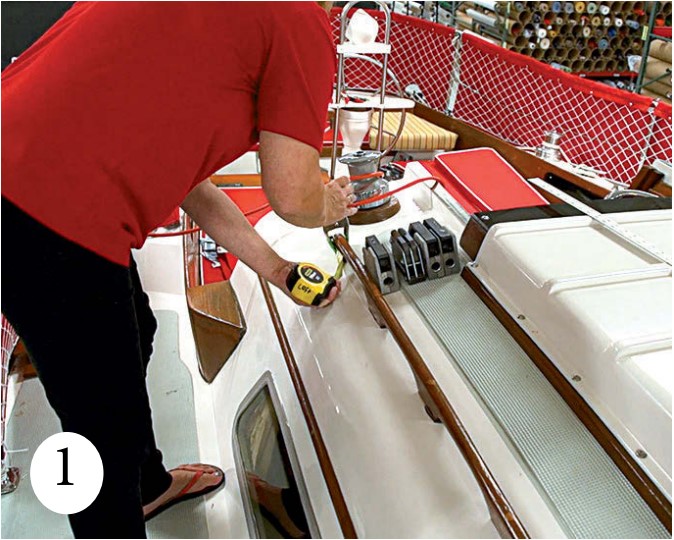
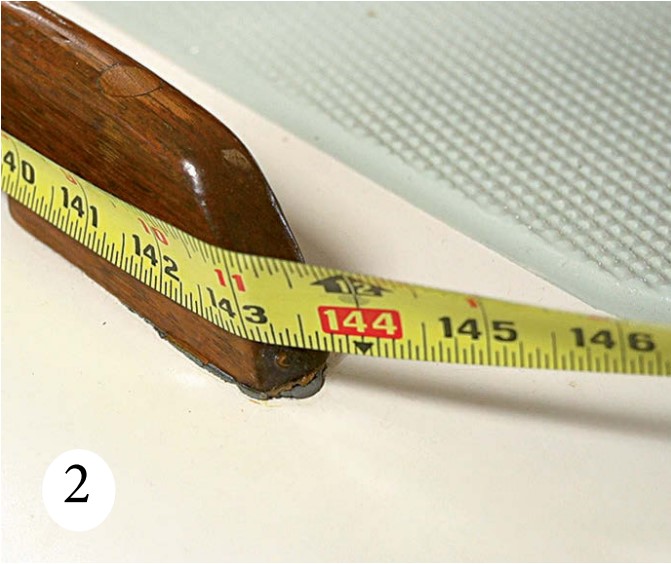
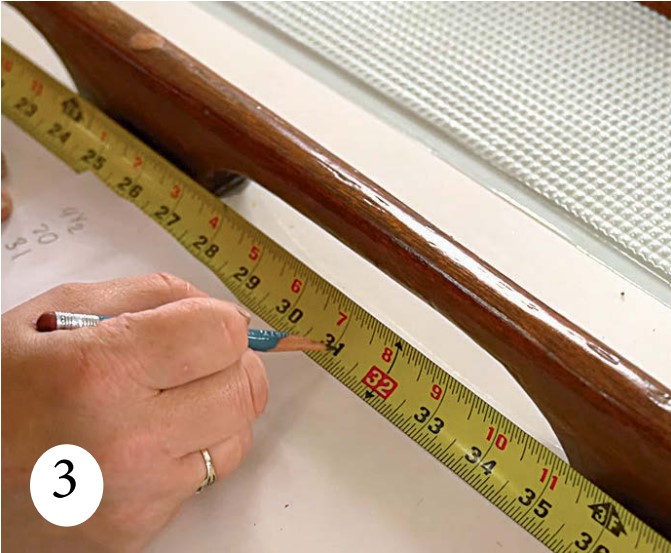
To start, clamp a tape measure to the handrail and measure the longest length, end to end, where it’s mounted to the cabintop (1). To this measurement, add 4 inches. This is the length of fabric you’ll need to make your cover (2). The finished cover will be secured with snaps that attach the cover to itself through the grab holes in the handrail. For all but the first and last grab holes, these snaps will attach the cover at the center of the hole. So for the center holes, note the distance measurement at the center of each (3). For the first and last holes, take a measurement as close to the outside of the grab opening as possible.
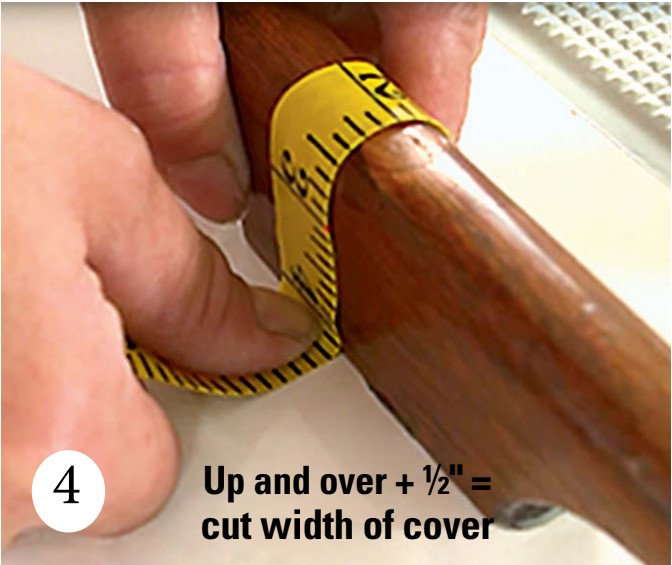
Next, at the side of one end of the handrail, use a soft tape to measure from where the handrail meets the deck, over the top of the rail, to where it meets the deck on the other side (4). Add 1/2 inch to this measurement. This is the width of the fabric you’ll need to make your cover.
Laying out
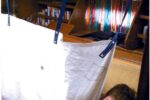
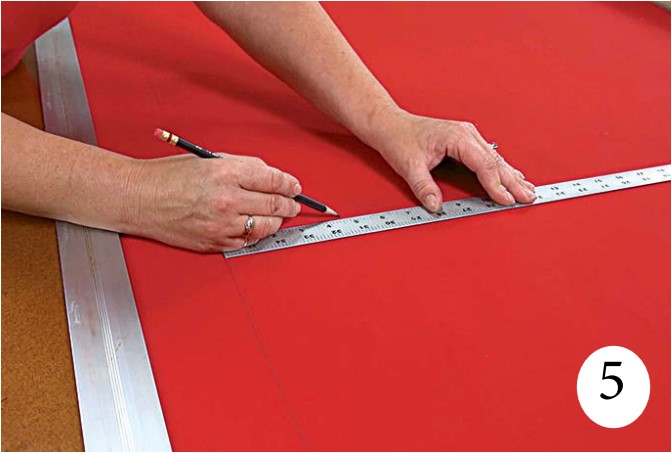
Mark your measurements on your fabric to form a long rectangular panel (5). Cut out the panel with scissors or a hot knife. Note: To reduce fabric waste, or in cases where you don’t have fabric long enough for your grabrail, you can pattern multiple shorter panels and seam them together to create a single panel of the desired length (6).
For example, in the project pictured, the grabrails were 147 inches long. To make the best use of the fabric, we used the full 60-inch width of Sunbrella fabric for each of three panels that we attached end-to-end using semi-flat-felled seams. See “The Semi-Flat-Felled Seam” below for the concept. If you have to join several pieces, do that before continuing.
Now, along one long side of the rectangular panel, on the wrong side (this is the side with the exposed seams that will be the inside of the cover), install 1-inch polypropylene webbing as a reinforcement for the snaps you will install. Place the webbing flush with the edge of the panel and attach it with straight stitches down both long sides of the webbing.
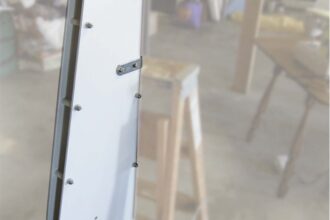
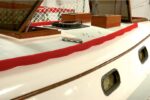
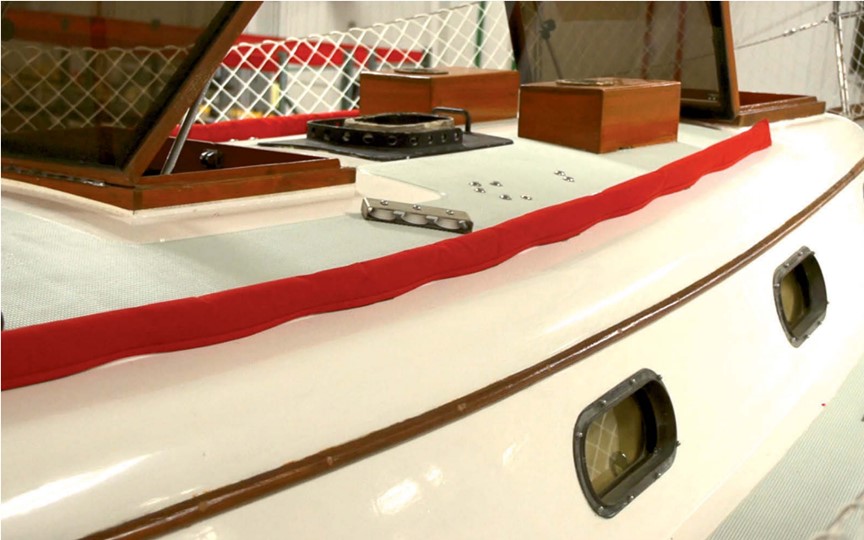
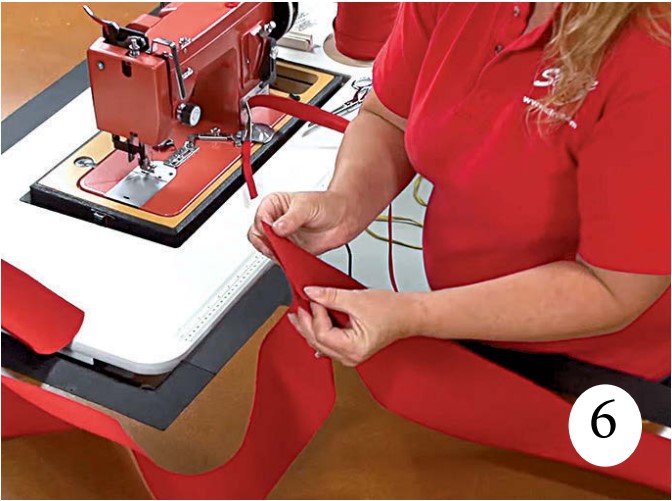
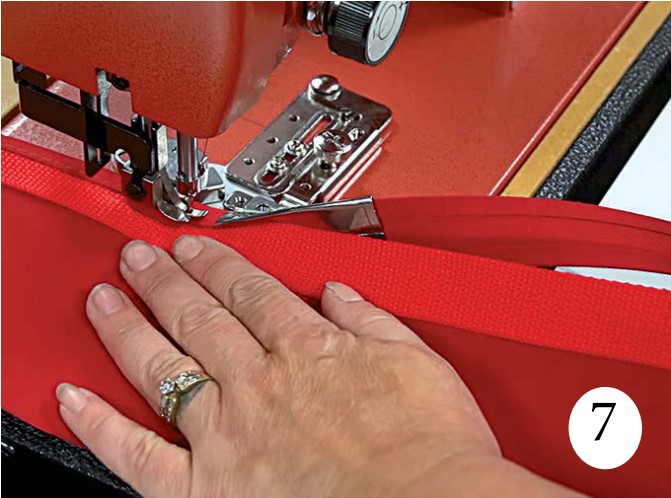
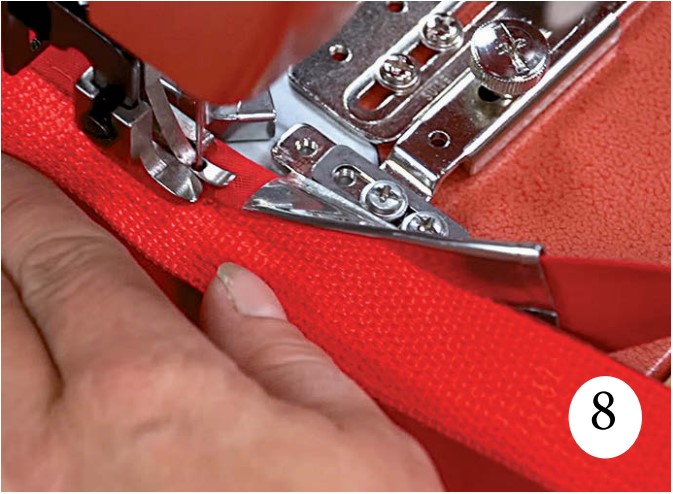
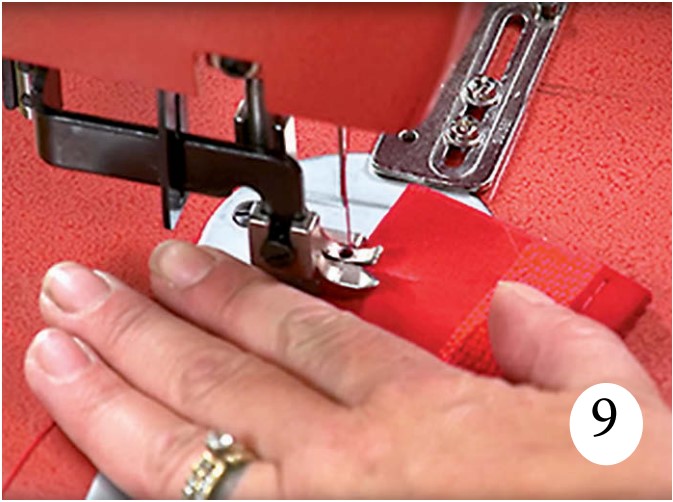
To finish the edges, sew 1-inch Sunbrella Acrylic Binding down both long edges of the cover. The Sailrite Ultrafeed sewing machine has a 1-inch swing-away binder attachment that makes this step easy (7, 8). If you don’t have such an attachment, fold the binding in half and sandwich the edge of the fabric into the folded crease of the binding. Double-sided basting tape (Seamstick) will help hold the binding in place while you sew. It’s possible to sew the binding in place without double-sided tape if you work in short increments.
To close up one end of your rail cover, fold the fabric in half widthwise with the right sides facing together. At one end, sew across at a diagonal that roughly matches the slope at the ends of your handrail (9). Turn the end right-side out to test the fit.
Before closing up the second end, measure from one end seam to the desired finished length of the cover plus 1/2 inch. Then turn the second end inside out and cut off any excess fabric. Sew this end on a diagonal the same way you sewed the first.
Installing the snaps
It is easier to install snaps than it is to read about installing snaps. You need a special tool to install snap fasteners. Prices range from $3 for a basic setting tool to $100 or more for fancier tools that will cut holes and install snaps in one step. For this project, a simple tool is fine, but if you will be installing snap fasteners frequently, you may choose to invest in one of the higher-end tools. (A video of the basic snap installation process is available at Sailrite.com/Snap-Fastener-Installation-Tool.)
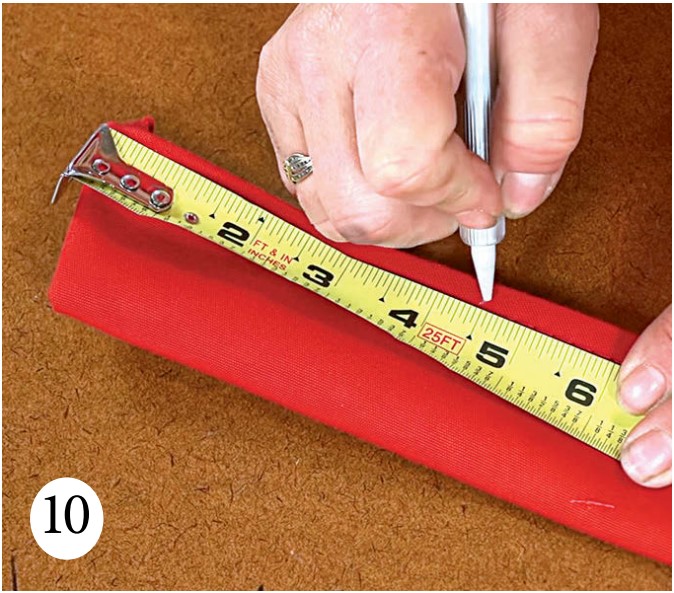
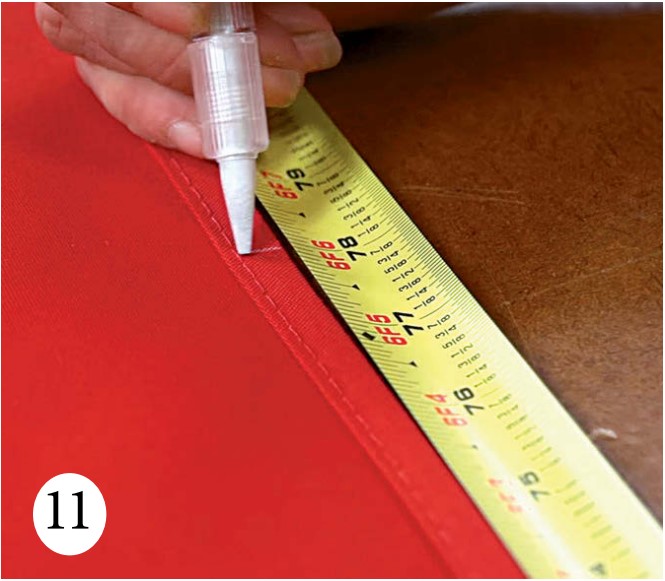
Measure and mark the location of each snap on the cover (10, 11).
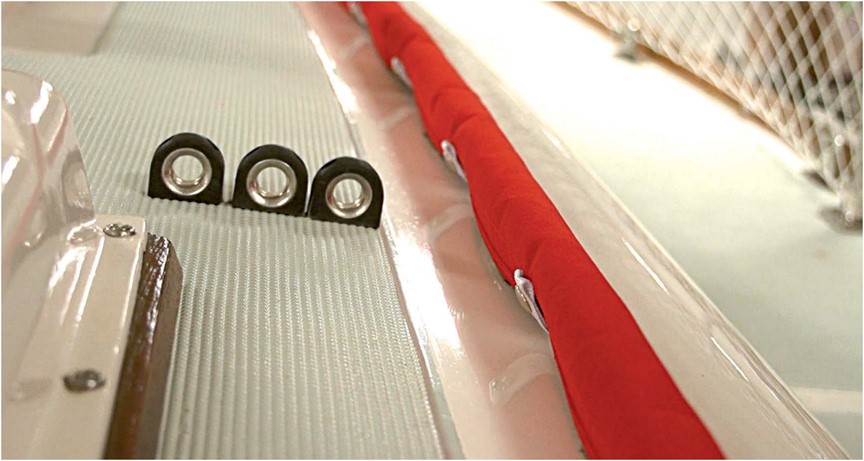
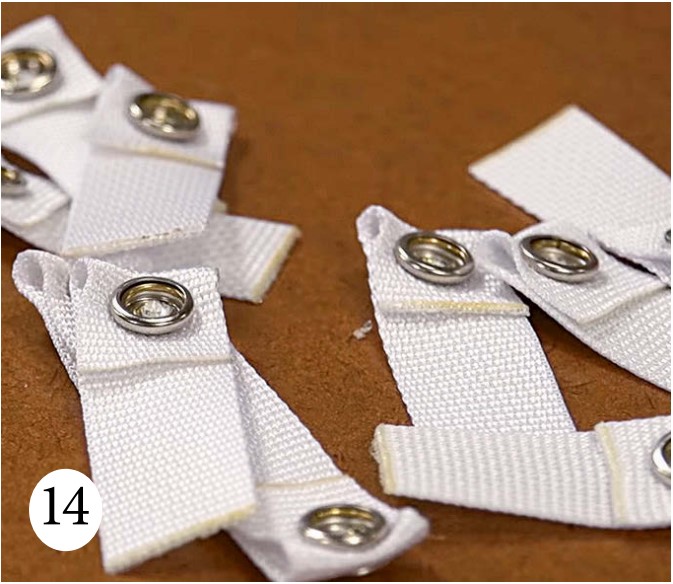
Cut 1-inch-wide polyester webbing into 4-inch-long strips, with one strip for every snap location along your cover (12). It’s best to cut webbing with a hot knife, to seal the ends. (If you don’t have a hot knife, melting the ends with a small flame will work.) Fold one end of a webbing strip over about 1 inch and install the button and socket part of the snap fastener on the folded webbing (13). Repeat this step on each webbing strip (14).

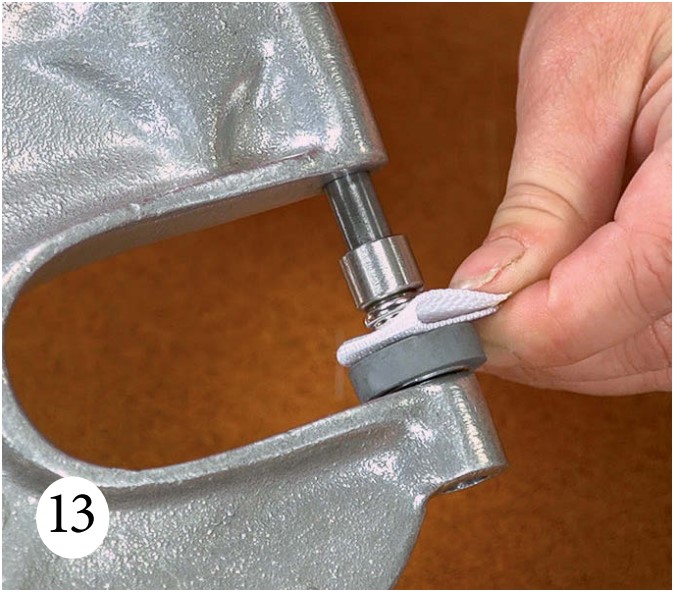
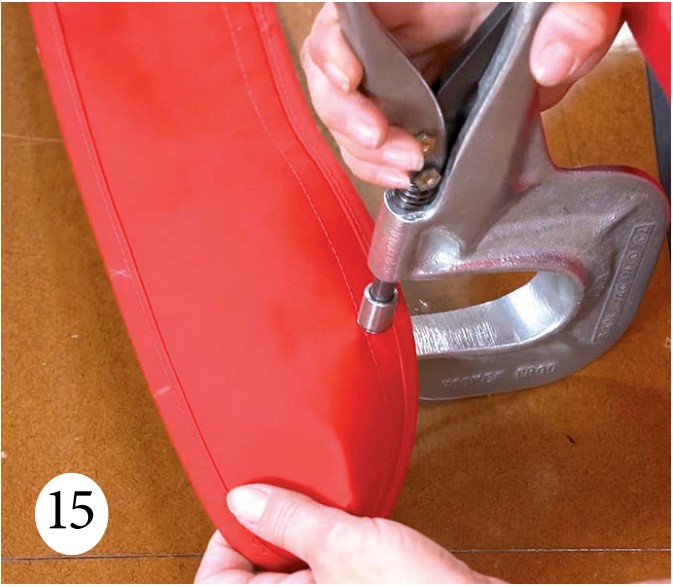
Install the eyelet and stud portions of the snap fasteners at the marked points along your cover with the studs on the outside of the cover. Be sure to install the studs through the webbing reinforcement (15).
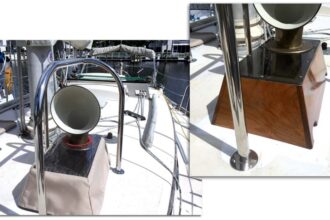
Next, snap the webbing straps onto the installed studs and place the cover over the handrail. Pull each webbing strap around and note where the bottom edge of the cover meets the webbing. Mark the webbing. This is where you’ll attach the webbing to the cover.
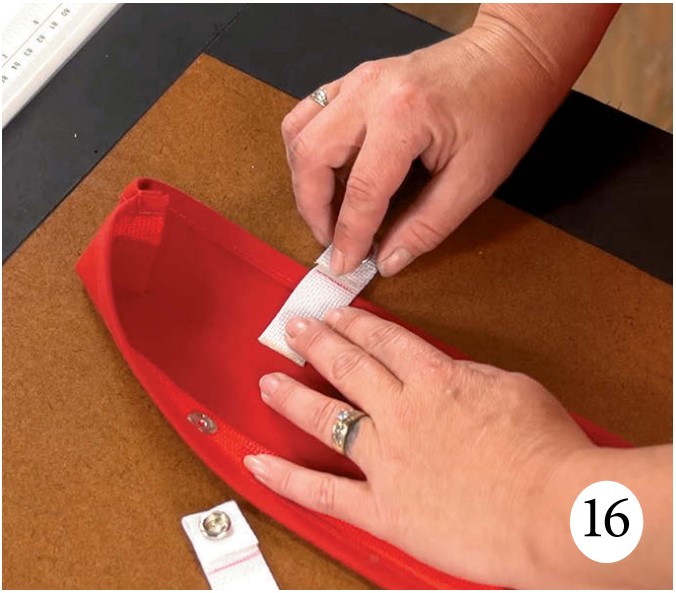
Remove the cover, unsnap the webbing straps, and be sure the cover is arranged so it is right-side out and the studs are facing up. Then, position the webbing straps on the inside of the cover directly opposite the studs, lining up the straps so the socket is facing up and the line you struck on the webbing is even with the edge of the cover (16).
Finishing
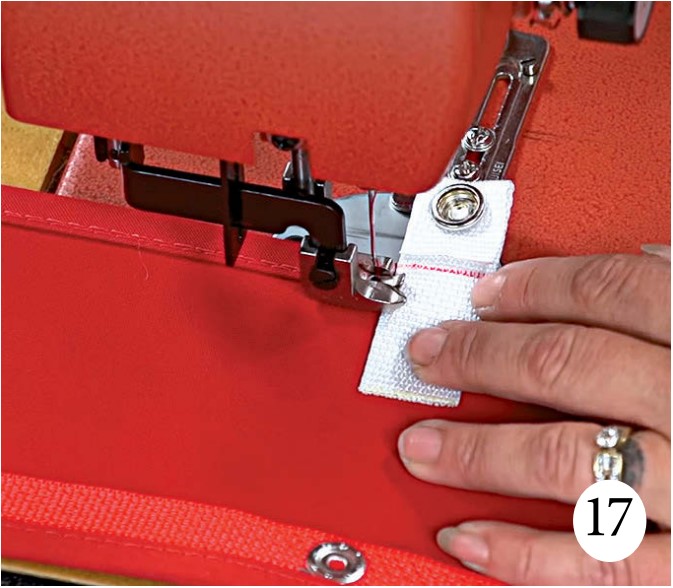
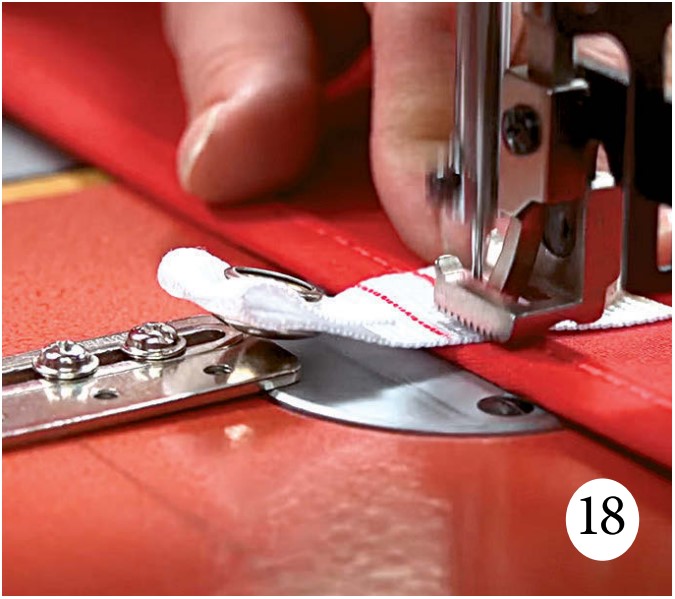
Splay the cover (so you don’t accidentally sew your cover closed) and sew each webbing strap in place by running a row of stitches in forward and reverse across the strap’s width (17, 18). You can then cut off any excess webbing with a hot knife. Take care not to cut the fabric underneath. Protect it with a metal straightedge or other heat-resistant cutting surface.
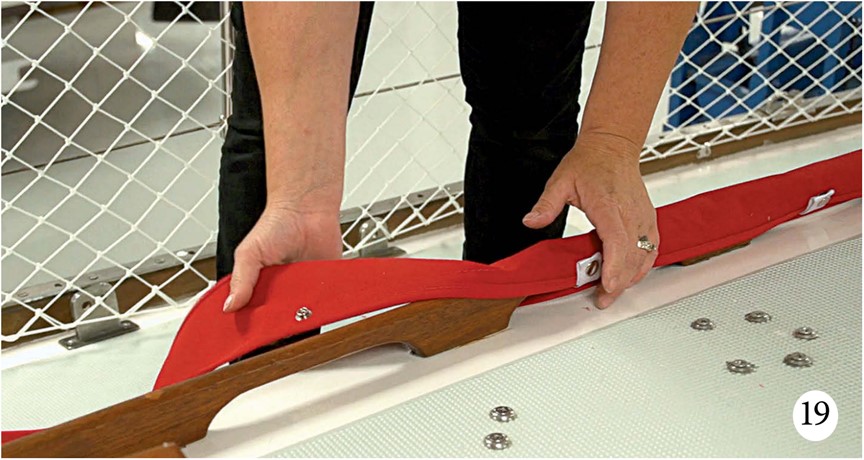
Place your finished handrail cover over your rail (19), wrap the webbing strap around the handrail, and snap it in place on the opposite side.
While it takes a little effort to make these covers, imagine the maintenance time you’ll save!
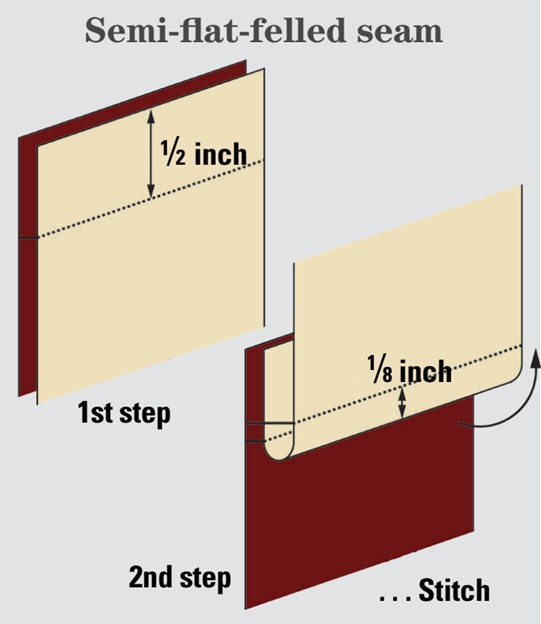
The semi-flat-felled seam
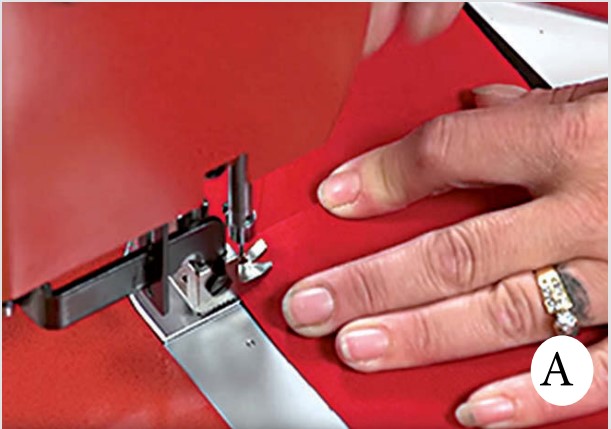
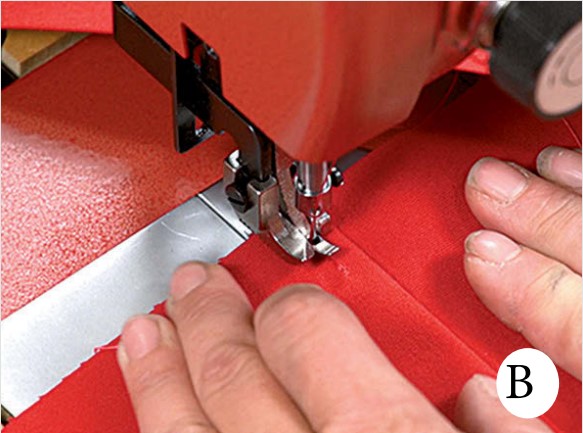
To seam two panels together, lay two Sunbrella strips so they are directly on top of one another with the short edges lined up. To create a semi-flat-felled seam, first sew a row of straight stitches with a 1/2-inch seam allowance (A). Unfold the fabric and sew another row of stitches about 1/8 inch away from the fold, making sure to stitch both flaps of the fabric seam (B). You’ll be sewing through three layers of fabric at once and strengthening your original seam. Repeat this process until you have seamed all of your panels together.
Nikki Dent was introduced to sailing as an adult when she started working for Sailrite, where she currently serves as staff writer and blogger. She enjoys spending weekends at the lake and sewing in her spare time.
Thank you to Sailrite Enterprises, Inc., for providing free access to back issues of Good Old Boat through intellectual property rights. Sailrite.com