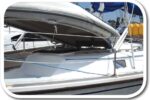
Unwanted portlights left holes to patch
Issue 111: Nov/Dec 2016
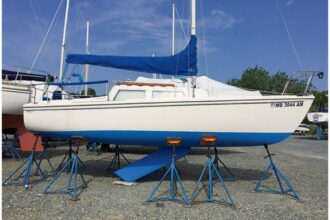
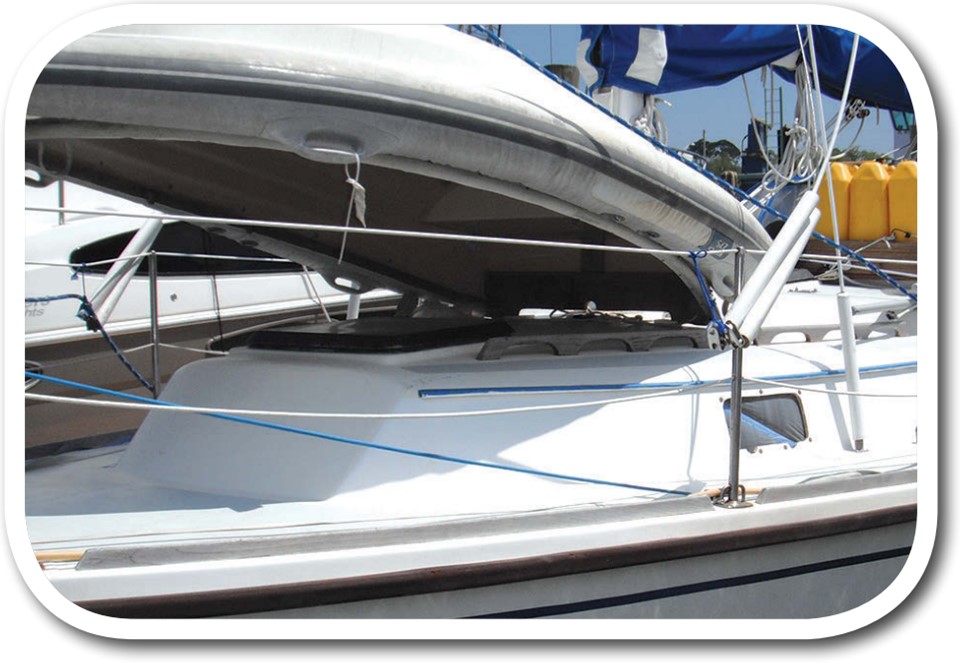
Over dinner one evening aboard their Allmand 31, Here & Now, our friends mentioned wanting to replace the boat’s portlights. They planned to head to the Caribbean that year and sought ways to make their boat more seaworthy. We looked around and counted 11 portlights. The conversation led from the enormous cost of replacing them all with a quality product to questioning the safety of having 11 holes in the cabin trunk. By the time dessert was served, a decision was made: they would eliminate six of the portlights and replace only the remaining five. And they hired my husband, Dave, to do the necessary fiberglass work and installation.
Eliminating six portlights would entail removing them and fiberglassing the resulting holes in the cabin trunk. Aware that the daily arrival of Florida’s afternoon summer thunderstorms limits the amount of time available for working with epoxy, Dave elected to undertake the project two portlights at a time.
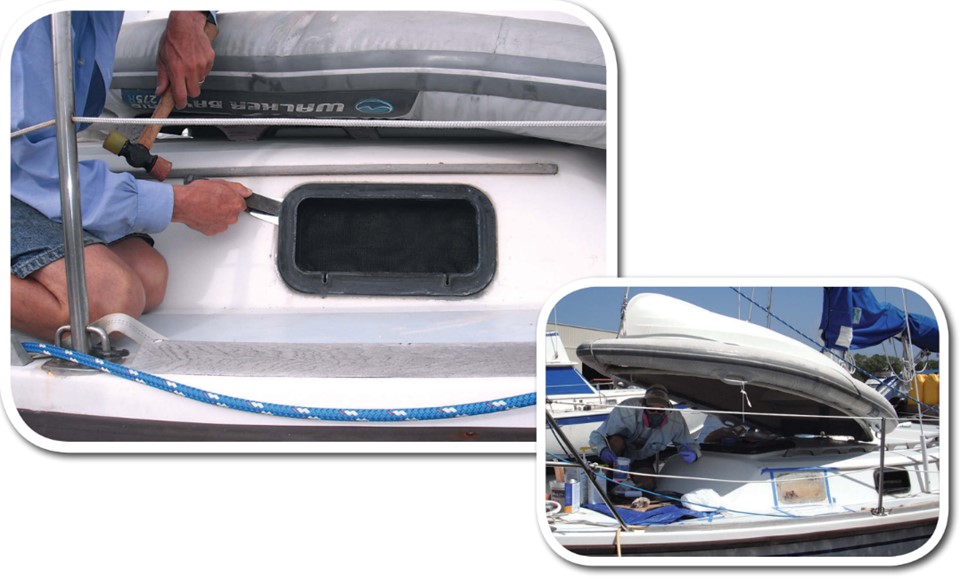
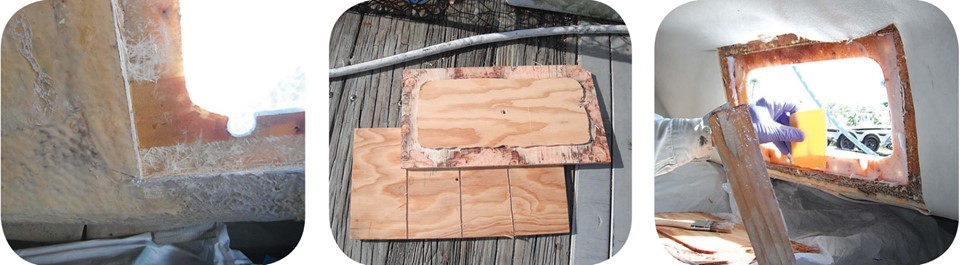
He began by removing the old portlights. After removing the hardware securing them, he worked to get the portlights out of the sides of the cabin trunk, a task that, because they had been in the boat for all of her 31 years, required patience and tools. Dave placed a thin scraper along the cabin side to protect it from the chisel and mallet he used to loosen each portlight.
After removing a portlight, Dave went below and pulled away the plywood trim panel that covered the inside of the cabin side, which was raw fiberglass. He then cleaned the area where the portlight had been, scraping off all of the sealant.
Next, he marked around the hole a 1 1⁄4-inch border with square corners. Following this pencil line, he used a Fein saw to cut through the inner laminate and the core, taking care not to cut into the outer laminate. He then chiseled out the core right up to the inside face of the outer laminate, creating a 1 1⁄4-inch-wide rabbet all around the hole. Because our friends lived aboard during the project, he often kept a shop vac running to reduce dust and debris.
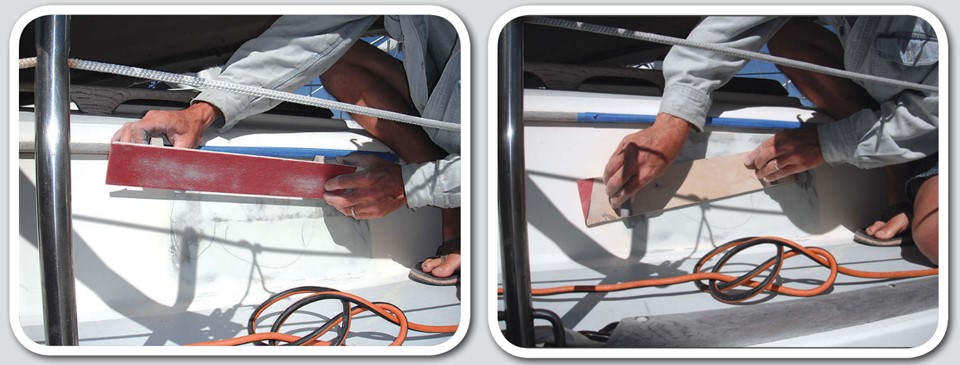
Plywood insert
Next, Dave cut a piece of 3⁄8-inch marine-grade fir plywood so that it easily fit into the rectangular hole in the inside laminate and core. With a circular saw, he cut three vertical kerfs about halfway through the inside face of the plywood to allow it to bend to conform to the slight curve of the cabin trunk. While I held this plywood in place from the inside, Dave went on deck and traced the shape of the portlight hole onto the outboard side. Using this line as a guide, he then routered a rabbet around the outboard side of the plywood, leaving an “island” about 3⁄16 inch high that matched the shape of the hole in the 3⁄8-inch-thick outer laminate.
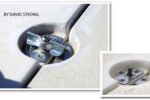
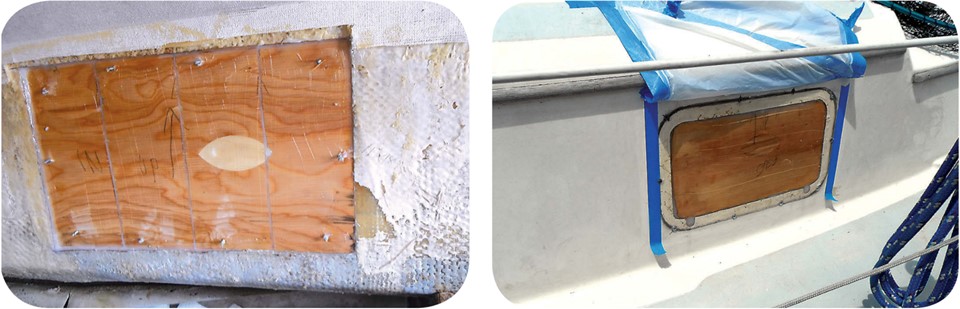
We dry-fit each piece of plywood, removing wood as necessary for an easy fit in the opening. A tight fit was not necessary, because we wanted epoxy to fill the gap around the edges. Next, we pre-drilled holes through the outer laminate and the plywood for screws that would hold the plywood in place as the epoxy cured.
Working from inside the cabin, Dave used West System epoxy (plain, with no filler) to wet out the rabbeted area on the inside of the cabin trunk and the side of the plywood that would mate with it. He then coated the same surfaces with epoxy thickened with colloidal silica. After placing the plywood in the hole, Dave filled the kerfs with thickened epoxy. Summer in Florida dictated that he use 206 Slow Hardener, but he still had to work as quickly (and neatly) as he could.
While I held the plywood in place from the inside, Dave screwed into it from the outside, through the holes we’d previously drilled in the outer laminate. This ensured a strong bond with no voids while the epoxy cured overnight. We caught any epoxy that was squeezed out and redistributed it to the kerfs and the edges. Before the epoxy was completely cured (while a fingernail still made an impression in it), Dave backed out each screw a quarter turn and retightened it (using a screwdriver for finesse, rather than a screw gun). He uses this trick often to ensure fasteners will back out from cured epoxy and not break off.
Glassing begins
The following day, after removing the screws, we sanded and scuffed the inside of the plywood, and a 1-inch-wide border of the cabin side around it, in preparation for applying fiberglass cloth. Dave used just one layer of fiberglass cloth here as its purpose was to waterproof the plywood and to prevent the joint from cracking. The laminate to be applied on the outside of the cabin trunk would provide the needed structural strength.
Dave cut a piece of fiberglass cloth large enough to extend 1 inch beyond the plywood on all sides. He wet out the plywood and the margin around it with epoxy, then filled the screw holes and faired the edges with epoxy thickened with colloidal silica. He carefully placed the fiberglass cloth over the wet-out plywood and wet out the cloth thoroughly with epoxy, making sure to leave no voids.
Experience has taught Dave to handle fiberglass cloth with great care. Even when the fabric is dry, pulling in any direction on a piece that’s cut to a shape permanently distorts that shape. Cloth that has been wet out before it’s positioned is even more likely to become distorted, and it can create a mess. Fiberglass mat, on the other hand, is more dimensionally stable, wet or dry, and can be wet out before it’s applied to a surface.
Beveled buildup
Leaving the interior to cure, we moved outside, where Dave started by scraping off sealant that remained on the cabin side. That done, he drew a line on the cabin side 11⁄2 inches out from the exposed plywood. Using a grinder, he beveled the area from his line down to the face of the plywood, creating a 1 1⁄2- x 3⁄16-inch taper over which to laminate the new fiberglass to the cabin side. The taper makes the repair stronger and less likely to crack. He also rounded the corners of this area, because rounded corners are stronger than square corners.
Dave would build up the laminate with alternating layers of fiberglass mat and woven cloth. The mat is used mostly for bulk while the cloth provides most of the strength.
Though he planned to round the corners of the pieces of cloth and mat to match the shape of the area to be filled, Dave initially cut the pieces as rectangles to better ensure that the opposite edges were perfectly parallel and the adjacent sides perpendicular to each other. Using a carpenter’s square, he verified that the fiberglass was not pulled out of shape, then marked the dimensions of the largest rectangle on both the cloth and mat.

Because he was working on two holes at a time, he cut two pieces of cloth and two pieces of mat of each size. The largest pieces were the exact size of the beveled edge on the cabin trunk, 7 1⁄2 x 15 inches. For each subsequent pair, he reduced the dimensions by 1⁄2 inch to 1 inch in each direction.
On a project like this one, Dave always cuts more pieces of fabric than he thinks he will need. Any waste is a small price to pay for ensuring that he does not have to cut fiberglass in the middle of the job when he is messy and his epoxy is kicking. We labeled and separated the pieces to make it easier for me to hand him the correct piece of mat or cloth as he required it.
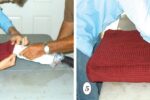
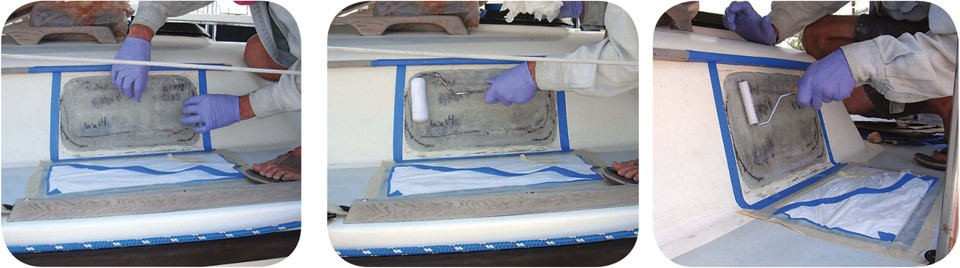
In preparation for epoxy work, we taped off the cabin trunk and covered the deck in front of the work area to contain any possible messes. Next, Dave thickened a little epoxy with colloidal silica and used it to fill the screw holes, then wet out the plywood with plain epoxy. Then, well aware that fiberglass mat takes up a considerable amount of epoxy, he wet out the largest piece of fiberglass mat. He placed the wet mat on the cabin side, aligning it with the marks to cover the ground-out area, then laid the same size cloth piece over the mat and wet it out in place. He repeated the process for the next-smaller-sized pieces, alternating between mat and cloth and building up the area until it was flush with the rest of the cabin trunk.
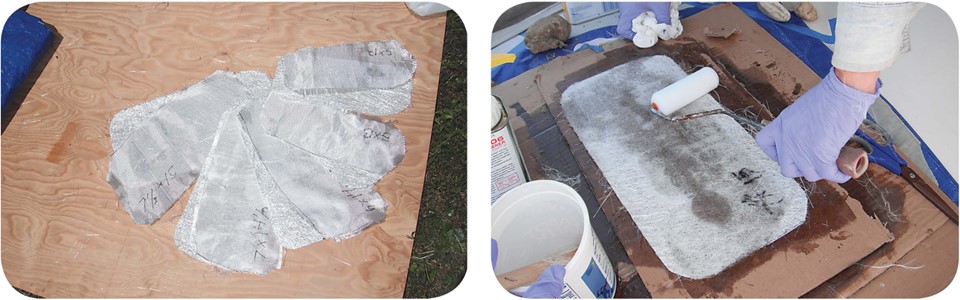
After placing each mat-and-cloth pair, Dave used a resin roller to completely flatten the fiberglass and squeeze any voids out of the layup. He worked from the middle of the area, pushing the roller outward toward the edges.
While the epoxy was still green (before it cured), Dave applied a skim coat of epoxy thickened with colloidal silica to begin the fairing process. He immediately peeled the tape before it became epoxied to the cabin trunk.
Fill and fair
Dave waited four days for the epoxy to cure and finish off-gassing. Before sanding, he scrubbed the surface with ammonia water to remove the amines that would prevent the fairing compound from adhering. Sanding alone does not remove amines but drives them into the surface.
Using 3M Marine Premium Filler, he faired the sanded area until it perfectly matched the original cabin trunk side. As usual, the fairing process required several days: sand, apply filler, wait for it to cure, repeat. Dave used the filler for only the finest fairing, as he’d already done most of the fairing with the thickened epoxy.
When sanding large, nearly-flat areas like this, Dave likes to use his homemade longboard as it prevents him from inadvertently creating divots or leaving high spots. (See “Longboard Sander,” below.)
After repeating the entire process for all six portlights (two at a time), Dave applied two coats of primer over the large section of the cabin trunk that encompassed them. He wanted the area perfectly fair, as painting would highlight any high or low spots.
Camouflage
The next challenge was painting these parts of the cabin trunk so the new paint wouldn’t stand out next to the old, dull gelcoat. Though it is usually not recommended to use Awlgrip’s flattening agent when rolling and tipping paint, our friends decided we should try it anyway. While a few irregularities showed in the end result (the paint finish was flatter in some places than others), we all agreed that the final product looked much better than if the new section were bright and shiny.
We completed this project several years ago. Here & Now is currently in the Caribbean, a more seaworthy boat with fewer holes in the cabin trunk. When I recently asked her owners how the patches and paint were holding up, they assured me they have had no problems with them. No cracks have appeared and the paint now blends in perfectly with the original gelcoat. The only challenge they faced with the entire project was deciding how to cover the holes in the original trim where the old portlights used to be. Their solution was to hang pictures over those areas. Tropical scenes and family members hide the only evidence that there were once more than five portlights in Here & Now.
Longboard sander
When sanding any large area, it’s easy to inadvertently create humps and hollows. To help prevent this, Dave uses a longboard. It’s flexible enough to follow gently curved surfaces but stiff enough to sand them fair.
He cut a piece of 1⁄4-inch plywood 3 inches wide and 16 inches long, as those dimensions fit sandpaper designed to be used with belt sanders. (The same sandpaper is sold as rolls and can be cut to fit boards of different lengths.)
He then cut two 3-inch handles out of 3⁄4-inch-square stock, glued them to the plywood with Gorilla Glue, then backed that up with countersunk flathead screws. The handles are 12 inches apart.
He cut the sandpaper belt along its “crooked” seam and glued it to the longboard with 3M Super 77 spray adhesive. The angled ends of the paper wrap around the board, helping to keep the paper in place.
The 1⁄4-inch plywood is flexible enough to conform to the shape of cabin trunk sides and other nearly-flat surfaces. For fairing surfaces with a little more curvature, kerfs cut in the back of the board will make it more flexible.
In 2002, Connie McBride, her husband, Dave, and their three boys began their lives of adventure on board their 34-footer Eurisko. After nearly a decade in the Caribbean, including a year in Panama, they returned to the U.S. for a while. Now empty-nesters, Connie and Dave are in the middle of a slow meander back to the Caribbean. Follow their adventures, tips, and DIY projects on Connie’s website: www.simplysailingonline.com.
Thank you to Sailrite Enterprises, Inc., for providing free access to back issues of Good Old Boat through intellectual property rights. Sailrite.com