Dropboards give way to user-friendly doors
Companionway dropboards are cumbersome to remove and replace and inconvenient to store. When you need them, they’re often buried deep in a locker. What’s a sailor to do?
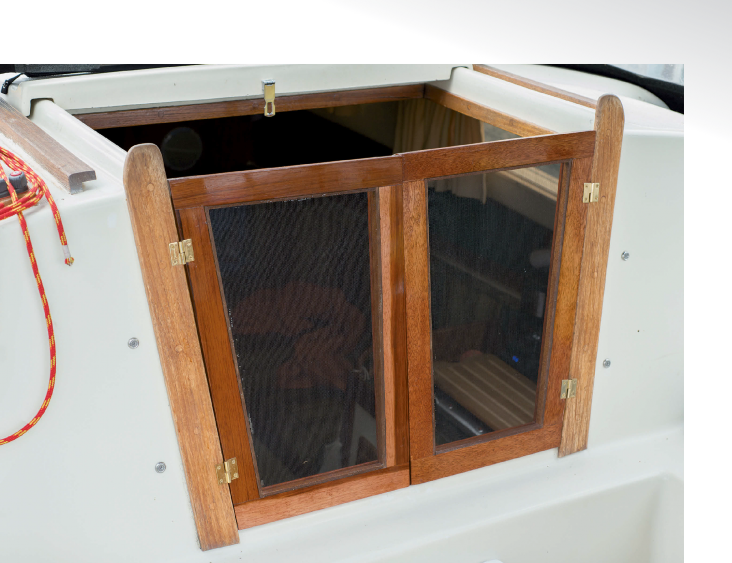
My solution on Sundew, our Watkins 27, is simple: companionway doors. They’re quick and easy to open and close and, because they’re always in place, storage isn’t an issue. Mine have screened inserts for when we want ventilation and solid closures for when we don’t. Using primarily scrap lumber, I built a set of companionway doors for less than $100.
I started with a trip to my local Home Depot, where special-order windows from Asia often arrive on Philippine-mahogany pallets that usually end up being discarded. I obtained all the lumber I needed for just the labor required to disassemble the pallets.
 First, a pattern
To construct the doors, I first made a pattern. I put the old dropboards in place in the companionway to serve as a surface upon which to create the pattern, then cut and taped together pieces of tagboard (similar to posterboard) to make a single sheet that extended past the perimeter of the companionway opening. Using a Sharpie, I traced the exact perimeter of the companionway opening and drew a vertical centerline where the doors would meet when closed.
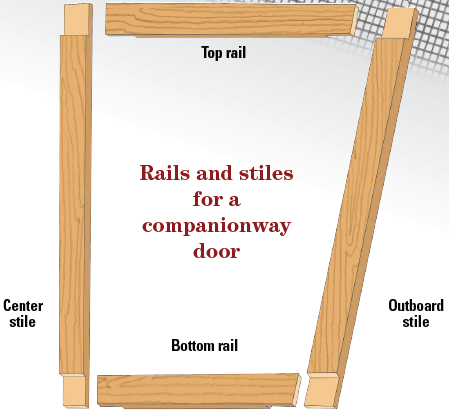
Each door was to be constructed from four pieces: two sides (stiles), a top rail, and a bottom rail, for eight pieces total. I took measurements from the pattern to determine the total length of dimensional lumber I would need. After deciding on 2 x ¾ inch for the door frames, I used a 10-inch table saw to cut some of the mahogany salvaged from the pallets to the desired thickness, then to trim them to the 2-inch width. (An alternative would have been to purchase nominal 1 x 6 mahogany boards, which are actually ¾ x 5½ inches.)
The centerline I drew on my template indicated the inboard side of each door. I laid each piece of each door, one at a time, onto the pattern and marked the ends where I’d have to cut. This method is especially useful for easily and accurately marking the angles at the tops and bottoms of the outboard stiles. It was my intention to join the pieces with lap joints, which maximize the gluing surface and eliminate the need for fasteners, so I marked each board to span the entire width or height of the individual door.
Lap joints
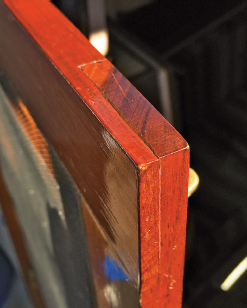
After cutting all eight pieces to size, I began work on the joints at the corners of the doors. I started by placing all four stiles (an inboard and outboard stile for each door) in their proper places on the pattern, then laid the rails on top of and overlapping the stiles. Where they overlapped, I would be cutting away half the thickness of each piece to make the lap joints.
I marked the boundaries of the overlap on each piece, outlining the area of the joint. Once I’d marked all the pieces, I set the blade height of my table saw to half the board thickness (3⁄8 inch). For each lap, I made a cut 2 inches from, and parallel to, the end of the stock, followed by several more passes between that cut and the end of the board. The material that remained between the cuts I removed with a ¾-inch wood chisel. I repeated this process at the end of each board, creating clean notches that allowed the pieces to fit flush together.
With the joints cut, I assembled the door pieces directly on the pattern again. It was still possible, at this point, to make minor adjustments so the doors would exactly match the pattern. Once I felt all the boards were cut and chiseled perfectly, I prepared to assemble them.
 Pattern board
The first step in assembling the doors was to make a pattern board. I took a piece of 3⁄8-inch plywood big enough to fit under the entire pattern. At each corner, I attached a 4-inch-long leg cut from a 2 x 4. I then attached my tagboard template to the pattern board (glue or staples work well).
I assembled one door at a time. After covering the pattern with wax paper, I clamped the door stiles in posi- tion on the board with 4-inch C-clamps. Next, I applied waterproof glue (Titebond or Gorilla Glue work well) to the joint areas and then clamped the top and bottom rails directly to the pattern board.
After the glue had fully set, I removed the assembled frames from the pattern board and sanded each joint smooth. I now had two frames into which I would build permanent screens and channels to hold removable wooden inserts.
Screens
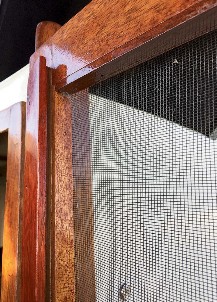
For the screens, I used black nylon screen stock held in place by battens fastened to the inside edges of the door frames. Using the table saw, I cut lengths of mahogany with a ¼ x ¾-inch cross section. From this material, I cut eight pieces, one for each inside edge.
For each door, I cut a piece of screen stock larger than the inside opening of the door (large enough that the excess would extend beyond the battens once they were in place and I could cut it off with a utility knife). While holding the screening so it would be flush with the outside of the finished door, I used ¾-inch brads to fasten the ¼-inch stock to secure one edge of the screen to the inside of one of the door stiles.
With one side secured, attaching the other sides was easier, but I found it important to stretch the screen stock as I installed it to prevent sags or loose spots. I used brads, rather than glue, to attach the ¼-inch stock, to make it easier to replace the screen should it get torn.
At this point I had two doors that were smoothed and screened. The next step was to create solid panels I could insert into each door when we didn’t want ventilation.

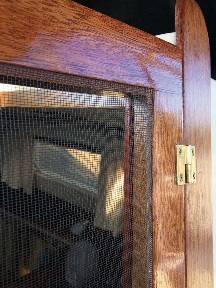
Removable panels
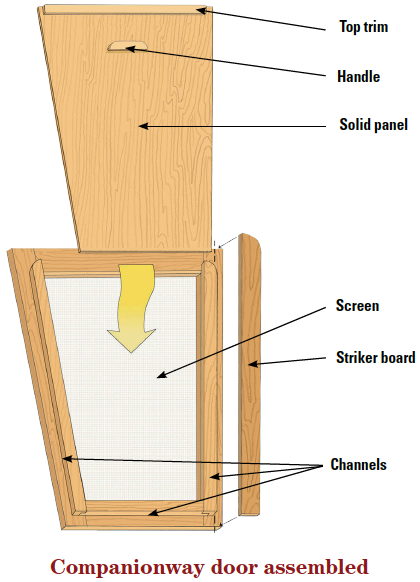
For the solid panels to be removable, I needed to fashion channels on the sides and bottoms of the door frames for them to slide into. I did this by fastening lengths of L-shaped mahogany to the interior faces of the frames.
Imagining panels that were just a bit taller and wider than the screens, I measured the lengths of the sides and bottoms of the doors to give me an idea of the total length of channel I’d need. I then ran a long length of ¾ x ¾-inch mahogany through my table saw to create an L-shaped cross section (like a corner molding) with a ¼-inch wall thickness on both legs.
After making precise measurements of the sides and bottom of the panel I wanted, I cut the pieces I needed from the length of channel. I then pre-drilled the channel pieces and fastened them to the doors with 1-inch finish brads.

Once the channels were in place, I measured the space they defined, side-to-side and top-to-bottom. I transferred these measurements to a piece of 3⁄16-inch floor underlayment I bought at Home Depot. One side of this underlayment is finished Philippine mahogany, also called Lauan. I cut out and trimmed two inserts to fit the openings.
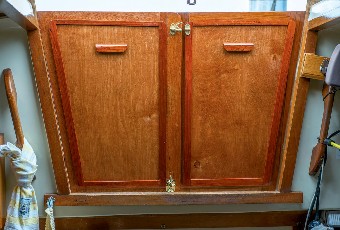
Next, I attached a small handle at the inside top of each insert to allow for their easy removal. I made my own handles from 1 x 1 x 3-inch blocks of mahogany, but purchased handles would work too. Finally, to complete the panel, I used the ¾ x ¾-inch square stock to make a trim piece that I attached to the top. I cut the ends of the trim piece at the same angle as the panel sides so that, when the panel is inserted, the trim lines up with the top edges of the side channels.
Finishing touches
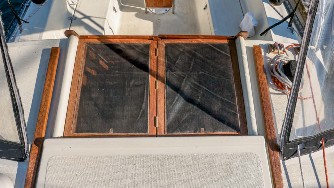
Next, I installed a 1/4 x 1 1/2-inch striker board on the inside of the starboard door. it extends past the inboard edge by 1/2 inch, creating a surface for the port-side door to close against. The unfinished door assemblies were now complete and ready for me to install them and add the finishing touches.
I hung the doors with two pairs of 3-inch drop-in hinges that I found at Hamilton Marine. I attached one side of one hinge to the door 3 inches from the top and another 3 inches from the bottom. While holding the door in place, I marked the position for the second half of each hinge on the companionway frame. After I’d secured all the hinge pieces, I was able to drop our new companionway doors into position and try them out.
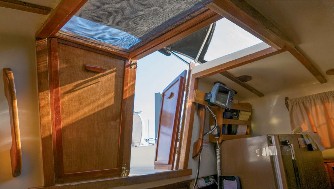
When I was satisfied that everything fit and operated properly, I varnished the doors and fitted the hardware that would hold them closed. I installed a brass barrel bolt at the bottom of the starboard-side door, on the inside adjacent to the striker plate, and drilled a hole in the companionway sill for the bolt to engage. At the tops of the doors, I installed a hook latch. Now the doors could be secured.
Our new companionway doors are a great addition to our good old boat. They add some nautical charm and will make our future sailing adventures easier and more enjoyable.
