A neglected 1977 Cape Dory 27 is returned to the sea. First of a two-part series
Issue 16 : Jan/Feb 2001
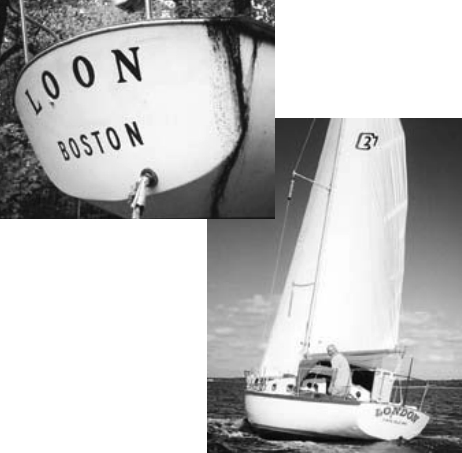
She slipped into the sea after 11 years spent sailing only through backyards and boatyards. As the sea caressed her hull, I was apprehensive. Will she stay afloat? Will she leak? How will she sail? I had never done anything like this before. Had I tightened all those clamps enough? Used enough bedding compound? Had I made a huge mistake? Whatever had led me to believe I could buy a neglected boat and make her whole again?
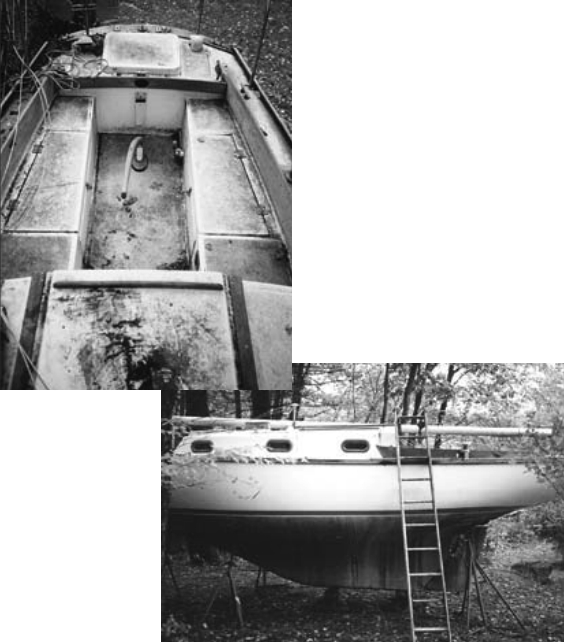
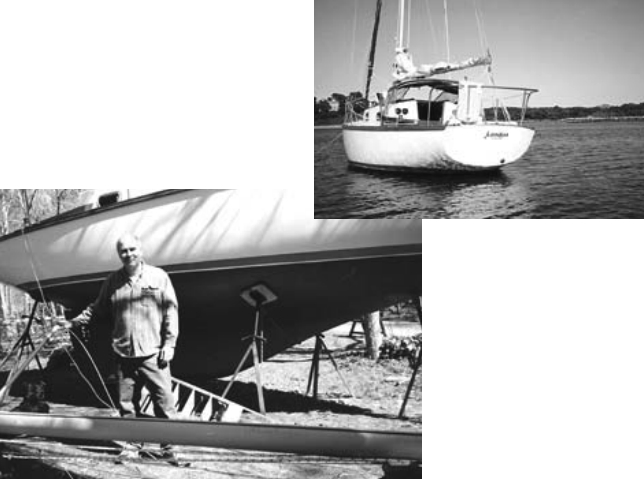
She was launched in Quincy, Mass., a historic New England town on the southern side of the broad sweep of Boston Harbor, and it was in Quincy that I first saw her in the early summer of 1998. She had sat 10 years uncovered under an oak tree. Her mast lay on top. Stains streaked her sides. Mice lived in the mast. The halyards, strewn every which way, were green and rotting. The cockpit was full of leaves and stained with their rot. The teak was many colors of black, gray, and green. Peeling duct tape covered the holes where her instruments had been. There were lots of bugs and spiders. Loon was a 1977 Cape Dory 27 with an 8-hp, single-cylinder diesel engine, hull #35.
The broker was dumping leaves out of the cockpit when I arrived. He apologized for the condition of the boat. He said he had not seen her in years. I said nothing. She was everything I wanted! Standing room, inboard diesel, full keel, and (probably) cheap. It took all summer to negotiate the price down to what I thought she was worth and all winter to get her ready for a spring launch.
We live northwest of Boston, 20 miles from the ocean. Before Loon arrived on Columbus Day, I got the chain saw out and removed a few trees behind the garage. It was a good spot, the one favored by my wife, Nancy, because she would not be able to see the boat from the house. With a shovel and a rake, I smoothed and packed the ground to make a large flat surface. There was a shed along that side of the garage for gear storage. It had a huge workbench. I organized my tools. Power and water were close by. I was ready to begin. When the tractor-trailer arrived, the driver exclaimed, “What a great spot for a boat!” and backed her in. After he’d left, I stood in the street for a long time motionless, just taking her in.
Everything off
I started by taking everything off the boat, from the boom to the anchors, flares to cushions, life jackets to silverware. It all landed on the ground and was either cleaned and stored in the shed or put in a pile for a final trip to the town dump. I picked up two docklines and climbed up into the trees near the boat and tightly strung one above her deck across her bow and another equally as high across her stern. I strung some additional lines between these lines running overhead and to the head and base of her mast.
Then I went into the house and found my 13-year-old daughter. We each grabbed a set of lines and hoisted the mast into the air, pulled it out parallel to the boat, and lowered it to the ground. As my daughter ran back to the house, I began to clean, first with a broom and a Shop Vac and then with a hose and scrub brush. This went on all that day and the next. And the weekend after that.
The weather stayed mild through November, and I worked on her whenever I could. During this period I slept well and awoke stiff but purposeful. There are few tasks more satisfying than scrubbing dirty and stained fiberglass; you can really see progress. My dog lay near the boat, chewing sticks and watching.
Up on deck with a hose and scrub brush, I would sometimes stop and sit on the cabintop in the warm afternoon sun and gaze over the garage roof to the wet meadow beyond, where tall grass waved in a westerly breeze. I imagined myself at sea. I was very happy. It was ridiculous. So far all the work had been cosmetic, I had not even started on the boat’s systems.
I found that for cleaning the fiberglass above the waterline it was best to wash the gross dirt off by scrubbing with a solution made up of a cup of bleach and some trisodium phosphate (TSP) in a bucket of water. I used a scrub brush and a Scotch-Brite pad and wore rubber gloves. I then hosed the surface off and applied On & Off, a powerful acidic fiberglass cleaner, according to the manufacturer’s directions. You use a natural bristle brush to apply On & Off, as it will soften and dissolve the artificial bristles of a paintbrush. You must wear gloves and eye protection and avoid breathing the fumes. It’s a good idea to keep a hose nearby to flush your skin of any splashes.
Not recommended
I would sometimes help the cleaning process along by rubbing the surface with On & Off and a wet Scotch-Brite pad. The manufacturer does not recommend this, but I found it to be very effective. I would finish up with a good water flush of the area and a further polish of any remaining stains with the bleach and TSP solution. A little Ajax Cleanser on a Scotch-Brite pad can really help as well. No stains stood up to this treatment. The fiberglass gleamed.
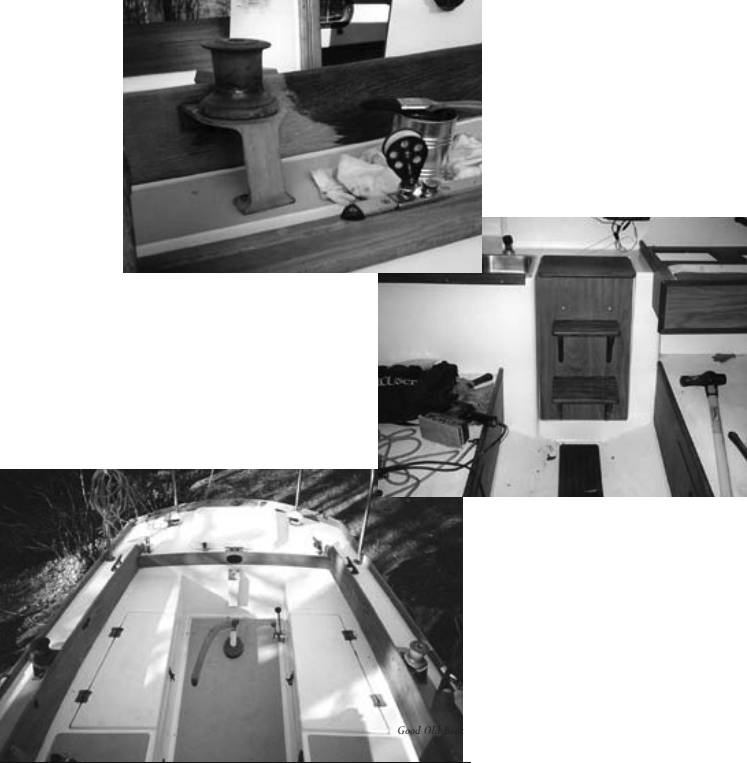
There is a lot of teak on a Cape Dory. I began by removing all the hardware — cleats, snaps for the dodger, plates, and so on — and put each set with its screws into a separate plastic bag and stored them in the shed. I scrubbed the teak, with that solution of bleach and TSP, using what was becoming my favorite Scotch-Brite pad. After the wood dried, I sanded it down with my orbital finishing sander. A number of teak plugs along the toerails were extruded or broken. I removed these and replaced them with new ones, set them in place with two-part marine glue, and sanded them flush. I hand-sanded all the teak with fine sandpaper, vacuumed, and wiped the dust away. By the time the weather turned colder, I had a couple of coats of semi-gloss Cetol on all the teak, and the exterior fiberglass was clean. I had also removed the name Loon from the stern.
The plumbing would take most of my time for the rest of the winter. I had to learn as I went. Although I had been sailing for years, I had never replaced entire systems. Fortunately, there are a number of excellent books, and I had the good fortune to have chosen a boat with an active website newsgroup to which I could turn in times of crisis or doubt. Often I would receive a number of responses to my message-board queries, sometimes with pictures, by the very next day. Even with the manufacturer out of business, Cape Dorys command a lot of loyalty and pride.
Removing hoses
I started my plumbing project by pulling out all the freshwater, cockpit-drain, and head hoses. I used my Dremel fiberglass cutting tool to cut the wire strands and carefully slice the hose around the pipe it was attached to without cutting into the underlying fitting. Leather gloves and eye protection are a good idea during this process.
Then I looked at the seacocks. Cape Dorys are fitted with bronze, tapered-plug-style seacocks. They are large, heavy, and impressive. There is one that sits in the back of my head compartment that looks like it belongs on a North Sea oil rig. Wilcox-Crittenden made my seacocks. In later boats, I understand, they were made by Spartan Marine. Every single one of the seacocks was frozen in the open position.
I consulted my source books on boat repair and then my new friends on the Cape Dory website. Dealing with frozen seacocks is a popular topic on the site, and there are a number of methods described there for getting the tapered plug out of the cylinder it has been embracing for years. The application of WD-40, backing the nut out to the end of the threaded stem (to avoid damaging the thread with the hammer) and then tapping the nut is probably the most popular. A heavy hammer helps. I used a brake puller on several where I had room. This allowed me to apply pressure without impact and pop the tapered plugs out.
From the Web site bulletin board, I also learned how to get an $11 radiator spud wrench (#8618) at Home Depot and use it to unscrew the through-hulls from the boat. I soon had all but two of the seacocks out of the boat, polished, and regreased. I had broken the tabs in both of these remaining seacocks’ through-hulls with the radiator spud wrench so they would not unscrew. These last two were both under the cockpit. Water running through the cockpit drains of the uncovered boat for the last 10 years had left them badly corroded. The seacock on the port side finally yielded its plug (with a pop) to WD-40 and a sledgehammer.
Finally gave up
The starboard cockpit drain seacock would not yield. Finally I gave up and cut it out of the boat. I used my Dremel tool with a cutter bit to remove the outside flanged portion of the through-hull and then knocked the remainder up into the boat. I cleaned up the hole, made a new tapered backing plate, coated this with epoxy, and then installed a new through-hull and seacock, well seated with bedding compound. I reinstalled the rebuilt seacocks and through-hulls I had removed from the boat.
To redo the freshwater system, I removed the plastic tank from the boat and cleaned it, first with a bleach mixture, then a flush, then a baking-soda mixture, and a flush. The tank had no deck fill, so I added one, running the fill hose into an opening I cut into the tank and fitted with a barbed through-tank fitting. I removed the old hand-pump faucet and replaced it with a simple Fynspray spout. A new Whale foot pump was installed near the sink to pump the fresh water through an Aqua City 1-micron filter and out of the spout.
On a cold day, when there was a strong breeze blowing, I removed the existing holding tank, which I regret to say was not empty. I then washed the whole area with the TSP and bleach solution. Then I took a shower. I wanted to make the waste system compliant, so everything from the head is routed into the holding tank. An exit hose runs from the holding tank to a Y-valve, which allows the waste to be pumped overboard or pumped up through a deck port. It took some time to find a holding tank small enough to fit with all its plumbing under the port forward berth. I eventually bought one of those polyethylene tanks on which you install the fittings and seal with a powerful adhesive. This worked well. I removed the manual Whale waste pump, cleaned and rebuilt it, and reinstalled it in the boat.
Best investment
Before buying this boat I had it inspected. I think this is essential and the best money I spent. For the most part, because of the survey I knew where my problems and strengths lay. On dark days when things were not going so well, I could comfort myself with the knowledge of a sturdy hull or an intact crisp mainsail. The surveyor had made a number of recommendations, and I went through them one by one. Fortunately, the Yanmar diesel engine was in excellent condition. It had been completely rebuilt before the boat had been laid up. I had only to replace some of the worn-out hoses and filters. I became somewhat complacent about this part of the overhaul. I would pay for this later.
I replaced all the Yanmar’s cooling hoses and added a new seawater filter. All the rubber fuel lines were also replaced and a new Racor fuel filter with a water separator was installed. I had been told to drain the old fuel out of the tank.
After I did this I noticed that the inside of the tank looked like the bottom of a dark primeval tidepool. There was no access port, so it was not economical to get it steam-cleaned as the surveyor had suggested. I found a new one almost the same size and spent a pleasant weekend hanging upside down in the cockpit, a power jigsaw in hand, enlarging the fuel tank enclosure and mounts, and installing the new tank. Once that was all done, there were only four more things left to do in the bilge. Then I could stand up again.
The old grounding plate had been painted over, so when Colin, my teenage nephew, was visiting, we replaced it and reattached the ground and lightning wires. I also got him to climb down into the cockpit locker and remove and replace two clamps around the stuffing box hose. This was an awkward position, even for him, but a handheld power driver made the job go quickly. The little paddle wheel for the knotlog was thick with years of paint. I took this out of the boat, disassembled it, cleaned and greased it, and put it back. I added an automatic electric bilge pump and ran a new bilge hose to a through-hull above the waterline in the stern.
Launch deadline set
Spring was coming. My friend Rich asked when I was going to launch my boat. I had no idea but by the time we were done talking, it was to be in May. He cleared the day to give me a hand. Having a launch date caused me to focus on getting the job done.
During the winter, I had measured the three old rotting rope-and-wire halyards and ordered New England Rope Sta-Set 3⁄8-inch line to replace them. I spliced thimble eyes into these using the Unifed rope-splicing kit. Since I had never done this before and did not trust my splices, I took one of the new halyards outside and wrapped one end around a tree and hooked the other end to a come-along-style winch fastened to another tree and gave it a good tug. Then I knew they would hold. Now I rove the three of them through the mast.
Although we had not been able to get any electricity flowing during the inspection because the positive wire to the fuse panel was broken, the work needed by the electrical system was straightforward. I learned to use a simple volt/ohm meter to test for continuity and current flow and checked out all the wiring. It was intact, but nearly all the connection points had to be redone. I bought new battery boxes and batteries. The navigation lights were all out. I took them apart, resoldered the connections, and polished their metal pieces. I put new ends on the VHF coaxial cable and installed a new antenna. At the same time, I put an anchor light at the masthead and ran new wires through the mast to it. I stocked up on fuses. My sister and her daughter, Hannah, helped polish the mast. We were ready to go.
Before I could call the truck to take us to the water, I had to get the mast off the ground and up 10 feet in the air on to the top of the boat. The mast is surprisingly heavy. My daughter and I might have been able to get it down, but there was no way we could get it back up by ourselves. One evening after work my friends Bruce and Mary, and her husband Josiah, came by to help. My daughter and wife also came out to help. I had the head of the mast rigged up with a couple of blocks to the lines overhead but did not have enough blocks for the deck end as well. At that end I took a few loops around the overhead line and then the base of the mast for extra purchase. As you might imagine, the head went up onto the boat easily, but the foot of the mast we only got back on deck with determination, many hands, and a few lucky heaves. We were ready for launch.
Part 2 of this story (launch day and the “rest of the story” concerning first-season blues) will appear in the March 2000 issue.
Peter says he goes sailing – a lot – to avoid technology overload. A sailor most of his life, he was converted to cruising just 12 years ago. He sails London in the Buzzard’s Bay area.
Thank you to Sailrite Enterprises, Inc., for providing free access to back issues of Good Old Boat through intellectual property rights. Sailrite.com