Dire necessity drove this 24-hour emergency repair
Issue 51 : Nov/Dec 2006
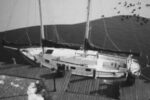
Short-tacking in and out of anchorages is one of my favorite types of sailing. With a competent husband/captain, crew in the form of three sons, and a sturdy boat, I thoroughly enjoy the challenge that shoal water, twisty channels, and strong winds provide. (Of course, since we haven’t had much luck with our diesel in the past four years, we have had ample opportunity to practice these skills while cruising in our 34-foot Creekmore.)
So in spite of having no working motor, we weren’t intimidated by 20 knots of wind blowing into the entrance as we were leaving Coral Bay, St. John, U.S. Virgin Islands, headed for Trinidad in July to avoid hurricane weather. We put a reef in the main, sailed off the anchor, and were doing 7 knots by the third tack. Eurisko was enjoying herself at 20 degrees of heel, racing toward each shore. We couldn’t bear to rein her in; we left her slightly over-canvassed with the intention of putting in another reef once we were in open water.
I was trimming the genoa when we heard a SHRBOING! and Eurisko gave a sickening shudder. Earlier in the year we had hit a large UFO (Unidentified Floating Object) in the Mona Passage, so all eyes went to the water trailing us, waiting to see what we had hit. When nothing appeared, we considered other possible sources of such a noise and vibration. One of us suggested “rigging,” and we all looked up as if expecting the mast to fall. We had moved the cutter stay and tied it to the port forward lower shroud to keep it out of the way so the genny would tack more easily. Our sailboards are also attached to the shrouds which added to the illusion that all was well with the rigging.
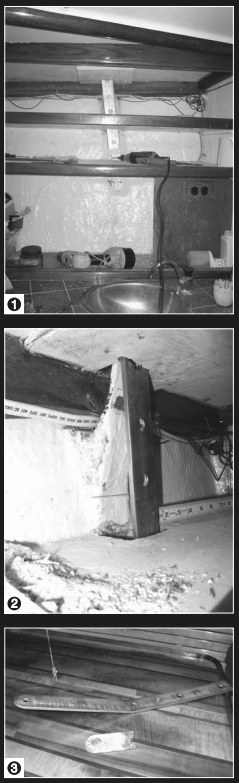
Failed chainplate
Finally, Dave spotted the slightly slack windward shroud, saw we had broken a chainplate, and kicked into emergency mode. “Ready about!”
Knowing we would react immediately, he didn’t even wait for a reply. As soon as the load was off the port shroud, he went forward, shouting orders. “Nick, furl the headsail, get her down to three reefs. Connie, take the wheel and return to the anchorage.” He used the staysail halyard to rig a temporary shroud while we shortened sail and limped back to Coral Bay at 2 knots.
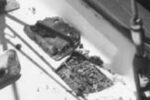
While the boys and I anchored, put sailcovers on, raised the windvane, and launched the dinghy, Dave tore apart the head locker to get a better look at what had happened. Our 1979 Creekmore is built like a floating tank. The only aspect of the design that has ever worried us is the chainplates, which were fiberglassed to the inside of the hull and were therefore not easy to inspect. After 26 years, we knew there was a good chance that they needed to be replaced, but Dave could never design a good way to do it. Thankfully, only one broke and we were not very far from a safe anchorage. Besides, St. John is a great place to be stuck, and stuck we assumed we were.
For five years, Dave had been trying unsuccessfully to invent an easy method to fix the chainplates, yet by the time Eurisko was settled on her anchor, he had a solution. How true it is that necessity is the mother of invention. The plate had broken inside the 1 1⁄4-inch plywood deck so the part below that, which was fiberglassed to the hull, was still there. Dave measured the length of the original piece, where the bend was, and where four holes could be drilled through it around the woodwork of two lockers with shelves.
Inside attachment
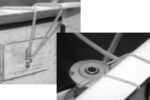
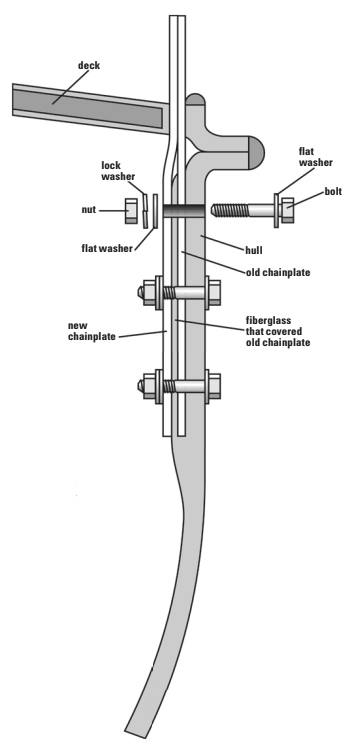
The plan was to lay — just inside the original — a new 24-inch piece of 1⁄4- inch stainless-steel stock with the appropriate bend and holes and to drill through the fiberglass, old chainplate, and hull to attach new to old and both to the boat with bolts. The only drawback was that the new one would come through the deck 1⁄4-inch inside the old, not changing the geometry of the rig significantly, but changing the hole in the deck. Dave used a drill saw — a drill bit that allows you to drill and cut — to increase the hole in the deck and caulked around this hole to fill the 1⁄4-inch gap. Further activities had to wait until we had a new chainplate in our hands to be sure reality would match theory. I gave the boys instructions for finishing the school day, grabbed my purse and a backpack, and we were off to Cruz Bay. It was 9:30 a.m.
As is so typical there, while waiting for the bus in Coral Bay we were offered a ride. After hearing our story, the driver gave us directions to Frank, the welder, and suggested two other options, one of which included faxing the information to his friend in Virginia, who could airmail us a new chainplate.
Frank proved to be easy to find and quite accommodating. He had the 1⁄4-inch stainless stock, a brake for the bend, and a punch for the holes. He offered to make it while we waited, and his price was so reasonable we had him make two: $95 total. It was noon.
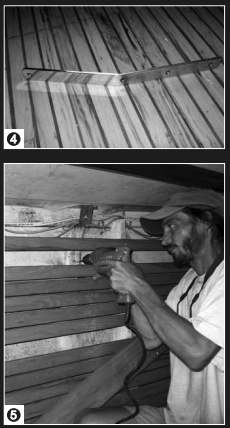
Back on board, the plate fit perfectly and three of the four holes were usable around the interior cabinetry. After repeatedly measuring and marking, Dave started drilling extremely slowly, using oil as a lubricant. We used a small 140-watt inverter that plugs into a cigarette lighter outlet to charge the battery of his drill. Waiting for it to recharge after he drained it each time was the most time-consuming part of the process.
Stepping up
He started with a 9⁄64-inch bit (the smallest cobalt bit aboard) then stepped up in size — anywhere from 3⁄32 to 1⁄8 inch each time using whatever size he happened to have — ending with a 9⁄16-inch bit to accommodate the 1⁄2-inch bolts we had purchased. Since we couldn’t be sure of the thickness of the fiberglass, old chainplate, and hull until the holes were drilled, and in the interest of saving another row to shore, we had bought 2-inch and 2 1⁄2-inch bolts. As the thickness of the fiberglass varied from hole to hole, we ended up using a few of both lengths before all of the chainplates were replaced, months later.
After drilling the holes and “dry fitting” to be certain all was according to plan, we put the three bolts, with 3M 5200 on them, through from the outside: washer, hull, old chainplate, fiberglass, new chainplate, washer, lock washer and nut (see illustration on Page 28). Within 24 hours we were ready to continue our journey south. We debated what to do with the second chainplate: replace the other port lower since we would be on a port tack for the next 450 miles; replace a starboard lower so at least we knew we had one good one on each side; or keep it just in case another one broke on the way. We opted to keep it, mostly because, without electricity aboard, we had no way to cut the old chainplates. Unless one broke on the way, we would have to wait until the boat was hauled out in Trinidad.
Luckily, we didn’t have to replace another chainplate on the trip to Trinidad. Once there, we had two more made identical to the one we still had: $37 each. After a friend mentioned that we should have had the exterior part polished, we paid an additional $10 to follow his advice. Our upper and intermediate shrouds are on the same chainplates which, rather than being fiberglassed to the hull, are through-bolted to bulkheads. Since they can be inspected, we did not change them.
Below deck level
Dave used his grinder to cut the other three plates just below deck level in each case. We emptied the lockers he would be working in and placed wet towels around to catch the hot sparks. Since we were on land at this point, with access to electricity, he could use his electric drill for all but the biggest bit, for which he had to use his cordless again. Though none of the other three chainplates appeared to be wearing, corroding, or in need of replacement, the drill bit sizzled as it encountered trapped moisture hidden in the fiberglass. We have had problems with several of the chainplates leaking over the years and can only imagine how damaged they are inside the fiberglass.
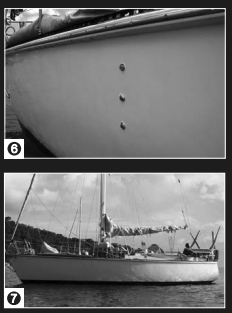
This method of replacing chainplates may not be for everyone and is certainly not perfect. We now have 12 bolt heads showing in Eurisko’s topsides, but they line up with and are obviously part of the rigging. We don’t find that they detract from the aesthetics. A friend said they actually make her look salty.
In hindsight, our only regret is that Dave cut out the three chainplates that didn’t break. He later realized that the toggle jaws were wide enough to accommodate both the old and new chainplates. Redundancy is always nice, but it was too late by then. All our chainplates can be inspected and replaced easily now, thanks to one of Dave’s better brainstorms devised at anchor, while running on solar power, and in haste to get south between hurricanes.
Thank you to Sailrite Enterprises, Inc., for providing free access to back issues of Good Old Boat through intellectual property rights. Sailrite.com