Make the switch from wire to rope
Issue 102 : May/Jun 2015
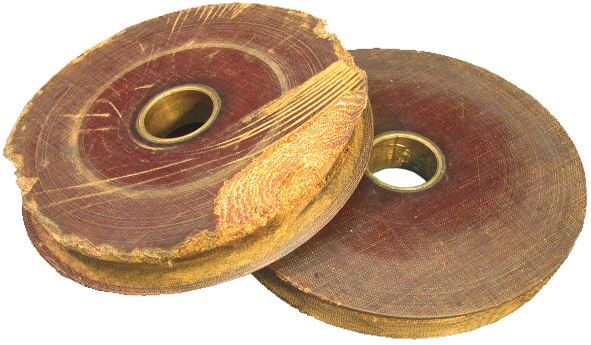
Not long ago a fellow named Sean brought his masthead sheaves to my shop. They were made from phenolic resin, known also as Micarta or Bakelite. One sheave was barely serviceable, the groove worn deep by the halyard wire and the bushing loose on its pin. The other was split and chipped with big chunks missing. Sean told me he couldn’t find sheaves to fit his good old boat. Before long, out came the full story.
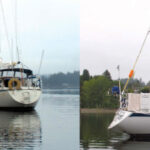
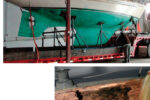
Sean was cruising alone in the Gulf Islands on the eastern coast of Vancouver Island in his Gulf 32. One day as he prepared to set out, hoisting the main seemed difficult, but he got it up and everything appeared to be fine. While cruising north, he encountered some weather and dodged into a small bay to lay over. He kept the main up while dropping anchor, then loosed the halyard to drop the sail. Nothing doing. Sean had recently installed a Strong Track with some matching slides to ease the effort of hauling the main up and down, so he knew his sail slides and track weren’t the problem. He figured the problem must be aloft. He was able to hoist himself to the masthead using the jib halyard.
An exposed anchorage was not his location of choice to go aloft singlehanded, but there he was nonetheless: main up, weather getting worse, and nothing else for it. At the top of the mast he found the wire halyard thoroughly jammed between the sheave and the wall of the sheave box. The wire had jumped the sheave and worked its way all the way down to the pin. It was not possible to get the wire out with the limited tools he had with him at the top of the mast while swaying back and forth in an exposed anchorage. Sean worked the halyard shackle loose, but as the shackle pin came out, the weight of the sail jammed the shackle. When he finally worked the headboard free of the shackle, the main dropped like a shot all over the house and deck and began to flog in the wind.
Sean was glad to reach the deck once more, but unhappy that his main halyard was out of action. Having a masthead rig meant he was able to use his jib halyard sheave for the main but then, of course, he had no jib. After a truncated cruise, he returned to his home port and hired his rigger to sort things out.
Change to rope
The first part of the solution to a problem like Sean’s is to switch out old-style wire halyards for modern, low-stretch rope. The stretch factor is the reason wire came into use in the first place. But wire is no longer necessary now that modern halyards stretch so little. A rigger can advise you on the correct halyard material for you and your boat. I installed 5⁄16-inch Sta-Set X on my 34-foot, 13,000-pound Abeking & Rasmussen cruiser. This did not stretch enough for me to notice. The sheave box on my 1937 boat was only 3⁄8-inch wide, as the boat was designed for a wire-only sheave, hence the need for a small diameter halyard.
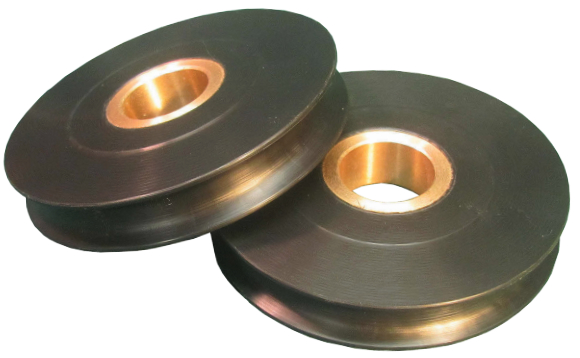
The second part of the solution is to install new sheaves at the masthead. The groove in the new sheave should be cut for a rope-only halyard instead of being shaped for wire or wire and rope. The pins that the sheaves run on should be checked for wear and proper radial clearance relative to the new sheaves. Many pins are undersized and yield too much clearance.
Often, no changes are necessary at the deck level, as many older halyards are wire-to-rope, meaning a tail of rope is spliced to the wire and is led to a rope winch. Some older boats with all-wire halyards need to switch out the wire halyard winch for a rope-only winch and add the necessary cleats.
Some sailors opt to use their old sheaves, but these sheaves are often wobbly on their pins and loose in their slots. This brings me to the second story I have to tell.
A masthead mystery
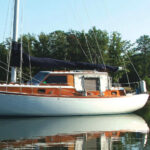
The first masthead sheave I serviced was on a friend’s Folkboat. As I had done a lot of work on the rest of the boat, I was invested in the outcome of the refit. As the boat headed out of the shop and back to the water, everything looked good, but I didn’t feel right about that masthead sheave. I knew the bushing was worn, but hey, it spun freely. What could go wrong? When it came time to raise the main, the owner complained that the sail was just as hard to raise as before. I was puzzled and dismayed. The fix would require going aloft and doing I knew not what. As the boat had a fractional rig, the jib halyard was not going to get me very high up on the mast, so I had to go up on the main halyard. Once up, I had to shift my weight off the halyard to investigate the problem. I could tell that the sheave spun freely.
I did not fix that sheave that summer. It took me a while to figure out what was going on. When I did, it was simple. I have seen it many times since.
When the clearance between the sheave bore and the axle pin it rides on gets excessive, the sheave is able to wobble side to side out of square with the sheave box. With no load on the sheave, things look sort of OK, as the observer can spin the sheave by hand without encountering any resistance. However, when a load is on it, the sheave can tilt and jam against the side of the sheave box. That was happening to the Folkboat halyard sheave, as I eventually learned.
Clearance is crucial
Good clearance between the sheave bushing and pin requires a close initial fit and good lubrication. Proper initial clearance keeps wear to a minimum. The sintered-bronze “sleeve bearings” I use are porous as manufactured and subsequently filled with 30-weight oil. When the bushings are under pressure or become heated, the oil moves to the surface and lubricates the interface. I use thick-walled bushings so more oil is available over the life of the bushing, thereby extending its life.
There are two clearance measurements for each sheave: radial clearance and axial clearance.
Radial clearance – I measure pins, or axles, with a set of digital calipers. This yields a measurement in thousandths of an inch. On a 1⁄2-inch pin, I shoot for .003-inch radial clearance. The pins I supply are .500 inch, and the bushings after finish reaming are .503 inch.
Axial clearance – The side-to-side, or axial, clearance should be enough for the sheave to spin freely and to move side to side about 1⁄32 to 1⁄16 inch.
I usually cut side reliefs on my sheaves, leaving just the 1⁄2 inch closest to the bushing on each side in contact with the inside of the sheave box, minimizing friction. If we are working with wire halyards, we do not cut side reliefs so there is no gap between sheave and sheave box for the wire to sneak into.
Side reliefs provide another plus. If the sheave pin is slightly out of square with the box, the relief will provide sufficient clearance so the sheave’s outer edge does not contact the sheave box first, which creates maximum friction. Not long ago I cut a set of sheaves with taper from the hub outward. Just the hub, the very inner part of the sheave next to the bushing, was permitted to bear on the wall. The friction was reduced dramatically.
Inspection time
The off-season is the time to inspect and refit your masthead sheaves and halyards, either aloft at the dock or when the mast is down. Check your boom sheaves as well. This is an easy way to save a good deal of trouble and expense during the sailing season, when you want to be sailing and not tied to a dock or anchored out in a faraway place with a main or jib that refuses to come down.
Ed Louchard runs Zephyrwerks. He makes custom-sized sheaves and rollers for sailboats and other applications, as well as rope-stropped block kits. Ed’s business was born out of the realization that very few sizes of sheave are commercially available. He works out of his home shop in Port Townsend, Washington. Check out his website at www.zephyrwerks.com.
Thank you to Sailrite Enterprises, Inc., for providing free access to back issues of Good Old Boat through intellectual property rights. Sailrite.com