Fear of holes redirects energy in a refit
Issue 102 : May/Jun 2015
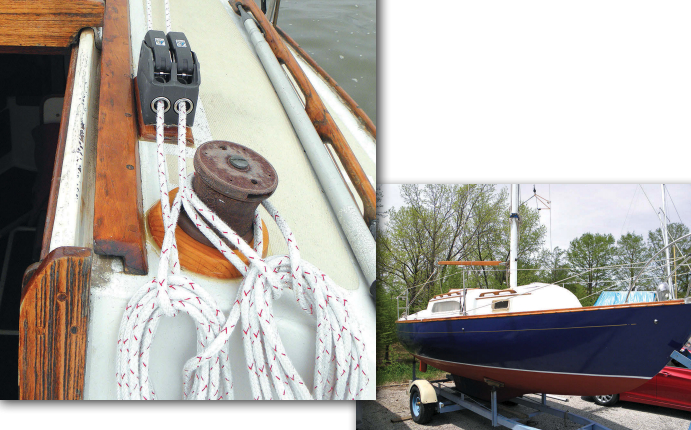
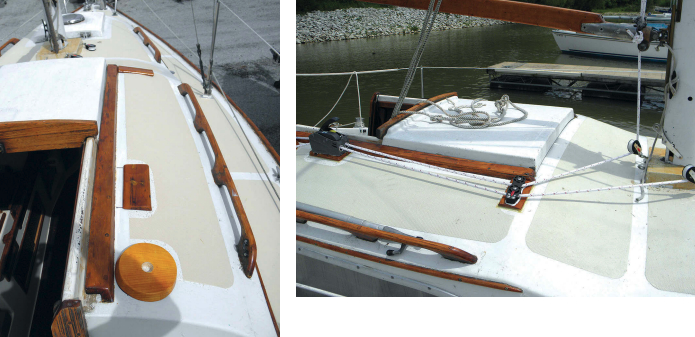
I agonized for months over what to do. I really did have a choice. I could either do nothing, which in my now-established senior years means the situation would get worse, or I could “bite the bullet” and cut into it. I’m not referring to a looming medical condition. I’m talking about running my boat’s halyards aft to the cockpit so I wouldn’t have to run to the mast every time I needed to do something, an activity that was getting more dangerous for me as a singlehander.
The cabin of my 1970 Irwin 23, ShaBoat Shalom, was tight and leak-free. The mere thought of cutting holes in my cabintop to facilitate the installation of a winch, clutch, and blocks was creating anxiety to no end. After all, the best way to doom a fiberglass sailboat is to let water enter the core. Furthermore, I realized that, until I drilled the first hole, I wouldn’t know the thickness of the cabintop and whether there was dead space between that and the headliner.
But once I drilled that first hole, I would be committed.
Even after I purchased the deck organizer and the clutch from West Marine and resurrected a used winch from a classic old boat, I was anxious. I stalled while creating mounting pads for it all in my workshop, temporarily putting it all together, and making trips to the boat to make adjustments. Once it all would theoretically work, I reached the point where it was time to suck it up and place the drill bit to the already marked spots on the cabintop and go for it.
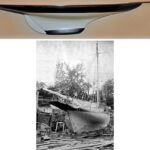
A “rescue boat”
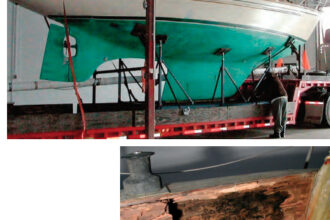
This was part of the seemingly continuous series of renovations I’ve been doing on my good old boat since I rescued her from “dead-boat row” at a nearby marina five years ago. I’ve painted her, replaced the lifelines, and totally rigged the mast and boom, both of which were stripped when I got her. I then replaced the port and starboard bulkheads, which were suffering from rot, stained and varnished the embossed cabin sole to make it look like wood, and put ceiling along the cabin sides.
But this year’s projects were going to be different. First of all, hanging on the wall of our home was the wooden boom from my old 1960 Schock 22 that is now a “fish condo.” The boom was a beautiful honey maple color with ancient bronze fittings at either end. I thought it would look fabulous along with the rest of the wooden trim on ShaBoat Shalom.
That took some doing. I had to take a foot off the length. I thought that would be easy. Just cut and scarf. No big deal. Ha!
Project creep
As we who do projects realize from experience, there are simple truths we cannot ignore. Any estimate of cost and time should be multiplied by at least two to be more realistic. And once a project begins, all kinds of unanticipated hidden issues will pop up.
When I cut what I thought was a solid piece of wood, I quickly discovered that the boom was very hollow — four 3⁄4-inch-thick sides around a very large air space. What to do? I ended up shaping a 2-foot length of wood to insert into the space and epoxied the segments together. Once that was done, sanding and varnishing made the seam disappear. It looked as if it had never been shortened.
I ordered bronze C-track to fit the gooseneck and installed it on the mast, then brought the boom and the gooseneck to the boat to make sure it would all work. After checking the fit, I attached the gooseneck to the boom and installed it on the boat before launch. She looked great.
Before she could be splashed, I purchased everything I’d need to run the halyards aft, brought it all to the boat for some fitting tests, and marked the locations. But not knowing the construction and thickness of the cabintop and how much space was between that and the headliner caused continued anxiety.
More diversions
While trying to motivate myself to drill through the cabintop, I worked on other projects. The exterior wood trim needed to be stripped, sanded, and revarnished. After taping off the wood, I did still more fitting tests while trying to get my courage up to make that first hole. Chicken!
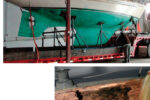
I procrastinated by adding non-skid to the deck using Interlux Interdeck paint. After 44 years, the original non-skid was losing its “non” and becoming more “skid.” I taped it all off and painted a section at a time, starting at the bow and working my way aft. Once it dried, I noticed the difference right away.
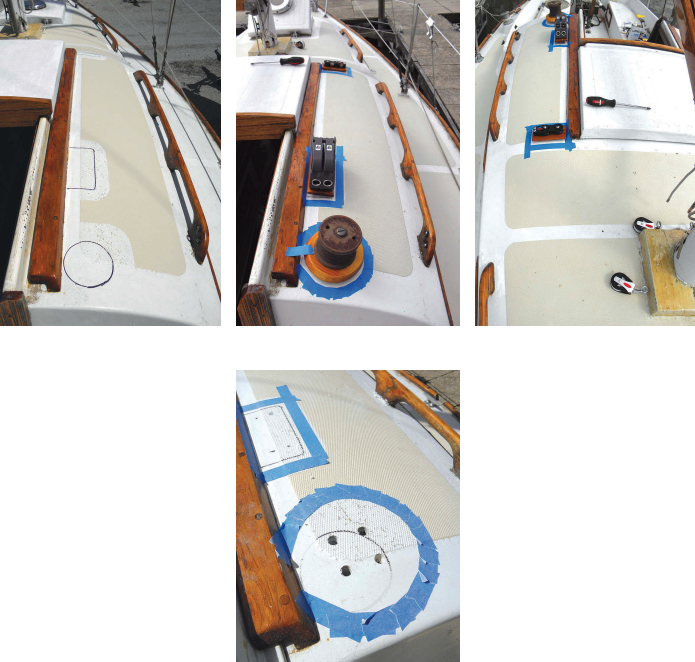
At that point, with a big black sharpie, I outlined where the pads would go on the cabintop, then found a way to procrastinate once again by painting the hull, bootstripe, bottom, and cove stripe.
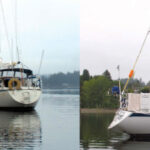
She was splashed in and I couldn’t put it off any longer. It was either do it . . . or not do it and continue to run to the mast for everything.
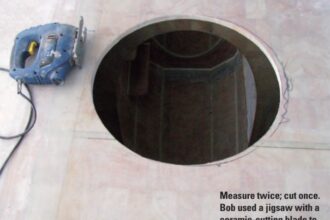
Time to drill
With much trepidation, I put the bit in the drill, placed the bit on the cabintop, took a big breath, and slowly drilled into the fiberglass. The holes I drilled were much larger than the bolt size so I could strip out a bit of the core, fill it with epoxy to seal it, and finally drill the proper-sized holes.
I was surprised to find that most of the holes went through solid fiberglass, probably because I mounted everything right alongside the starboard companionway hatch guide and Irwin overbuilt the cabintop there for strength.
Once everything was drilled, I filled the holes with epoxy, then drilled again to the size of the bolts I used to mount the hardware. I test-fitted the bolts in the wood bases, the cabintop, and backing plates. Everything fit. I was ready to make it all permanent.
I sanded the areas, then permanently mounted the bases with thickened epoxy, taking care to line up all the bolt holes. After redrilling the bolt holes, I installed the clutch, deck organizer, and winch with liberal applications of 3M 5200.
I should admit that I almost made a fatal mistake. I first mounted the clutch wrong! Luckily, I have a tendency to check, then recheck, and recheck some more. Just before applying the 5200 and bolting it together, I ran some line through the clutch to be sure everything worked as expected. That’s when I noticed I had placed it on the cabintop backward! I turned it around and mounted it properly.
I had to drop the mast to replace my wind indicator and run the new halyards through the sheaves. Then after raising it again, I put the mainsail on the boom and raised it using the new hardware for the first time. I then tried it with the jib. It worked like a charm! I popped the clutch free and they both dropped easily. All that was left to complete this project was to adjust the lazy-jacks, add the outhaul and slab reefing, and rig a downhaul for the hanked-on jib. Done!
Much yet to do
What next? I want to build a bowsprit or anchor platform to make anchoring less of a chore and stop the anchor from taking chunks out of my bow on the way up. I’d like to add tracks with cars to give me the ability to control the shape of my jib. I could use a traveler for the mainsheet. Another big project that fills me with trepidation is the creation of cockpit lockers. The Irwin 23 has no lockers in its 7-foot-long cockpit. There’s a huge volume of unused space under the cockpit but I have no way to store stuff there and have quick access to it.
Maybe next year. Right now, it’s time to go sailing!
Steve Wein began sailing in 1974. During his 25 years in Southwest Florida, he sailed the Florida Gulf Coast, the Keys, and the Bahamas. His radio career took him north to Cleveland, then Chicagoland, cruising Lake Erie, then Lake Michigan. Now living in metro St. Louis, he sails his Irwin 23, ShaBoat Shalom, on Carlyle Lake, Illinois.
Thank you to Sailrite Enterprises, Inc., for providing free access to back issues of Good Old Boat through intellectual property rights. Sailrite.com