Looking up is no longer embarrassing
Issue 114: May/June 2017
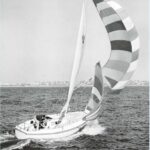
One of the inescapable downsides of owning a good old boat is, it’s old! Much on board a boat that’s pushing 40, like my Down East 45 schooner, Britannia, needs renovating or replacing.
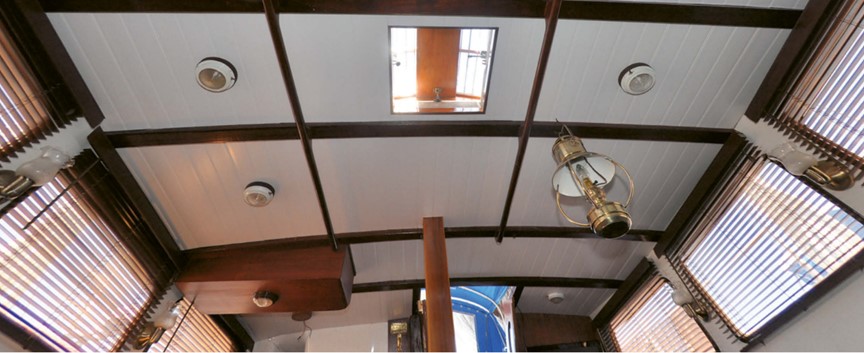
Britannia’s original overhead liner is an example. Throughout the boat, in the spaces between wooden beams, the liner was a faded dirty beige vinyl. It might have once been white, but it had irritated us from the day we bought the boat six years ago.
Changing Britannia’s rig from a ketch to a schooner didn’t help the appearance of the overhead. We through-bolted new eye bolts, winches, rope jammers, and life-raft chocks, then cut a hole for the new mainmast, which is stepped in the center of the saloon. I had to cut the liner for every installation, and all I could come up with for repairing the vinyl was cream-colored masking tape, which didn’t match too well. I caught visitors glancing upward, but politely saying nothing.
Time to cut bait
Eventually, replacing the overhead liner came to the top of my to-do list, but even thinking about completing the job gave me hot flushes. The saloon overhead alone is 9 feet wide and 11 feet long, in five full-width sections between wooden deck beams. There are also three cabins, two heads, and two passageways.
I found a suitable replacement material at Lowe’s. It’s tongue-and-groove PVC planking that’s used as beadboard wainscot on interior house walls. The planks are 7 1/2 inches wide and 1/4 inch thick and come in bundles of three boards either 8 feet or 3 feet long. It was most economical for me to buy the three-packs of 8-foot-long boards, which amounts to 24 linear feet, for $22.97 per pack, roughly one dollar a foot. The planks are reversible, with two “boards” on one side and three on the other. I decided to use the “two-board” side.
Important benefits, on a boat particularly, are the product’s lifetime guarantee against rot and mildew and the ease with which it can be washed with soap and water. I also think the greater thickness of this material compared to the old vinyl must provide better thermal insulation from the hot deck.
Taking down the old
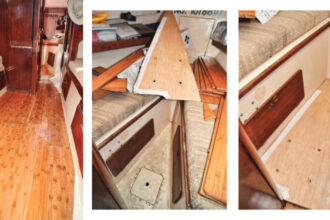
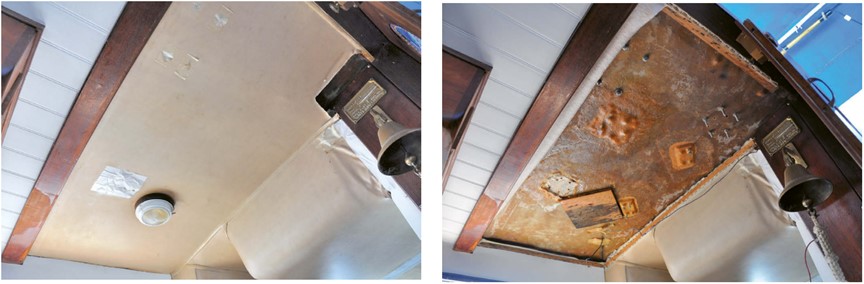
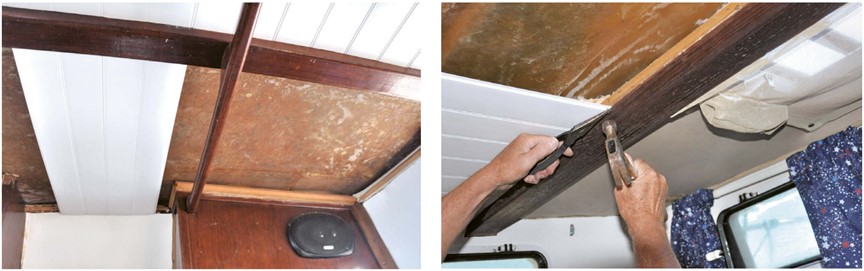
I began by removing one panel of the old headliner to see what I was facing. On all four sides, the material was stapled every inch (with steel staples) to wooden battens stapled in turn to the beams. That was about 24 staples per foot of liner, every one of them rusty!
With a box cutter, I cut the vinyl panel close to the staples along each side, whereupon it fell onto my head, along with nearly three decades of dust and more than a few dead cockroaches. (It always amazes me that cockroaches don’t ever seem to decompose.) I wore my wife’s shower cap when cutting out subsequent panels.
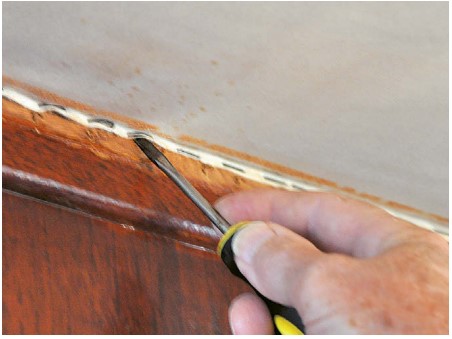
After stripping the material out of a section, I embarked on the tedious job of removing all the staples that had held it to the batten. Luckily, the battens were still in good condition. I used a thin-blade flat-head screwdriver to pry the staples up, one at a time, then levered them out with long-nosed pliers. Each vinyl panel was affixed with more than 500 staples.
Installing the new
My plan for the saloon was to install the tongue-and-groove boards with the seams running fore and aft. The material was stiff enough to be self-supporting over the 2-foot span between the beams, so I decided to secret nail them to the battens with stainless-steel brads.
To cut the PVC boards to length, I installed my miter saw in the cockpit. It sliced through them like butter but, unfortunately, makes only a 6-inch-long cut, so I had to turn the board over to finish the cut — very carefully. A sliding compound saw would have been a better tool but, on boats, you learn to use the tools you have. I could also have cut the material with a box cutter, but that is a slow process (it takes four passes with a sharp blade) and is hard on the hands.
I cut the first piece off an 8-foot board, slightly longer than the space between the beams. I then held it up between the beams, exactly down the centerline of the boat, which I had marked with a thin string fastened at each end of the saloon. I found the beams to be remarkably close to parallel, but each board still had to be checked, and sometimes trimmed, to ensure a close butt-fit to the beam. I marked the other end of the board using a wooden ruler against the beam, then scribed a line with a pencil.
Then it was up the six steps into the cockpit, another careful cut to the line, then back down to try the fit, then back up to make minute adjustments — sometimes less than a millimeter — to seat the panel snugly between the beams.
Before nailing a board in place, I drilled 1/16-inch pilot holes into the corner tongues to prevent them from splitting. I then nailed the board to the battens, driving the brads at an angle. The brads are small, so I held them with long-nosed pliers to start them, then used a nail set to drive them home. I considered gluing the boards in place, but then realized they would be practically impossible to remove if I ever needed to bolt another fitting through the deck.
I cut and measured each subsequent board exactly the same way, fit it into the groove of the adjacent board, covering the brads, then secured it on the other side.
When I came to the outboard edge of a section, where the last board met the saloon side, I had to make precise cardboard templates. Due to the curvature of the coachroof sides, the spaces to be filled were irregular, with tapered or curved edges that also had to be chamfered. I made templates for the pieces in the central passageway section too.
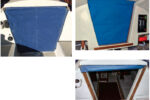
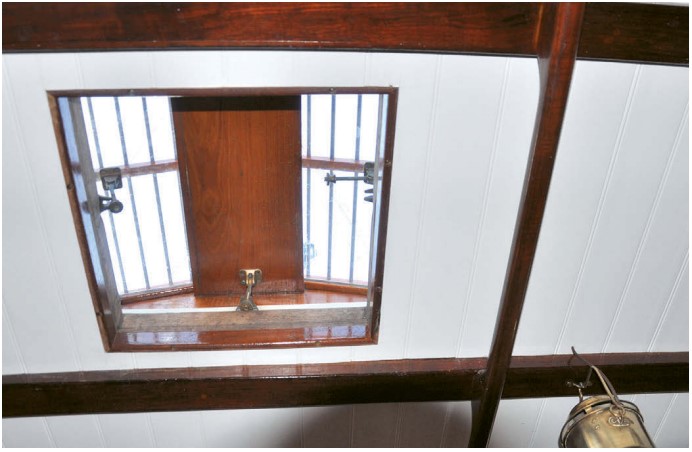
Board by board, I slowly in-filled each section. It was gratifying to see the new clean overhead between the beams. It was all easy enough, and I soon got into the swing of measuring and cutting, but I did make a few wrong cuts, and more than once found myself trying to mount a panel upside down.
Details . . .
Working full time, it took me a week to complete the saloon, and another two weeks to work my way through the rest of the boat.
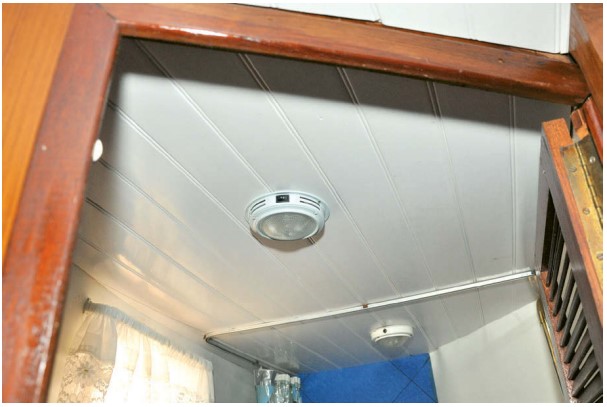
The uninterrupted spans in the overhead were longer in the staterooms and heads. To keep the boards from sagging, I supported them mid-span by driving screws up through them into the cabintop. To hide the screw heads, I used white plastic washers with attached snap-on caps, also available at Lowe’s.
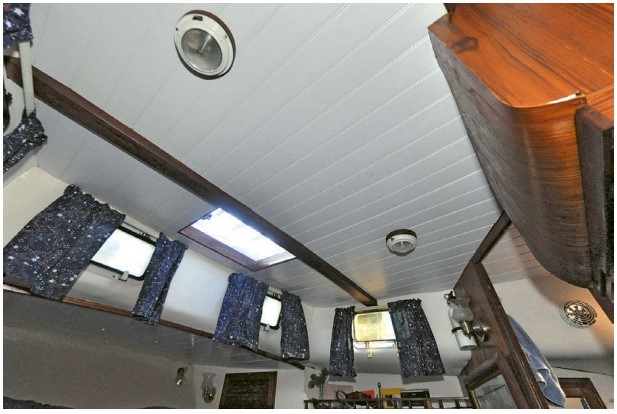
It was tedious work and for much of it I was reaching overhead. My arms ached for days afterward. I used 10 packages of boards and cut and attached about 200 pieces. I removed more than 4,000 rusty staples and pre-drilled and drove home about 400 brads. But we now have a very professional-looking overhead throughout the boat. The total cost of materials was around $250. I shudder to think how much it would have cost to have professionals install it.
As I hoped, the overhead feels cooler to the touch on blistering-hot Florida days. The effort has greatly improved the appearance of Britannia’s interior and probably the value of our good old boat.
Roger Hughes has been sailing for nearly half a century as a professional captain, charterer, restorer, and happy imbiber on a lot of boats. His restoration of Britannia, a once run-down Down East 45, is nearing completion after five years (he thought it would take two at the most). Roger and his wife, Kati, look forward to cruising later in 2017 and enjoying all the innovations he has incorporated in Britannia, many of which have been featured in Good Old Boat. Roger’s website is www.schooner-britannia.com.
Thank you to Sailrite Enterprises, Inc., for providing free access to back issues of Good Old Boat through intellectual property rights. Sailrite.com