The riddle of “overheating” engine
Issue 115: July/Aug 2017
It was a beautiful summer’s day and we were heading out for a two-week cruise. Our first leg was 26 miles across the Strait of Georgia. An hour into the trip we noticed that the engine temperature was higher than normal. Halfway across the Strait we were running over 200°F and had to reduce power. I went below to check the most common causes: raw-water blockage, coolant leak, or lack of oil pressure.
Everything checked out fine and we saw no smoke coming from the engine, so we continued on our way. But something was amiss.
The 30-horsepower marinized Kubota engine on our 1979 Dufour 35 had always run a bit hot. The previous owner told us it was happiest at 190°F and 1,800 rpm, even though the manual specified an operating temperature of 170°F at 2,400 rpm. We didn’t know any better, so we shrugged and bought the boat. A month later, the engine temperature was above 200°F.
After two years, thousands of dollars, and hundreds of man hours, I discovered the problem. The fix cost $20 and took 5 minutes. My search for the cause took me through every conceivable engine system. In many ways it was a boon, as I found a different problem everywhere I looked, but not the one responsible for the overly high engine temperature readings. Not until the very end.
What follows is my account of the search. I learned things that I found difficult to find in the Kubota service manuals, or by talking to mechanics, or through online searches. I tried to be systematic in both my approach and in the telling in the hope that others can use the information and perhaps avoid some of the pitfalls I encountered.
In my search for the cause of the overheating problem, I began with the raw-water system.
Raw-water system
The most common cause of engine overheating is inadequate raw-water flow. I wish I’d had the foresight to determine the rate at which water exited with the exhaust prior to encountering the problem. We did not have such a baseline so, to establish one, I measured the amount of water coming out of the exhaust outlet. I then checked each component of the system to ensure that there were no constrictions or other issues.
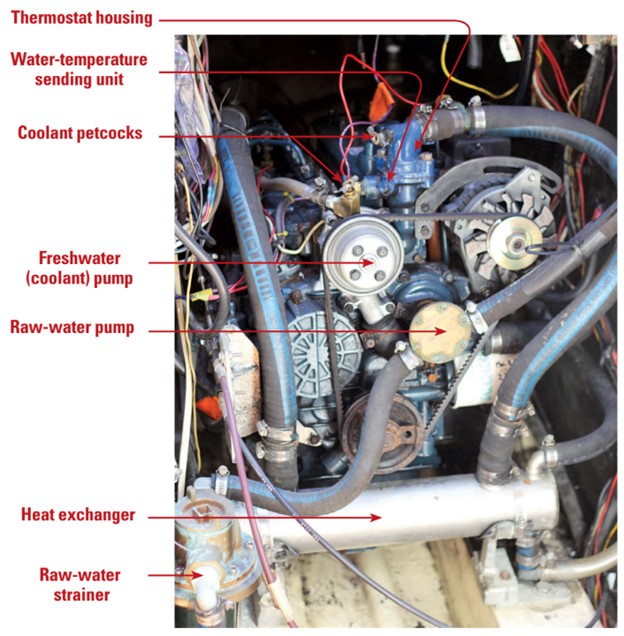
The raw-water loop has many components: through-hull inlet, strainer, pump and impeller, heat exchanger, and exhaust mixer. I checked each of these components in turn, starting at the through-hull and working my way to the exhaust mixer.
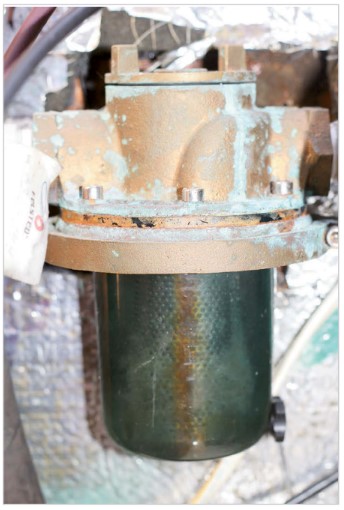
The through-hull had been recently replaced and there was no visible growth restricting the water flow. I detached the inlet hose from the strainer, opened the through-hull, and water poured in, which was a good sign. Next, I checked the strainer and found no obstructions there. Moving on, I examined the weep holes on the Jabsco water pump and then took the faceplate off to inspect the impeller. The face of the impeller looked fine and I removed the impeller from the pump housing and examined the fins for cracks, bending each one in turn. It looked great, but had I seen any deformation, cracking, or other visible anomaly, I’d have replaced the impeller. And if a fin had broken off, it would have been sucked into the rest of the system to be lodged someplace and I’d have had to track it down.
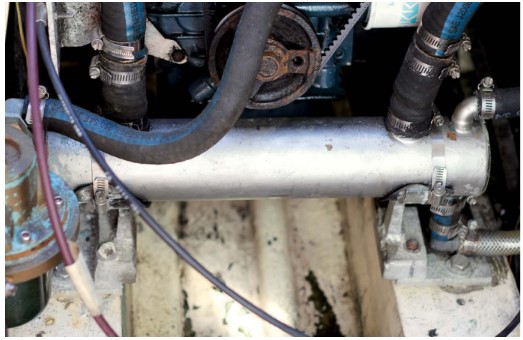
After the pump, I examined the heat exchanger, where I saw calcification had begun to narrow the passages in the tubes. I took it to a radiator shop and they charged me $50 to submerge it in an acid bath until it was clean. Last in the raw-water system, I removed the exhaust mixer, which is a common cause of flow restriction. I blew out some black dust, but saw no evidence of carbonization, rust, or any other potential source of blockages.
After putting the raw-water system back together, I noticed a slightly improved flow rate, but we still had the same elevated engine temperature. I thought that perhaps the coolant wasn’t flowing efficiently, and that became the next target.
Coolant loop
The coolant loop is similarly comprised of various elements, namely the coolant reservoir, thermostat, heat exchanger, and the freshwater (coolant) pump. I decided it was also a good idea to check the coolant ratio and the coolant-temperature sending unit. Upon examining the coolant loop, I found a number of small issues.
The level of coolant in the coolant reservoir was normal. I donned protective clothing and gloves and goggles and, with the engine running and at operating temperature, I opened the petcocks at the pump and thermostat, draining a bit of hot coolant into a small cup. I quickly got a good idea of the coolant flow rate. As with the raw water, I wished I’d determined a baseline coolant flow rate beforehand.
Due to the risk of freezing in the Pacific Northwest, our engine coolant was 50:50 ethylene glycol and water. Thinking that higher summertime water temperatures might be part of the problem, I changed the ratio to 30:70 ethylene glycol to water, which is the recommended minimum ethylene glycol content for engine coolant. Ethylene glycol has a lower specific heat (capacity to absorb heat) than water, so more water means more heat absorption. If the coolant ratio is unknown, it can be determined using a device that measures the specific gravity of the coolant, similar to a battery tester, and can be bought for less than $20 at most automotive stores.
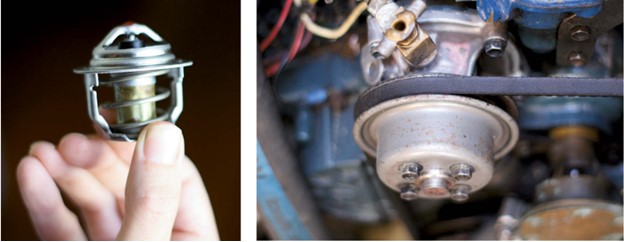
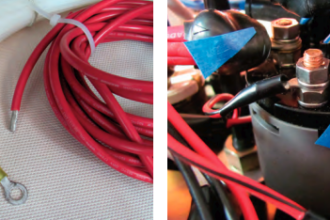
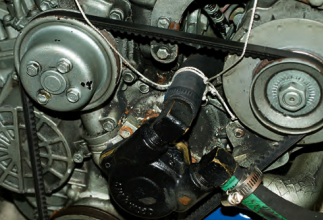
After draining the coolant so I could send the heat exchanger for cleaning, I removed the thermostat and verified that it was functioning correctly by placing it in a pot of water on the stove and noting its action at specific temperatures. I should have checked the sending unit at this time as well but, foolishly, I didn’t. I also examined the coolant side of the heat exchanger for any signs of damage or blockage. Lastly, I checked the freshwater pump, which had visible discoloration around the weep hole, indicating a failed mechanical seal. I disassembled the pump and found the shaft to be scored from the failed seal, which meant I needed a replacement pump.
After putting the coolant system back together and adding the new coolant mixture, we found that the engine temperature was still above 200°F at cruising rpm. Assured that the raw-water and coolant systems were functioning properly, my next step was to make sure the engine wasn’t overloaded.
Engine overload
Common causes of engine overload are a fouled propeller, a rough hull surface, auxiliary equipment (any equipment that loads the engine, either directly as engine-driven or indirectly via the alternator, including watermakers, refrigeration, and radar), adverse conditions, or an oversized propeller.
The boat had been out of the water recently and the hull sanded and painted. The propeller wasn’t fouled. We have very little auxiliary equipment, but I turned it all off, just to make sure that it wasn’t contributing to the problem. Even with the equipment off, the temperature was unaffected. The high temperature would occur even when on a flat calm sea, so adverse conditions weren’t to blame.
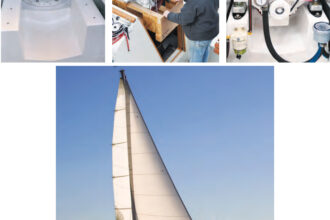
We checked the propeller using an online propeller calculator and discovered it was twice the recommended size; no wonder we could reach hull speed well below cruising rpm. After much research, we purchased and installed a used propeller of the correct diameter and pitch. The difference was immediate and dropped the temperature down to under 200 degrees at cruising rpm, but not to the 170 degrees that it should have been according to the engine manual and thermostat.
If the engine was no longer overloaded, perhaps it wasn’t running efficiently. A misfiring cylinder, worn piston rings, faulty injectors, or malfunctioning valves can cause all sorts of problems, overheating being one of them.
Valves, injectors, and cylinders
Cylinder misfiring is usually rhythmic and the result of a bad injector. The easiest way to check the injectors is to start the engine and then test each injector in turn by loosening the nut that connects the high-pressure fuel line to the top of the injector until fuel seeps out. If the engine vibration or pitch changes, then that injector was working. If there is no discernible change in the sound of the engine, then there is a problem with that injector.
Another worthwhile check is the crankcase breather tube. Worn piston rings can cause excessive blow-by and increase the pressure in the crankcase. A cup or water bottle cut in half and placed under the breather tube will catch any oil that spurts out. A very small amount of oil is normal, but any more could indicate worn piston rings. If, while the engine is running at idle, the oil fill cap is loosened all the way but not removed, it should bounce around in its hole but not get blown off. If it won’t stay in the hole, that’s another potential indicator of piston-ring wear.
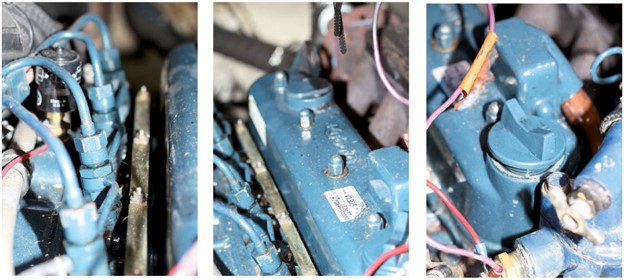
Our cylinders were all working well, so on to the valves. After removing the valve cover, I used a feeler gauge. Valves have a very small operational tolerance (thousandths of an inch) and I found that two of ours were out of tolerance by a large margin. I also examined the valve seats and they looked clean and undamaged. While adjusting the valves may have improved the engine’s efficiency, it unfortunately did not solve the overheating issue.
Verify the temperature
The test we did last was the test we should have done first: verify that the engine was, in fact, overheating. Most of us rely on a temperature gauge and a sending unit to determine the engine’s water (coolant) temperature. We were assured by professionals time and again that sending units and gauges almost never fail. The operative word proved to be almost.
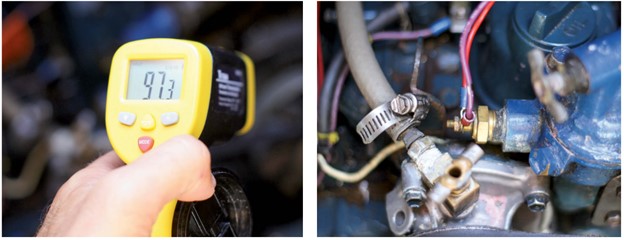
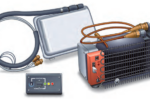
The easiest way to check the engine’s temperature independent of the sending unit and gauge is to use an infrared thermometer, also known as a temperature gun. It uses a laser beam to measure the amount of heat energy that a surface emits. The beam widens as it gets farther from the barrel of the temperature gun; different guns have different ranges. I hold the thermometer 6 inches from whatever I am measuring to isolate that particular element. The measurement is most accurate on dark surfaces that don’t reflect the beam. Coloring shiny surfaces with a black marker or engine paint will improve readings.
I first measured the thermostat housing, and was surprised to see that it registered only 175°F on the infrared thermometer, while the temperature gauge for the engine read 195°F. Eager to verify the reading on the infrared thermometer, I measured the temperatures of a boiling pot of water, my partner’s tongue, the refrigerator, and a book at ambient temperature. It checked out fine.
I next aimed the thermometer at the heat exchanger inlet and outlet. I anticipated a 10 to 20°F drop in temperature across the heat exchanger, where heat is removed by the raw water. There was a temperature drop — from 170°F to 155°F. Then I took the temperature of the sending unit. It, too, was 170°F, and I felt my heart hit the floor. The engine was not overheating! Sickened and, at the same time, elated, I set about determining whether it was the sending unit or the gauge at fault.
Sending units are devices called thermistors. When an electrical current is sent through a thermistor, its resistance to the current changes proportionally with the temperature. Sending units have known resistances at certain temperatures, so it is a matter of getting the sending unit to temperature and then measuring the resistance by touching the leads of a multimeter to the base and to the contact of the sender. The resistance of our sending unit did not match its specifications, verifying that it was indeed malfunctioning.
Problem solved
I replaced the temperature sending unit and, just to be sure, the temperature gauge. During our first foray out of the harbor at cruising rpm, the engine pegged at 175°F. But it seemed to take a long time to get up to temperature. Because it’s not good for a diesel to run cool, it can’t be good that it’s a little slow getting warmed up. Hmmmm… maybe I should look into it.
Checklist for an overheating engine
INITIAL CHECKS
Raw-water flow
• Check raw-water flow rate.
Coolant leak
• Check coolant level/leaks.
Oil-pressure drop
• Check oil pressure and oil level.
Dummy check
• Check temperature of engine with an infrared thermometer!
SYSTEMATIC CHECKS
Raw water system
• Check through-hull for obstructions.
• Check strainer for obstructions.
• Check water-pump weep holes.
• Check water-pump impeller.
• Check heat exchanger for obstructions or calcification.
• Check exhaust mixer.
Coolant loop
• Check level in coolant reservoir.
• Open coolant petcock while engine is running and . . .
• Check for air lock.
• Check flow rate.
• Check coolant ratio.
• Check thermostat.
• Check sender unit/temperature gauge.
• Check freshwater pump weep holes.
Engine overload
• Check for fouled propeller.
• Check for extremely rough/fouled hull surface.
• Check for adverse conditions.
• Check for auxiliary-equipment power draw.
• Check for oversized propeller.
Valves, injectors, cylinders
• Loosen and tighten the injector nut for each cylinder in turn and check for vibration change.
• Check crankcase breather tube.
• Loosen oil cap and check for blowby.
• Check valve spacing.
Robin Urquhart’s master’s degree in building engineering and his skills as a diesel mechanic have been severely tested since he and his partner (now wife!), Fiona McGlynn, headed south from Vancouver on MonArk, their good old 1979 Dufour 35. In May of this year, they arrived in the Marquesas Islands after a “beautiful” passage from Mexico. Check out their blog at youngandsalty.com, where they reach out to younger sailors who share a passion for good old boats.
Thank you to Sailrite Enterprises, Inc., for providing free access to back issues of Good Old Boat through intellectual property rights. Sailrite.com