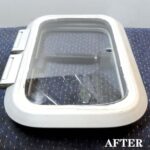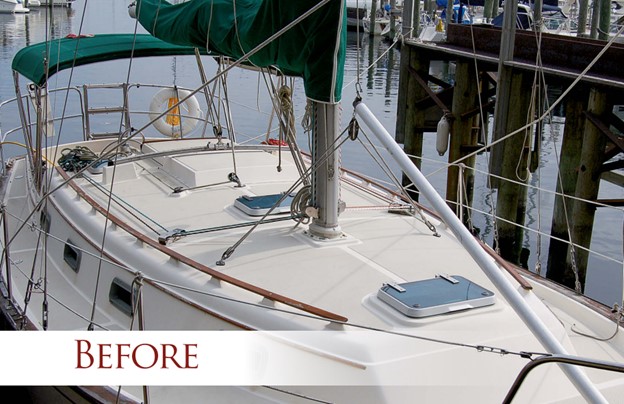
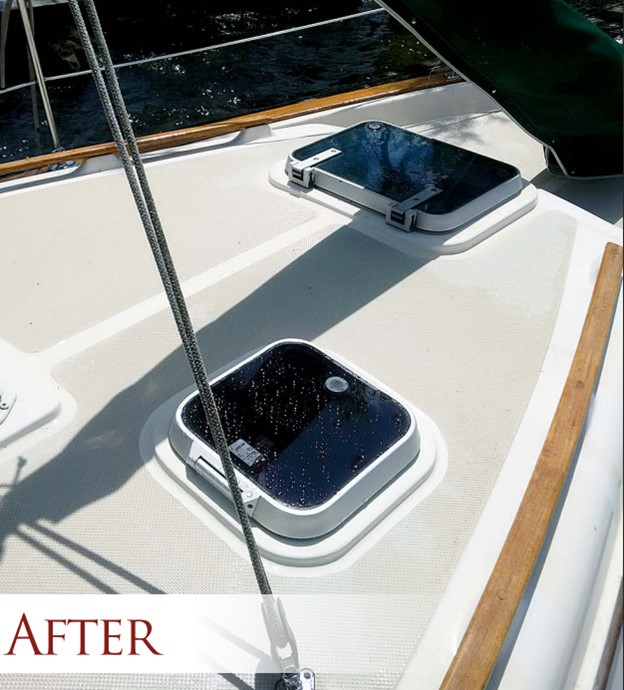
Adding a deck hatch transformed the head compartment
Issue 121: July/Aug 2018
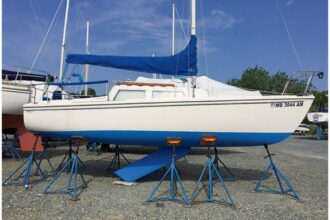
Even with an opening portlight, the head in our Island Packet 31 was a dark cave in need of more ventilation. Adding an overhead hatch would not be that big a deal, I figured. I’d build a level base out of teak, cut a hole, and bolt the hatch down. Done! Or so I thought.
“You will make it look nice?” said the Admiral. “So it looks just like the other hatches?”
Everything I have learned in 25 years of marriage informed me those question marks were exclamation points. And I knew she was right. Our good old boat deserves better than a quick-and-dirty job. My new hatch would need a fiberglass base with a faired and gelcoated non-skid-free perimeter, just the way the factory would have done it.
Most of the glasswork I had done in the past was structural and was hidden upon completion. I had done only minimal gelcoat work. Being a bit cautious, I thought I’d farm out the glasswork to a local wizard, but no one seemed interested in doing the job. The one quote I received was north of $1,500, just for the glasswork. I was on my own.
Over the next few weeks, I went through the hatch installation over and over again in my head, refining the process until I had a pretty good idea how to do it. That the new hatch would be located completely within an area of non-skid worked in my favor because, on our boat, the non-skid areas are darker than the smooth-gelcoat areas. I would not have to match gelcoat colors exactly but would only need to come close. I bought some supplies and practiced off the boat to build up my confidence.
Ordering the hatch
Consulting with other IP31 owners, I learned that the hatch I needed was a Lewmar Ocean Hatch, size 10. This was the same hatch as the one above the navigation desk, so I already had something to take measurements from. I found on the company’s website that Lewmar still makes the hatch in two models, one with a flat base and the other with a 1-inch flange. It also makes a trim kit that works in conjunction with the flanged-base hatch to provide a nice clean finish on the interior of the boat and includes a bug screen.
I ordered the flange-based hatch, along with the trim kit in ivory to match the interior of the boat.
A mold for the base
In its literature, Lewmar states quite clearly that the hatch must be mounted on a surface that is flat to plus or minus 1 mm. Given that the deck is slightly crowned, and to match the appearance of the other hatches, I needed a base for the hatch to sit on. Measuring the base on the existing hatch gave me 15 × 15 × 1⁄2 inches.
Thinking that a piece of G10 would do very nicely, but unable to find anything locally, I went looking on the web and was utterly surprised at the cost of G10 and shipping—something on the order of $250 delivered to my door. No go on that. My next stop was our local fiberglass guy at the club. When he quoted me $100 for a piece that he would make to my specs, I realized that, if he could make the piece, I could too, and it would give me something “boaty” to do over the winter.
A little research revealed that a layer of 2-ounce chopped-strand mat in resin has a thickness of .060 inches, so I would need 8.33 layers to create a thickness of 1⁄2 inch. I ordered 3 yards (50 inches wide) of 2-ounce mat to give me a little extra, just in case. Again, not being sure how much I needed, I ordered a gallon of polyester resin. I did have some epoxy resin on hand but decided not to use it because the styrene in polyester resin dissolves the binder in the mat, ensuring a much easier wet-out than with epoxy resin. Besides, polyester resin is less expensive and, let’s face it, I was only building a hatch base.
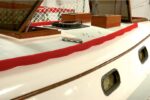
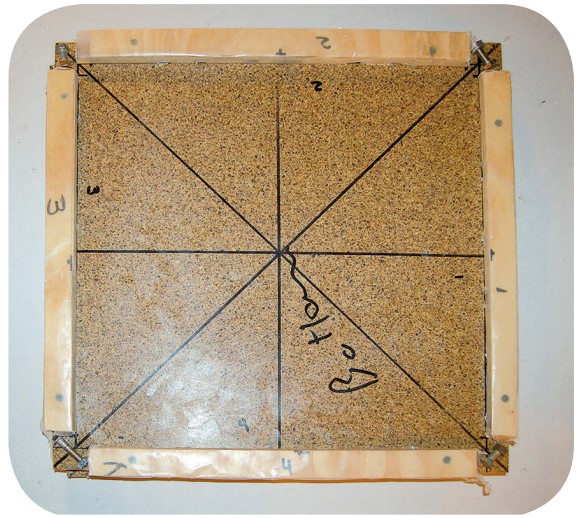
My thoughts next turned to how to ensure that the base was indeed flat. I chose to build a form using some 3⁄4-inch plywood I had in my basement. I decided to make the blank for the hatch base 16 × 16 inches, giving me 1⁄2 inch on each side to cut off in case the edges turned out a little ragged. This also allowed me to cut squares in rows of three from my roll of mat.
I cut a plywood square for the top of the mold and another for the bottom. To give me a smooth surface, I glued melamine (left over from another project) to each of the squares. I waxed the melamine with paraffin wax melted with a hot iron, removing the excess with a scraper. I then cut 1⁄2-inch fences from scrap wood, wrapped them in wax paper, and screwed them to the bottom part of the mold to define the edges of my 16 × 16-inch square, leaving gaps at the corners for excess resin to drain.
Laminating
When preparing to cut the squares of fiberglass mat, I found that drawing lines on it with a Sharpie or any other writing instrument is a bit of a challenge, as the fibers come loose and make a mess. Using a Sharpie to make a dot at each end and a chalkline to connect the dots made things a lot easier. I elected to cut 15 squares, just in case the wetted-out mat required more layers than I had calculated.

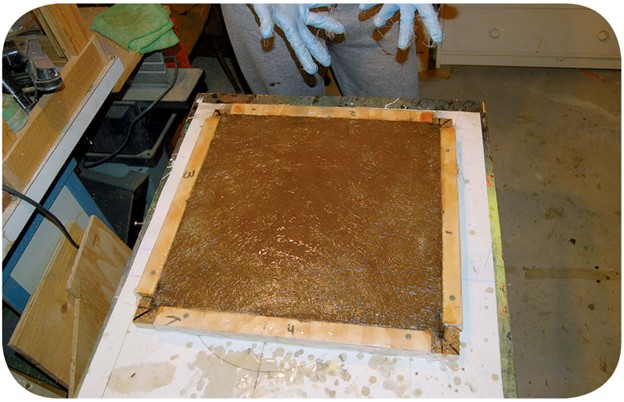
Laying up the glass in the form, I worked with my daughter Katie, and the whole process took about 30 minutes. I mixed the resin in small batches of about 12 ounces to avoid the shorter working times associated with large batches due to heat buildup. I was glad I cut extra mat, as we used all 15 squares before the mold was full. Once it was full, we secured the top on it with clamps and set it aside to cure. (A word of caution: polyester resin, specifically the styrene, has a pungent smell, and I strongly recommend not bringing it into the house.)
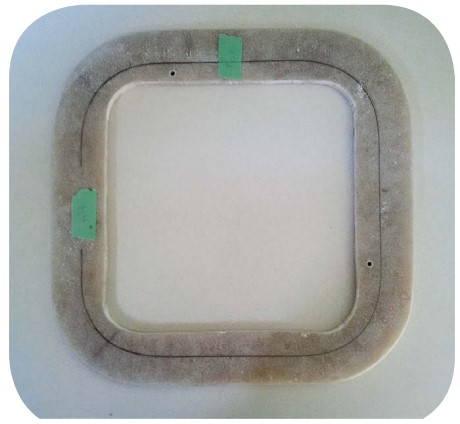
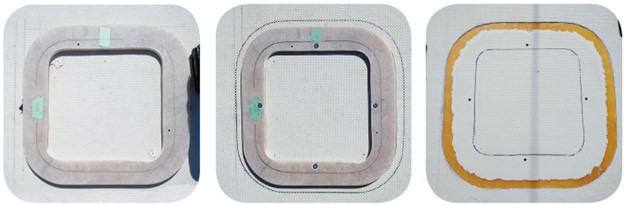
Once the laminate had cured, the mold opened easily. On extracting the part, I saw the edges were actually quite neat and required only a little cleanup. At this stage, it was important to clean the wax off the blank to ensure that any fairing compound or gelcoat would stick to it properly. Trisodium phosphate (TSP) did a reasonable job, but it took naptha, as in Coleman fuel, to remove the last traces of the wax.
Next, I centered the hatch on the base, marked around the inside of the hatch flange, then cut out the center with a jigsaw. With the hatch mounted temporarily in the base, I marked two of the hatch’s mounting holes on the blank, drilled and tapped them, and secured the hatch to the base with two machine screws. This gave me an accurate and repeatable way to position the hatch on the base. I used these screws later, when installing the hatch on the boat, to make sure the alignment was correct.
Using a pencil and a piece of wood as a gauge, I drew on the base a 1-inch offset around the outside of the hatch to mark the finished outside perimeter of the base. I rough-cut the extra material to just outside the line and then sanded the edges smooth until they conformed exactly to the marked line.
Installing the base
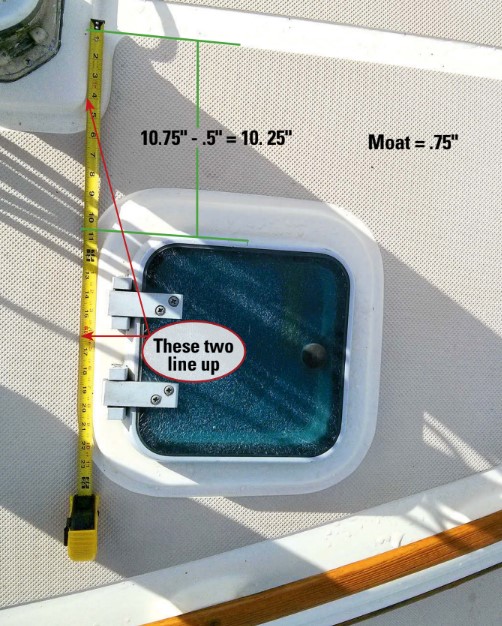
I was close to being ready to start working on the actual installation, but I needed information on the location of the hatch as installed at the factory. Thankfully, through the IP community I was able to contact Ed, another owner, who graciously took a number of pictures, complete with measurements. It was finally time to proceed to the boat and start the scary part, the actual installation. My plan was simple: measure 14 times, pray at least twice, and cut only once!
Placing the hatch in the correct location and making sure it was straight was much easier than I’d anticipated. That there was only minimal curvature in the deck at that location also simplified matters. Aligning the hatch with the non-skid, which is in a diamond pattern, and using the measurements from the pictures Ed sent helped me position the hatch and its base nice and straight. At this point, I removed the hatch from the base and temporarily secured the base to the deck with double-sided tape.
Despite all my careful measuring, to calm my nerves, I had to ensure that the hatch was positioned correctly relative to the boat’s interior. To do this, in the part of the deck that would be removed when I cut the hole for the hatch, I drilled four very small holes, one in each corner on the inside of the hatch base and all the way through the deck. Checking from below, I confirmed that all was good and I sealed the holes.
My next step was to secure the base to the deck, which is curved, so I had to take special care that the base remained flat. To accomplish this, I drilled four holes through both the hatch base and the deck, one at the center of each side close to the inside edge of the base where the installed hatch would hide them. Using a tap, I threaded all the holes in the deck. On the base, I threaded the holes on the port and starboard sides but drilled the forward and aft holes to the clearance size for the machine screws to fit through (no threads).
My thinking was that the forward and aft screws locate the base at the point where it contacts the deck and, with both the base and the deck threaded on the port and starboard sides, the base would remain flat and not bend to conform to the deck when the screws were tightened. When I did a trial fit, a check with a straightedge confirmed that the base remained flat.
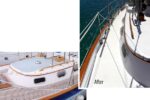
Uniform appearance
Each of the other deck hatches has a 3⁄4-inch border of smooth gelcoat around its base. While I had the base trial-fitted to the deck, I outlined that 3⁄4-inch strip using a fine-tipped Sharpie and a piece of wood as a spacer.
Even though I had already drilled a bunch of holes in my boat, this was the point where I felt things got serious. After some contemplation and prayer, I fitted a cutoff disc to my Dremel tool and scored the deck along the line marking the outside of the 3⁄4-inch border, taking care to score through the gelcoat only and not the underlying laminate. Switching to a 60- and then a 120-grit sanding disc on the Dremel, I sanded off the gelcoat in the 3⁄4-inch strip, again making sure not to touch the deck laminate.
To ensure the adhesives would stick as well as possible, I next cleaned the area with a vigorous scrub-down with TSP, a freshwater rinse, and an acetone wash. I mixed a batch of West System epoxy and first wet the areas to be glued with it, then added colloidal silica to the mix until it had the consistency of peanut butter. This I applied liberally to the underside of the hatch base, aiming to get squeeze-out all the way around. Next, I affixed the base to the deck using the four machine screws and, once done, used the straightedge to ensure the base was flat. I cleaned up the squeeze-out on the inside of the base and used a tongue depressor to produce a nice fillet around the outside, then left the epoxy to harden.
All of the above installation steps took less than a day, but progress now slowed down considerably, and I spent many hours on a seemingly never-ending journey to smoothness. My first target was the fillet, which I sanded until it was smooth and fair. Using a short length of 1⁄2-inch copper pipe as a sanding form helped me ensure the fillet was uniform.
The next step was to apply the gelcoat. I had bought from Jamestown Distributors a quart of cream air-dry gelcoat, which the IP body of knowledge proclaimed to be a good match for the faded IP beige. I elected to brush the gelcoat, as I did not like the results from my experiments with affordable sprayers. For the next while, the drill was to mask off the boat, brush on the gelcoat, sand smooth, and repeat. This cycle continued through sandpaper grits up to 1,000 grit, after which I polished the surface and checked for flatness with a straightedge. Much to my relief, the final gelcoat color was virtually indistinguishable from the original.
I planned to use the two alignment holes in the base during the final hatch installation so, to keep them clear, I threaded machine screws into them while I applied the gelcoat. One lesson I learned is to not use cheap plastic drink cups to mix the gelcoat and hardener. I did this once and, after about 10 minutes, the cup melted and the bottom fell out. Thankfully, most of the spill was on the area slated to be cut out for the hatch and the rest cleaned up with acetone.
Installing the hatch
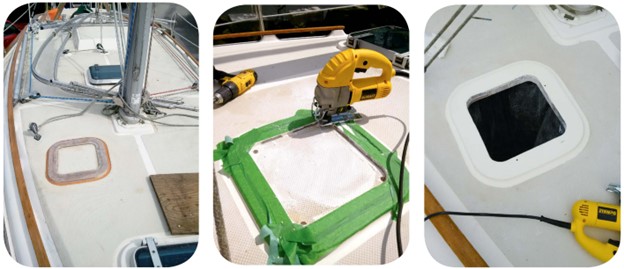
Once I’d finished polishing, I faced “hole-cutting day.” I began by taping a garbage bag inside the head to catch the dust and debris from the cutting operation, then drilled a hole in each corner of the hatch cutout and used a good jigsaw with a new blade to cut between them. Presto! I had a 12 × 12-inch hole. I was very anxious about cutting a hole this big in my boat, but it all went very well. When test-fitting the hatch in the new hole, I checked that there was enough space for the hatch’s trim kit to slide between the hatch flange and the cut surface.
Island Packet uses a core material called PolyCore that’s a mix of resin and microspheres. It is not affected by moisture and cannot rot, so I was less concerned with sealing the core against moisture than I would have been if it were balsa. Nevertheless, as a precaution, I sealed the cut surfaces with a coat of West System epoxy.
When I was ready to mount the hatch, I used the two alignment holes to temporarily hold it in place and marked all the holes to be drilled. Lewmar specifies that the two fasteners near the hinge be through-bolts, and that self-tapping screws be used everywhere else. Given that the hatch base is 1⁄2 inch of solid glass and that the core material takes a thread very well, I chose to use machine screws installed in threaded holes instead of the self-tapping screws.
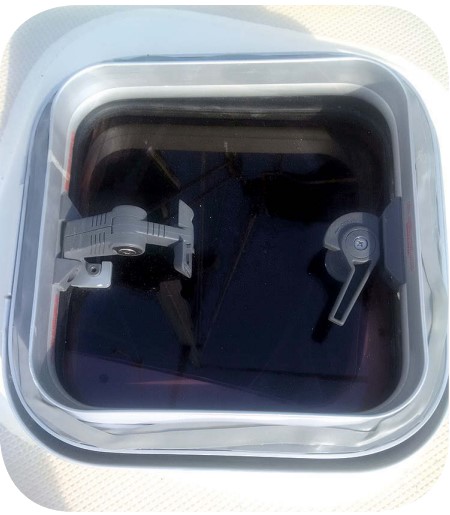
To bed the hatch, I used butyl tape that I had on hand, although I am sure a number of other suitable materials are available. The last step was to install the interior trim kit, which is made from quite thin and flexible plastic and gives a finished look to the hatch installation. It fits from underneath and has a flange that slides between the hatch and the cut surface of the deck and has to be trimmed to ensure that it seats properly against the overhead. Once it’s fitted, four screws hold it in place.
Wrap-up
The hatch has been installed for some time now and the difference in the head compartment is like day and night. The light and ventilation it delivers has transformed a dark cave into a bright and pleasant space.
Despite the fairly significant scope of this project, I found that it was manageable and I encountered no nasty surprises. The total cost was also quite reasonable at $583, which of course assumes that my time is worth nothing.
Advice I would pass on to anyone contemplating something similar is to do your research up front and to carefully think through all the steps until you are comfortable with them. Oh yes, and bring plenty of patience when it comes to smoothing, fairing, and making the gelcoat beautiful.
Project Costs
The prices in this table have been converted from Canadian to US dollars at the rate $1 CAD = $0.8 USD.
- Hatch, Lewmar Ocean size 10 and trim kit: $434
- Fiberglass mat, 2-ounce (3 yards × 50 inches): $19
- Polyester resin (1 gallon): $44
- Gelcoat, cream air-dry: $41
- West System epoxy: $20
- Sandpaper, jigsaw blades, etc.: $25
Total: $583
Resources
Island Packet Yacht Owners Association – www.ipyoa.com
IP Home Port – www.iphomeport.com
Lewmar – www.lewmar.com
Jamestown Distributors – www.jamestowndistributors.com
Matt Koch has been a sailor since the age of 6, when his father bought his first boat. Matt met his wife, Carolyn, 28 years ago at their local sailing club and they have been sailing together ever since. They sail their Island Packet 31 with their two daughters (ages 21 and 18) on Lac St. Louis in Montreal, and make an annual vacation pilgrimage to the 1,000 Islands and Lake Ontario.
Thank you to Sailrite Enterprises, Inc., for providing free access to back issues of Good Old Boat through intellectual property rights. Sailrite.com