Rigidity and shade were just two of the benefits
Issue 121: July/Aug 2018
As all things must, the old canvas dodger on my Westsail 32, Antares, came to the end of its life. We had sailed many a happy mile together, but at last my faithful friend made its final passage.
I began thinking about a replacement and was intrigued by the idea of a hardtop dodger. A hardtop would be impervious to sun damage and would never leak. It would be mounted on a rigid frame (with secure grab handles) and would be a great place to mount solar panels. I also liked that it would create some permanent shade, as I’ve been trying to minimize my exposure to the sun for years.
I was sure that hiring the job out would require taking out a second mortgage, so I decided to build it myself. I already had the stainless steel frame, so I could simply mount a hardtop to it and then sew in the cloth and vinyl windows. Piece of cake. One small problem: I knew almost nothing about sewing. But first things first: build the hardtop.
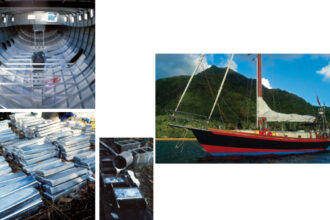
Sailing author Tor Pinney wrote about building a hardtop using FRP (fiberglass reinforced plastic, aka fiberglass), and he’s used this system for years in the tropics. Thin sheet FRP is the same stuff that lines shower stalls and is available in 4 x 8-foot sheets at any home-improvement store. It’s virtually indestructible, it’s lightweight, it holds up to ultraviolet light (UV), and it bends easily to conform to a dodger frame. It does flex a little when pushed down on, but a cloth top gives even more.
Frame and fabrication
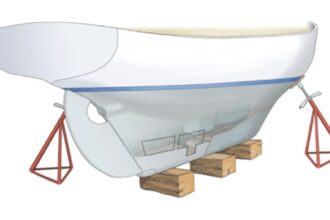
Before installing the FRP, I spent some time tweaking the height of my existing frame, as it had always been a little too high. I wanted it low enough to see over but high enough that I didn’t have to crouch like an ape to squirm beneath it. By lowering the existing frame by two inches, I traded a little clunky-looking height for the convenience of climbing in under it when stepping into the companionway over the high bridge deck. Boats are full of compromise.
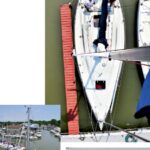
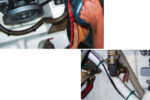
Once I’d settled on the new height, I cut and fit four pieces of 1-inch stainless steel tubing to reinforce the frame and make it perfectly rigid; two pieces angled down from the forward hoop to the deck and two pieces to bridge the hoops together. I temporarily clamped a sheet of FRP over the frame and traced its lines fore and aft along the hoops, adding a couple of extra inches for overhang. A strip of blue painter’s tape helped me visualize the height of the sides before I cut them to length.
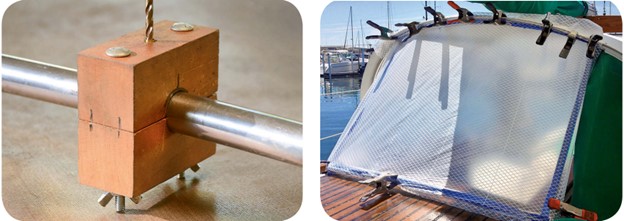
I then drilled holes in the frame so I could bolt the FRP to it. To make drilling straight through the round stainless steel tubing easier, I made a drilling jig out of wood, and lined the guide hole with thin copper tubing. (Drilling jigs can be purchased for about $55.)
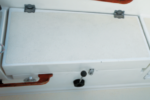
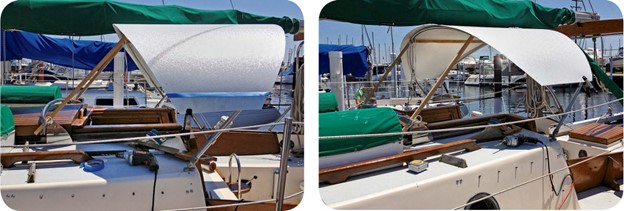
Next, I bolted two sheets of FRP (now cut to size) to the frame. I kept the smooth side down for a clean, bright interior. Even without the windows installed, I liked the protective feeling of the hardtop, and I especially enjoyed the shade it cast over the forward end of the cockpit.
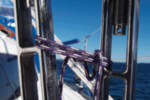
Unlike an all-cloth dodger, where the front window panels and top section are sewn together, a hardtop dodger requires a means of easily and securely attaching the separate window sections to its forward edge. The next step, then, was to mount awning track to the FRP to accept awning ropes sewn to the tops of the window panels. Since I was making three front panels (two sides and a center section), I cut three sections of track.
Awning track is made of PVC, and it was stiff and difficult to bend along the curve of the FRP top. I glued a cap to one end of a PVC pipe and tied it upright to a stanchion, then filled it with boiling water from the galley. Steeped in the hot water, the awning track became limp like a linguini noodle and formed easily to the curve of the hardtop. I now had the top securely attached to the rigid frame and the awning track bolted to it around the leading edge.
Next step: sewing!
Sewing it all together
His eminence, the high priest of the local canvas shop, assured me that no mere mortal could possibly sew his own dodger. I had hoped to buy supplies (as well as some knowledge) from him, but instead found a wealth of information and tutorials at the Sailrite website. Sailrite provides help and supplies to the do-it-yourselfer and through that company I had no trouble mail-ordering all the materials I needed.
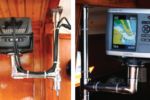
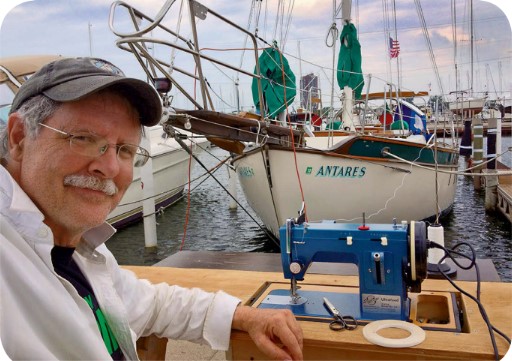
I bought a lightly used sailmaker’s sewing machine and set about learning how to operate it. Sewing is a bit like woodworking; it takes careful measuring, steady nerves, good hand-eye coordination, and a lot of practice. I got some experience mending my sail covers, sewing hatch and winch covers, and doing a big repair job for a friend. This gave me some confidence, but even so, I roughed in one of the dodger’s side panels with scrap material just to see if I could actually pull this off. (I’m now convinced that a sewing machine should be part of every boat owner’s tool set.)
Encouraged, for the windows, I used a patterning material, which I taped and clamped to the frame then cut precisely to size. From these patterns, I laid out the exact dimensions of the panels. Although I did most of the sewing at home, having the machine at the boat for small tweaks and adjustments was very useful. I made a sewing table with a recessed cutout and set it up between two sawhorses. Working on-site saved a huge amount of time and I spent many pleasant hours sewing and fitting.
I worked slowly and carefully, measuring not just twice but thrice, and gradually the panels came together. Final assembly was simply a matter of sliding the panel’s awning rope into the awning track and then pulling the material taut before installing snap fasteners around the edges. Being in no particular hurry, I opted for a simple hammer-driven setting tool and a small round anvil rather than a pricey snap-fastener tool.
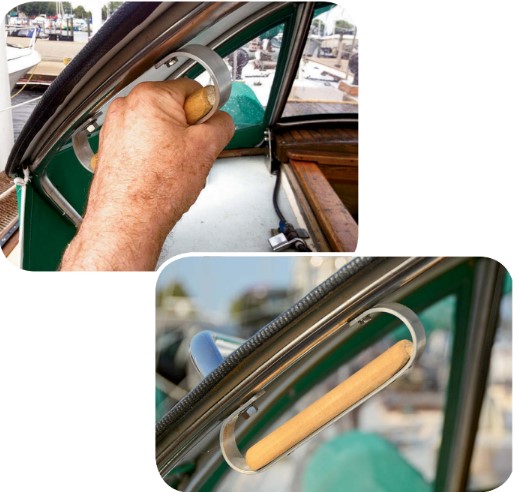
A black flexible edging material neatly trimmed the hard edges of the FRP and gave the top a professional finished look. I mounted two shiny stainless steel handles, bolting them through the FRP to the hoops below. How did I go forward without such a key safety feature all these years? On the premise that one can never have enough grab handles, I made two handles out of 1-inch aluminum to mount below the top handles, one on either side.
A welcome addition
So far, I’ve test-driven my new dodger on daysails and I couldn’t be happier — there is nothing more satisfying than enjoying the results of your own work. Since I can easily remove the window panels from the hardtop, I may just daysail without them for the hot summer months. That way I’ll get cooling breezes across the cockpit and avoid the bane of all dodgers and stitching: the UV in sunlight.
Next, I plan to paint the FRP the same color as the deck, and there is plenty of room on the hardtop to mount two 20 x 30-inch solar panels, one on either side. But enough for now, it’s time to go sailing!
Charles Scott, a freelance cameraman, lives in Ann Arbor, Michigan. He has sailed his Westsail 32, Antares, solo from Lake Superior to Bermuda — and back again.
Thank you to Sailrite Enterprises, Inc., for providing free access to back issues of Good Old Boat through intellectual property rights. Sailrite.com