Precise patterns and plywood replace a complex, cracked floor.
Issue 144: May/June 2022
Our 1980 Fantasia 35, Cetus, is a centercockpit design, and below deck on the port side beneath the cockpit is a small compartment that basically serves as a garage—a workroom, sail locker, catch-all kind of space. And when I stepped into this space one day and heard a sharp crack beneath my feet, I knew we had a problem.
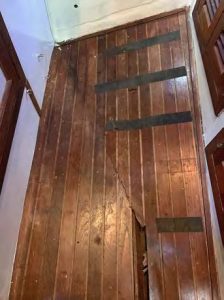
After nearly 30 years of living aboard and cruising, I continue to be amazed at the effort the boatbuilders must have taken to construct her, and this floor is a good example. To accommodate the shape of the hull, they attached thin sheets of mahogany plywood to the inside curvature, then bent them to form the horizontal (or flat) part of the floor—imagine taking a 3 x 4-foot piece of plywood and basically folding it in half diagonally. When done, this sole was nearly 3/4-inch thick, matched the shape of the hull, then transitioned to a horizontal floor. The builders completed it with steamed teak-and-holly strips that also achieved that gentle, curving transition from wall to floor.
But after 40 years, fatigue had set in; the bend in the wood had finally given way. We would have to replace it. My wife, Heidi, made a rough pattern of the existing floor using butcher paper. From this, she pointed out that none of the corners were square, so we would have to take into consideration the multiple angles and curves complicating the design process.

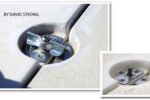
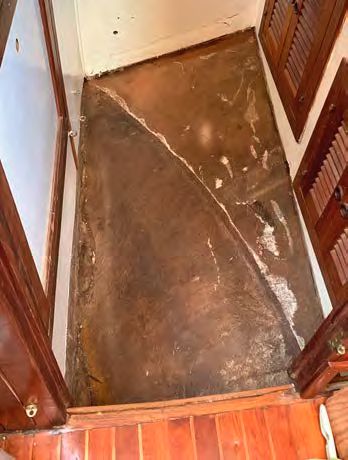
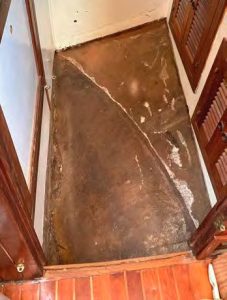
Removing it was pretty straightforward. Once the crack started, every time I stepped on it, the fracture grew, which gave me a great starting point for lifting it out. The subfloor was attached to the hull using something akin to Bondo. The horizontal part of the floor was attached to a 1 x 1-inch mahogany cleat that acted as a ledge for the floor to rest on. After I broke the bond with the hull, it was just a matter of folding the piece in half, essentially breaking the floor in two along the diagonal.
I was worried that I might find that dry rot had caused the floor to break at the seam, but the surrounding wood bulkheads and cabinets were perfectly sturdy and sound. So, after cleaning out the sawdust and some debris that was as old as the boat, Heidi and I sat back, looked at the void, and began planning how to cover it up.
At the time, we were living aboard on a mooring buoy in Puerto Escondido in the Sea of Cortez. We caught a ride into the nearby town of Loreto, then returned with two pieces of 5/8-inch, exterior-grade plywood. We’d cut one piece to attach to the curve of the hull and run it several inches below where the second, horizontal, piece would intersect on a diagonal, forming the floor.
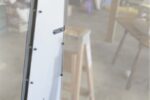
While Heidi drew the layout for the new pieces, I thoroughly washed the inside of the hull with soap and water, then further cleaned the surface with alcohol. Then I cut the first piece, which would line the hull. Roughly triangular, I cut it larger than needed—to give us some flexibility in placing the horizontal portion of the floor—and bonded it to the hull with thickened West System epoxy.
After letting it dry overnight, we tackled the second piece, which would form the horizontal and rest on the existing cleat (it would also push against the hull-liner piece for extra support). Again, roughly a right triangle in shape, the plywood would have one corner that was close to a right angle, while the hypotenuse (the long diagonal) would be slightly curved. The cut on the long edge would need to be undercut at an angle to match the slope of the side of the hull.
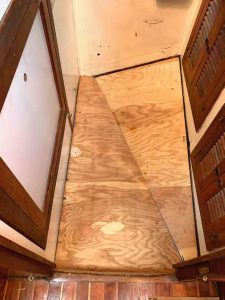
Thanks to the precise and patient work of my design team (Heidi), the cut piece fell right into place with the exception of the undercut. Since my power saw only cuts at a 45-degree angle and I needed something like 30 degrees, out came the rasp and sandpaper. Once I removed enough material and we’d successfully dry-fit the piece, I cleaned all the dust from the joints and edges with a damp cloth. I pre-drilled for the screws that would hold the two straight sides to the supporting cleat.
Again, we used West System thickened epoxy on the cleat, as well as copious amounts on the long-angled edge that would rest against the previously installed hull liner. Not wasting time in the 85-degree heat, we screwed down the floor. After a quick excess-goo cleanup, we stacked a water jug and a couple of toolboxes on the floor to act as weights, insuring the joint would adhere properly to the plywood hull liner.
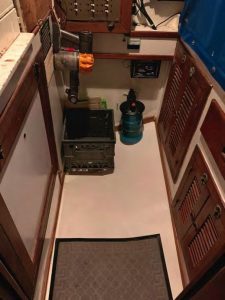
I had planned from the start to use KiwiGrip for the new floor surface, as I could see no reason to lay beautiful teak and holly on a floor in a utility room. Plus, we had plenty of KiwiGrip left over from previous projects. The directions recommend a coat of paint or sealant for bare wood, so Heidi painted a coat of white, water-based paint, then we waited about an hour for that to dry before coating the floor with the KiwiGrip. She applied the material using the roller supplied with the product, which gives an aggressive stipple and creates a non-skid floor (See “Get a Grip,” January/February 2022).
The teak I used for the replacement trim pieces had been in storage on the boat since 2009. After carting them around for years, it was gratifying to finally put them to use. And while it may not be as intricate as what the original builders created, our new floor is neat, clean, and free of creaks or cracks.
Terry Kotas and his wife, Heidi, began sailing in 1978. After building their first boat from a bare hull, the family set sail for the South Pacific. They are currently enjoying the Sea of Cortez aboard Cetus with their cat, Rosie, while planning their next adventure. Terry has written three humorous sailing adventure novels and the latest, Adventures Off the Beaten Path, is now available at all major booksellers.
Thank you to Sailrite Enterprises, Inc., for providing free access to back issues of Good Old Boat through intellectual property rights. Sailrite.com